

קטעי מפה ריאליסטיים בתלת-ממד הם בפורמט glTF לפי תקן OGC, כלומר אתם יכולים להשתמש בכל כלי רינדור שתומך במפרט של OGC 3D Tiles כדי ליצור את ההדמיות התלת-ממדיות שלכם. לדוגמה, Cesium היא ספריית קוד פתוח בסיסית לעיבוד של ויזואליזציות תלת-ממדיות.
עבודה עם CesiumJS
CesiumJS היא ספריית JavaScript בקוד פתוח להמחשה תלת-ממדית באינטרנט. מידע נוסף על השימוש ב-CesiumJS זמין במאמר Learn CesiumJS.
פקדי משתמש
לכלי לעיבוד אריחים של CesiumJS יש קבוצה סטנדרטית של אמצעי בקרה למשתמשים.
| פעולה | תיאור |
|---|---|
| הזזת התצוגה | לחיצה שמאלית וגרירה |
| שינוי מרחק התצוגה | לוחצים לחיצה ימנית וגוררים, או גוללים את גלגל העכבר |
| סיבוב התצוגה | Ctrl + לחיצה שמאלית/ימנית וגרירה, או לחיצה אמצעית וגרירה |
שיטות מומלצות
יש כמה דרכים לקצר את זמני הטעינה של CesiumJS 3D. לדוגמה:
כדי להפעיל בקשות בו-זמניות, מוסיפים את ההצהרה הבאה לקוד ה-HTML של העיבוד:
Cesium.RequestScheduler.requestsByServer["tile.googleapis.com:443"] = <REQUEST_COUNT>ככל שערך ה-
REQUEST_COUNTגבוה יותר, כך המשבצות נטענות מהר יותר. עם זאת, כשמבצעים טעינה בדפדפן Chrome עםREQUEST_COUNTגדול מ-10 והמטמון מושבת, יכול להיות שתיתקלו בבעיה מוכרת ב-Chrome. ברוב תרחישי השימוש, מומלץ להגדירREQUEST_COUNTשל 18 כדי לקבל ביצועים אופטימליים.הפעלת דילוג על רמות פירוט. למידע נוסף, ראו הבעיה הזו ב-Cesium.
כדי לוודא ששיוך הנתונים מוצג בצורה תקינה, צריך להפעיל את showCreditsOnScreen: true. מידע נוסף על כללי מדיניות
מדדי רינדור
כדי למצוא את קצב הפריימים, בודקים כמה פעמים בשנייה מתבצעת קריאה ל-method requestAnimationFrame.
כדי לראות איך זמן האחזור של הפריימים מחושב, אפשר לעיין במחלקה PerformanceDisplay.
דוגמאות לרינדור ב-CesiumJS
כדי להשתמש במנוע הרינדור של CesiumJS עם משבצות המפה התלת-ממדיות של Map Tiles API, פשוט צריך לספק את כתובת ה-URL של קבוצת המשבצות ברמה הבסיסית (root).
דוגמה פשוטה
בדוגמה הבאה מתבצע אתחול של רכיב ה-renderer של CesiumJS, ואז נטען ה-tileset הבסיסי.
<!DOCTYPE html>
<head>
  <meta charset="utf-8">
  <title>CesiumJS 3D Tiles Simple Demo</title>
  <script src="https://ajax.googleapis.com/ajax/libs/cesiumjs/1.105/Build/Cesium/Cesium.js"></script>
  <link href="https://ajax.googleapis.com/ajax/libs/cesiumjs/1.105/Build/Cesium/Widgets/widgets.css" rel="stylesheet">
</head>
<body>
  <div id="cesiumContainer"></div>
  <script>

    // Enable simultaneous requests.
    Cesium.RequestScheduler.requestsByServer["tile.googleapis.com:443"] = 18;

    // Create the viewer.
    const viewer = new Cesium.Viewer('cesiumContainer', {
      imageryProvider: false,
      baseLayerPicker: false,
      geocoder: false,
      globe: false,
      // https://cesium.com/blog/2018/01/24/cesium-scene-rendering-performance/#enabling-request-render-mode
      requestRenderMode: true,
    });

    // Add 3D Tiles tileset.
    const tileset = viewer.scene.primitives.add(new Cesium.Cesium3DTileset({
      url: "https://tile.googleapis.com/v1/3dtiles/root.json?key=YOUR_API_KEY",
      // This property is needed to appropriately display attributions
      // as required.
      showCreditsOnScreen: true,
    }));
  </script>
</body>
מידע על requestRenderMode זמין במאמר הפעלת מצב עיבוד בקשות.
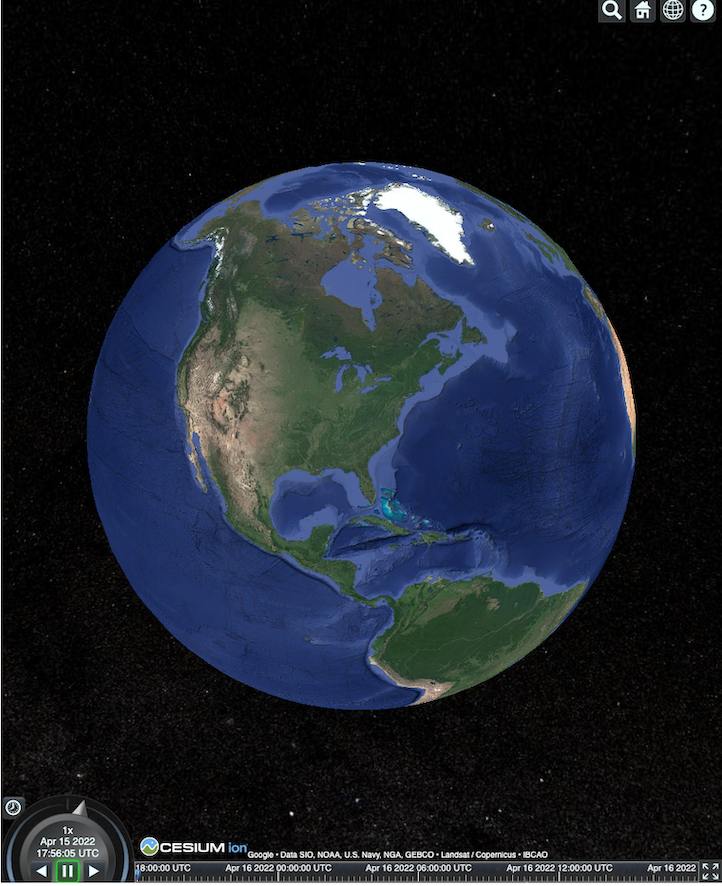
דף ה-HTML מוצג כמו שמופיע כאן.
שילוב של Places API (חדש)
אתם יכולים להשתמש ב-CesiumJS עם Places API (החדש) כדי לאחזר מידע נוסף. אתם יכולים להשתמש בווידג'ט ההשלמה האוטומטית כדי לעבור אל אזור התצוגה של המקומות. בדוגמה הזו משתמשים ב-Places Autocomplete API (השלמה אוטומטית למקומות), שמופעל לפי ההוראות האלה, וב-Maps JavaScript API, שמופעל לפי ההוראות האלה.
<!DOCTYPE html>
<head>
 <meta charset="utf-8" />
 <title>CesiumJS 3D Tiles Places API (New) Integration Demo</title>
 <script src="https://ajax.googleapis.com/ajax/libs/cesiumjs/1.105/Build/Cesium/Cesium.js"></script>
 <link href="https://ajax.googleapis.com/ajax/libs/cesiumjs/1.105/Build/Cesium/Widgets/widgets.css" rel="stylesheet">
</head>
<body>
 <label for="pacViewPlace">Go to a place: </label>
 <input
   type="text"
   id="pacViewPlace"
   name="pacViewPlace"
   placeholder="Enter a location..."
   style="width: 300px"
 />
 <div id="cesiumContainer"></div>
 <script>
   // Enable simultaneous requests.
   Cesium.RequestScheduler.requestsByServer["tile.googleapis.com:443"] = 18;

   // Create the viewer.
   const viewer = new Cesium.Viewer("cesiumContainer", {
     imageryProvider: false,
     baseLayerPicker: false,
     requestRenderMode: true,
     geocoder: false,
     globe: false,
   });

   // Add 3D Tiles tileset.
   const tileset = viewer.scene.primitives.add(
     new Cesium.Cesium3DTileset({
       url: "https://tile.googleapis.com/v1/3dtiles/root.json?key=YOUR_API_KEY",
       // This property is required to display attributions as required.
       showCreditsOnScreen: true,
     })
   );

   const zoomToViewport = (viewport) => {
     viewer.entities.add({
       polyline: {
         positions: Cesium.Cartesian3.fromDegreesArray([
           viewport.getNorthEast().lng(), viewport.getNorthEast().lat(),
           viewport.getSouthWest().lng(), viewport.getNorthEast().lat(),
           viewport.getSouthWest().lng(), viewport.getSouthWest().lat(),
           viewport.getNorthEast().lng(), viewport.getSouthWest().lat(),
           viewport.getNorthEast().lng(), viewport.getNorthEast().lat(),
         ]),
         width: 10,
         clampToGround: true,
         material: Cesium.Color.RED,
       },
     });
     viewer.flyTo(viewer.entities);
   };

   function initAutocomplete() {
     const autocomplete = new google.maps.places.Autocomplete(
       document.getElementById("pacViewPlace"),
       {
         fields: [
           "geometry",
           "name",
         ],
       }
     );
     autocomplete.addListener("place_changed", () => {
       viewer.entities.removeAll();
       const place = autocomplete.getPlace();
       if (!place.geometry || !place.geometry.viewport) {
         window.alert("No viewport for input: " + place.name);
         return;
       }
       zoomToViewport(place.geometry.viewport);
     });
   }
 </script>
 <script
   async=""
   src="https://maps.googleapis.com/maps/api/js?key=YOUR_API_KEY&libraries=places&callback=initAutocomplete"
 ></script>
</body>
תצוגת רחפן מסתובבת
אתם יכולים לשלוט במצלמה כדי להוסיף אנימציה לקבוצת המשבצות. בשילוב עם Places API (החדש) ו-Elevation API, האנימציה הזו מדמה טיסה אינטראקטיבית של רחפן מעל כל נקודת עניין.
דוגמת הקוד הזו מציגה את המקום שבחרתם בווידג'ט ההשלמה האוטומטית ממעוף הציפור.
<!DOCTYPE html>
<head>
  <meta charset="utf-8" />
  <title>CesiumJS 3D Tiles Rotating Drone View Demo</title>
  <script src="https://ajax.googleapis.com/ajax/libs/cesiumjs/1.105/Build/Cesium/Cesium.js"></script>
  <link href="https://ajax.googleapis.com/ajax/libs/cesiumjs/1.105/Build/Cesium/Widgets/widgets.css" rel="stylesheet">
</head>
<body>
  <label for="pacViewPlace">Go to a place: </label>
  <input type="text" id="pacViewPlace" name="pacViewPlace" placeholder="Enter a location..." style="width: 300px" />
  <div id="cesiumContainer"></div>
  <script>
    // Enable simultaneous requests.
    Cesium.RequestScheduler.requestsByServer["tile.googleapis.com:443"] = 18;

    // Create the viewer and remove unneeded options.
    const viewer = new Cesium.Viewer("cesiumContainer", {
      imageryProvider: false,
      baseLayerPicker: false,
      homeButton: false,
      fullscreenButton: false,
      navigationHelpButton: false,
      vrButton: false,
      sceneModePicker: false,
      geocoder: false,
      globe: false,
      infobox: false,
      selectionIndicator: false,
      timeline: false,
      projectionPicker: false,
      clockViewModel: null,
      animation: false,
      requestRenderMode: true,
    });

    // Add 3D Tile set.
    const tileset = viewer.scene.primitives.add(
      new Cesium.Cesium3DTileset({
        url: "https://tile.googleapis.com/v1/3dtiles/root.json?key=YOUR_API_KEY",
        // This property is required to display attributions.
        showCreditsOnScreen: true,
      })
    );

    // Point the camera at a location and elevation, at a viewport-appropriate distance.
    function pointCameraAt(location, viewport, elevation) {
      const distance = Cesium.Cartesian3.distance(
        Cesium.Cartesian3.fromDegrees(
          viewport.getSouthWest().lng(), viewport.getSouthWest().lat(), elevation),
        Cesium.Cartesian3.fromDegrees(
          viewport.getNorthEast().lng(), viewport.getNorthEast().lat(), elevation)
      ) / 2;
      const target = new Cesium.Cartesian3.fromDegrees(location.lng(), location.lat(), elevation);
      const pitch = -Math.PI / 4;
      const heading = 0;
      viewer.camera.lookAt(target, new Cesium.HeadingPitchRange(heading, pitch, distance));
    }

    // Rotate the camera around a location and elevation, at a viewport-appropriate distance.
    let unsubscribe = null;
    function rotateCameraAround(location, viewport, elevation) {
      if(unsubscribe) unsubscribe();
      pointCameraAt(location, viewport, elevation);
      unsubscribe = viewer.clock.onTick.addEventListener(() => {
        viewer.camera.rotate(Cesium.Cartesian3.UNIT_Z);
      });
    }

    function initAutocomplete() {
      const autocomplete = new google.maps.places.Autocomplete(
        document.getElementById("pacViewPlace"), {
          fields: [
            "geometry",
            "name",
          ],
        }
      );

      autocomplete.addListener("place_changed", async () => {
        const place = autocomplete.getPlace();

        if (!(place.geometry && place.geometry.viewport && place.geometry.location)) {
          window.alert(`Insufficient geometry data for place: ${place.name}`);
          return;
        }
        // Get place elevation using the ElevationService.
        const elevatorService = new google.maps.ElevationService();
        const elevationResponse =  await elevatorService.getElevationForLocations({
          locations: [place.geometry.location],
        });

        if(!(elevationResponse.results && elevationResponse.results.length)){
          window.alert(`Insufficient elevation data for place: ${place.name}`);
          return;
        }
        const elevation = elevationResponse.results[0].elevation || 10;

        rotateCameraAround(
          place.geometry.location,
          place.geometry.viewport,
          elevation
        );
      });
    }
  </script>
  <script async src="https://maps.googleapis.com/maps/api/js?key=YOUR_API_KEY&libraries=places&callback=initAutocomplete"></script>
</body>
שרטוט קווים פוליגוניים ותוויות
דוגמת הקוד הזו ממחישה איך להוסיף קווים פוליגוניים ותוויות למפה. אפשר להוסיף קווים פוליגוניים למפה כדי להציג מסלולי נסיעה והליכה, להציג גבולות של נכסים או לחשב משכי נסיעה והליכה. אפשר גם לקבל מאפיינים בלי להציג את הסצנה בפועל.
אתם יכולים להציע למשתמשים סיור מודרך בשכונה, או להציג נכסים סמוכים שמוצעים כרגע למכירה, ואז להוסיף לסצנה אובייקטים תלת-ממדיים כמו שלטי חוצות.
אפשר לסכם טיול, לפרט את הנכסים שראיתם ולהציג את הפרטים האלה באובייקטים וירטואליים.
<!DOCTYPE html>
<head>
  <meta charset="utf-8" />
  <title>CesiumJS 3D Tiles Polyline and Label Demo</title>
  <script src="https://ajax.googleapis.com/ajax/libs/cesiumjs/1.105/Build/Cesium/Cesium.js"></script>
  <link
    href="https://ajax.googleapis.com/ajax/libs/cesiumjs/1.105/Build/Cesium/Widgets/widgets.css"
    rel="stylesheet"
  />
</head>
<body>
  <div id="cesiumContainer"></div>
  <script>
    // Enable simultaneous requests.
    Cesium.RequestScheduler.requestsByServer["tile.googleapis.com:443"] = 18;

    // Create the viewer.
    const viewer = new Cesium.Viewer("cesiumContainer", {
      imageryProvider: false,
      baseLayerPicker: false,
      requestRenderMode: true,
      geocoder: false,
      globe: false,
    });

    // Add 3D Tiles tileset.
    const tileset = viewer.scene.primitives.add(
      new Cesium.Cesium3DTileset({
        url: "https://tile.googleapis.com/v1/3dtiles/root.json?key=YOUR_API_KEY",

        // This property is required to display attributions as required.
        showCreditsOnScreen: true,
      })
    );

    // Draws a circle at the position, and a line from the previous position.
    const drawPointAndLine = (position, prevPosition) => {
      viewer.entities.removeAll();
      if (prevPosition) {
        viewer.entities.add({
          polyline: {
            positions: [prevPosition, position],
            width: 3,
            material: Cesium.Color.WHITE,
            clampToGround: true,
            classificationType: Cesium.ClassificationType.CESIUM_3D_TILE,
          },
        });
      }
      viewer.entities.add({
        position: position,
        ellipsoid: {
          radii: new Cesium.Cartesian3(1, 1, 1),
          material: Cesium.Color.RED,
        },
      });
    };

    // Compute, draw, and display the position's height relative to the previous position.
    var prevPosition;
    const processHeights = (newPosition) => {
      drawPointAndLine(newPosition, prevPosition);

      const newHeight = Cesium.Cartographic.fromCartesian(newPosition).height;
      let labelText = "Current altitude (meters above sea level):\n\t" + newHeight;
      if (prevPosition) {
        const prevHeight =
          Cesium.Cartographic.fromCartesian(prevPosition).height;
        labelText += "\nHeight from previous point (meters):\n\t" + Math.abs(newHeight - prevHeight);
      }
      viewer.entities.add({
        position: newPosition,
        label: {
          text: labelText,
          disableDepthTestDistance: Number.POSITIVE_INFINITY,
          pixelOffset: new Cesium.Cartesian2(0, -10),
          showBackground: true,
          verticalOrigin: Cesium.VerticalOrigin.BOTTOM,
        }
      });

      prevPosition = newPosition;
    };

    const handler = new Cesium.ScreenSpaceEventHandler(viewer.canvas);
    handler.setInputAction(function (event) {
      const earthPosition = viewer.scene.pickPosition(event.position);
      if (Cesium.defined(earthPosition)) {
        processHeights(earthPosition);
      }
    }, Cesium.ScreenSpaceEventType.LEFT_CLICK);
  </script>
</body>
תנועת המצלמה
ב-Cesium, אתם יכולים להקיף עם המצלמה נקודת עניין, בלי להתנגש בבניינים. אפשר גם להגדיר שהמבנים יהיו שקופים כשהמצלמה עוברת דרכם.
קודם נועלים את המצלמה על נקודה מסוימת, ואז אפשר ליצור מסלול הקפה של המצלמה כדי להציג את הנכס. כדי לעשות את זה, משתמשים בפונקציה lookAtTransform של המצלמה עם רכיב event listener, כמו בדוגמת הקוד הזו.
// Lock the camera onto a point.
const center = Cesium.Cartesian3.fromRadians(
  2.4213211833389243,
  0.6171926869414084,
  3626.0426275055174
);

const transform = Cesium.Transforms.eastNorthUpToFixedFrame(center);

viewer.scene.camera.lookAtTransform(
  transform,
  new Cesium.HeadingPitchRange(0, -Math.PI / 8, 2900)
);

// Orbit around this point.
viewer.clock.onTick.addEventListener(function (clock) {
  viewer.scene.camera.rotateRight(0.005);
});
מידע נוסף על שליטה במצלמה זמין במאמר שליטה במצלמה.
עבודה עם Cesium for Unreal
כדי להשתמש בפלאגין Cesium for Unreal עם 3D Tiles API, צריך לבצע את השלבים הבאים.
מתקינים את הפלאגין Cesium for Unreal.
יוצרים פרויקט חדש ב-Unreal.
מתחברים אל Google Photorealistic 3D Tiles API.
פותחים את חלון Cesium על ידי בחירה באפשרות Cesium > Cesium מהתפריט.
בוחרים באפשרות Blank 3D Tiles Tileset (ערכת משבצות תלת-ממדיות ריקה).
ב-World Outliner, פותחים את החלונית Details על ידי בחירה ב-Cesium3DTileset.
משנים את Source (מקור) מ-From Cesium Ion (מ-Cesium Ion) ל-From URL (מכתובת URL).
מגדירים את כתובת ה-URL של Google 3D Tiles.
https://tile.googleapis.com/v1/3dtiles/root.json?key=YOUR_API_KEY- כדי להציג את הקרדיטים בצורה תקינה, מפעילים את האפשרות הצגת הקרדיטים על המסך.
העולם נטען. כדי לעבור לכל קו רוחב וקו אורך, בוחרים את הפריט CesiumGeoreference בחלונית Outliner, ואז עורכים את Origin Latitude/Longitude/Height בחלונית Details.
עבודה עם Cesium ל-Unity
כדי להשתמש באריחים פוטו-ריאליסטיים עם Cesium ל-Unity, פועלים לפי השלבים הבאים.
יוצרים פרויקט Unity חדש.
מוסיפים מאגר חדש עם היקף מוגבל בקטע Package Manager (ניהול חבילות) (דרך Editor (עורך) > Project Settings (הגדרות הפרויקט)).
שם: Cesium
כתובת URL: https://unity.pkg.cesium.com
היקף: com.cesium.unity
מתקינים את החבילה Cesium for Unity.
מתחברים ל-Google Photorealistic 3D Tiles API.
פותחים את החלון של Cesium על ידי בחירה באפשרות Cesium > Cesium בתפריט.
לוחצים על Blank 3D Tiles Tileset (ערכת משבצות תלת-ממדיות ריקה).
בחלונית הימנית, באפשרות Tileset Source בקטע Source, בוחרים באפשרות From URL (במקום From Cesium Ion).
מגדירים את כתובת ה-URL לכתובת ה-URL של Google 3D Tiles.
https://tile.googleapis.com/v1/3dtiles/root.json?key=YOUR_API_KEY- כדי להציג את הקרדיטים כמו שצריך, מפעילים את האפשרות הצגת הקרדיטים במסך.
העולם ייטען. כדי לעבור לכל קו רוחב וקו אורך, בוחרים את הפריט CesiumGeoreference ב-Scene Hierarchy, ואז עורכים את קו הרוחב, קו האורך והגובה של נקודת המוצא ב-Inspector.
עבודה עם deck.gl
deck.gl, שמבוסס על WebGL, הוא JavaScript framework בקוד פתוח להצגה חזותית של נתונים בקנה מידה גדול ובביצועים גבוהים.
שיוך (Attribution)
כדי להציג את שיוך הנתונים בצורה נכונה, צריך לחלץ את השדה copyright
מ-tiles gltf asset ולהציג אותו בתצוגה המעובדת. מידע נוסף זמין במאמר הצגת שיוך נתונים.
דוגמאות ל-renderer של deck.gl
דוגמה פשוטה
בדוגמה הבאה, המרנדר של deck.gl מאותחל ואז נטען מקום בתלת-ממד. בקוד, חשוב להחליף את הערך YOUR_API_KEY במפתח ה-API בפועל.
<!DOCTYPE html>
<html>
 <head>
   <title>deck.gl Photorealistic 3D Tiles example</title>
   <script src="https://unpkg.com/deck.gl@latest/dist.min.js"></script>
   <style>
     body { margin: 0; padding: 0;}
     #map { position: absolute; top: 0;bottom: 0;width: 100%;}
     #credits { position: absolute; bottom: 0; right: 0; padding: 2px; font-size: 15px; color: white;
        text-shadow: -1px 0 black, 0 1px black, 1px 0 black, 0 -1px black;}
   </style>
 </head>

 <body>
   <div id="map"></div>
   <div id="credits"></div>
   <script>
     const GOOGLE_API_KEY = YOUR_API_KEY;
     const TILESET_URL = `https://tile.googleapis.com/v1/3dtiles/root.json`;
     const creditsElement = document.getElementById('credits');
     new deck.DeckGL({
       container: 'map',
       initialViewState: {
         latitude: 50.0890,
         longitude: 14.4196,
         zoom: 16,
         bearing: 90,
         pitch: 60,
         height: 200
       },
       controller: {minZoom: 8},
       layers: [
         new deck.Tile3DLayer({
           id: 'google-3d-tiles',
           data: TILESET_URL,
           loadOptions: {
            fetch: {
              headers: {
                'X-GOOG-API-KEY': GOOGLE_API_KEY
              }
            }
          },
           onTilesetLoad: tileset3d => {
             tileset3d.options.onTraversalComplete = selectedTiles => {
               const credits = new Set();
               selectedTiles.forEach(tile => {
                 const {copyright} = tile.content.gltf.asset;
                 copyright.split(';').forEach(credits.add, credits);
                 creditsElement.innerHTML = [...credits].join('; ');
               });
               return selectedTiles;
             }
           }
         })
       ]
     });
   </script>
 </body>
</html>
הצגת שכבות דו-ממדיות מעל קטעי מפה ריאליסטיים בתלת-ממד של Google
התוסף TerrainExtension של deck.gl מעבד נתונים דו-ממדיים על פני שטח תלת-ממדיים. לדוגמה, אתם יכולים להציג את ה-GeoJSON של שטח הבניין מעל הגיאומטריה של קטעי המפה הריאליסטיים בתלת-ממד.
בדוגמה הבאה, שכבת מבנים מוצגת עם הפוליגונים שמותאמים למשטח של קטעי המפה הריאליסטיים בתלת-ממד.
<!DOCTYPE html>
<html>
 <head>
   <title>Google 3D tiles example</title>
   <script src="https://unpkg.com/deck.gl@latest/dist.min.js"></script>
   <style>
     body { margin: 0; padding: 0;}
     #map { position: absolute; top: 0;bottom: 0;width: 100%;}
     #credits { position: absolute; bottom: 0; right: 0; padding: 2px; font-size: 15px; color: white;
        text-shadow: -1px 0 black, 0 1px black, 1px 0 black, 0 -1px black;}
   </style>
 </head>

 <body>
   <div id="map"></div>
   <div id="credits"></div>
   <script>
     const GOOGLE_API_KEY = YOUR_API_KEY;
     const TILESET_URL = `https://tile.googleapis.com/v1/3dtiles/root.json`;
     const BUILDINGS_URL = 'https://raw.githubusercontent.com/visgl/deck.gl-data/master/examples/google-3d-tiles/buildings.geojson'
     const creditsElement = document.getElementById('credits');
     const deckgl = new deck.DeckGL({
       container: 'map',
       initialViewState: {
         latitude: 50.0890,
         longitude: 14.4196,
         zoom: 16,
         bearing: 90,
         pitch: 60,
         height: 200
       },
       controller: true,
       layers: [
         new deck.Tile3DLayer({
           id: 'google-3d-tiles',
           data: TILESET_URL,
           loadOptions: {
            fetch: {
              headers: {
                'X-GOOG-API-KEY': GOOGLE_API_KEY
              }
            }
          },
          onTilesetLoad: tileset3d => {
             tileset3d.options.onTraversalComplete = selectedTiles => {
               const credits = new Set();
               selectedTiles.forEach(tile => {
                 const {copyright} = tile.content.gltf.asset;
                 copyright.split(';').forEach(credits.add, credits);
                 creditsElement.innerHTML = [...credits].join('; ');
               });
               return selectedTiles;
             }
           },
           operation: 'terrain+draw'
         }),
         new deck.GeoJsonLayer({
           id: 'buildings',
           // This dataset is created by CARTO, using other Open Datasets available. More info at: https://3dtiles.carto.com/#about.
           data: 'https://raw.githubusercontent.com/visgl/deck.gl-data/master/examples/google-3d-tiles/buildings.geojson',
           stroked: false,
           filled: true,
           getFillColor: ({properties}) => {
             const {tpp} = properties;
             // quantiles break
             if (tpp < 0.6249)
               return [254, 246, 181]
             else if (tpp < 0.6780)
               return [255, 194, 133]
             else if (tpp < 0.8594)
               return [250, 138, 118]
             return [225, 83, 131]
           },
           opacity: 0.2,
           extensions: [new deck._TerrainExtension()]
         })
       ]
     });
   </script>
 </body>
</html>