
포토리얼리스틱 3D 타일은 OGC 표준 glTF 형식으로 되어 있으므로 OGC 3D 타일 사양을 지원하는 렌더러를 사용하여 3D 시각화를 빌드할 수 있습니다. 예를 들어, Cesium 은 3D 시각화를 렌더링하기 위한 기본 오픈소스 라이브러리입니다.
CesiumJS 작업
CesiumJS는 웹에서 3D 시각화를 위한 오픈소스 자바스크립트 라이브러리입니다. CesiumJS 사용에 관한 자세한 내용은 CesiumJS 알아보기 페이지를 참고하세요.
사용자 컨트롤
CesiumJS 타일 렌더러에는 표준 사용자 컨트롤 세트가 있습니다.
| 작업 | 설명 |
|---|---|
| 팬 뷰 | 왼쪽 클릭 및 드래그 |
| 확대/축소 뷰 | 마우스 오른쪽 클릭 및 드래그 또는 마우스 휠 스크롤 |
| 뷰 회전 | Ctrl + 왼쪽/오른쪽 클릭 및 드래그 또는 가운데 클릭 및 드래그 |
권장사항
CesiumJS 3D 로드 시간을 줄이는 방법에는 여러 가지가 있습니다. 예를 들면 다음과 같습니다.
렌더링 HTML에 다음 문을 추가하여 동시 요청을 사용 설정합니다.
Cesium.RequestScheduler.requestsByServer["tile.googleapis.com:443"] = <REQUEST_COUNT>REQUEST_COUNT가 클수록 타일이 더 빠르게 로드됩니다. 하지만REQUEST_COUNT10보다 크고 캐시가 사용 중지된 Chrome 브라우저에서 로드할 때는 알려진 Chrome 문제가 발생할 수 있습니다. 대부분의 사용 사례에서는 최적의 성능을 위해REQUEST_COUNT를 18로 설정하는 것이 좋습니다.세부정보 수준 건너뛰기를 사용 설정합니다. 자세한 내용은 이 Cesium 문제를 참고하세요.
showCreditsOnScreen: true를 사용 설정하여 데이터 기여 분석을 올바르게 표시합니다. 자세한 내용은
정책을 참고하세요.
렌더링 측정항목
프레임 지연 시간이 계산되는 방식을 보려면 PerformanceDisplay 클래스를 살펴보세요.
CesiumJS 렌더러 예시
루트 타일 세트 URL을 제공하기만 하면 Map Tiles API의 3D 타일과 함께 CesiumJS 렌더러를 사용할 수 있습니다.
간단한 예시
다음 예시에서는 CesiumJS 렌더러를 초기화한 다음 루트 타일 세트를 로드합니다.
<!DOCTYPE html>
<head>
  <meta charset="utf-8">
  <title>CesiumJS 3D Tiles Simple Demo</title>
  <script src="https://ajax.googleapis.com/ajax/libs/cesiumjs/1.105/Build/Cesium/Cesium.js"></script>
  <link href="https://ajax.googleapis.com/ajax/libs/cesiumjs/1.105/Build/Cesium/Widgets/widgets.css" rel="stylesheet">
</head>
<body>
  <div id="cesiumContainer"></div>
  <script>

    // Enable simultaneous requests.
    Cesium.RequestScheduler.requestsByServer["tile.googleapis.com:443"] = 18;

    // Create the viewer.
    const viewer = new Cesium.Viewer('cesiumContainer', {
      imageryProvider: false,
      baseLayerPicker: false,
      geocoder: false,
      globe: false,
      // https://cesium.com/blog/2018/01/24/cesium-scene-rendering-performance/#enabling-request-render-mode
      requestRenderMode: true,
    });

    // Add 3D Tiles tileset.
    const tileset = viewer.scene.primitives.add(new Cesium.Cesium3DTileset({
      url: "https://tile.googleapis.com/v1/3dtiles/root.json?key=YOUR_API_KEY",
      // This property is needed to appropriately display attributions
      // as required.
      showCreditsOnScreen: true,
    }));
  </script>
</body>
requestRenderMode에 관한 자세한 내용은
요청 렌더 모드 사용 설정을 참고하세요.
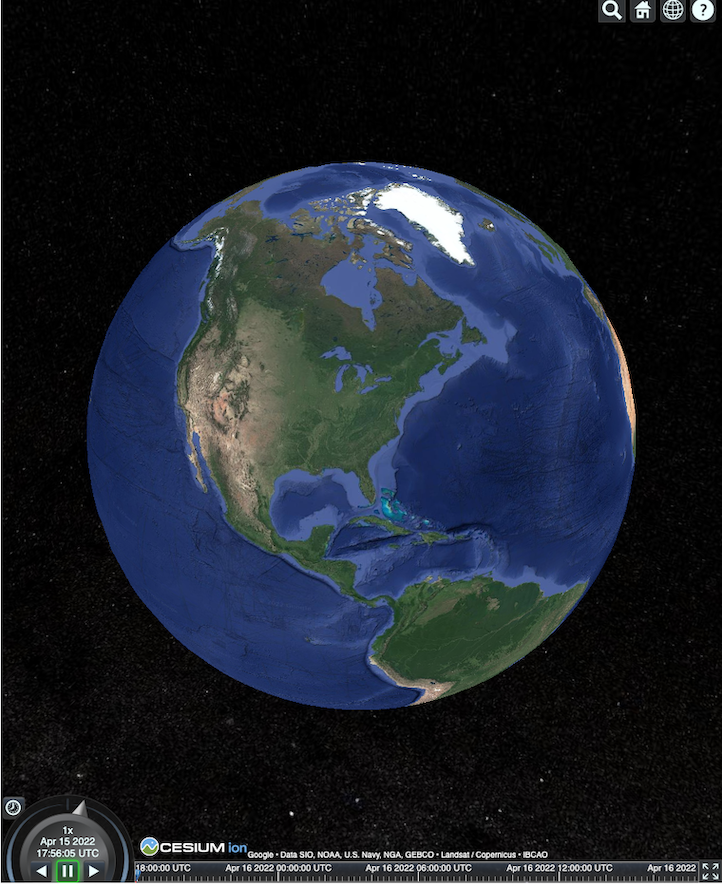
HTML 페이지는 여기에 표시된 대로 렌더링됩니다.
Places API 통합
Places API와 함께 CesiumJS를 사용하여 자세한 정보를 가져올 수 있습니다. 자동 완성 위젯을 사용하여 장소의 표시 영역으로 이동할 수 있습니다. 이 예시에서는 이러한 안내에 따라 사용 설정되는 Places Autocomplete API와 이러한 안내에 따라 사용 설정되는 Maps JavaScript API를 사용합니다.
<!DOCTYPE html>
<head>
 <meta charset="utf-8" />
 <title>CesiumJS 3D Tiles Places API Integration Demo</title>
 <script src="https://ajax.googleapis.com/ajax/libs/cesiumjs/1.105/Build/Cesium/Cesium.js"></script>
 <link href="https://ajax.googleapis.com/ajax/libs/cesiumjs/1.105/Build/Cesium/Widgets/widgets.css" rel="stylesheet">
</head>
<body>
 <label for="pacViewPlace">Go to a place: </label>
 <input
   type="text"
   id="pacViewPlace"
   name="pacViewPlace"
   placeholder="Enter a location..."
   style="width: 300px"
 />
 <div id="cesiumContainer"></div>
 <script>
   // Enable simultaneous requests.
   Cesium.RequestScheduler.requestsByServer["tile.googleapis.com:443"] = 18;

   // Create the viewer.
   const viewer = new Cesium.Viewer("cesiumContainer", {
     imageryProvider: false,
     baseLayerPicker: false,
     requestRenderMode: true,
     geocoder: false,
     globe: false,
   });

   // Add 3D Tiles tileset.
   const tileset = viewer.scene.primitives.add(
     new Cesium.Cesium3DTileset({
       url: "https://tile.googleapis.com/v1/3dtiles/root.json?key=YOUR_API_KEY",
       // This property is required to display attributions as required.
       showCreditsOnScreen: true,
     })
   );

   const zoomToViewport = (viewport) => {
     viewer.entities.add({
       polyline: {
         positions: Cesium.Cartesian3.fromDegreesArray([
           viewport.getNorthEast().lng(), viewport.getNorthEast().lat(),
           viewport.getSouthWest().lng(), viewport.getNorthEast().lat(),
           viewport.getSouthWest().lng(), viewport.getSouthWest().lat(),
           viewport.getNorthEast().lng(), viewport.getSouthWest().lat(),
           viewport.getNorthEast().lng(), viewport.getNorthEast().lat(),
         ]),
         width: 10,
         clampToGround: true,
         material: Cesium.Color.RED,
       },
     });
     viewer.flyTo(viewer.entities);
   };

   function initAutocomplete() {
     const autocomplete = new google.maps.places.Autocomplete(
       document.getElementById("pacViewPlace"),
       {
         fields: [
           "geometry",
           "name",
         ],
       }
     );
     autocomplete.addListener("place_changed", () => {
       viewer.entities.removeAll();
       const place = autocomplete.getPlace();
       if (!place.geometry || !place.geometry.viewport) {
         window.alert("No viewport for input: " + place.name);
         return;
       }
       zoomToViewport(place.geometry.viewport);
     });
   }
 </script>
 <script
   async=""
   src="https://maps.googleapis.com/maps/api/js?key=YOUR_API_KEY&libraries=places&callback=initAutocomplete"
 ></script>
</body>
회전하는 드론 뷰
카메라를 제어하여 타일 세트를 통해 애니메이션을 만들 수 있습니다. Places API 및 Elevation API와 결합하면 이 애니메이션은 관심 지점의 대화형 드론 비행을 시뮬레이션합니다.
이 코드 샘플은 자동 완성 위젯에서 선택한 장소 주변을 비행합니다.
<!DOCTYPE html>
<head>
  <meta charset="utf-8" />
  <title>CesiumJS 3D Tiles Rotating Drone View Demo</title>
  <script src="https://ajax.googleapis.com/ajax/libs/cesiumjs/1.105/Build/Cesium/Cesium.js"></script>
  <link href="https://ajax.googleapis.com/ajax/libs/cesiumjs/1.105/Build/Cesium/Widgets/widgets.css" rel="stylesheet">
</head>
<body>
  <label for="pacViewPlace">Go to a place: </label>
  <input type="text" id="pacViewPlace" name="pacViewPlace" placeholder="Enter a location..." style="width: 300px" />
  <div id="cesiumContainer"></div>
  <script>
    // Enable simultaneous requests.
    Cesium.RequestScheduler.requestsByServer["tile.googleapis.com:443"] = 18;

    // Create the viewer and remove unneeded options.
    const viewer = new Cesium.Viewer("cesiumContainer", {
      imageryProvider: false,
      baseLayerPicker: false,
      homeButton: false,
      fullscreenButton: false,
      navigationHelpButton: false,
      vrButton: false,
      sceneModePicker: false,
      geocoder: false,
      globe: false,
      infobox: false,
      selectionIndicator: false,
      timeline: false,
      projectionPicker: false,
      clockViewModel: null,
      animation: false,
      requestRenderMode: true,
    });

    // Add 3D Tile set.
    const tileset = viewer.scene.primitives.add(
      new Cesium.Cesium3DTileset({
        url: "https://tile.googleapis.com/v1/3dtiles/root.json?key=YOUR_API_KEY",
        // This property is required to display attributions.
        showCreditsOnScreen: true,
      })
    );

    // Point the camera at a location and elevation, at a viewport-appropriate distance.
    function pointCameraAt(location, viewport, elevation) {
      const distance = Cesium.Cartesian3.distance(
        Cesium.Cartesian3.fromDegrees(
          viewport.getSouthWest().lng(), viewport.getSouthWest().lat(), elevation),
        Cesium.Cartesian3.fromDegrees(
          viewport.getNorthEast().lng(), viewport.getNorthEast().lat(), elevation)
      ) / 2;
      const target = new Cesium.Cartesian3.fromDegrees(location.lng(), location.lat(), elevation);
      const pitch = -Math.PI / 4;
      const heading = 0;
      viewer.camera.lookAt(target, new Cesium.HeadingPitchRange(heading, pitch, distance));
    }

    // Rotate the camera around a location and elevation, at a viewport-appropriate distance.
    let unsubscribe = null;
    function rotateCameraAround(location, viewport, elevation) {
      if(unsubscribe) unsubscribe();
      pointCameraAt(location, viewport, elevation);
      unsubscribe = viewer.clock.onTick.addEventListener(() => {
        viewer.camera.rotate(Cesium.Cartesian3.UNIT_Z);
      });
    }

    function initAutocomplete() {
      const autocomplete = new google.maps.places.Autocomplete(
        document.getElementById("pacViewPlace"), {
          fields: [
            "geometry",
            "name",
          ],
        }
      );

      autocomplete.addListener("place_changed", async () => {
        const place = autocomplete.getPlace();

        if (!(place.geometry && place.geometry.viewport && place.geometry.location)) {
          window.alert(`Insufficient geometry data for place: ${place.name}`);
          return;
        }
        // Get place elevation using the ElevationService.
        const elevatorService = new google.maps.ElevationService();
        const elevationResponse =  await elevatorService.getElevationForLocations({
          locations: [place.geometry.location],
        });

        if(!(elevationResponse.results && elevationResponse.results.length)){
          window.alert(`Insufficient elevation data for place: ${place.name}`);
          return;
        }
        const elevation = elevationResponse.results[0].elevation || 10;

        rotateCameraAround(
          place.geometry.location,
          place.geometry.viewport,
          elevation
        );
      });
    }
  </script>
  <script async src="https://maps.googleapis.com/maps/api/js?key=YOUR_API_KEY&libraries=places&callback=initAutocomplete"></script>
</body>
다중선 및 라벨 그리기
이 코드 샘플은 지도에 다중선과 라벨을 추가하는 방법을 보여줍니다. 지도에 다중선을 추가하여 운전 및 도보 경로를 표시하거나, 부동산 경계를 표시하거나, 운전 및 도보 시간을 계산할 수 있습니다. 장면을 실제로 렌더링하지 않고도 속성을 가져올 수도 있습니다.
사용자에게 엄선된 동네 투어를 제공하거나 현재 판매 중인 인접한 부동산을 표시한 다음 장면의 광고판과 같은 3D 객체를 추가할 수 있습니다.
방문한 부동산을 나열하고 이러한 세부정보를 가상 객체에 표시하여 여행을 요약할 수 있습니다.
<!DOCTYPE html>
<head>
  <meta charset="utf-8" />
  <title>CesiumJS 3D Tiles Polyline and Label Demo</title>
  <script src="https://ajax.googleapis.com/ajax/libs/cesiumjs/1.105/Build/Cesium/Cesium.js"></script>
  <link
    href="https://ajax.googleapis.com/ajax/libs/cesiumjs/1.105/Build/Cesium/Widgets/widgets.css"
    rel="stylesheet"
  />
</head>
<body>
  <div id="cesiumContainer"></div>
  <script>
    // Enable simultaneous requests.
    Cesium.RequestScheduler.requestsByServer["tile.googleapis.com:443"] = 18;

    // Create the viewer.
    const viewer = new Cesium.Viewer("cesiumContainer", {
      imageryProvider: false,
      baseLayerPicker: false,
      requestRenderMode: true,
      geocoder: false,
      globe: false,
    });

    // Add 3D Tiles tileset.
    const tileset = viewer.scene.primitives.add(
      new Cesium.Cesium3DTileset({
        url: "https://tile.googleapis.com/v1/3dtiles/root.json?key=YOUR_API_KEY",

        // This property is required to display attributions as required.
        showCreditsOnScreen: true,
      })
    );

    // Draws a circle at the position, and a line from the previous position.
    const drawPointAndLine = (position, prevPosition) => {
      viewer.entities.removeAll();
      if (prevPosition) {
        viewer.entities.add({
          polyline: {
            positions: [prevPosition, position],
            width: 3,
            material: Cesium.Color.WHITE,
            clampToGround: true,
            classificationType: Cesium.ClassificationType.CESIUM_3D_TILE,
          },
        });
      }
      viewer.entities.add({
        position: position,
        ellipsoid: {
          radii: new Cesium.Cartesian3(1, 1, 1),
          material: Cesium.Color.RED,
        },
      });
    };

    // Compute, draw, and display the position's height relative to the previous position.
    var prevPosition;
    const processHeights = (newPosition) => {
      drawPointAndLine(newPosition, prevPosition);

      const newHeight = Cesium.Cartographic.fromCartesian(newPosition).height;
      let labelText = "Current altitude (meters above sea level):\n\t" + newHeight;
      if (prevPosition) {
        const prevHeight =
          Cesium.Cartographic.fromCartesian(prevPosition).height;
        labelText += "\nHeight from previous point (meters):\n\t" + Math.abs(newHeight - prevHeight);
      }
      viewer.entities.add({
        position: newPosition,
        label: {
          text: labelText,
          disableDepthTestDistance: Number.POSITIVE_INFINITY,
          pixelOffset: new Cesium.Cartesian2(0, -10),
          showBackground: true,
          verticalOrigin: Cesium.VerticalOrigin.BOTTOM,
        }
      });

      prevPosition = newPosition;
    };

    const handler = new Cesium.ScreenSpaceEventHandler(viewer.canvas);
    handler.setInputAction(function (event) {
      const earthPosition = viewer.scene.pickPosition(event.position);
      if (Cesium.defined(earthPosition)) {
        processHeights(earthPosition);
      }
    }, Cesium.ScreenSpaceEventType.LEFT_CLICK);
  </script>
</body>
카메라 궤도
Cesium에서는 건물과의 충돌을 방지하면서 관심 지점 주변으로 카메라를 회전시킬 수 있습니다. 또는 카메라가 건물을 통과할 때 건물을 투명하게 만들 수 있습니다.
먼저 카메라를 한 지점에 고정하면 카메라 궤도를 만들어 애셋을 보여줄 수 있습니다. 이 코드 샘플에 나와 있는 것처럼 이벤트 리스너와 함께 카메라의
lookAtTransform
함수를 사용하여 이 작업을 실행할 수 있습니다.
// Lock the camera onto a point.
const center = Cesium.Cartesian3.fromRadians(
  2.4213211833389243,
  0.6171926869414084,
  3626.0426275055174
);

const transform = Cesium.Transforms.eastNorthUpToFixedFrame(center);

viewer.scene.camera.lookAtTransform(
  transform,
  new Cesium.HeadingPitchRange(0, -Math.PI / 8, 2900)
);

// Orbit around this point.
viewer.clock.onTick.addEventListener(function (clock) {
  viewer.scene.camera.rotateRight(0.005);
});
카메라 제어에 관한 자세한 내용은 카메라 제어를 참고하세요.
Unreal용 Cesium 작업
3D Tiles API와 함께 Unreal용 Cesium 플러그인을 사용하려면 다음 단계를 따르세요.
Unreal용 Cesium 플러그인을 설치합니다.
새 Unreal 프로젝트를 만듭니다.
Google 포토리얼리스틱 3D 타일 API에 연결합니다.
메뉴에서 Cesium > Cesium 을 선택하여 Cesium 창을 엽니다.
빈 3D 타일 타일 세트 를 선택합니다.
월드 아웃라이너에서 이 Cesium3DTileset을 선택하여 세부정보 패널을 엽니다.
소스 를 Cesium Ion에서 에서 URL에서 로 변경합니다.
URL을 Google 3D 타일 URL로 설정합니다.
https://tile.googleapis.com/v1/3dtiles/root.json?key=YOUR_API_KEY- 기여 분석을 올바르게 표시하려면 화면에 저작자 표시 를 사용 설정합니다.
그러면 월드가 로드됩니다. LatLng로 이동하려면 아웃라이너 패널에서 CesiumGeoreference 항목을 선택한 다음 세부정보 패널에서 원점 위도/경도/높이 를 수정합니다.
Unity용 Cesium 작업
Unity용 Cesium에서 포토리얼리스틱 타일을 사용하려면 다음 단계를 따르세요.
새 Unity 프로젝트를 만듭니다.
Editor > Project Settings 를 통해 패키지 관리자 섹션에 새 범위 지정 레지스트리를 추가합니다.
이름: Cesium
URL: https://unity.pkg.cesium.com
범위: com.cesium.unity
Unity용 Cesium 패키지를 설치합니다.
Google 포토리얼리스틱 3D 타일 API에 연결합니다.
메뉴에서 Cesium > Cesium 을 선택하여 Cesium 창을 엽니다.
빈 3D 타일 타일 세트 를 클릭합니다.
왼쪽 패널의 소스 아래에 있는 타일 세트 소스 옵션에서 Cesium Ion에서가 아닌 URL에서를 선택합니다.
URL을 Google 3D 타일 URL로 설정합니다.
https://tile.googleapis.com/v1/3dtiles/root.json?key=YOUR_API_KEY- 기여 분석을 올바르게 표시하려면 화면에 저작자 표시 를 사용 설정합니다.
그러면 월드가 로드됩니다. LatLng로 이동하려면 CesiumGeoreference 항목을 장면 계층 구조에서 선택한 다음 원점 위도/경도/높이를 인스펙터에서 수정합니다.
deck.gl 작업
deck.gl, WebGL 기반의 은 고성능 대규모 데이터 시각화를 위한 오픈소스 자바스크립트 프레임워크입니다.
기여 분석
타일 gltf asset에서 copyright 필드를 추출한 다음 렌더링된 뷰에 표시하여 데이터 기여 분석을 올바르게 표시합니다. 자세한 내용은
데이터 기여 분석 표시를 참고하세요.
deck.gl 렌더러 예시
간단한 예시
다음 예시에서는 deck.gl 렌더러를 초기화한 다음 장소를 3D로 로드합니다. 코드에서 YOUR_API_KEY를 실제 API 키로 바꿔야 합니다.
<!DOCTYPE html>
<html>
 <head>
   <title>deck.gl Photorealistic 3D Tiles example</title>
   <script src="https://unpkg.com/deck.gl@latest/dist.min.js"></script>
   <style>
     body { margin: 0; padding: 0;}
     #map { position: absolute; top: 0;bottom: 0;width: 100%;}
     #credits { position: absolute; bottom: 0; right: 0; padding: 2px; font-size: 15px; color: white;
        text-shadow: -1px 0 black, 0 1px black, 1px 0 black, 0 -1px black;}
   </style>
 </head>

 <body>
   <div id="map"></div>
   <div id="credits"></div>
   <script>
     const GOOGLE_API_KEY = YOUR_API_KEY;
     const TILESET_URL = `https://tile.googleapis.com/v1/3dtiles/root.json`;
     const creditsElement = document.getElementById('credits');
     new deck.DeckGL({
       container: 'map',
       initialViewState: {
         latitude: 50.0890,
         longitude: 14.4196,
         zoom: 16,
         bearing: 90,
         pitch: 60,
         height: 200
       },
       controller: {minZoom: 8},
       layers: [
         new deck.Tile3DLayer({
           id: 'google-3d-tiles',
           data: TILESET_URL,
           loadOptions: {
            fetch: {
              headers: {
                'X-GOOG-API-KEY': GOOGLE_API_KEY
              }
            }
          },
           onTilesetLoad: tileset3d => {
             tileset3d.options.onTraversalComplete = selectedTiles => {
               const credits = new Set();
               selectedTiles.forEach(tile => {
                 const {copyright} = tile.content.gltf.asset;
                 copyright.split(';').forEach(credits.add, credits);
                 creditsElement.innerHTML = [...credits].join('; ');
               });
               return selectedTiles;
             }
           }
         })
       ]
     });
   </script>
 </body>
</html>
Google 포토리얼리스틱 3D 타일 위에 2D 레이어 시각화
deck.gl TerrainExtension 은 2D 데이터를 3D 표면에 렌더링합니다. 예를 들어 포토리얼리스틱 3D 타일 도형 위에 건물 면적의 GeoJSON을 덮을 수 있습니다.
다음 예시에서는 포토리얼리스틱 3D 타일 표면에 맞게 조정된 다각형으로 건물 레이어가 시각화됩니다.
<!DOCTYPE html>
<html>
 <head>
   <title>Google 3D tiles example</title>
   <script src="https://unpkg.com/deck.gl@latest/dist.min.js"></script>
   <style>
     body { margin: 0; padding: 0;}
     #map { position: absolute; top: 0;bottom: 0;width: 100%;}
     #credits { position: absolute; bottom: 0; right: 0; padding: 2px; font-size: 15px; color: white;
        text-shadow: -1px 0 black, 0 1px black, 1px 0 black, 0 -1px black;}
   </style>
 </head>

 <body>
   <div id="map"></div>
   <div id="credits"></div>
   <script>
     const GOOGLE_API_KEY = YOUR_API_KEY;
     const TILESET_URL = `https://tile.googleapis.com/v1/3dtiles/root.json`;
     const BUILDINGS_URL = 'https://raw.githubusercontent.com/visgl/deck.gl-data/master/examples/google-3d-tiles/buildings.geojson'
     const creditsElement = document.getElementById('credits');
     const deckgl = new deck.DeckGL({
       container: 'map',
       initialViewState: {
         latitude: 50.0890,
         longitude: 14.4196,
         zoom: 16,
         bearing: 90,
         pitch: 60,
         height: 200
       },
       controller: true,
       layers: [
         new deck.Tile3DLayer({
           id: 'google-3d-tiles',
           data: TILESET_URL,
           loadOptions: {
            fetch: {
              headers: {
                'X-GOOG-API-KEY': GOOGLE_API_KEY
              }
            }
          },
          onTilesetLoad: tileset3d => {
             tileset3d.options.onTraversalComplete = selectedTiles => {
               const credits = new Set();
               selectedTiles.forEach(tile => {
                 const {copyright} = tile.content.gltf.asset;
                 copyright.split(';').forEach(credits.add, credits);
                 creditsElement.innerHTML = [...credits].join('; ');
               });
               return selectedTiles;
             }
           },
           operation: 'terrain+draw'
         }),
         new deck.GeoJsonLayer({
           id: 'buildings',
           // This dataset is created by CARTO, using other Open Datasets available. More info at: https://3dtiles.carto.com/#about.
           data: 'https://raw.githubusercontent.com/visgl/deck.gl-data/master/examples/google-3d-tiles/buildings.geojson',
           stroked: false,
           filled: true,
           getFillColor: ({properties}) => {
             const {tpp} = properties;
             // quantiles break
             if (tpp < 0.6249)
               return [254, 246, 181]
             else if (tpp < 0.6780)
               return [255, 194, 133]
             else if (tpp < 0.8594)
               return [250, 138, 118]
             return [225, 83, 131]
           },
           opacity: 0.2,
           extensions: [new deck._TerrainExtension()]
         })
       ]
     });
   </script>
 </body>
</html>