
Photorealistic 3D Tiles は OGC 標準の glTF 形式であるため、OGC 3D Tiles 仕様をサポートするレンダラを使用して 3D 可視化を構築できます。たとえば、Cesium は、3D 可視化のレンダリング用の基盤となるオープンソース ライブラリです。
CesiumJS を使用する
CesiumJS は、ウェブ上の 3D 可視化用のオープンソースの JavaScript ライブラリです。CesiumJS の使用について詳しくは、CesiumJS を学ぶをご覧ください。
ユーザー コントロール
CesiumJS タイル レンダラには、標準のユーザー コントロール セットがあります。
| アクション | 説明 |
|---|---|
| パンビュー | 左クリックしてドラッグ |
| ズームビュー | 右クリックしてドラッグするか、マウスホイールをスクロールする |
| ビューを回転 | Ctrl+左クリック/右クリックしてドラッグ、または中クリックしてドラッグ |
ベスト プラクティス
CesiumJS の 3D 読み込み時間を短縮する方法はいくつかあります。次に例を示します。
レンダリング HTML に次のステートメントを追加して、同時リクエストを有効にします。
Cesium.RequestScheduler.requestsByServer["tile.googleapis.com:443"] = <REQUEST_COUNT>REQUEST_COUNTが大きいほど、タイルの読み込みが速くなります。ただし、REQUEST_COUNTが 10 より大きく、キャッシュが無効になっている Chrome ブラウザで読み込むと、既知の Chrome の問題が発生する可能性があります。ほとんどのユースケースでは、最適なパフォーマンスを得るためにREQUEST_COUNTを 18 にすることをおすすめします。詳細レベルのスキップを有効にします。詳細については、こちらの Cesium の問題をご覧ください。
showCreditsOnScreen: true を有効にして、データ アトリビューションが適切に表示されるようにします。詳細については、ポリシーをご覧ください。
レンダリング指標
フレームレートを確認するには、requestAnimationFrame メソッドが 1 秒間に呼び出される回数を調べます。
フレーム レイテンシの計算方法については、PerformanceDisplay クラスをご覧ください。
CesiumJS レンダラの例
ルート タイルセットの URL を指定するだけで、Map Tiles API の 3D タイルで CesiumJS レンダラを使用できます。
簡単な例
次の例では、CesiumJS レンダラを初期化してから、ルート タイルセットを読み込みます。
<!DOCTYPE html>
<head>
  <meta charset="utf-8">
  <title>CesiumJS 3D Tiles Simple Demo</title>
  <script src="https://ajax.googleapis.com/ajax/libs/cesiumjs/1.105/Build/Cesium/Cesium.js"></script>
  <link href="https://ajax.googleapis.com/ajax/libs/cesiumjs/1.105/Build/Cesium/Widgets/widgets.css" rel="stylesheet">
</head>
<body>
  <div id="cesiumContainer"></div>
  <script>

    // Enable simultaneous requests.
    Cesium.RequestScheduler.requestsByServer["tile.googleapis.com:443"] = 18;

    // Create the viewer.
    const viewer = new Cesium.Viewer('cesiumContainer', {
      imageryProvider: false,
      baseLayerPicker: false,
      geocoder: false,
      globe: false,
      // https://cesium.com/blog/2018/01/24/cesium-scene-rendering-performance/#enabling-request-render-mode
      requestRenderMode: true,
    });

    // Add 3D Tiles tileset.
    const tileset = viewer.scene.primitives.add(new Cesium.Cesium3DTileset({
      url: "https://tile.googleapis.com/v1/3dtiles/root.json?key=YOUR_API_KEY",
      // This property is needed to appropriately display attributions
      // as required.
      showCreditsOnScreen: true,
    }));
  </script>
</body>
requestRenderMode については、リクエスト レンダリング モードを有効にするをご覧ください。
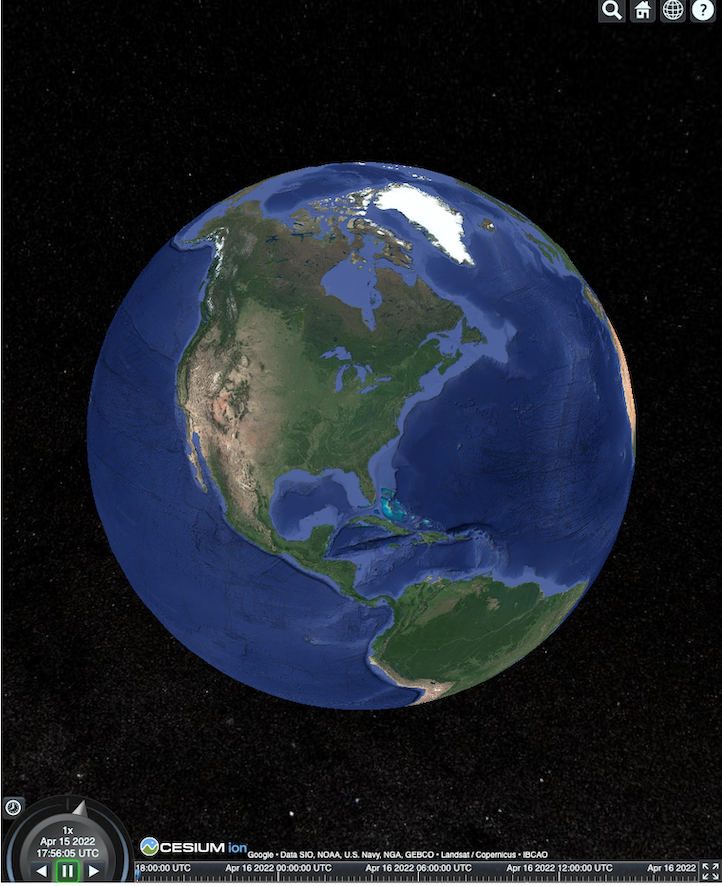
HTML ページは次のようにレンダリングされます。
Places API の統合
CesiumJS と Places API を使用して、詳細情報を取得できます。予測入力ウィジェットを使用して、プレイスのビューポートに移動できます。この例では、こちらの手順に沿って有効にした Places Autocomplete API と、こちらの手順に沿って有効にした Maps JavaScript API を使用します。
<!DOCTYPE html>
<head>
 <meta charset="utf-8" />
 <title>CesiumJS 3D Tiles Places API Integration Demo</title>
 <script src="https://ajax.googleapis.com/ajax/libs/cesiumjs/1.105/Build/Cesium/Cesium.js"></script>
 <link href="https://ajax.googleapis.com/ajax/libs/cesiumjs/1.105/Build/Cesium/Widgets/widgets.css" rel="stylesheet">
</head>
<body>
 <label for="pacViewPlace">Go to a place: </label>
 <input
   type="text"
   id="pacViewPlace"
   name="pacViewPlace"
   placeholder="Enter a location..."
   style="width: 300px"
 />
 <div id="cesiumContainer"></div>
 <script>
   // Enable simultaneous requests.
   Cesium.RequestScheduler.requestsByServer["tile.googleapis.com:443"] = 18;

   // Create the viewer.
   const viewer = new Cesium.Viewer("cesiumContainer", {
     imageryProvider: false,
     baseLayerPicker: false,
     requestRenderMode: true,
     geocoder: false,
     globe: false,
   });

   // Add 3D Tiles tileset.
   const tileset = viewer.scene.primitives.add(
     new Cesium.Cesium3DTileset({
       url: "https://tile.googleapis.com/v1/3dtiles/root.json?key=YOUR_API_KEY",
       // This property is required to display attributions as required.
       showCreditsOnScreen: true,
     })
   );

   const zoomToViewport = (viewport) => {
     viewer.entities.add({
       polyline: {
         positions: Cesium.Cartesian3.fromDegreesArray([
           viewport.getNorthEast().lng(), viewport.getNorthEast().lat(),
           viewport.getSouthWest().lng(), viewport.getNorthEast().lat(),
           viewport.getSouthWest().lng(), viewport.getSouthWest().lat(),
           viewport.getNorthEast().lng(), viewport.getSouthWest().lat(),
           viewport.getNorthEast().lng(), viewport.getNorthEast().lat(),
         ]),
         width: 10,
         clampToGround: true,
         material: Cesium.Color.RED,
       },
     });
     viewer.flyTo(viewer.entities);
   };

   function initAutocomplete() {
     const autocomplete = new google.maps.places.Autocomplete(
       document.getElementById("pacViewPlace"),
       {
         fields: [
           "geometry",
           "name",
         ],
       }
     );
     autocomplete.addListener("place_changed", () => {
       viewer.entities.removeAll();
       const place = autocomplete.getPlace();
       if (!place.geometry || !place.geometry.viewport) {
         window.alert("No viewport for input: " + place.name);
         return;
       }
       zoomToViewport(place.geometry.viewport);
     });
   }
 </script>
 <script
   async=""
   src="https://maps.googleapis.com/maps/api/js?key=YOUR_API_KEY&libraries=places&callback=initAutocomplete"
 ></script>
</body>
回転するドローンビュー
カメラを制御して、タイルセットをアニメーション化できます。Places API と Elevation API を組み合わせることで、このアニメーションは任意のスポットをドローンがインタラクティブに上空を通過する様子をシミュレートします。
このコードサンプルでは、Autocomplete ウィジェットで選択した場所を飛び回ります。
<!DOCTYPE html>
<head>
  <meta charset="utf-8" />
  <title>CesiumJS 3D Tiles Rotating Drone View Demo</title>
  <script src="https://ajax.googleapis.com/ajax/libs/cesiumjs/1.105/Build/Cesium/Cesium.js"></script>
  <link href="https://ajax.googleapis.com/ajax/libs/cesiumjs/1.105/Build/Cesium/Widgets/widgets.css" rel="stylesheet">
</head>
<body>
  <label for="pacViewPlace">Go to a place: </label>
  <input type="text" id="pacViewPlace" name="pacViewPlace" placeholder="Enter a location..." style="width: 300px" />
  <div id="cesiumContainer"></div>
  <script>
    // Enable simultaneous requests.
    Cesium.RequestScheduler.requestsByServer["tile.googleapis.com:443"] = 18;

    // Create the viewer and remove unneeded options.
    const viewer = new Cesium.Viewer("cesiumContainer", {
      imageryProvider: false,
      baseLayerPicker: false,
      homeButton: false,
      fullscreenButton: false,
      navigationHelpButton: false,
      vrButton: false,
      sceneModePicker: false,
      geocoder: false,
      globe: false,
      infobox: false,
      selectionIndicator: false,
      timeline: false,
      projectionPicker: false,
      clockViewModel: null,
      animation: false,
      requestRenderMode: true,
    });

    // Add 3D Tile set.
    const tileset = viewer.scene.primitives.add(
      new Cesium.Cesium3DTileset({
        url: "https://tile.googleapis.com/v1/3dtiles/root.json?key=YOUR_API_KEY",
        // This property is required to display attributions.
        showCreditsOnScreen: true,
      })
    );

    // Point the camera at a location and elevation, at a viewport-appropriate distance.
    function pointCameraAt(location, viewport, elevation) {
      const distance = Cesium.Cartesian3.distance(
        Cesium.Cartesian3.fromDegrees(
          viewport.getSouthWest().lng(), viewport.getSouthWest().lat(), elevation),
        Cesium.Cartesian3.fromDegrees(
          viewport.getNorthEast().lng(), viewport.getNorthEast().lat(), elevation)
      ) / 2;
      const target = new Cesium.Cartesian3.fromDegrees(location.lng(), location.lat(), elevation);
      const pitch = -Math.PI / 4;
      const heading = 0;
      viewer.camera.lookAt(target, new Cesium.HeadingPitchRange(heading, pitch, distance));
    }

    // Rotate the camera around a location and elevation, at a viewport-appropriate distance.
    let unsubscribe = null;
    function rotateCameraAround(location, viewport, elevation) {
      if(unsubscribe) unsubscribe();
      pointCameraAt(location, viewport, elevation);
      unsubscribe = viewer.clock.onTick.addEventListener(() => {
        viewer.camera.rotate(Cesium.Cartesian3.UNIT_Z);
      });
    }

    function initAutocomplete() {
      const autocomplete = new google.maps.places.Autocomplete(
        document.getElementById("pacViewPlace"), {
          fields: [
            "geometry",
            "name",
          ],
        }
      );

      autocomplete.addListener("place_changed", async () => {
        const place = autocomplete.getPlace();

        if (!(place.geometry && place.geometry.viewport && place.geometry.location)) {
          window.alert(`Insufficient geometry data for place: ${place.name}`);
          return;
        }
        // Get place elevation using the ElevationService.
        const elevatorService = new google.maps.ElevationService();
        const elevationResponse =  await elevatorService.getElevationForLocations({
          locations: [place.geometry.location],
        });

        if(!(elevationResponse.results && elevationResponse.results.length)){
          window.alert(`Insufficient elevation data for place: ${place.name}`);
          return;
        }
        const elevation = elevationResponse.results[0].elevation || 10;

        rotateCameraAround(
          place.geometry.location,
          place.geometry.viewport,
          elevation
        );
      });
    }
  </script>
  <script async src="https://maps.googleapis.com/maps/api/js?key=YOUR_API_KEY&libraries=places&callback=initAutocomplete"></script>
</body>
ポリラインとラベルを描画する
このコードサンプルは、地図にポリラインとラベルを追加する方法を示しています。地図にポリラインを追加して、運転ルートや徒歩経路を表示したり、土地の境界線を表示したり、運転時間や徒歩時間を計算したりできます。シーンを実際にレンダリングせずに属性を取得することもできます。
ユーザーに近隣の厳選されたツアーを提供したり、現在販売中の近隣の物件を表示したり、看板などの 3D オブジェクトをシーンに追加したりできます。
旅行を要約し、閲覧した物件をリストアップして、これらの詳細を仮想オブジェクトに表示できます。
<!DOCTYPE html>
<head>
  <meta charset="utf-8" />
  <title>CesiumJS 3D Tiles Polyline and Label Demo</title>
  <script src="https://ajax.googleapis.com/ajax/libs/cesiumjs/1.105/Build/Cesium/Cesium.js"></script>
  <link
    href="https://ajax.googleapis.com/ajax/libs/cesiumjs/1.105/Build/Cesium/Widgets/widgets.css"
    rel="stylesheet"
  />
</head>
<body>
  <div id="cesiumContainer"></div>
  <script>
    // Enable simultaneous requests.
    Cesium.RequestScheduler.requestsByServer["tile.googleapis.com:443"] = 18;

    // Create the viewer.
    const viewer = new Cesium.Viewer("cesiumContainer", {
      imageryProvider: false,
      baseLayerPicker: false,
      requestRenderMode: true,
      geocoder: false,
      globe: false,
    });

    // Add 3D Tiles tileset.
    const tileset = viewer.scene.primitives.add(
      new Cesium.Cesium3DTileset({
        url: "https://tile.googleapis.com/v1/3dtiles/root.json?key=YOUR_API_KEY",

        // This property is required to display attributions as required.
        showCreditsOnScreen: true,
      })
    );

    // Draws a circle at the position, and a line from the previous position.
    const drawPointAndLine = (position, prevPosition) => {
      viewer.entities.removeAll();
      if (prevPosition) {
        viewer.entities.add({
          polyline: {
            positions: [prevPosition, position],
            width: 3,
            material: Cesium.Color.WHITE,
            clampToGround: true,
            classificationType: Cesium.ClassificationType.CESIUM_3D_TILE,
          },
        });
      }
      viewer.entities.add({
        position: position,
        ellipsoid: {
          radii: new Cesium.Cartesian3(1, 1, 1),
          material: Cesium.Color.RED,
        },
      });
    };

    // Compute, draw, and display the position's height relative to the previous position.
    var prevPosition;
    const processHeights = (newPosition) => {
      drawPointAndLine(newPosition, prevPosition);

      const newHeight = Cesium.Cartographic.fromCartesian(newPosition).height;
      let labelText = "Current altitude (meters above sea level):\n\t" + newHeight;
      if (prevPosition) {
        const prevHeight =
          Cesium.Cartographic.fromCartesian(prevPosition).height;
        labelText += "\nHeight from previous point (meters):\n\t" + Math.abs(newHeight - prevHeight);
      }
      viewer.entities.add({
        position: newPosition,
        label: {
          text: labelText,
          disableDepthTestDistance: Number.POSITIVE_INFINITY,
          pixelOffset: new Cesium.Cartesian2(0, -10),
          showBackground: true,
          verticalOrigin: Cesium.VerticalOrigin.BOTTOM,
        }
      });

      prevPosition = newPosition;
    };

    const handler = new Cesium.ScreenSpaceEventHandler(viewer.canvas);
    handler.setInputAction(function (event) {
      const earthPosition = viewer.scene.pickPosition(event.position);
      if (Cesium.defined(earthPosition)) {
        processHeights(earthPosition);
      }
    }, Cesium.ScreenSpaceEventType.LEFT_CLICK);
  </script>
</body>
カメラの軌道
Cesium では、建物との衝突を避けながら、カメラを注目ポイントの周囲で回転させることができます。または、カメラが建物を通過するときに建物を透明にすることもできます。
まず、カメラをポイントにロックしてから、アセットを紹介するカメラ オービットを作成します。このコードサンプルに示すように、カメラの lookAtTransform 関数をイベント リスナーとともに使用することで、これを行うことができます。
// Lock the camera onto a point.
const center = Cesium.Cartesian3.fromRadians(
  2.4213211833389243,
  0.6171926869414084,
  3626.0426275055174
);

const transform = Cesium.Transforms.eastNorthUpToFixedFrame(center);

viewer.scene.camera.lookAtTransform(
  transform,
  new Cesium.HeadingPitchRange(0, -Math.PI / 8, 2900)
);

// Orbit around this point.
viewer.clock.onTick.addEventListener(function (clock) {
  viewer.scene.camera.rotateRight(0.005);
});
カメラの操作について詳しくは、カメラを操作するをご覧ください。
Cesium for Unreal を使用する
Cesium for Unreal プラグインを 3D Tiles API で使用する手順は次のとおりです。
Cesium for Unreal プラグインをインストールします。
新しい Unreal プロジェクトを作成します。
Google Photorealistic 3D Tiles API に接続します。
メニューから [Cesium] > [Cesium] を選択して、Cesium ウィンドウを開きます。
[Blank 3D Tiles Tileset] を選択します。
[World Outliner] で、この Cesium3DTileset を選択して [Details] パネルを開きます。
[Source] を [From Cesium Ion] から [From URL] に変更します。
URL を Google 3D タイル URL に設定します。
https://tile.googleapis.com/v1/3dtiles/root.json?key=YOUR_API_KEY- 帰属情報を適切に表示するには、[画面にクレジットを表示] を有効にします。
これで世界が読み込まれます。LatLng に移動するには、[Outliner] パネルで CesiumGeoreference アイテムを選択し、[Details] パネルで [Origin Latitude/Longitude/Height] を編集します。
Cesium for Unity を使用する
Cesium for Unity でフォトリアリスティック タイルを使用する手順は次のとおりです。
新しい Unity プロジェクトを作成します。
Package Manager セクション([Editor](エディタ) > [Project Settings](プロジェクト設定))で、新しい Scoped Registry を追加します。
名前: Cesium
URL: https://unity.pkg.cesium.com
スコープ: com.cesium.unity
Cesium for Unity パッケージをインストールします。
Google Photorealistic 3D Tiles API に接続します。
メニューから [Cesium] > [Cesium] を選択して、Cesium ウィンドウを開きます。
[Blank 3D Tiles Tileset] をクリックします。
左側のパネルの [ソース] の [タイルセット ソース] オプションで、[Cesium Ion から] ではなく [URL から] を選択します。
URL を Google 3D タイルの URL に設定します。
https://tile.googleapis.com/v1/3dtiles/root.json?key=YOUR_API_KEY- 帰属情報を適切に表示するには、[画面にクレジットを表示] を有効にします。
これで世界が読み込まれます。任意の LatLng に移動するには、[Scene Hierarchy] で [CesiumGeoreference] アイテムを選択し、[Inspector] で [Origin Latitude]、[Origin Longitude]、[Origin Height] を編集します。
deck.gl を使用する
WebGL を利用した deck.gl は、高性能で大規模なデータ可視化のためのオープンソース JavaScript フレームワークです。
アトリビューション
タイル gltf asset から copyright フィールドを抽出し、レンダリングされたビューに表示することで、データ帰属が適切に表示されるようにします。詳しくは、データ帰属を表示するをご覧ください。
deck.gl レンダラの例
簡単な例
次の例では、deck.gl レンダラを初期化し、3D で場所を読み込みます。コードでは、YOUR_API_KEY を実際の API キーに置き換えてください。
<!DOCTYPE html>
<html>
 <head>
   <title>deck.gl Photorealistic 3D Tiles example</title>
   <script src="https://unpkg.com/deck.gl@latest/dist.min.js"></script>
   <style>
     body { margin: 0; padding: 0;}
     #map { position: absolute; top: 0;bottom: 0;width: 100%;}
     #credits { position: absolute; bottom: 0; right: 0; padding: 2px; font-size: 15px; color: white;
        text-shadow: -1px 0 black, 0 1px black, 1px 0 black, 0 -1px black;}
   </style>
 </head>

 <body>
   <div id="map"></div>
   <div id="credits"></div>
   <script>
     const GOOGLE_API_KEY = YOUR_API_KEY;
     const TILESET_URL = `https://tile.googleapis.com/v1/3dtiles/root.json`;
     const creditsElement = document.getElementById('credits');
     new deck.DeckGL({
       container: 'map',
       initialViewState: {
         latitude: 50.0890,
         longitude: 14.4196,
         zoom: 16,
         bearing: 90,
         pitch: 60,
         height: 200
       },
       controller: {minZoom: 8},
       layers: [
         new deck.Tile3DLayer({
           id: 'google-3d-tiles',
           data: TILESET_URL,
           loadOptions: {
            fetch: {
              headers: {
                'X-GOOG-API-KEY': GOOGLE_API_KEY
              }
            }
          },
           onTilesetLoad: tileset3d => {
             tileset3d.options.onTraversalComplete = selectedTiles => {
               const credits = new Set();
               selectedTiles.forEach(tile => {
                 const {copyright} = tile.content.gltf.asset;
                 copyright.split(';').forEach(credits.add, credits);
                 creditsElement.innerHTML = [...credits].join('; ');
               });
               return selectedTiles;
             }
           }
         })
       ]
     });
   </script>
 </body>
</html>
Google Photorealistic 3D Tiles の上に 2D レイヤを可視化する
deck.gl の TerrainExtension は、2D データを 3D サーフェスにレンダリングします。たとえば、建物のフットプリントの GeoJSON を Photorealistic 3D Tiles ジオメトリの上に重ねることができます。
次の例では、Photorealistic 3D Tiles のサーフェスに合わせて調整されたポリゴンで建物のレイヤが可視化されています。
<!DOCTYPE html>
<html>
 <head>
   <title>Google 3D tiles example</title>
   <script src="https://unpkg.com/deck.gl@latest/dist.min.js"></script>
   <style>
     body { margin: 0; padding: 0;}
     #map { position: absolute; top: 0;bottom: 0;width: 100%;}
     #credits { position: absolute; bottom: 0; right: 0; padding: 2px; font-size: 15px; color: white;
        text-shadow: -1px 0 black, 0 1px black, 1px 0 black, 0 -1px black;}
   </style>
 </head>

 <body>
   <div id="map"></div>
   <div id="credits"></div>
   <script>
     const GOOGLE_API_KEY = YOUR_API_KEY;
     const TILESET_URL = `https://tile.googleapis.com/v1/3dtiles/root.json`;
     const BUILDINGS_URL = 'https://raw.githubusercontent.com/visgl/deck.gl-data/master/examples/google-3d-tiles/buildings.geojson'
     const creditsElement = document.getElementById('credits');
     const deckgl = new deck.DeckGL({
       container: 'map',
       initialViewState: {
         latitude: 50.0890,
         longitude: 14.4196,
         zoom: 16,
         bearing: 90,
         pitch: 60,
         height: 200
       },
       controller: true,
       layers: [
         new deck.Tile3DLayer({
           id: 'google-3d-tiles',
           data: TILESET_URL,
           loadOptions: {
            fetch: {
              headers: {
                'X-GOOG-API-KEY': GOOGLE_API_KEY
              }
            }
          },
          onTilesetLoad: tileset3d => {
             tileset3d.options.onTraversalComplete = selectedTiles => {
               const credits = new Set();
               selectedTiles.forEach(tile => {
                 const {copyright} = tile.content.gltf.asset;
                 copyright.split(';').forEach(credits.add, credits);
                 creditsElement.innerHTML = [...credits].join('; ');
               });
               return selectedTiles;
             }
           },
           operation: 'terrain+draw'
         }),
         new deck.GeoJsonLayer({
           id: 'buildings',
           // This dataset is created by CARTO, using other Open Datasets available. More info at: https://3dtiles.carto.com/#about.
           data: 'https://raw.githubusercontent.com/visgl/deck.gl-data/master/examples/google-3d-tiles/buildings.geojson',
           stroked: false,
           filled: true,
           getFillColor: ({properties}) => {
             const {tpp} = properties;
             // quantiles break
             if (tpp < 0.6249)
               return [254, 246, 181]
             else if (tpp < 0.6780)
               return [255, 194, 133]
             else if (tpp < 0.8594)
               return [250, 138, 118]
             return [225, 83, 131]
           },
           opacity: 0.2,
           extensions: [new deck._TerrainExtension()]
         })
       ]
     });
   </script>
 </body>
</html>