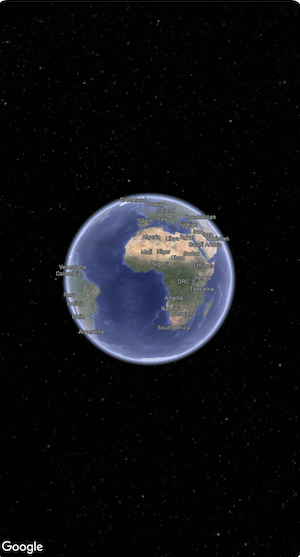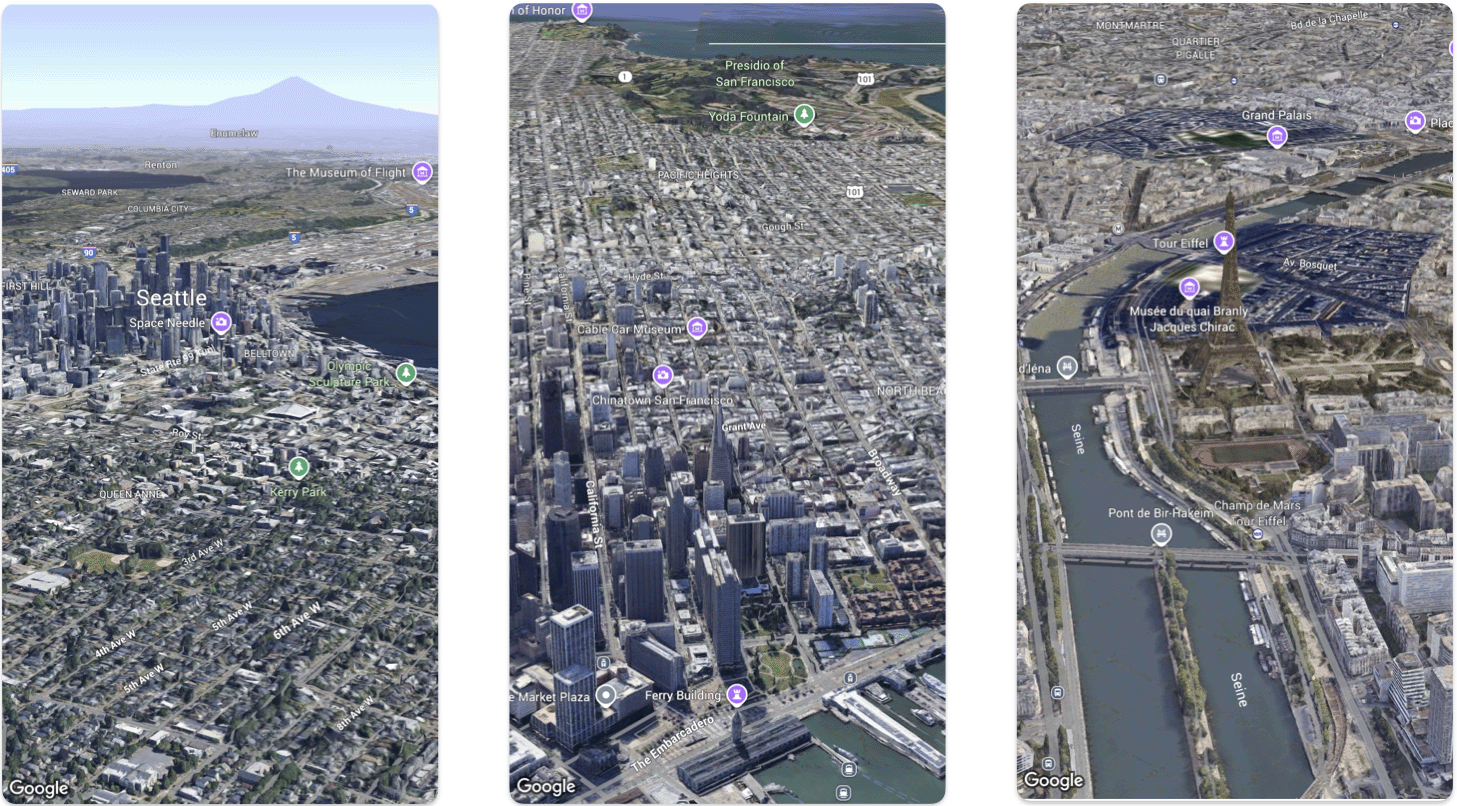
Auf dieser Seite wird anhand eines Beispiels beschrieben, wie Sie einer iOS-App mit dem Maps 3D SDK für iOS eine einfache 3D-Karte hinzufügen. Bei der Anleitung auf dieser Seite wird davon ausgegangen, dass Sie die Schritte auf der Seite Einrichtung bereits ausgeführt haben und Folgendes vorliegt:
Ein Google Cloud-Projekt, in dem das Maps 3D SDK für iOS aktiviert ist
Einen API-Schlüssel für das Maps 3D SDK für iOS
XcodeVersion 16.0 oder höher mit dem hinzugefügten Maps 3D SDK for iOS-Paket.
Weitere Informationen zu diesen Voraussetzungen finden Sie unter Einrichtung.
Der API-Schlüssel muss festgelegt werden, bevor die Karte initialisiert wird. Setzen Sie dazu Map.apiKey im init()-Ereignishandler des View, der die Karte enthält.
3D-Kartenansichten werden über die Klasse Camera gesteuert. In diesem Schritt erfahren Sie, wie Sie den Ort, die Höhe, die Ausrichtung, die Neigung, die Drehung und die Entfernung angeben, um die Kartenansicht anzupassen.
Ändern Sie den Map()-Funktionsaufruf so, dass er ein initialCamera-Attribut enthält.
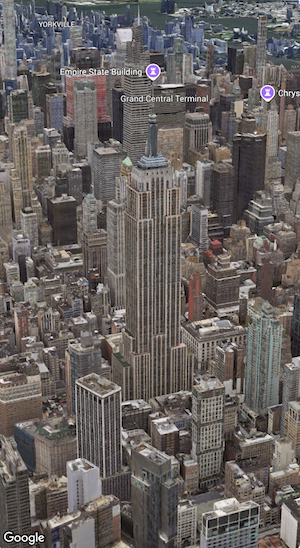
Initialisiere initialCamera, um eine Ansicht von Manhattan zu zeigen.
Im obigen Code werden Werte für diese Parameter festgelegt:
heading: Die Richtung in Grad von Norden aus, in die die Kamera ausgerichtet werden soll.
tilt: Der Neigungswinkel in Grad, wobei 0 direkt über dem Kopf und 90 horizontal ist.
roll: Der Rollwinkel um die vertikale Ebene der Kamera in Grad.
range: Der Abstand der Kamera in Metern vom Breiten- und Längengrad des Standorts
altitude: Die Höhe der Kamera über dem Meeresspiegel.
Wenn Sie keinen dieser zusätzlichen Parameter angeben, wird ein Standardwert verwendet.
Wenn Sie möchten, dass in der Kameraansicht mehr 3D-Daten angezeigt werden, legen Sie die Anfangsparameter so fest, dass eine näher herangezoomte, geneigte Ansicht zu sehen ist.
Teil 6: App in der Vorschau ansehen und ausführen
Xcode-Vorschau hinzufügen
Vorschauen sind eine leistungsstarke Xcode-Funktion, mit der Sie Ihre App ansehen und mit ihr interagieren können, ohne den Simulator oder ein externes Gerät verwenden zu müssen.
Um eine Vorschau hinzuzufügen, fügen Sie einen #Preview {}-Codeblock außerhalb Ihrer Struktur ein.
#Preview{CameraDemo()}
Anwendung ausführen
Erstellen Sie die App und führen Sie sie aus.
Glückwunsch!
Sie haben einer App erfolgreich eine 3D-Karte hinzugefügt.
[[["Leicht verständlich","easyToUnderstand","thumb-up"],["Mein Problem wurde gelöst","solvedMyProblem","thumb-up"],["Sonstiges","otherUp","thumb-up"]],[["Benötigte Informationen nicht gefunden","missingTheInformationINeed","thumb-down"],["Zu umständlich/zu viele Schritte","tooComplicatedTooManySteps","thumb-down"],["Nicht mehr aktuell","outOfDate","thumb-down"],["Problem mit der Übersetzung","translationIssue","thumb-down"],["Problem mit Beispielen/Code","samplesCodeIssue","thumb-down"],["Sonstiges","otherDown","thumb-down"]],["Zuletzt aktualisiert: 2025-09-05 (UTC)."],[],[],null,["# Add a 3D map to your app\n\nSelect platform: [Android](/maps/documentation/maps-3d/android-sdk/add-a-3d-map \"View this page for the Android platform docs.\") [iOS](/maps/documentation/maps-3d/ios-sdk/add-a-3d-map \"View this page for the iOS platform docs.\") [JavaScript](/maps/documentation/javascript/3d/get-started \"View this page for the JavaScript platform docs.\")\n\n\u003cbr /\u003e\n\n\u003cbr /\u003e\n\n| This product or feature is Experimental (pre-GA). Pre-GA products and features might have limited support, and changes to pre-GA products and features might not be compatible with other pre-GA versions. Pre-GA Offerings are covered by the [Google\n| Maps Platform Service Specific Terms](https://cloud.google.com/maps-platform/terms/maps-service-terms). For more information, see the [launch stage descriptions](/maps/launch-stages).\n\n\u003cbr /\u003e\n\nThis page walks through an example of how to add a basic 3D map to an iOS app\nusing the Maps 3D SDK for iOS. The instructions on this page assume that you have\nalready completed the steps in the\n[Setup](/maps/documentation/maps-3d/ios-sdk/setup) page and have the following:\n\n- A Google Cloud project with the Maps 3D SDK for iOS enabled\n- An API key Maps 3D SDK for iOS\n- [Xcode](https://developer.apple.com/xcode/) **version\n 16.0** or later with the Maps 3D SDK for iOS package added.\n\nFor more information about these prerequisites, see\n[Setup](/maps/documentation/maps-3d/ios-sdk/setup).\n\n[Follow a more advanced codelab](/codelabs/maps-platform/maps-platform-101-3d-maps-ios).\n\n[See more code samples on\nGitHub](https://github.com/googlemaps-samples/ios-maps-3d-sdk-samples).\n\nPart 1: Create a basic SwiftUI app\n----------------------------------\n\n1. Create a new app in Xcode.\n2. Set your **Product Name** to `Hello3DWorld`, with the organization identifier set to `com.example`. The package name should be `com.example.Hello3DWorld`.\n3. Choose the SwiftUI interface.\n4. Add the Maps 3D library to your app. [See instructions in the setup\n section](/maps/documentation/maps-3d/ios-sdk/setup#step_2_create_the_xcode_project_and_install_the).\n\nPart 2: Add a map\n-----------------\n\n1. Open the file called `ContentView.swift`. This is the entry point and main\n navigation for your app.\n\n2. Import `SwiftUI` and the `GoogleMaps3D` package.\n\n3. Replace all the code inside the body declaration with Map(mode: .hybrid).\n\n The minimum initial configuration you need to supply to initialize a `Map`\n is the `MapMode`:\n - .hybrid, or\n - .satellite\n\n Your `ContentView.swift` file should look like this: \n\n import SwiftUI\n import GoogleMaps3D\n\n struct ContentView: View {\n var body: some View {\n Map(mode: .hybrid)\n }\n }\n\n #Preview {\n ContentView()\n }\n\nPart 3: Set your API key.\n-------------------------\n\n1. The API key must be set before the Map initializes. Do this by setting\n `Map.apiKey` in the `init()` event handler of the `View` that contains the\n Map.\n\n **Warning:** Don't check the API key into external or public source control \n\n import SwiftUI\n import GoogleMaps3D\n\n struct ContentView: View {\n init () {\n Map.apiKey = \"YOUR_API_KEY\"\n }\n\n var body: some View {\n Map(mode: .hybrid)\n }\n }\n\nPart 4: Use a camera to control the map view\n--------------------------------------------\n\n3D Map views are controlled by the `Camera` class. In this step you will learn\nhow to specify the location, altitude, heading, tilt, roll and range to\ncustomize the map view.\n\n1. Change the `Map()` function call to include an `initialCamera` property.\n Initialize `initialCamera` to show a view of downtown Manhattan.\n\n **Note:** Parameter order matters. The Camera is initialized by providing latitude first, then longitude. Make sure you specify the correct values for each, especially when pasting in from another source, or the camera may show an unexpected location. \n\n import SwiftUI\n import GoogleMaps3D\n\n struct ContentView: View {\n init () {\n Map.apiKey = \"YOUR_API_KEY\"\n }\n var body: some View {\n Map(initialCamera: .init(\n latitude: 40.748339,\n longitude: -73.985912,\n altitude: 211.1,\n heading: 52,\n tilt: 68,\n range: 1039\n ), mode: .hybrid)\n }\n }\n\nThe code above sets values for these parameters:\n\n- `heading`: The bearing in degrees from north to point the camera towards.\n- `tilt`: The angle of tilt in degrees, where 0 is directly overhead and 90 is looking horizontally.\n- `roll`: The angle of roll around the vertical plane of the camera, in degrees.\n- `range`: The distance in metres of the camera from the latitude, longitude location\n- `altitude`: The height of the camera above sea level.\n\nIf you don't supply any of these additional parameters, a default value will be\nused.\n| **Note:** Camera altitude is an absolute value. In areas where ground level is well above sea level, setting an altitude lower than ground level may cause strange visual effects.\n| **Note:** You can also adjust the relative altitude of the camera using tilt and range.\n\nTo make the camera view show more 3D data, set the initial parameters to show a\ncloser, tilted view.\n\nPart 6: Preview and run your App\n--------------------------------\n\n1. Add an Xcode Preview\n\n Previews are a powerful XCode feature that let you see and interact with\n your App without having to use the Simulator or an external device.\n\n To add a preview, add a `#Preview {}` code block outside your struct. \n\n #Preview {\n CameraDemo()\n }\n\n2. Run the app\n\nBuild and run the app.\n\nCongratulations!\n----------------\n\nYou've successfully added a 3D map to an app!\n\nNext, you can explore more advanced features of the Maps 3D SDK for iOS, such as\n[camera path\nanimations](/maps/documentation/maps-3d/ios-sdk/custom-camera-paths), [3D\nmarkers](/maps/documentation/maps-3d/ios-sdk/add-a-marker), or\n[polygons](/en/maps/documentation/maps-3d/ios-sdk/add-polygons)."]]