Page Summary
-
This page provides instructions on how to customize the appearance of your search box and results for a Programmable Search Engine.
-
Customization can be done through the control panel or by using the XML context file, with XML being better suited for managing many search engines.
-
You can host the search results using a customizable Search element embedded in your webpage.
-
Various components of the search UI are customizable, including the layout, search box, search results, and refinement tabs.
-
Implementing the design involves saving your changes in the control panel and embedding the generated code snippet into your webpage.
This page discusses how you can customize the look and feel of your search box and search results. If you want to implement the design of your search engine using the context file, see the "Designing the Look and Feel with XML page".
- Overview
- Designing Individual Components of the Search UI
- Hosting the Results using the Search Element
- Setting the Search Element Layout
- Designing the Search Box
- Designing the Results
- Implementing the Design in Your Website
Overview
You can change both the search box and the search results of your Programmable Search Engine in either the control panel or the XML context file. If you have a handful of search engines, managing and customizing them with the control panel is fairly simple. Just navigate to the Look and feel page, select a style, design the components, click Save and you are good to go. This page tells you how to do all that. However, if you are creating and managing a large number of search engines, even that simple procedure—when repeated across multiple search engines—gets tedious. In such cases, working with XML would be better. If you decide to use XML, read this page first to get an idea of how things generally work; afterwards, read the Designing the Look and Feel with XML page to learn about the XML elements and attributes.
If you are not sure whether you should just use the control panel or use the XML format, see The Basics page, which discusses the benefits and challenges of each format.
Note: Before you start designing the look and feel of your custom search engine, read the Guidelines for implementing Programmable Search Engine . It's a short document that tells you how you should handle Google branding and attribution.
Hosting the Results using the Search Element
A Search element is an object that you can embed in your webpage, which allows extensive customization. It can show the search box and search results, either together in the same webpage that the reader is viewing or in different webpages.
Note: Search element, when paired with a compact layout, works well on mobile devices.
You can also take advantage of the Programmable Search Element Control API to further customize the search UI. Many customizations are supported through HTML attributes. For example, you can select among six layouts for your results page, or you can set the number of search results to return.
Programmable Search Engine no longer supports the iframe hosting option. We recommend the "Two page" or "Results only" layouts in Search element as the new options. Check out our blog post for more information.
Designing Individual Components of the Search UI
The Customizable Components
The components that you can customize depends on the selected Element layout of your search engine. For example, the control panel lets you add a logo only for search engines that are hosted by Google; you cannot add a logo to search engines using other hosting options.
You can define the following components using the control panel:
- The Search element layout
- The search box
- The search results
- The refinement tabs
- The promotions
- The logo (Google-hosted only)
Setting the Search Element Layout
You have the option to customize how your search UI is laid out on the webpage. You can place the search box and the results section in the same column or display them in separately columns with the search box in one column and the results section in another column or even in another page.
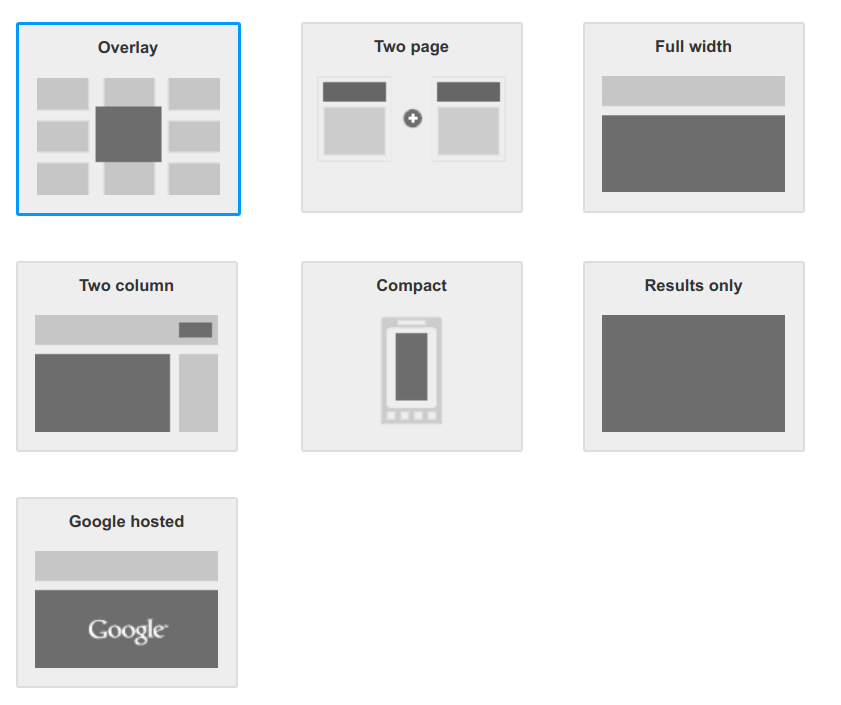
Your layout options are (click the links to see demos):
| Option | Description |
|---|---|
| OverLay | Display the search results in an overlay. |
|
Two Page
Simple Multiple search boxes/results sections |
The search box and the search results section are placed in two different webpages.
Note: The search results section also contains a search box. Users can submit queries in the search results page directly. |
| Full-width | The search box and the search results section take up the entire width of the page or the column where you have inserted the Search element. |
| Two Column | The search box and the search results section are in different columns or sections of your webpage. To close the search results section, the user clicks on the X icon next to the search box. |
| Compact |
Like the full-width option, this takes up the entire width of the page or column, but
the results section shows fewer results, so it takes up less vertical space when
expanded in the webpage.
Tip: This option is optimized for smartphones and mobile devices. |
|
Results Only
Search via URL Search via search box |
Search results are placed in one of your webpages, and the search results page does
not contain a search box. Use your own search box to submit the search query.
Note: A Programmable Search Engine that does not show ads has no option to disable branding. |
|
Google-Hosted
Current window New window |
The search box is placed on one of your webpages. The search results are displayed on a Google-hosted webpage, which can be opened either in the same window or in a new window. |
Designing the Search Box
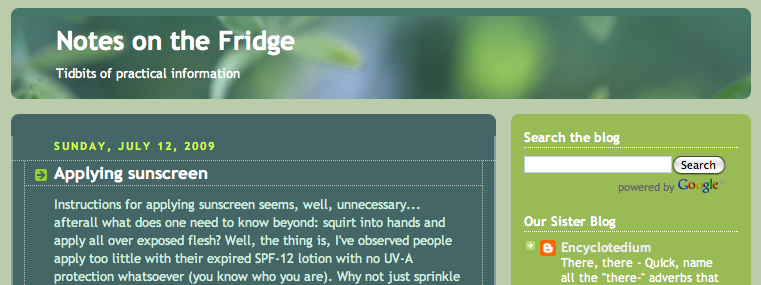
You can insert the search box anywhere within the HTML body of your webpage, although—by convention—search boxes are placed at the top (or close to the top) of webpages, as in the following example:
Figure 1: Webpage with the search box positioned at the top.
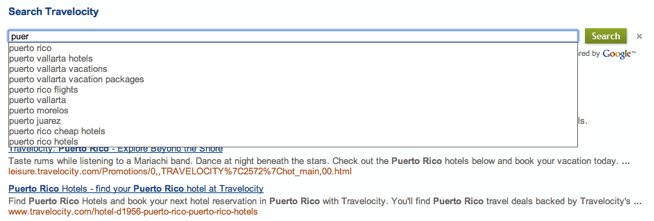
Enabling Autocompletion
Autocompletion offers query options to your users as they enter their search queries on your search box. It is similar to the optional queries that you see on Google search.
Figure 2: Typing just a few characters in the search box brings up a drop-down list that provides options for different search queries.
Programmable Search Engine tailors autocompletion specifically to your search engine. It uses a different algorithm that draws from multiple sources, including queries to your search engine, as well as keywords and phrases extracted from the content of websites that your search engine covers.
Autocompletions feature is located in the Autocomplete section of the Search Features page.
To enable autocompletions, do the following:
- Go to the Autocomplete section of the Search Features page.
-
Turn on the Enable autocomplete control.
Note: Because the autocompleted queries are generated for each search engine, it takes a few hours before autocompletion starts appearing in your search engine.
- If you are enabling autocompletions in an existing search engine for the first time, you have to remove the code snippet for the search box that you had inserted in your webpage. Replace it with the new one generated in the Get code tab. For more detailed instructions, see the Implementing the Design in Your Website section.
Designing the Results
You can change the following components of the results page:
- The individual results
- The font type
- The text colors
- The refinement tabs
- The promotions
- The logo (Google-hosted only)
The Individual Results
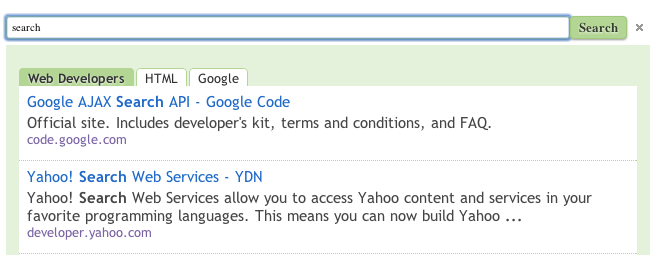
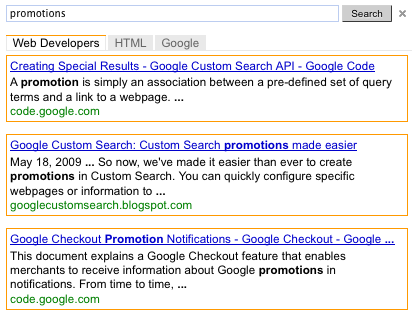
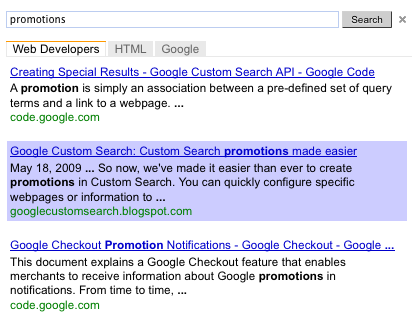
If you want to visually delineate individual results or highlight results that are being selected by users, you can define the borders and background for individual results.
Figure 3: Results with individual results delineated and individual result that is highlighted on mouseover.
The Refinement Tabs
If you have created refinement labels in your search engine, the labels appear as tabs in the Search element. You can use the control panel to change the colors of the refinement tabs.
Promotions
If you have created promotions in your search engine, you can change their look and feel. Promotions are a special type of search results that you create.
The Logo (Google-Hosted Only)
If you are letting Google host your results page, you can choose to include a logo or small image right next to the search box in the search results page. The image has to be a .jpg, .png, or .gif file hosted on a website (your own or from a website that does not have copyright restrictions). You have the option of associating a URL with the image, turning it into a clickable image.
The following is an example of results page with a logo.
Figure 4: Search box with an image
![]()
Implementing the Design in Your Website
After you have designed the look and feel of your search engine, you can implement it in your webpage by doing the following:
- Click Save in sections you modified in the Look and feel page.
- Click Get code in the Layout section of the Look and feel page.
-
Copy the code snippet generated in the Code popup.
If you have selected the two-column layout, copy two pieces of code snippets: one for the search box, and the other for results.
If you have selected two-page layout, type the URL of the webpage that will show the results for your search engine. Type the query parameter name embedded in the url, which is parsed by search results page. Finally, copy the two pieces of code snippets.
The code snippet for results-only layout is for the case where search results are shown in a new page. Type the query parameter name embedded in the url, which is parsed by the search results page. Finally, copy the search results code snippet.
-
Insert the code in every page where you want a Programmable Search Engine box. You can paste the
code anywhere within the
<body></body>tag of your webpage.Note: For the most cross-browser compatibility, it is recommended that your HTML pages use a supported doctype such as
<!DOCTYPE html>.If you are using hover effects for your Search element, your HTML page must use a supported doctype such as
<!DOCTYPE html>.
If you have selected the two-column layout, insert the code for the search box in one column and the code for the results in another column.
If you have selected the two-page layout, insert the code for the search box in the webpage where you want the search box to appear, and the code for the results in the webpage where you want the search results to appear.
If you have selected the results-only layout, insert the code snippet in the webpage where you want the search results to appear.