
编码水平:初级
时长:10 分钟
项目类型:使用自定义菜单实现自动化
目标
- 了解解决方案的功能。
- 了解 Apps 脚本服务在解决方案中的作用。
- 设置脚本。
- 运行脚本。
关于此解决方案
使用 Google 表格中的数据自动填充电子邮件模板。这些电子邮件会从您的 Gmail 账号发送,以便您处理收件人的回信。
重要提示:此邮件合并示例受Google 服务配额中所述的电子邮件限制的约束。
运作方式
您创建的 Gmail 草稿模板包含与 Google 表格中的数据对应的占位符。工作表中的每个列标题都代表一个占位标记。脚本会将电子表格中每个占位符的信息发送到电子邮件草稿中相应占位符代码的位置。
Apps 脚本服务
此解决方案使用以下服务:
- Gmail 服务:获取、读取并发送您要发送给收件人的电子邮件草稿。
- 如果您的电子邮件包含 Unicode 字符(例如表情符号),请改用 Mail 服务。了解如何更新代码以在电子邮件中包含 Unicode 字符。
- 电子表格服务:使用每位收件人的个性化信息填充电子邮件占位符。
 |
更喜欢通过视频学习?
Google Workspace Developers 频道提供有关提示、技巧和最新功能的视频。
|
前提条件
如需使用此示例,您需要满足以下前提条件:
- Google 账号(Google Workspace 账号可能需要管理员批准)。
- 可访问互联网的网络浏览器。
设置脚本
完成以下步骤以设置脚本。
创建 Apps 脚本项目
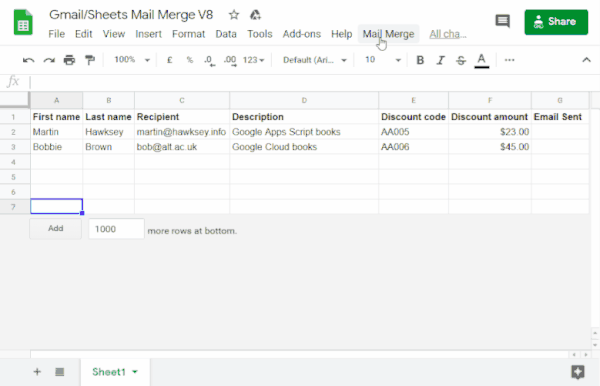
点击以下按钮,制作 Gmail/Google 表格邮件合并示例电子表格的副本。此解决方案的 Apps 脚本项目已附加到该电子表格。
在复制的电子表格中,使用要在邮件合并中使用的电子邮件地址更新收件人列。
(可选)添加、修改或移除列,以自定义要在电子邮件模板中包含的数据。
如果您更改了收件人或电子邮件发送状态列的名称,则必须更新 Apps 脚本项目中的相应代码。您可以从电子表格中打开 Apps 脚本项目,方法是依次选择扩展程序 > Apps 脚本。
创建电子邮件模板
- 在您的 Gmail 账号中,创建电子邮件草稿。如需在电子邮件中添加电子表格中的数据,请使用与列名称对应的占位符(用大括号括起来),例如
{{First name}}。- 如果您设置了电子邮件中文字的格式,还必须设置占位符方括号的格式。
- 占位符区分大小写,并且必须与列标题完全一致。
- 复制电子邮件草稿的主题行。
运行脚本
- 在电子表格中,依次点击邮件合并 > 发送电子邮件。您可能需要刷新页面,此自定义菜单才会显示。
根据提示为脚本授权。
如果 OAuth 权限请求页面显示警告此应用未经过验证,请继续操作,依次选择高级 > 前往 {项目名称}(不安全)。
再次点击邮件合并 > 发送电子邮件。
粘贴电子邮件模板的主题行,然后点击确定。
如果您对工作表应用了过滤条件,脚本仍会向过滤后的参与者发送电子邮件,但不会添加时间戳。
查看代码
如需查看此解决方案的 Apps 脚本代码,请点击查看源代码:
查看源代码
Code.gs
修改
您可以根据自己的需求修改邮件合并自动化流程。以下示例展示了您可以对源代码进行的一些可选更改。
添加密送、抄送、回复至或发件人电子邮件参数
示例代码包含许多其他已注释掉的参数,这些参数可让您控制电子邮件的发送账号名称、电子邮件回复地址,以及密件抄送和抄送电子邮件地址。
移除每个参数前面的正斜杠 //,以激活要添加的参数。
以下示例展示了 sendEmails 函数的摘录,该函数可激活大多数电子邮件参数:
GmailApp.sendEmail(row[RECIPIENT_COL], msgObj.subject, msgObj.text, {
         htmlBody: msgObj.html,
         bcc: 'bcc@example.com',
         cc: 'cc@example.com',
         from: 'from.alias@example.com',
         name: 'name of the sender',
         replyTo: 'reply@example.com',
        // noReply: true, // if the email should be sent from a generic no-reply email address (not available to gmail.com users)
在上面的示例中,noReply 参数仍处于注释状态,因为已设置 replyTo 参数。
在电子邮件中包含 Unicode 字符
如果您想在电子邮件中添加 Unicode 字符(例如表情符号),则必须更新代码以使用 Mail 服务,而不是 Gmail 服务。
在示例代码中,更新以下行:
GmailApp.sendEmail(row[RECIPIENT_COL], msgObj.subject, msgObj.text, {
将该行替换为以下代码:
MailApp.sendEmail(row[RECIPIENT_COL], msgObj.subject, msgObj.text, {
贡献者
此示例由爱丁堡未来研究所的学习设计和技术主管 Martin Hawksey 创建,他同时也是一位博主和 Google 开发者专家。
- 您可以在 Twitter 上找到 Martin (@mhawksey)。
- 阅读 Martin 撰写的与 Apps 脚本相关的博文。
- 观看 Martin 的 YouTube 节目 Totally Unscripted。
此示例由 Google 在 Google 开发者专家的帮助下维护。