ตั้งค่าพร็อกซี Charles สำหรับ Google Mobile Ads SDK ใน Android N ขึ้นไป
จัดทุกอย่างให้เป็นระเบียบอยู่เสมอด้วยคอลเล็กชัน
บันทึกและจัดหมวดหมู่เนื้อหาตามค่ากำหนดของคุณ
ใน Android N ขึ้นไป การเรียกโฆษณาจะปรากฏใน Charles Proxy ก็ต่อเมื่อทำตามขั้นตอนต่อไปนี้
- อัปเดตบริการ Google Play บนอุปกรณ์เคลื่อนที่
- เปิดใช้การติดตามเครือข่ายในอุปกรณ์เคลื่อนที่
- ติดตั้งใบรับรอง SSL ของ Charles ในอุปกรณ์และตั้งค่าพร็อกซี
- เปิดใช้พร็อกซี SSL สำหรับแอปบนอุปกรณ์เคลื่อนที่
อัปเดตบริการ Google Play บนอุปกรณ์เคลื่อนที่
สำหรับโปรแกรมจำลอง หากไม่เห็นส่วน Google Play ในเมนูด้านข้าง
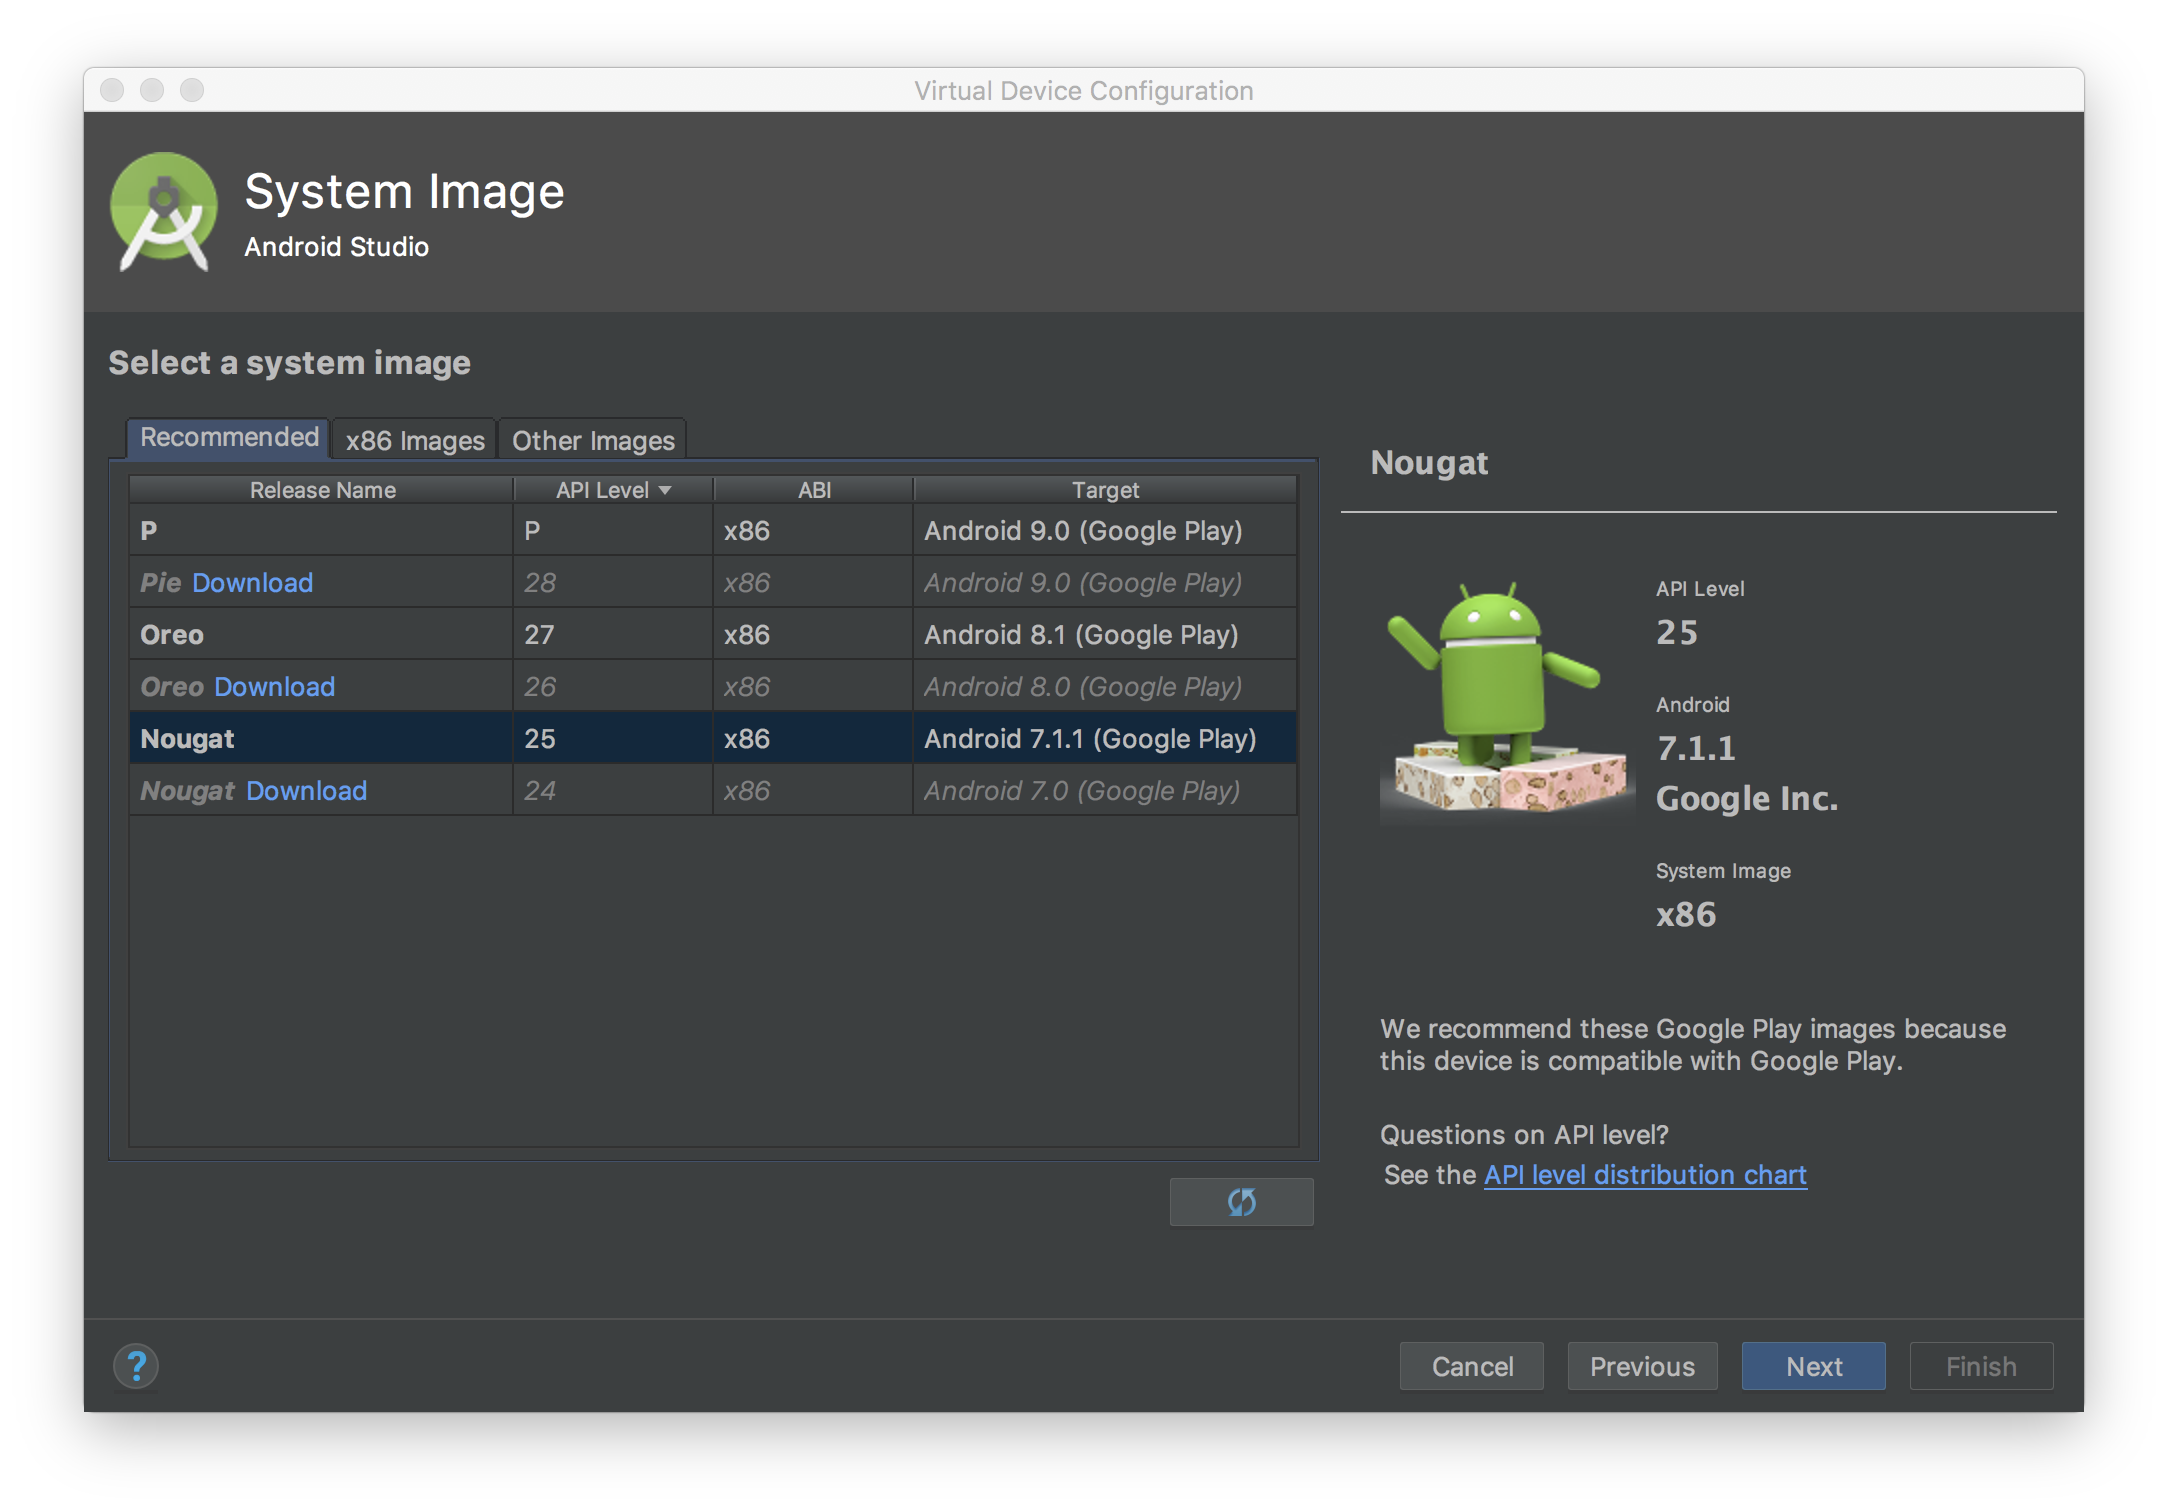
คุณอาจต้องอัปเดต Android Studio และดาวน์โหลดอิมเมจระบบล่าสุด
ในการกำหนดค่าอุปกรณ์เสมือน อย่าลืมใช้รูปภาพระบบ
ที่มี Google Play ในเป้าหมาย

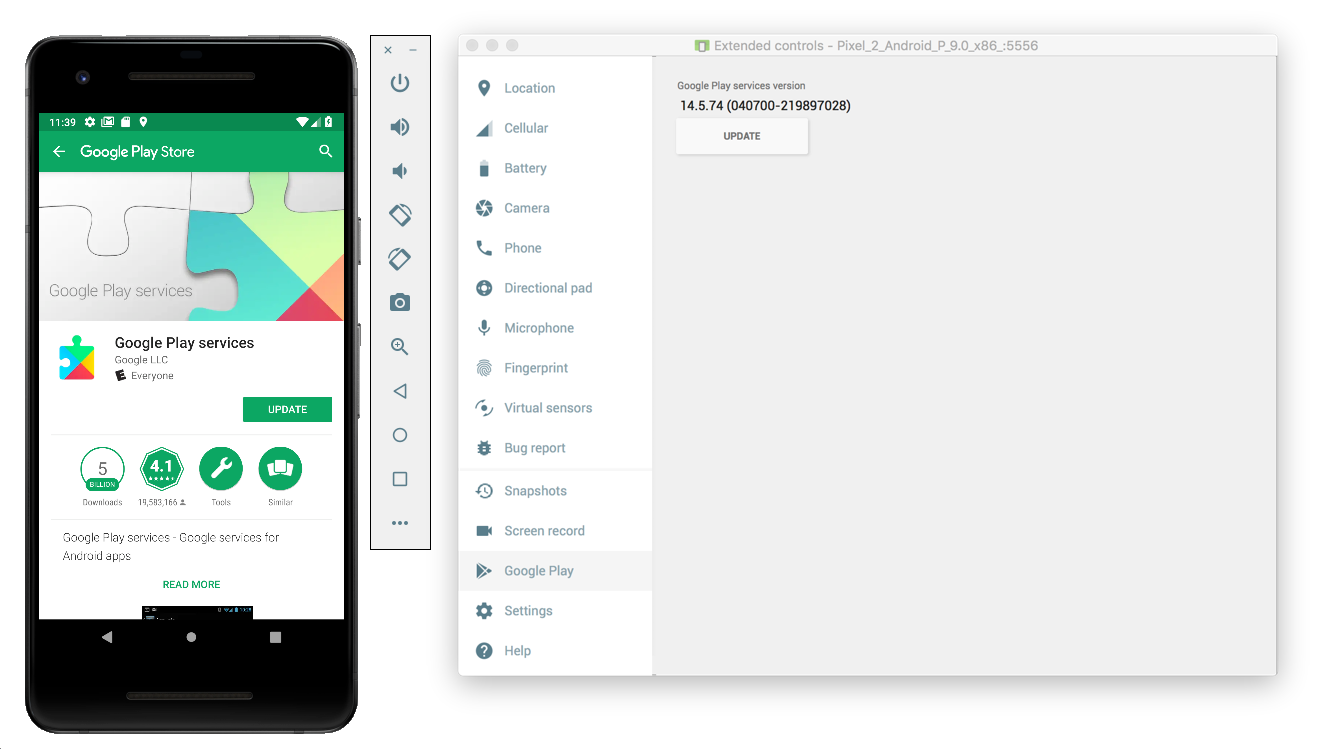
ใช้เมนูด้านข้างเพื่อตรวจสอบและอัปเดตบริการ Google Play เป็นเวอร์ชันล่าสุด
บริการ Google Play เวอร์ชันที่ใช้งานได้ขั้นต่ำคือ
14.5.74
สำหรับอุปกรณ์เคลื่อนที่จริง (โทรศัพท์หรือแท็บเล็ต) คุณสามารถค้นหา Google
Play หรือไปที่ลิงก์นี้
เพื่อเปิด Google Play โดยตรง
เปิดใช้การติดตามเครือข่ายในอุปกรณ์เคลื่อนที่
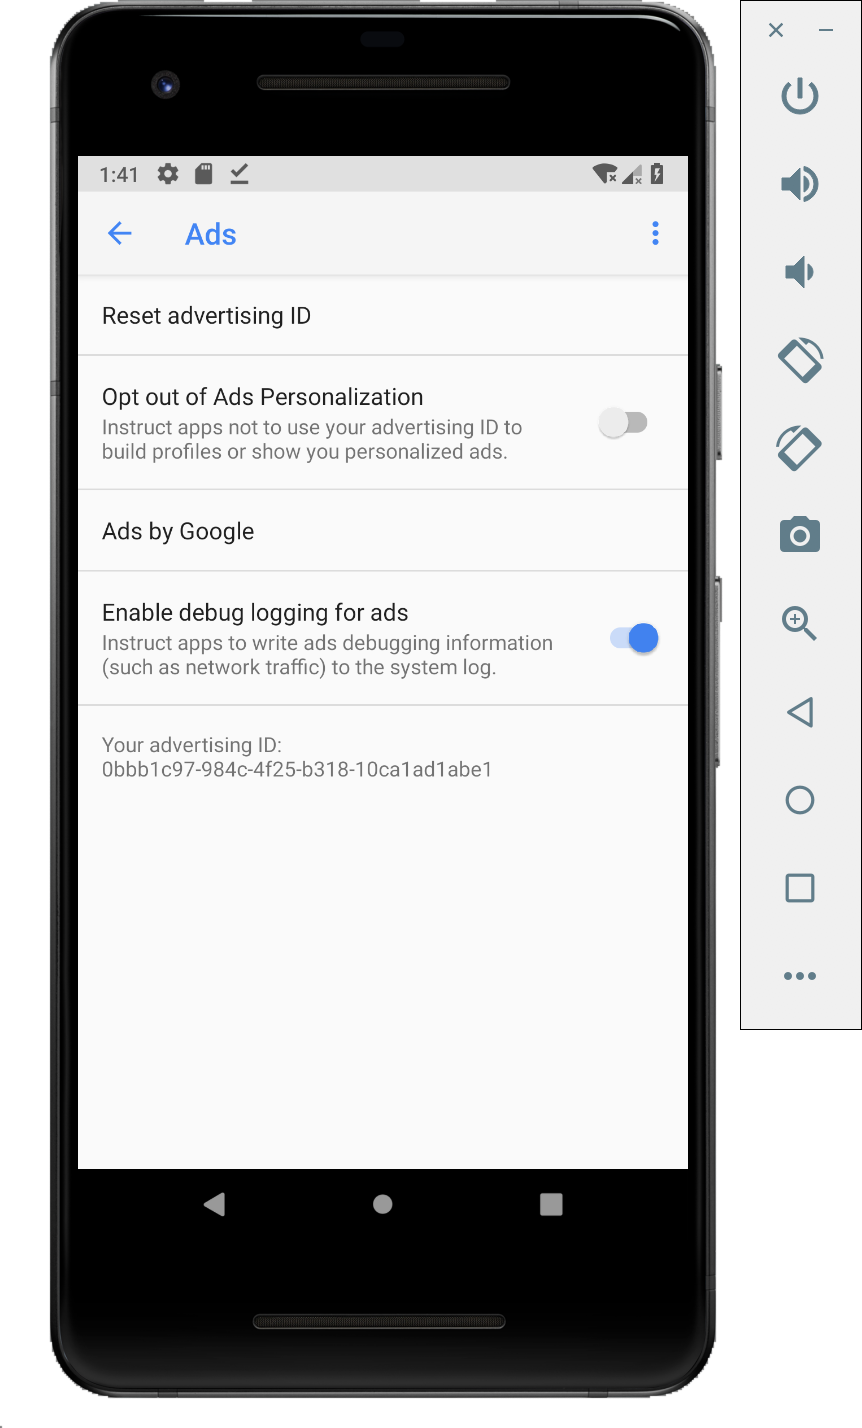
หากต้องการเปิดใช้การติดตามเครือข่าย คุณจะต้องเปิดใช้ตัวเลือกสำหรับนักพัฒนาแอปสำหรับอุปกรณ์
เปิดแอปการตั้งค่า Google แล้วเลือก Google > โฆษณา > เปิดใช้
การบันทึกการแก้ไขข้อบกพร่องสำหรับโฆษณา คู่มือฉบับละเอียด
มีให้บริการสำหรับผู้เผยแพร่โฆษณา AdMob และ Google Ad Manager
ติดตั้งใบรับรอง SSL ของ Charles ในอุปกรณ์และตั้งค่าพร็อกซี
หากต้องการใช้ Charles เป็นพร็อกซีสำหรับแอปบนอุปกรณ์เคลื่อนที่ คุณจะต้องดาวน์โหลดและติดตั้ง Charles
ในคอมพิวเตอร์ ทำตามวิธีการของ Charles เพื่อติดตั้งใบรับรอง SSL ใน
โปรแกรมจำลอง Android หรืออุปกรณ์เคลื่อนที่
การใช้โปรแกรมจำลองกับพร็อกซีทำได้ง่ายกว่าเนื่องจาก
โปรแกรมจำลองเชื่อมต่อกับเครือข่าย Wi-Fi เดียวกันกับคอมพิวเตอร์
ที่เรียกใช้ Charles อยู่แล้ว เมื่อใช้โปรแกรมจำลองกับพร็อกซี ให้ตั้งค่าพร็อกซีเป็น
localhost (http://127.0.0.1
) และพอร์ตที่พร็อกซี Charles ทำงานอยู่
(ดูได้ในตัวเลือกเมนูของ Charles ที่Proxy > Proxy Settings)
หากใช้อุปกรณ์เคลื่อนที่จริง (โทรศัพท์หรือแท็บเล็ต) คุณจะต้อง
เชื่อมต่ออุปกรณ์เคลื่อนที่กับเครือข่าย Wi-Fi เดียวกันกับคอมพิวเตอร์
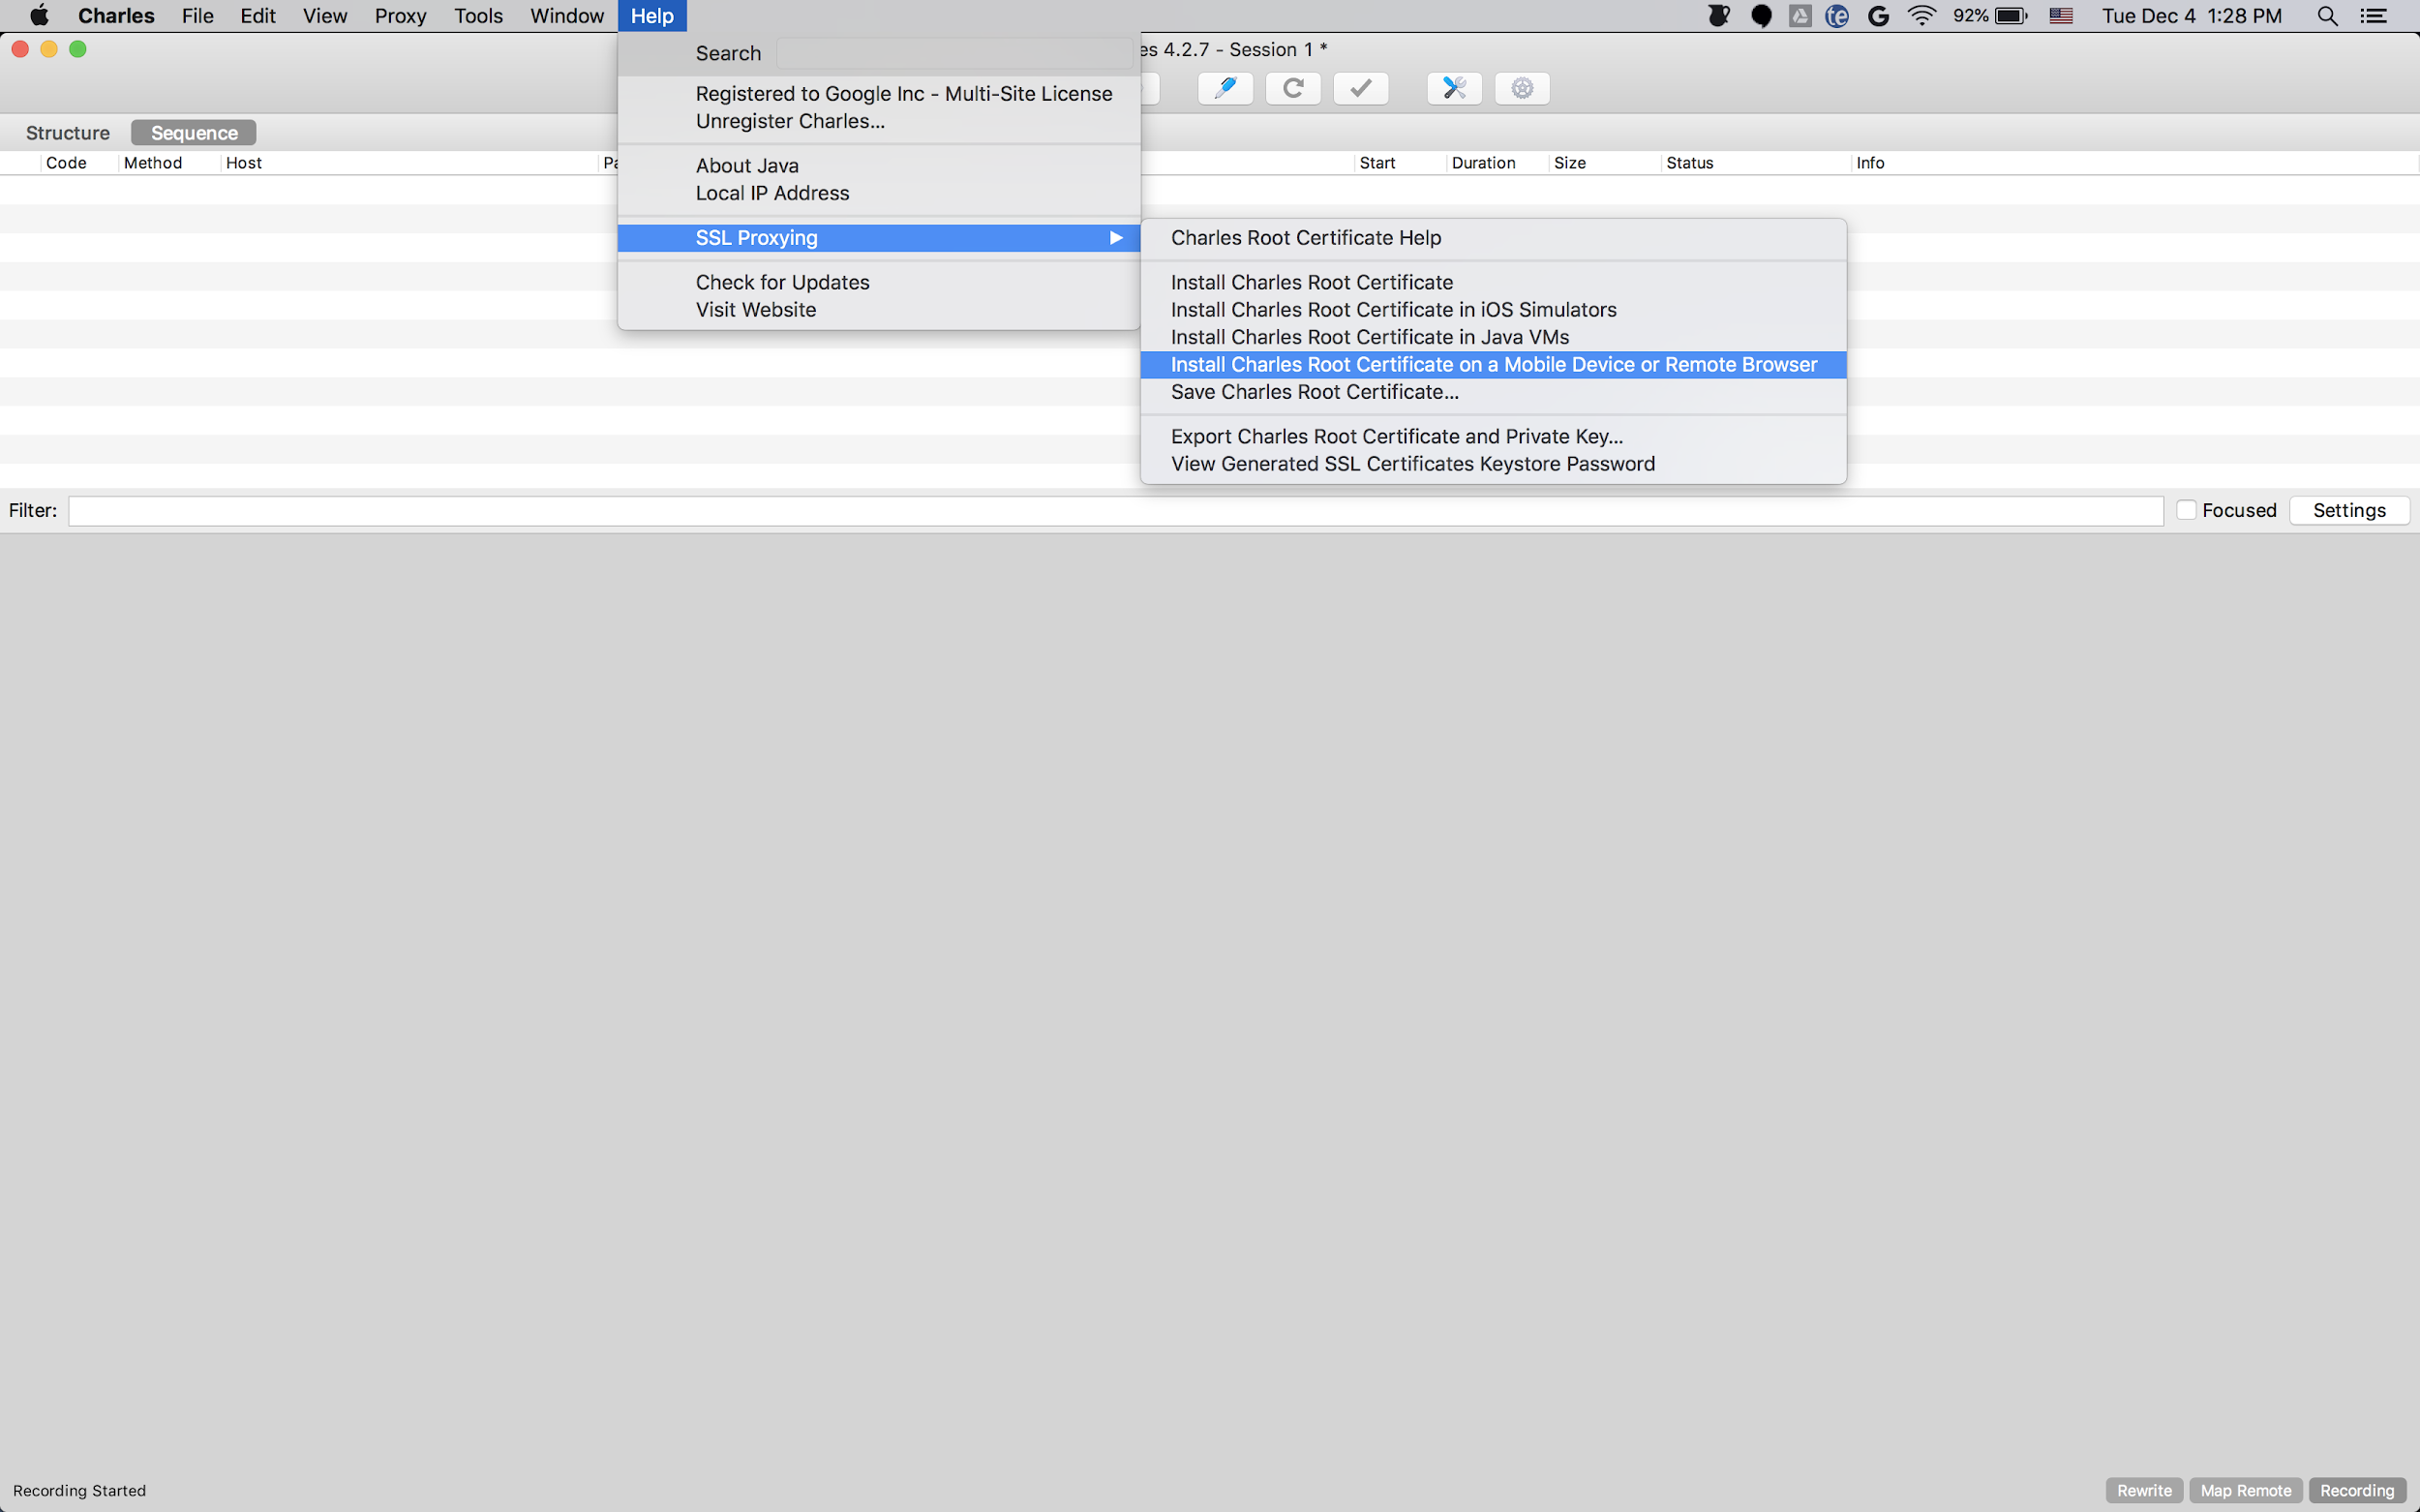
ที่ใช้ Charles โดยใช้การตั้งค่าเครือข่ายขั้นสูง เมื่อตั้งค่าพร็อกซีสำหรับอุปกรณ์จริง ให้ใช้ตัวเลือกเมนู Help >
Local IP address ของ Charles เพื่อรับที่อยู่ IP ของคอมพิวเตอร์ แล้วป้อนที่อยู่ดังกล่าวสำหรับที่อยู่พร็อกซีในอุปกรณ์ (คุณต้องใช้เครือข่าย Wi-Fi เดียวกันเพื่อให้การตั้งค่านี้ทำงานได้)
ใช้พอร์ตที่พร็อกซี Charles ทำงานอยู่
เปิดใช้พร็อกซี SSL สำหรับแอปบนอุปกรณ์เคลื่อนที่
หากต้องการให้ Charles สกัดกั้นการรับส่งข้อมูล SSL ของแอปบนอุปกรณ์เคลื่อนที่ คุณจะต้องประกาศ
ว่าแอปของคุณเชื่อถือใบรับรอง SSL ที่ผู้ใช้ระบุ
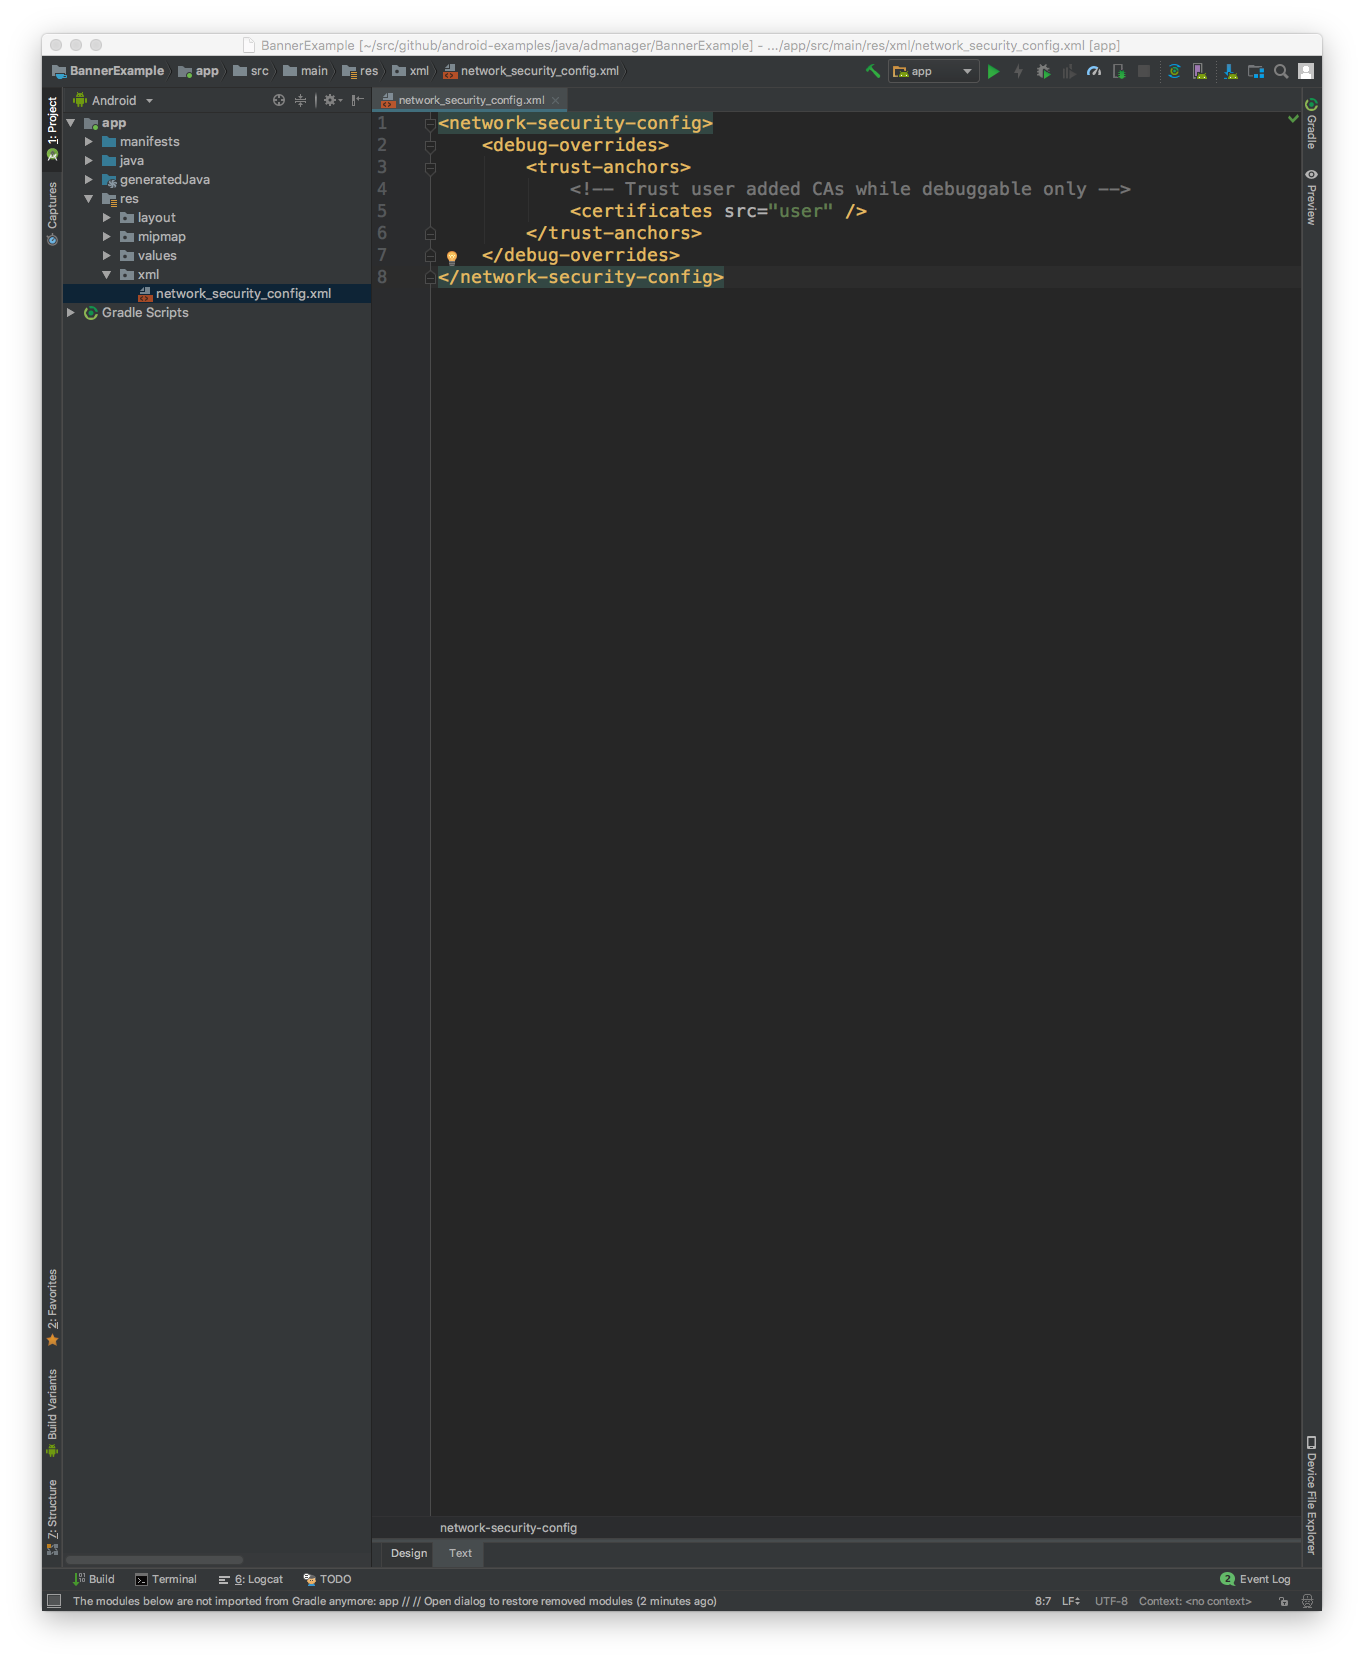
ก่อนอื่นคุณจะต้องเพิ่มไฟล์ทรัพยากร XML ใหม่สำหรับการกำหนดค่า
ความปลอดภัยของเครือข่ายในส่วน
<network-security-config>
<debug-overrides>
<trust-anchors>
<!-- Trust user added CAs while debuggable only -->
<certificates src="user" />
</trust-anchors>
</debug-overrides>
</network-security-config>
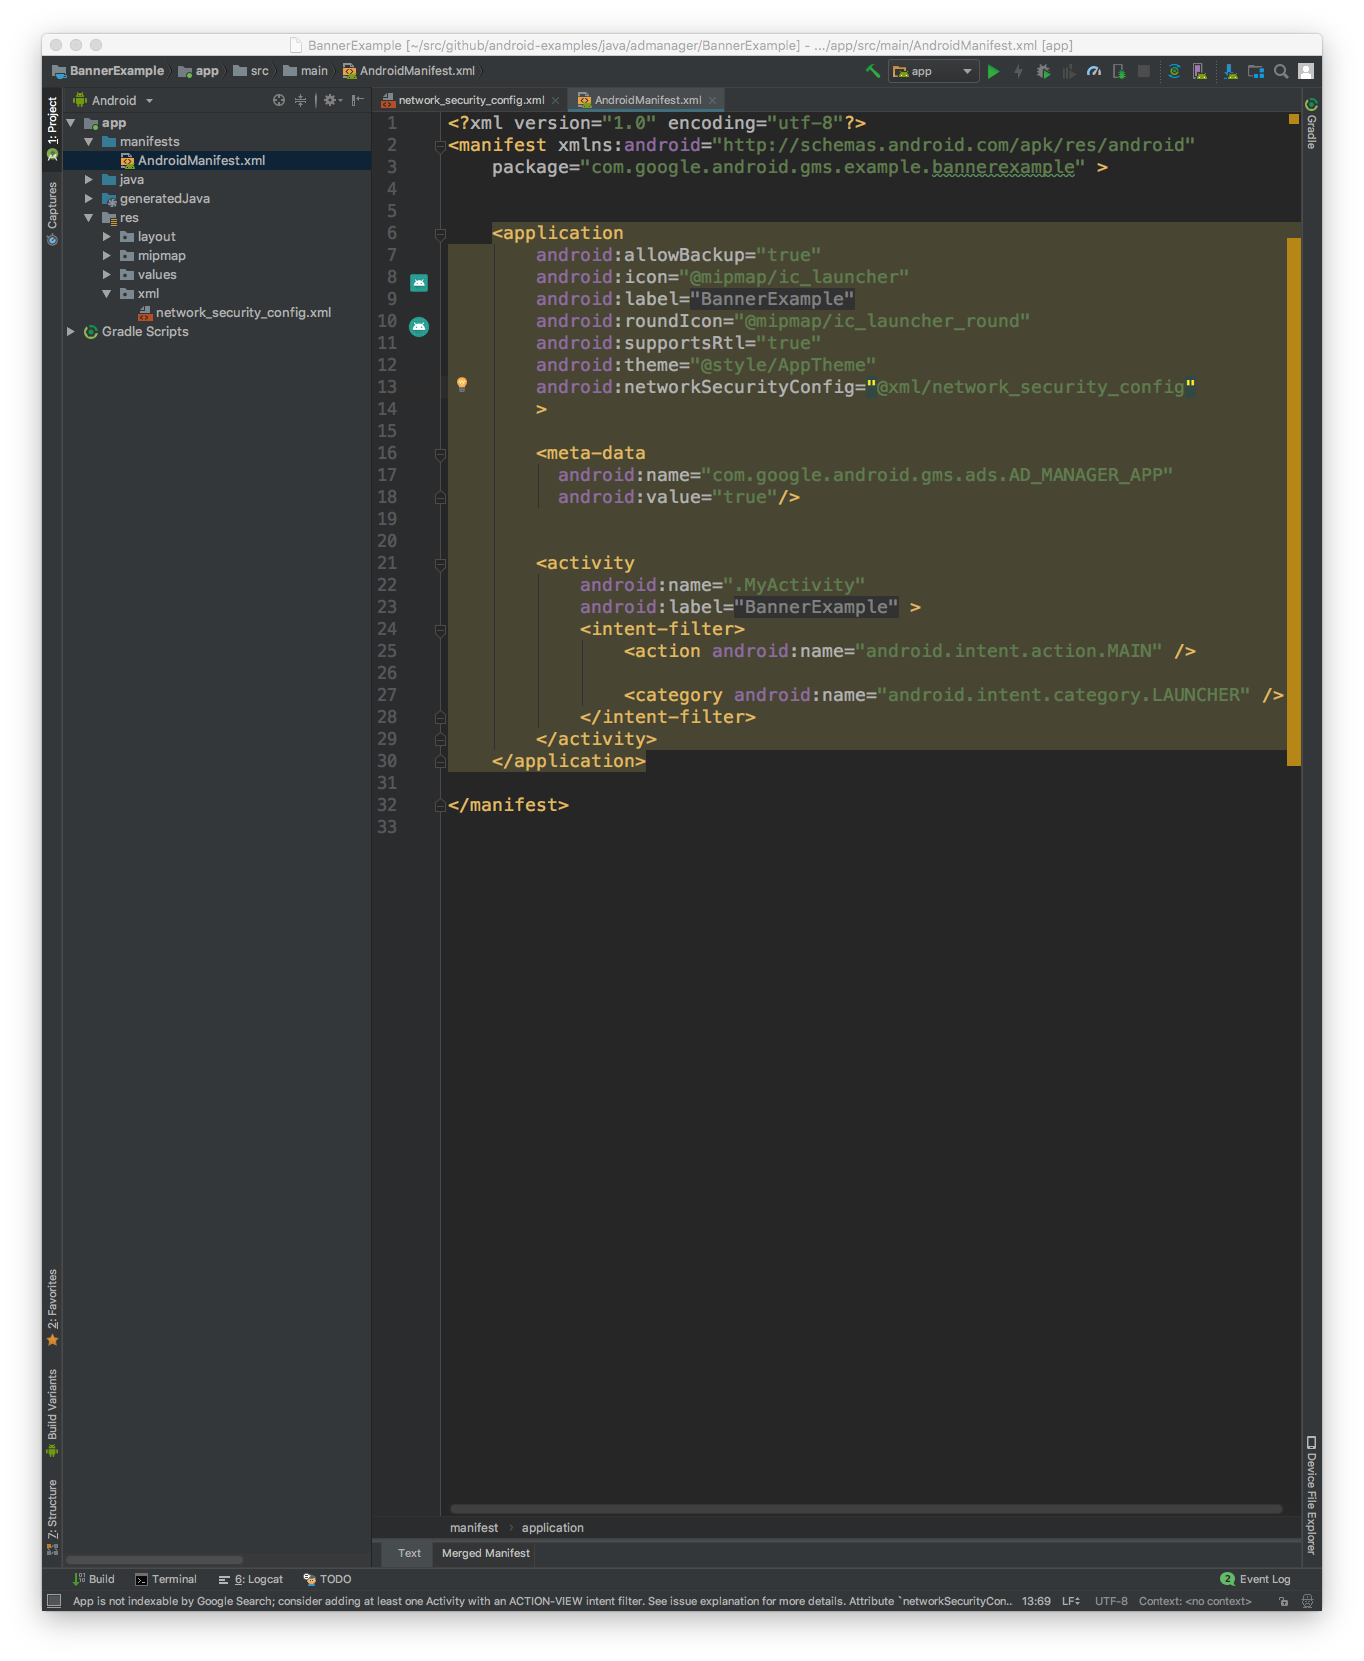
จากนั้นอัปเดตไฟล์ AndroidManifest.xml
เพื่อใช้การกำหนดค่าความปลอดภัยของเครือข่าย
<?xml version="1.0" encoding="utf-8"?>
<manifest ... >
<application ...
android:networkSecurityConfig="@xml/network_security_config"
... >
...
</application>
</manifest>
หลังจากนั้น คุณจะเปิดแอปบนอุปกรณ์เคลื่อนที่และค้นหาคำขอโฆษณาใน
บันทึกของ Charles ได้
เนื้อหาของหน้าเว็บนี้ได้รับอนุญาตภายใต้ใบอนุญาตที่ต้องระบุที่มาของครีเอทีฟคอมมอนส์ 4.0 และตัวอย่างโค้ดได้รับอนุญาตภายใต้ใบอนุญาต Apache 2.0 เว้นแต่จะระบุไว้เป็นอย่างอื่น โปรดดูรายละเอียดที่นโยบายเว็บไซต์ Google Developers Java เป็นเครื่องหมายการค้าจดทะเบียนของ Oracle และ/หรือบริษัทในเครือ
อัปเดตล่าสุด 2025-09-05 UTC
[[["เข้าใจง่าย","easyToUnderstand","thumb-up"],["แก้ปัญหาของฉันได้","solvedMyProblem","thumb-up"],["อื่นๆ","otherUp","thumb-up"]],[["ไม่มีข้อมูลที่ฉันต้องการ","missingTheInformationINeed","thumb-down"],["ซับซ้อนเกินไป/มีหลายขั้นตอนมากเกินไป","tooComplicatedTooManySteps","thumb-down"],["ล้าสมัย","outOfDate","thumb-down"],["ปัญหาเกี่ยวกับการแปล","translationIssue","thumb-down"],["ตัวอย่าง/ปัญหาเกี่ยวกับโค้ด","samplesCodeIssue","thumb-down"],["อื่นๆ","otherDown","thumb-down"]],["อัปเดตล่าสุด 2025-09-05 UTC"],[[["\u003cp\u003eOn Android N or higher, specific steps are required to view ad calls in Charles proxy, including updating Google Play services, enabling network tracing, installing the Charles SSL certificate, and configuring SSL proxy settings for your app.\u003c/p\u003e\n"],["\u003cp\u003eFor successful network tracing, ensure your Google Play services version is at least 14.5.74 and enable debug logging for ads within the Google Settings app.\u003c/p\u003e\n"],["\u003cp\u003eInstalling the Charles SSL certificate requires downloading Charles on your computer and following the instructions provided to install the certificate on your emulator or mobile device.\u003c/p\u003e\n"],["\u003cp\u003eWhen using Charles proxy, ensure your mobile device and computer are on the same Wi-Fi network and correctly configure proxy settings using either localhost for emulators or your computer's local IP address for physical devices.\u003c/p\u003e\n"],["\u003cp\u003eTo enable Charles to intercept SSL traffic from your mobile app, you need to declare trust for user-provided SSL certificates by adding a network security configuration XML file and updating your app's AndroidManifest.xml file.\u003c/p\u003e\n"]]],[],null,["On Android N or higher, ad calls are visible in Charles proxy only when the\nfollowing steps are performed:\n\n1. Update the Google Play services on the mobile device.\n2. Enable Network Tracing on the mobile device.\n3. Install Charles SSL certificate on your device, and set up proxy.\n4. Enable SSL Proxy for your mobile app.\n\nUpdate the Google Play services on the mobile device\n\nFor an emulator, if you don't see the Google Play section in the side menu,\nyou may need to update the Android Studio and download the latest system\nimages in the **Virtual Device Configuration**. Make sure to use a system\nimage with Google Play in its target.\n\nUse the side menu to check and update Google Play services to the latest\nversion. The minimum working version of the Google Play services is\n`14.5.74`.\n\nFor a physical mobile device (phone or tablet), you can search for Google\nPlay or follow this\n[link](//play.google.com/store/apps/details?id=com.google.android.gms)\nto open Google Play directly.\n\nEnable Network Tracing on the mobile device\n\nTo enable network tracing, you will need to [enable developer\noptions](//developer.android.com/studio/debug/dev-options) for your\ndevice. Launch the Google Settings app and select **Google \\\u003e Ads \\\u003e Enable\ndebug logging for ads** . A more detailed\n[guide](/admob/android/network-tracing) is\navailable for both AdMob and Google Ad Manager publishers.\n\nInstall Charles SSL certificate on your device, and set up proxy\n\nTo use Charles as a proxy for your mobile app, you will need to download and\n[install](//www.charlesproxy.com/documentation/installation/) Charles\non a computer. Follow Charles' instructions to install an SSL certificate on\nthe Android emulator or mobile device.\n\nIt is simpler to [use the emulator with a\nproxy](//developer.android.com/studio/run/emulator-networking#proxy) because the\nemulator is already connected to the same Wi-Fi network with the computer\nrunning Charles. When using the emulator with a proxy, set the proxy to\nlocalhost (`http://127.0.0.1`) and the port that Charles proxy is running on\n(found in Charles menu option **Proxy \\\u003e Proxy Settings**).\n\nIf you're using a physical mobile device (phone or tablet), you'll need to\nconnect the mobile device to the same Wi-Fi network with your computer\nrunning Charles using the [advanced network\nsettings](//support.google.com/pixelphone/answer/2819519). When setting up the\nproxy settings for your physical device, use the Charles menu option **Help \\\u003e\nLocal IP address** to get the IP address of your computer, to enter for the proxy\naddress on your device (you must be on the same Wi-Fi network for this to work).\nUse the port that Charles proxy is running on.\n\nEnable SSL Proxy for your mobile app\n\nFor Charles to intercept your mobile app's SSL traffic, you will need to declare\nthat your app can trust a user-provided SSL certificate.\n\nFirst, you will need to add a new XML resource file for [Network Security\nConfiguration](//developer.android.com/training/articles/security-config) under \n\n \u003cnetwork-security-config\u003e\n \u003cdebug-overrides\u003e\n \u003ctrust-anchors\u003e\n \u003c!-- Trust user added CAs while debuggable only --\u003e\n \u003ccertificates src=\"user\" /\u003e\n \u003c/trust-anchors\u003e\n \u003c/debug-overrides\u003e\n \u003c/network-security-config\u003e\n\nNext, update the `AndroidManifest.xml` file to use the network security\nconfiguration. \n\n \u003c?xml version=\"1.0\" encoding=\"utf-8\"?\u003e\n \u003cmanifest ... \u003e\n \u003capplication ...\n android:networkSecurityConfig=\"@xml/network_security_config\"\n ... \u003e\n ...\n \u003c/application\u003e\n \u003c/manifest\u003e\n\nAfter that, you can launch the mobile app and look for ad requests in the\nCharles log."]]