
Android N 이상의 경우 다음 단계를 수행할 때만 Charles 프록시에서 광고 호출을 볼 수 있습니다.
- 휴대기기에서 Google Play 서비스를 업데이트합니다.
- 휴대기기에서 네트워크 추적을 사용하도록 설정합니다.
- 기기에 Charles SSL 인증서를 설치하고 프록시를 설정합니다.
- 모바일 앱에서 SSL 프록시를 사용하도록 설정합니다.
휴대기기에서 Google Play 서비스 업데이트하기
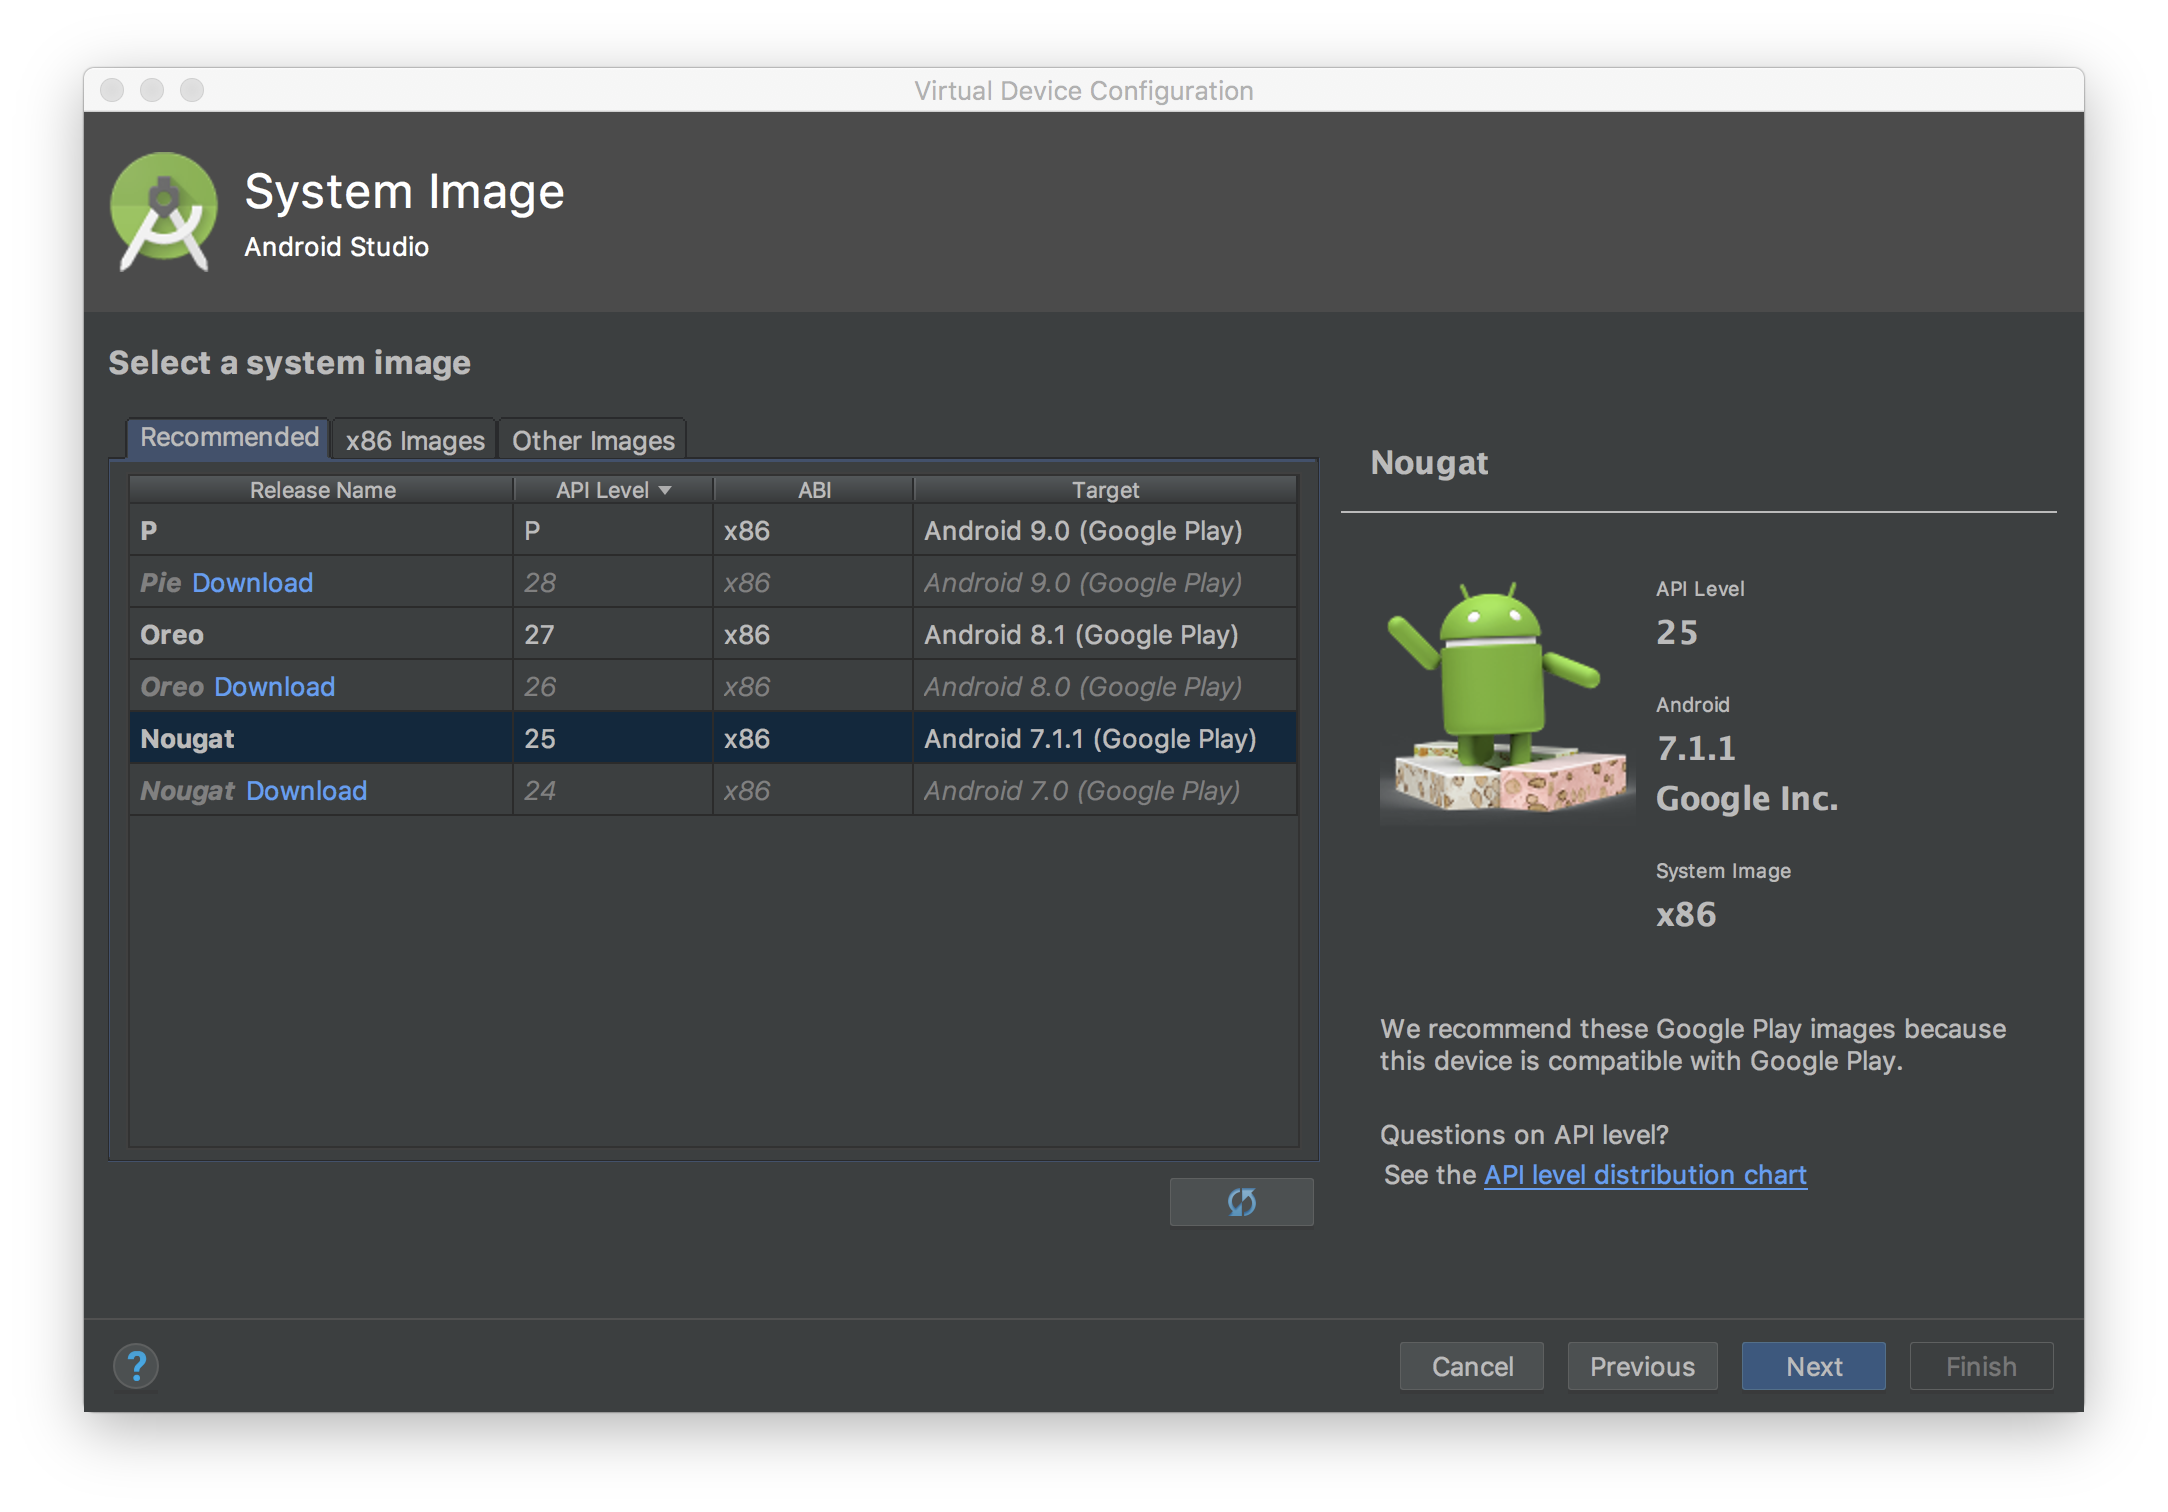
에뮬레이터의 경우 사이드 메뉴에 Google Play 섹션이 표시되지 않으면 Android 스튜디오를 업데이트하고 가상 기기 설정 에서 최신 시스템 이미지를 다운로드해야 할 수 있습니다. 타겟에 Google Play가 있는 시스템 이미지를 사용해야 합니다.
사이드 메뉴를 통해 Google Play 서비스를 확인하고 최신 버전으로 업데이트하세요. Google Play 서비스는 14.5.74 이상의 버전에서 작동합니다.
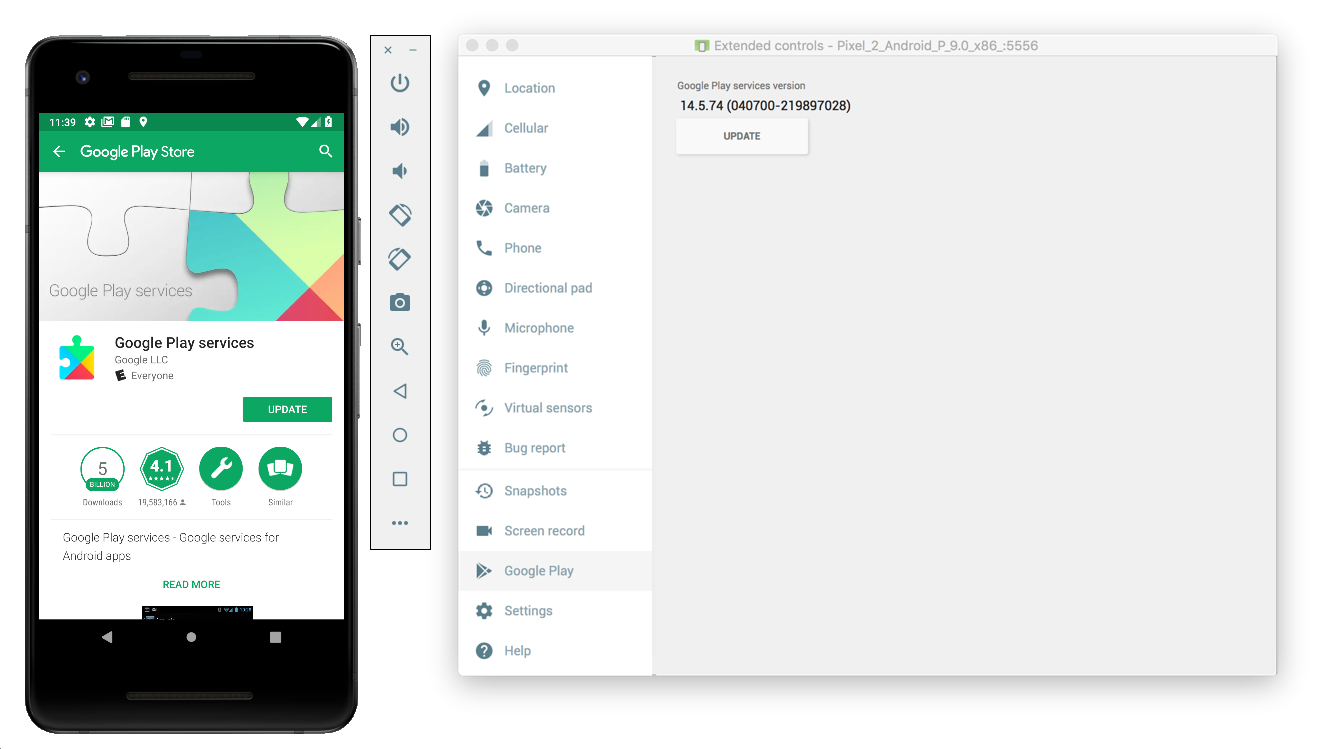
실제 휴대기기 (스마트폰 또는 태블릿)에서는 Google Play를 검색하거나 이 링크 를 이용해 Google Play를 바로 열 수 있습니다.
휴대기기에서 네트워크 추적 사용 설정하기
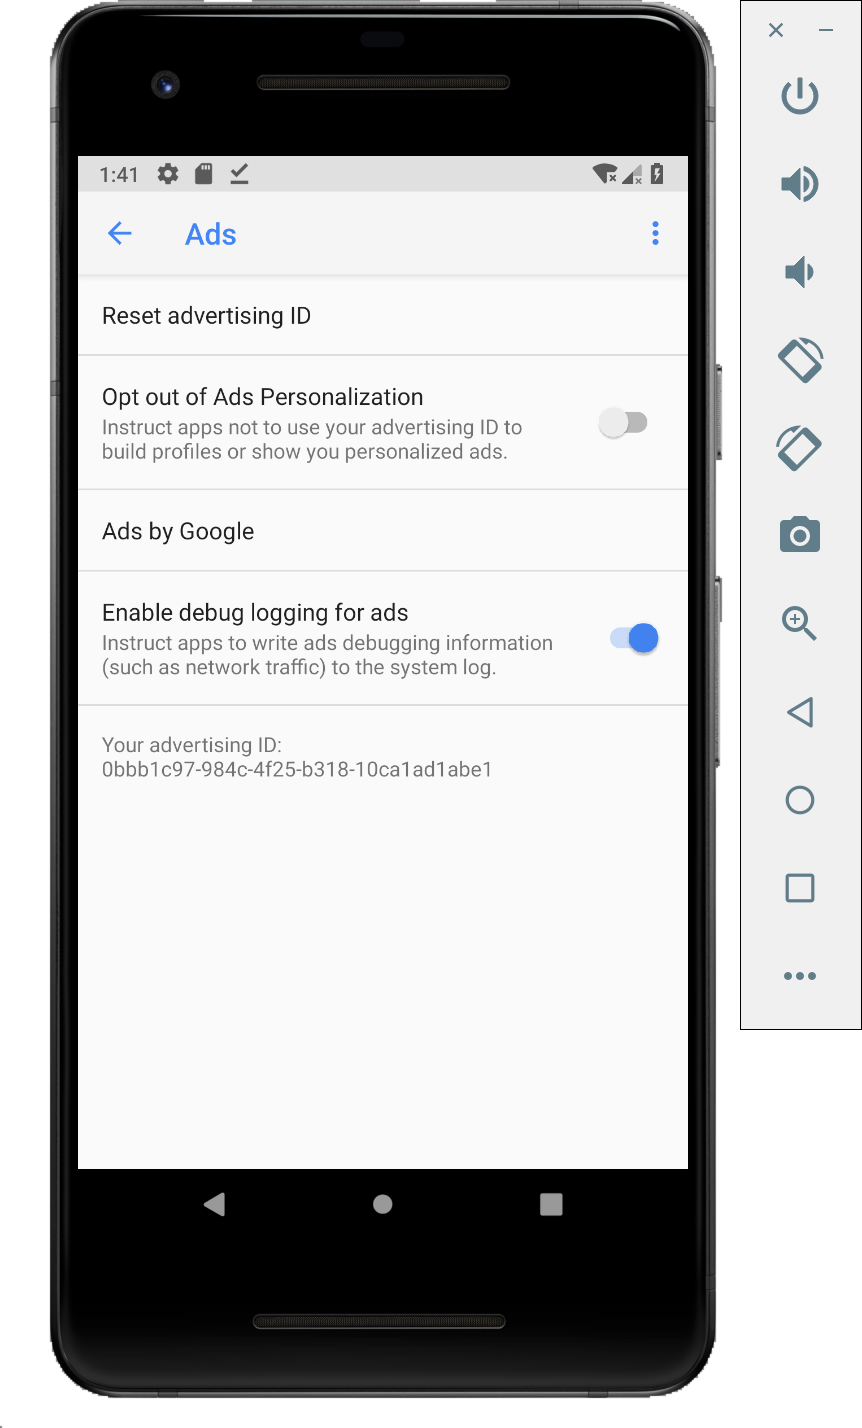
네트워크 추적을 사용하려면 기기에서 개발자 옵션을 사용 설정해야 합니다. Google 설정 앱을 실행하고 Google > 광고 > 광고 디버그 로깅 사용 을 선택하세요. 자세한 내용은 AdMob 및 Google Ad Manager 게시자를 위한 가이드에서 확인하세요.
기기에 Charles SSL 인증서를 설치하고 프록시 설정하기
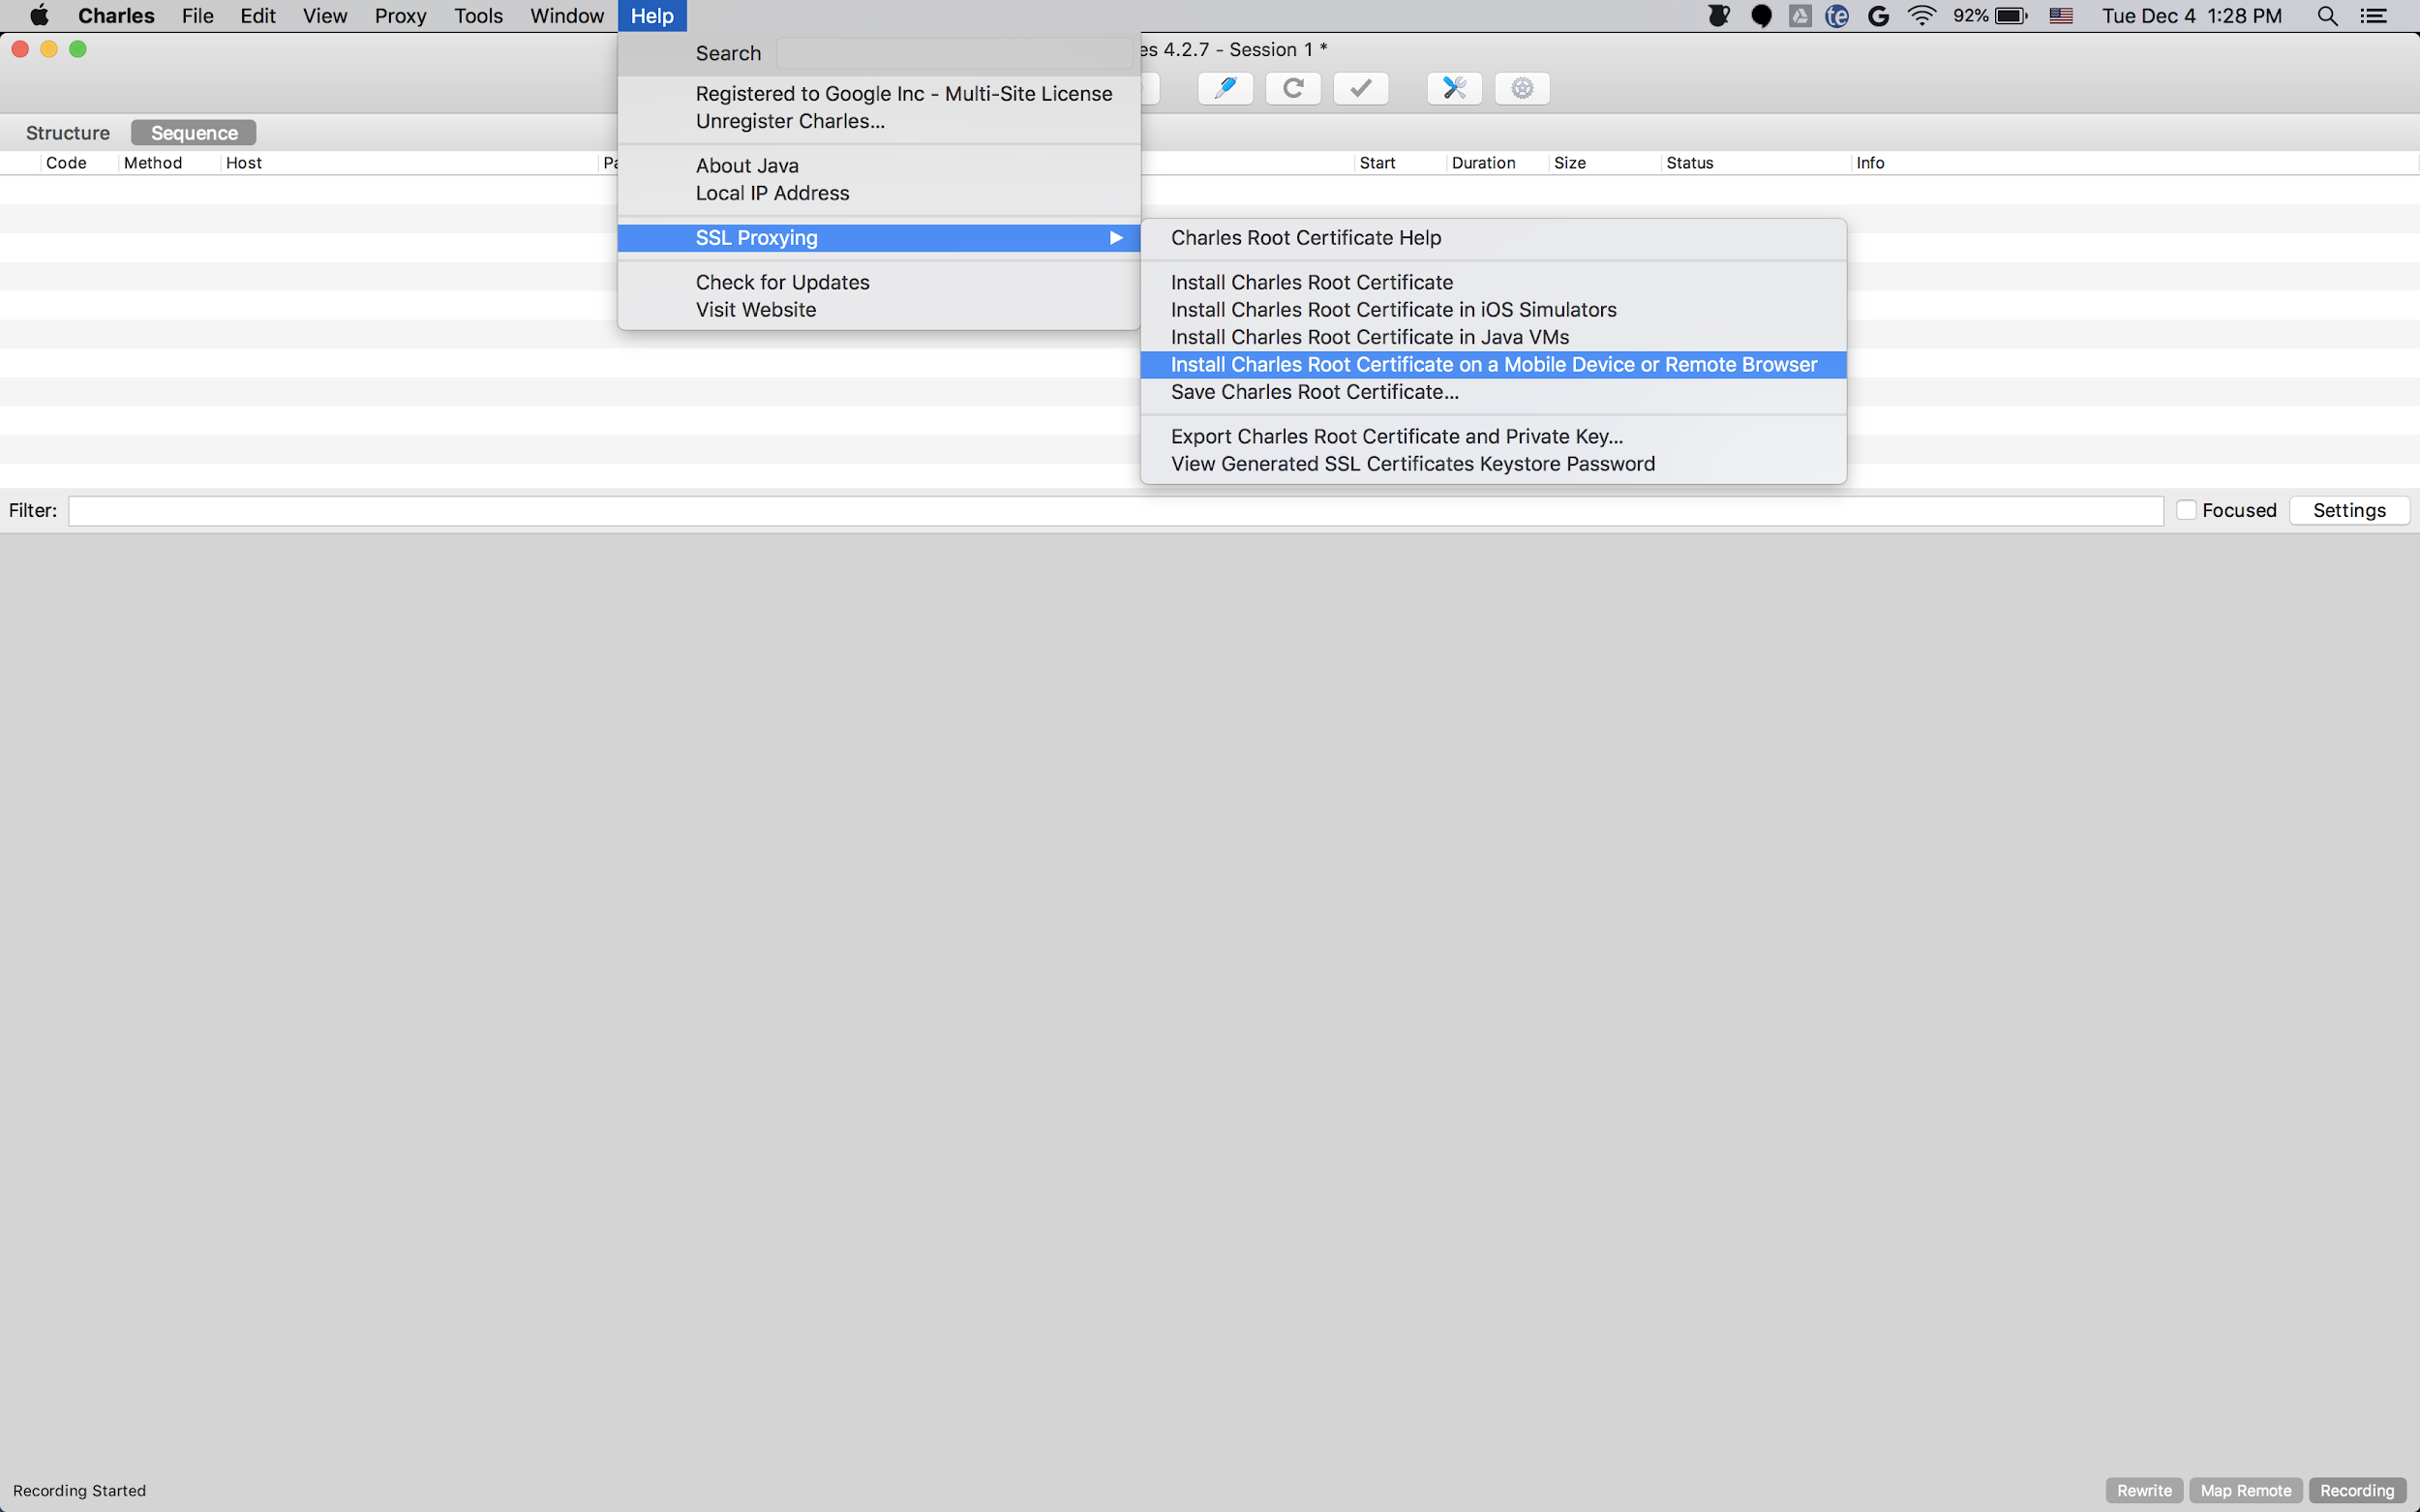
Charles를 모바일 앱의 프록시로 사용하려면 컴퓨터에 Charles를 다운로드하여 설치해야 합니다. Charles에 관한 안내에 따라 Android 에뮬레이터 또는 휴대기기에 SSL 인증서를 설치하세요.
에뮬레이터는 이미 Charles가 실행되고 있는 컴퓨터와 동일한 Wi-Fi 네트워크에 연결되어 있기 때문에 프록시가 있는 에뮬레이터를
사용하는 것이 더 간단합니다. 에뮬레이터를 프록시와 함께 사용할 경우 프록시를 localhost (http://127.0.0.1) 및 Charles 프록시가 실행되고 있는 포트(프록시 > 프록시 설정 에서 Charles 메뉴 옵션을 찾을 수 있음)로 설정합니다.
실제 휴대기기 (스마트폰 또는 태블릿)를 사용하는 경우 고급 네트워크 설정을 사용해 Charles가 실행되고 있는 컴퓨터와 동일한 Wi-Fi 네트워크에 휴대기기를 연결해야 합니다. 실제 기기에 프록시를 설정할 경우 컴퓨터의 IP 주소를 확인할 수 있는 Charles 메뉴 옵션인 도움말 > 로컬 IP 주소 를 사용해 기기에 프록시 주소를 입력합니다 (동일한 Wi-Fi 네트워크에 연결된 상태여야 함). Charles 프록시가 실행 중인 포트를 사용합니다.
모바일 앱에서 SSL 프록시를 사용하도록 설정하기
Charles에서 모바일 앱의 SSL 트래픽을 인터셉트하기 위해서는 앱에서 사용자가 제공한 SSL 인증서를 신뢰할 수 있음을 선언해야 합니다.
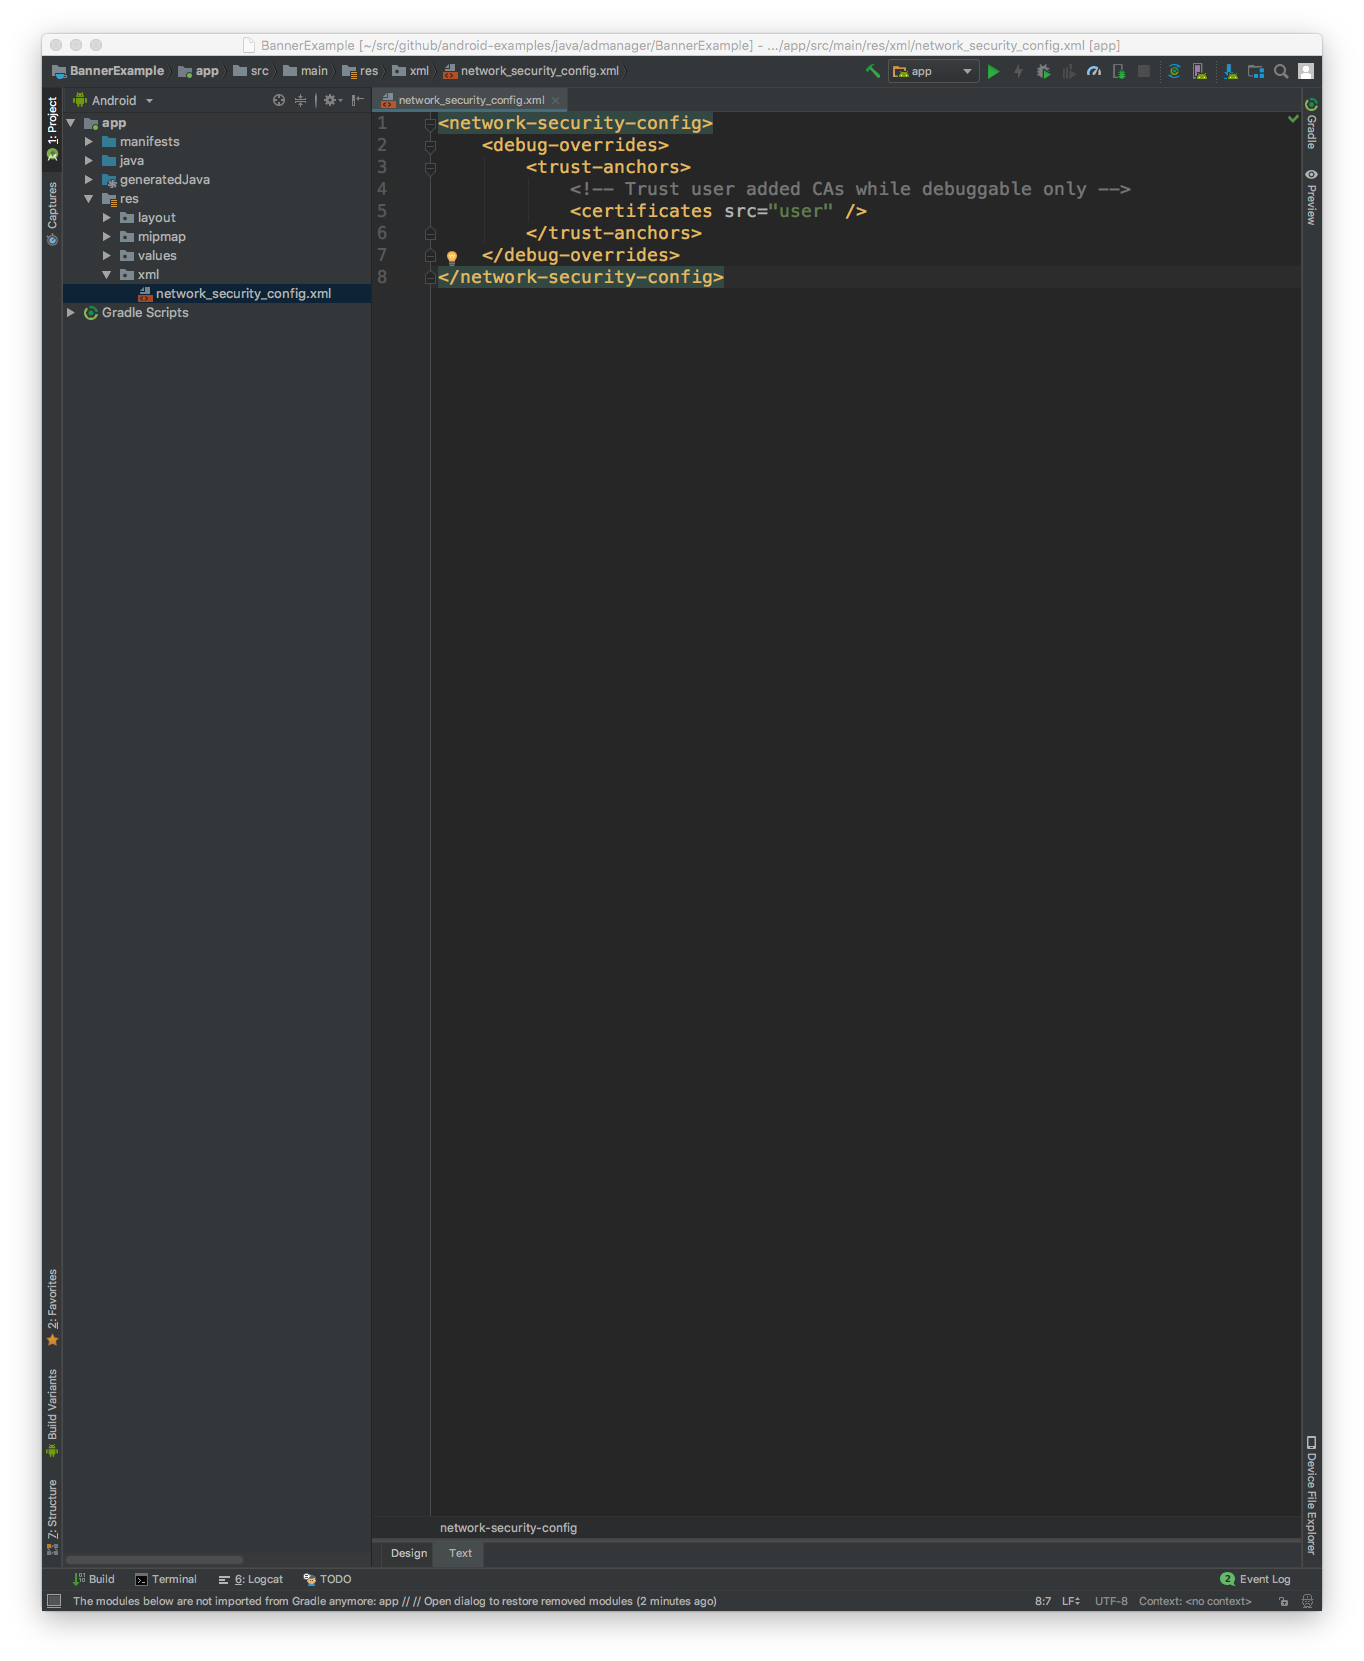
먼저 네트워크 보안 설정을 위한 새 XML 리소스 파일을
<network-security-config>
   <debug-overrides>
       <trust-anchors>
           <!-- Trust user added CAs while debuggable only -->
           <certificates src="user" />
       </trust-anchors>
   </debug-overrides>
</network-security-config>
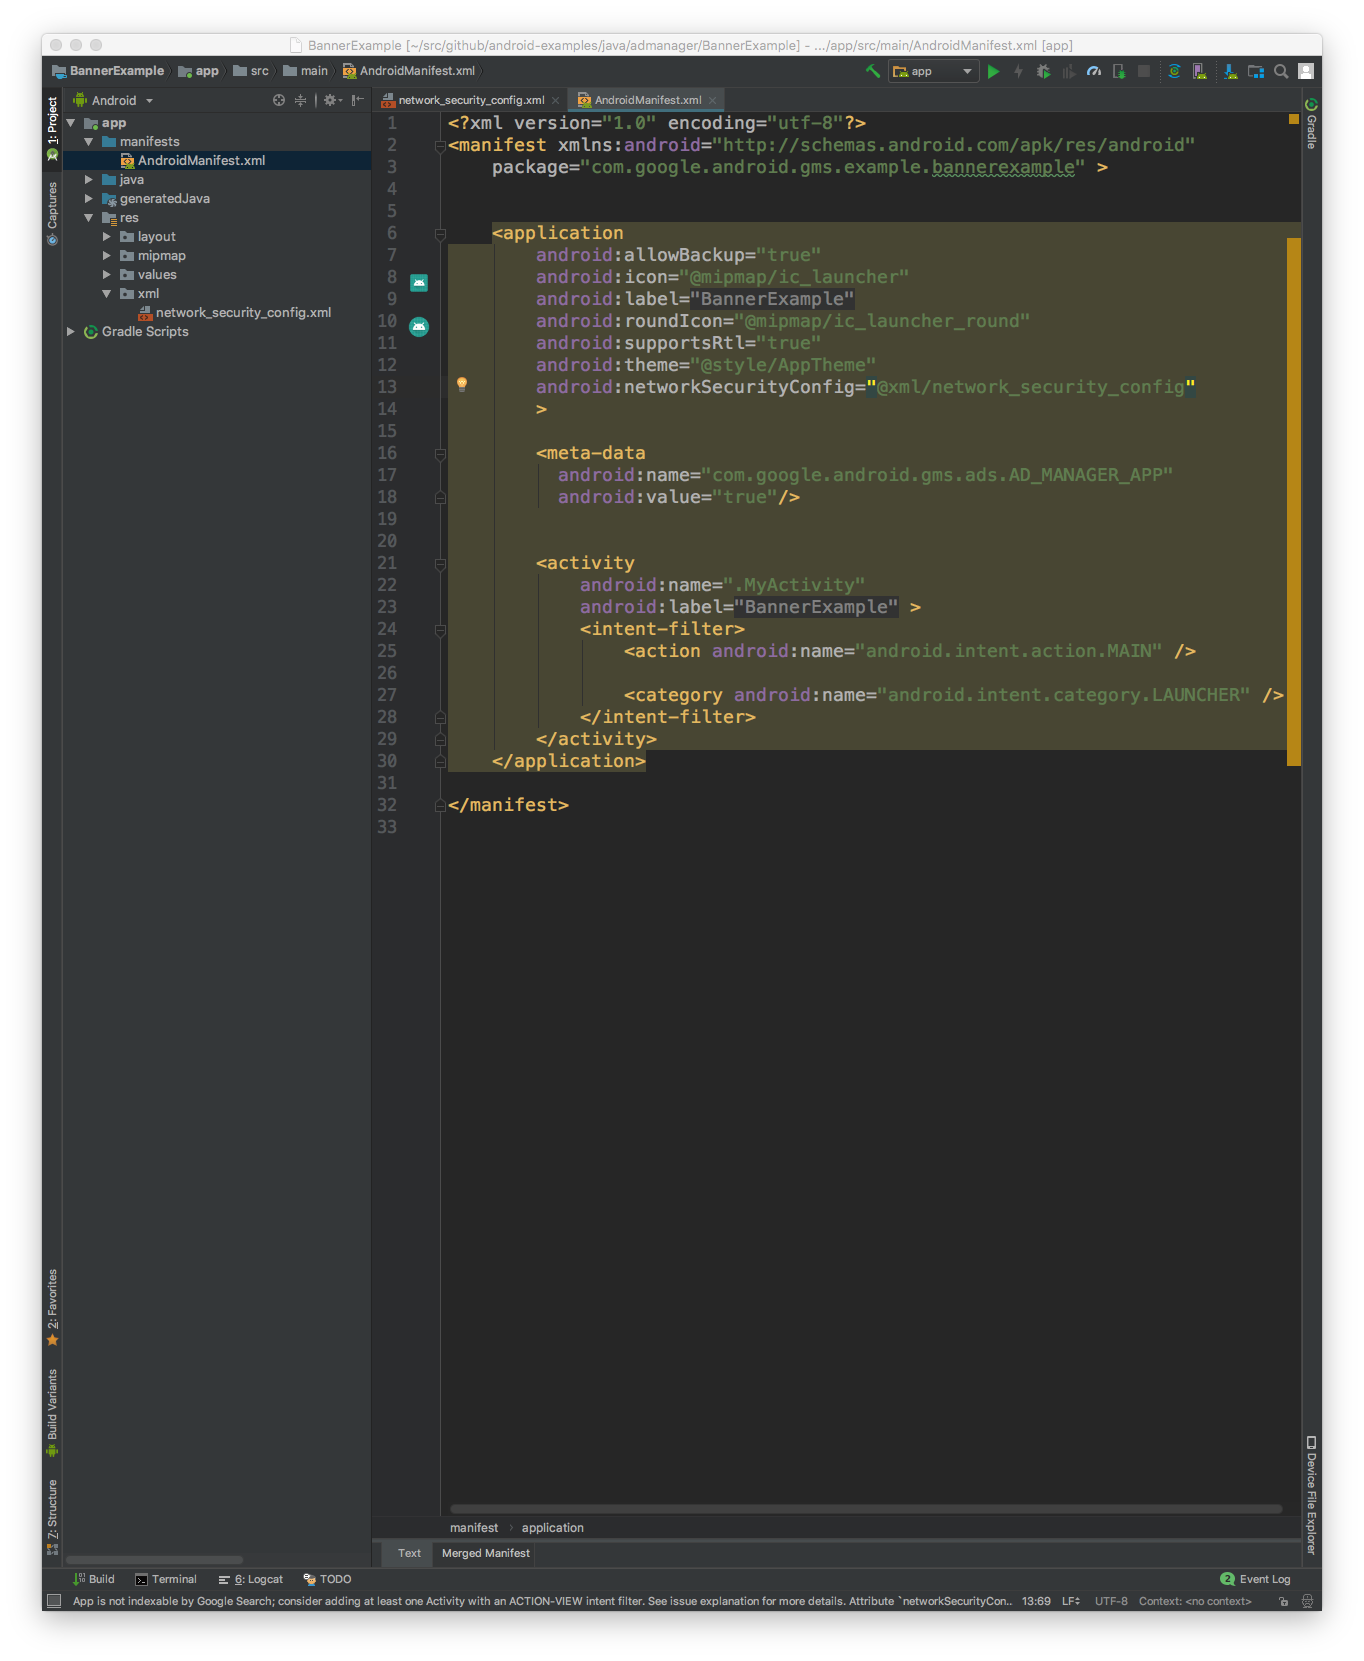
그런 다음 AndroidManifest.xml 파일을 업데이트하여 네트워크 보안 설정을 사용합니다.
<?xml version="1.0" encoding="utf-8"?>
<manifest ... >
    <application ...
                 android:networkSecurityConfig="@xml/network_security_config"
                 ... >
        ...
    </application>
</manifest>
그런 다음 모바일 앱을 시작하고 Charles 로그에서 광고 요청을 찾을 수 있습니다.