
ใน Android N ขึ้นไป การเรียกโฆษณาจะปรากฏในพร็อกซี Charles ก็ต่อเมื่อทำตามขั้นตอนต่อไปนี้
- อัปเดตบริการ Google Play ในอุปกรณ์เคลื่อนที่
- เปิดใช้การติดตามเครือข่ายในอุปกรณ์เคลื่อนที่
- ติดตั้งใบรับรอง SSL ของ Charles ในอุปกรณ์และตั้งค่าพร็อกซี
- เปิดใช้พร็อกซี SSL สำหรับแอปบนอุปกรณ์เคลื่อนที่
อัปเดตบริการ Google Play ในอุปกรณ์เคลื่อนที่
สำหรับโปรแกรมจำลอง หากไม่เห็นส่วน Google Play ในเมนูด้านข้าง คุณอาจต้องอัปเดต Android Studio และดาวน์โหลดอิมเมจระบบล่าสุดในการกำหนดค่าอุปกรณ์เสมือน ตรวจสอบว่าได้ใช้ระบบอิมเมจที่มี Google Play ในเป้าหมาย
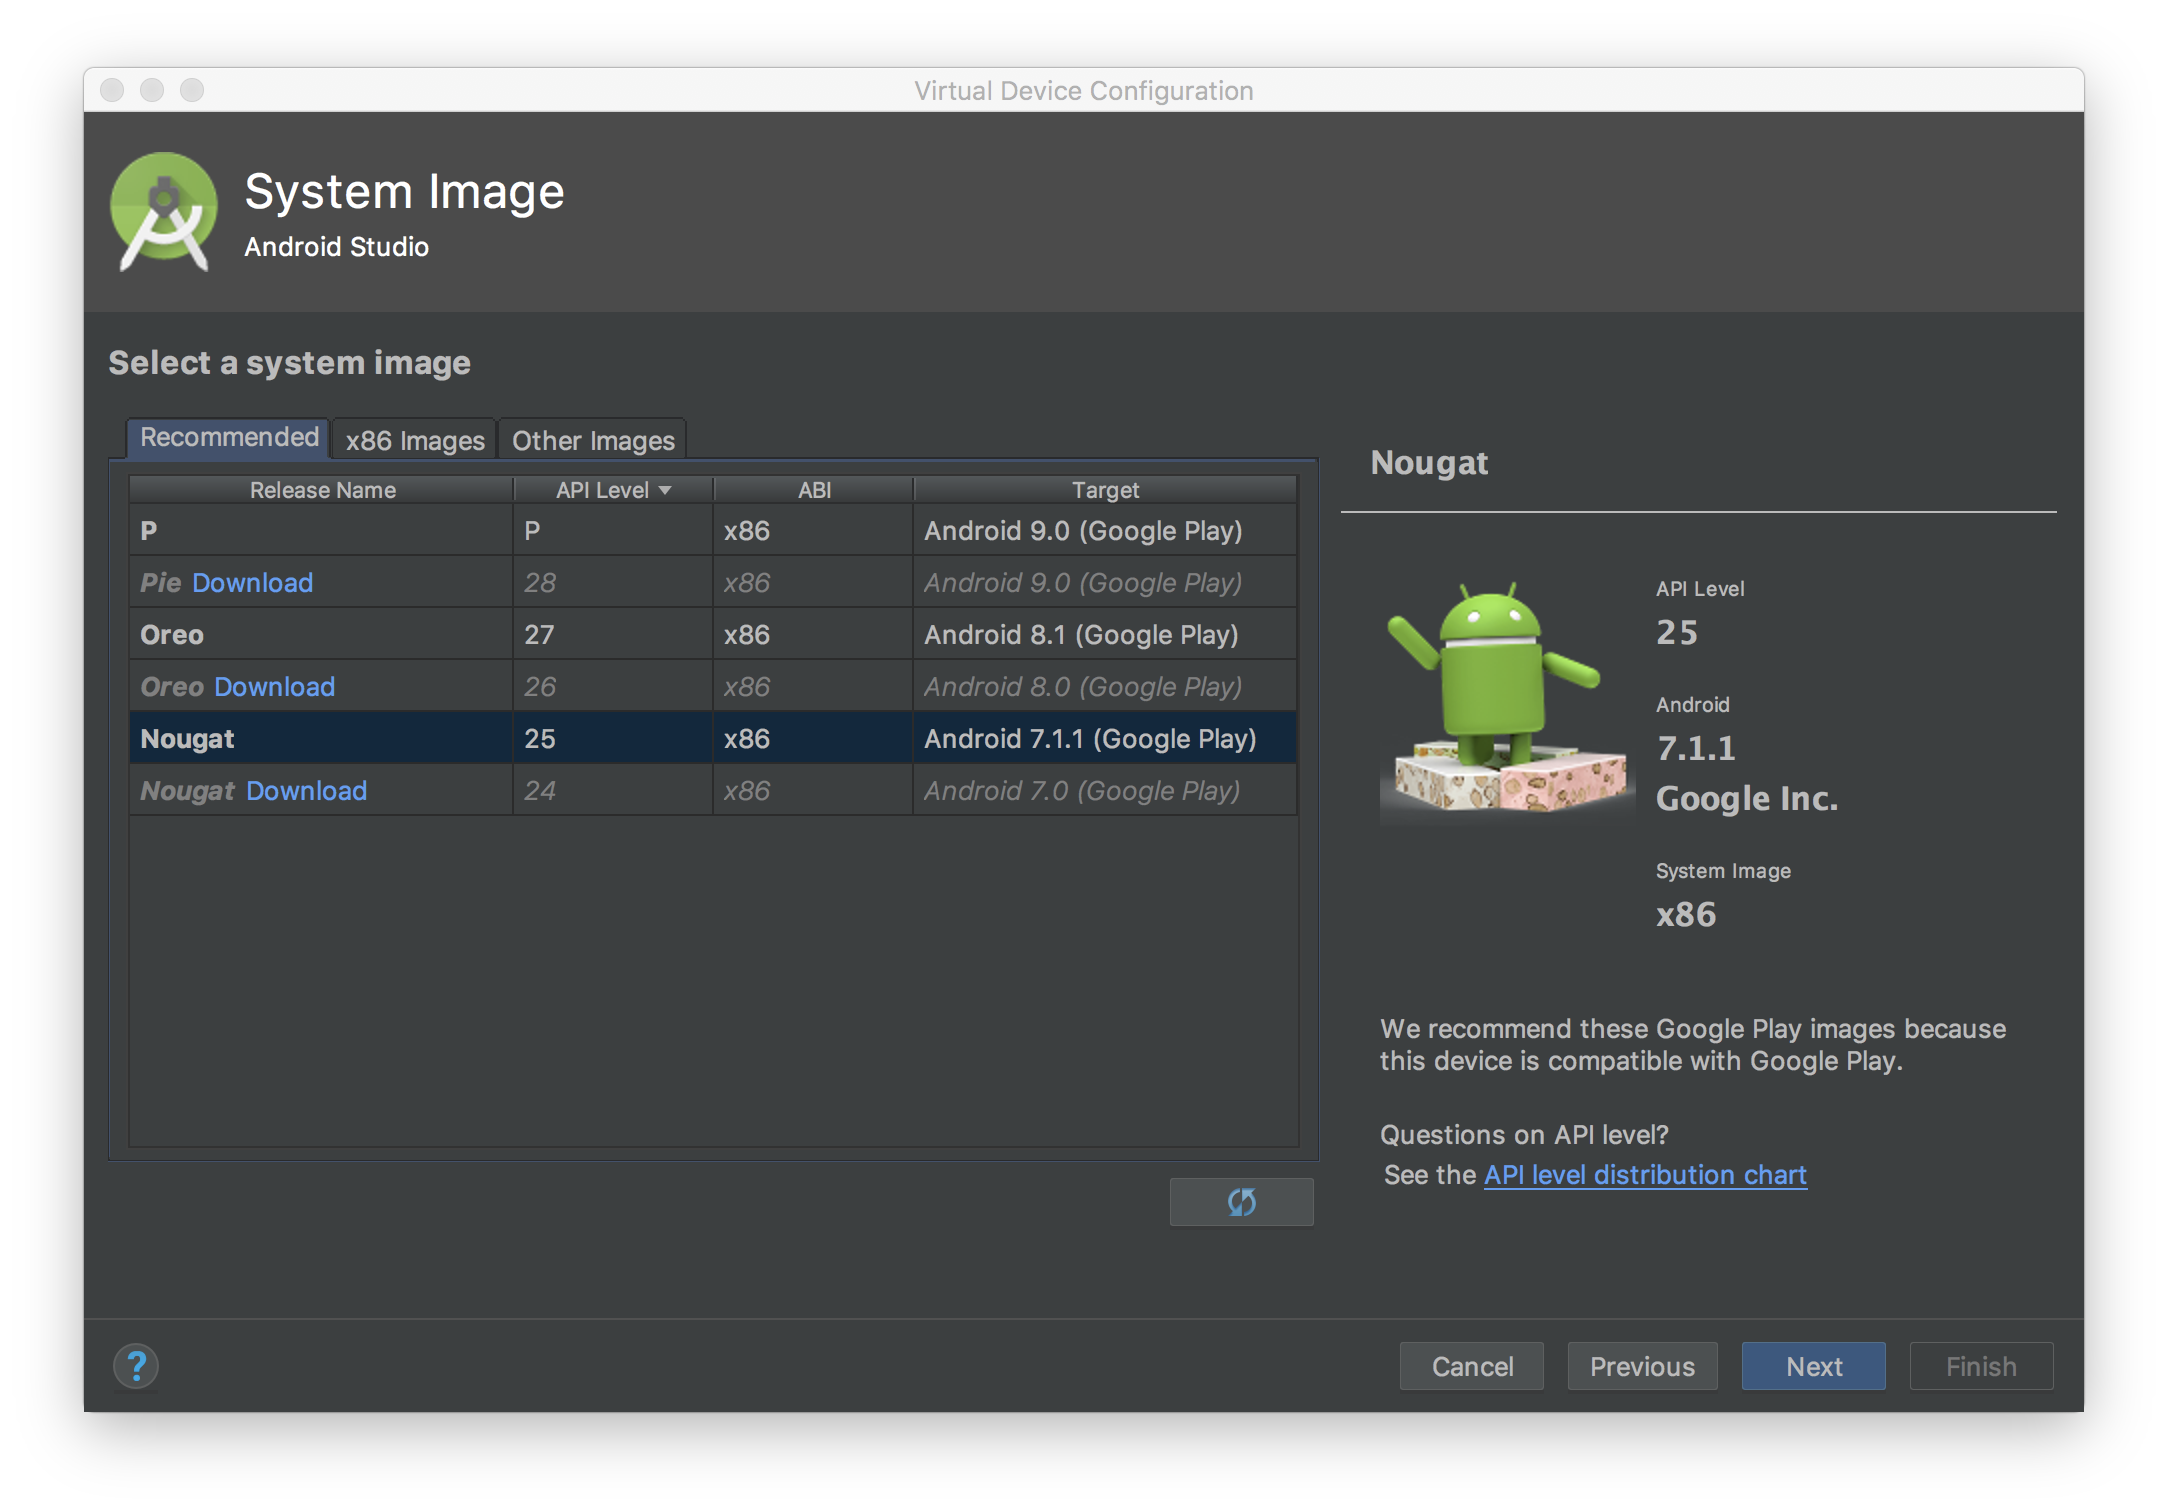
ใช้เมนูด้านข้างเพื่อตรวจสอบและอัปเดตบริการ Google Play เป็นเวอร์ชันล่าสุด บริการ Google Play เวอร์ชันต่ำสุดที่ใช้งานได้คือ 14.5.74
สำหรับอุปกรณ์เคลื่อนที่จริง (โทรศัพท์หรือแท็บเล็ต) คุณสามารถค้นหา Google Play หรือคลิก ลิงก์ นี้เพื่อเปิด Google Play โดยตรง
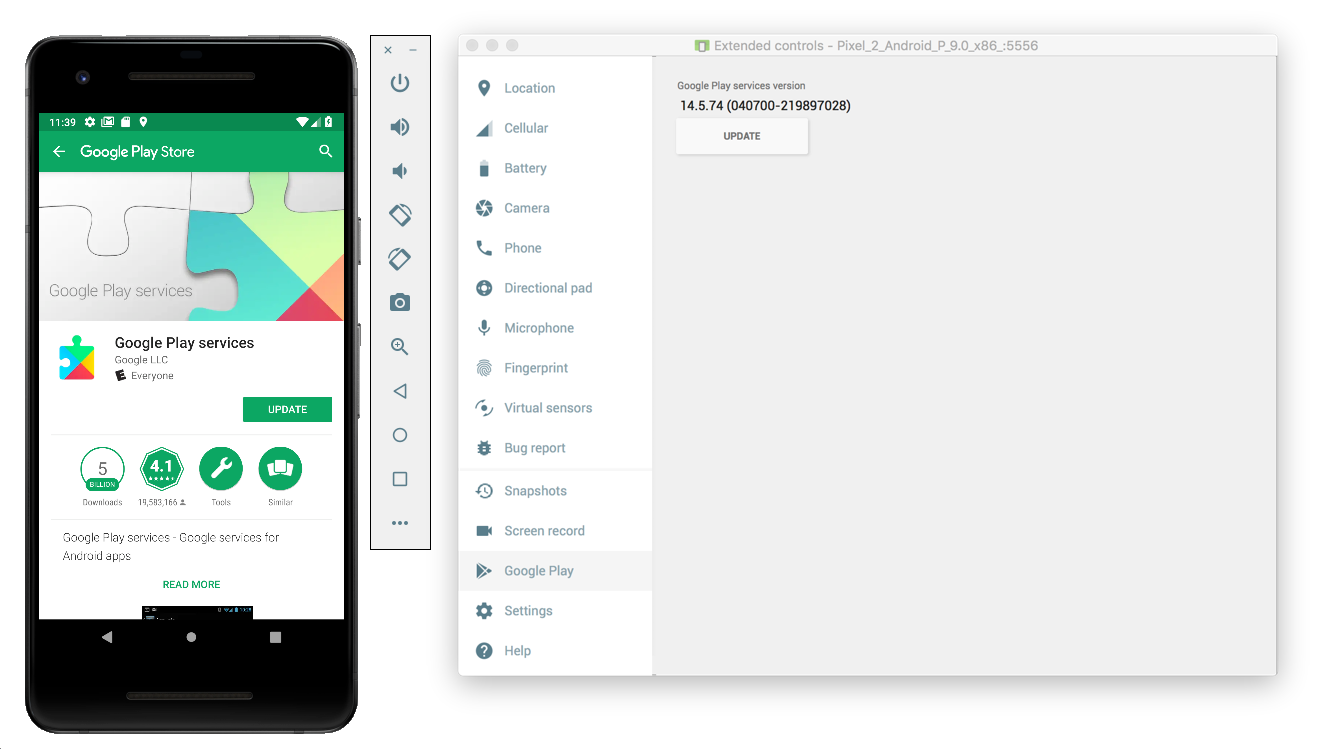
เปิดใช้การติดตามเครือข่ายในอุปกรณ์เคลื่อนที่
หากต้องการเปิดใช้การติดตามเครือข่าย คุณจะต้องเปิดใช้ตัวเลือกสำหรับนักพัฒนาแอปสำหรับอุปกรณ์ เปิดแอปการตั้งค่า Google แล้วเลือกGoogle > โฆษณา > เปิดใช้การบันทึกการแก้ไขข้อบกพร่องสำหรับโฆษณา คู่มือโดยละเอียดเพิ่มเติม มีให้บริการ สำหรับผู้เผยแพร่โฆษณา AdMob และ Google Ad Manager
ติดตั้งใบรับรอง SSL ของ Charles ในอุปกรณ์และตั้งค่าพร็อกซี
หากต้องการใช้ Charles เป็นพร็อกซีสำหรับแอปบนอุปกรณ์เคลื่อนที่ คุณจะต้องดาวน์โหลดและ ติดตั้ง Charles ในคอมพิวเตอร์ ทำตามวิธีการของ Charles เพื่อติดตั้งใบรับรอง SSL ในโปรแกรมจำลอง Android หรืออุปกรณ์เคลื่อนที่
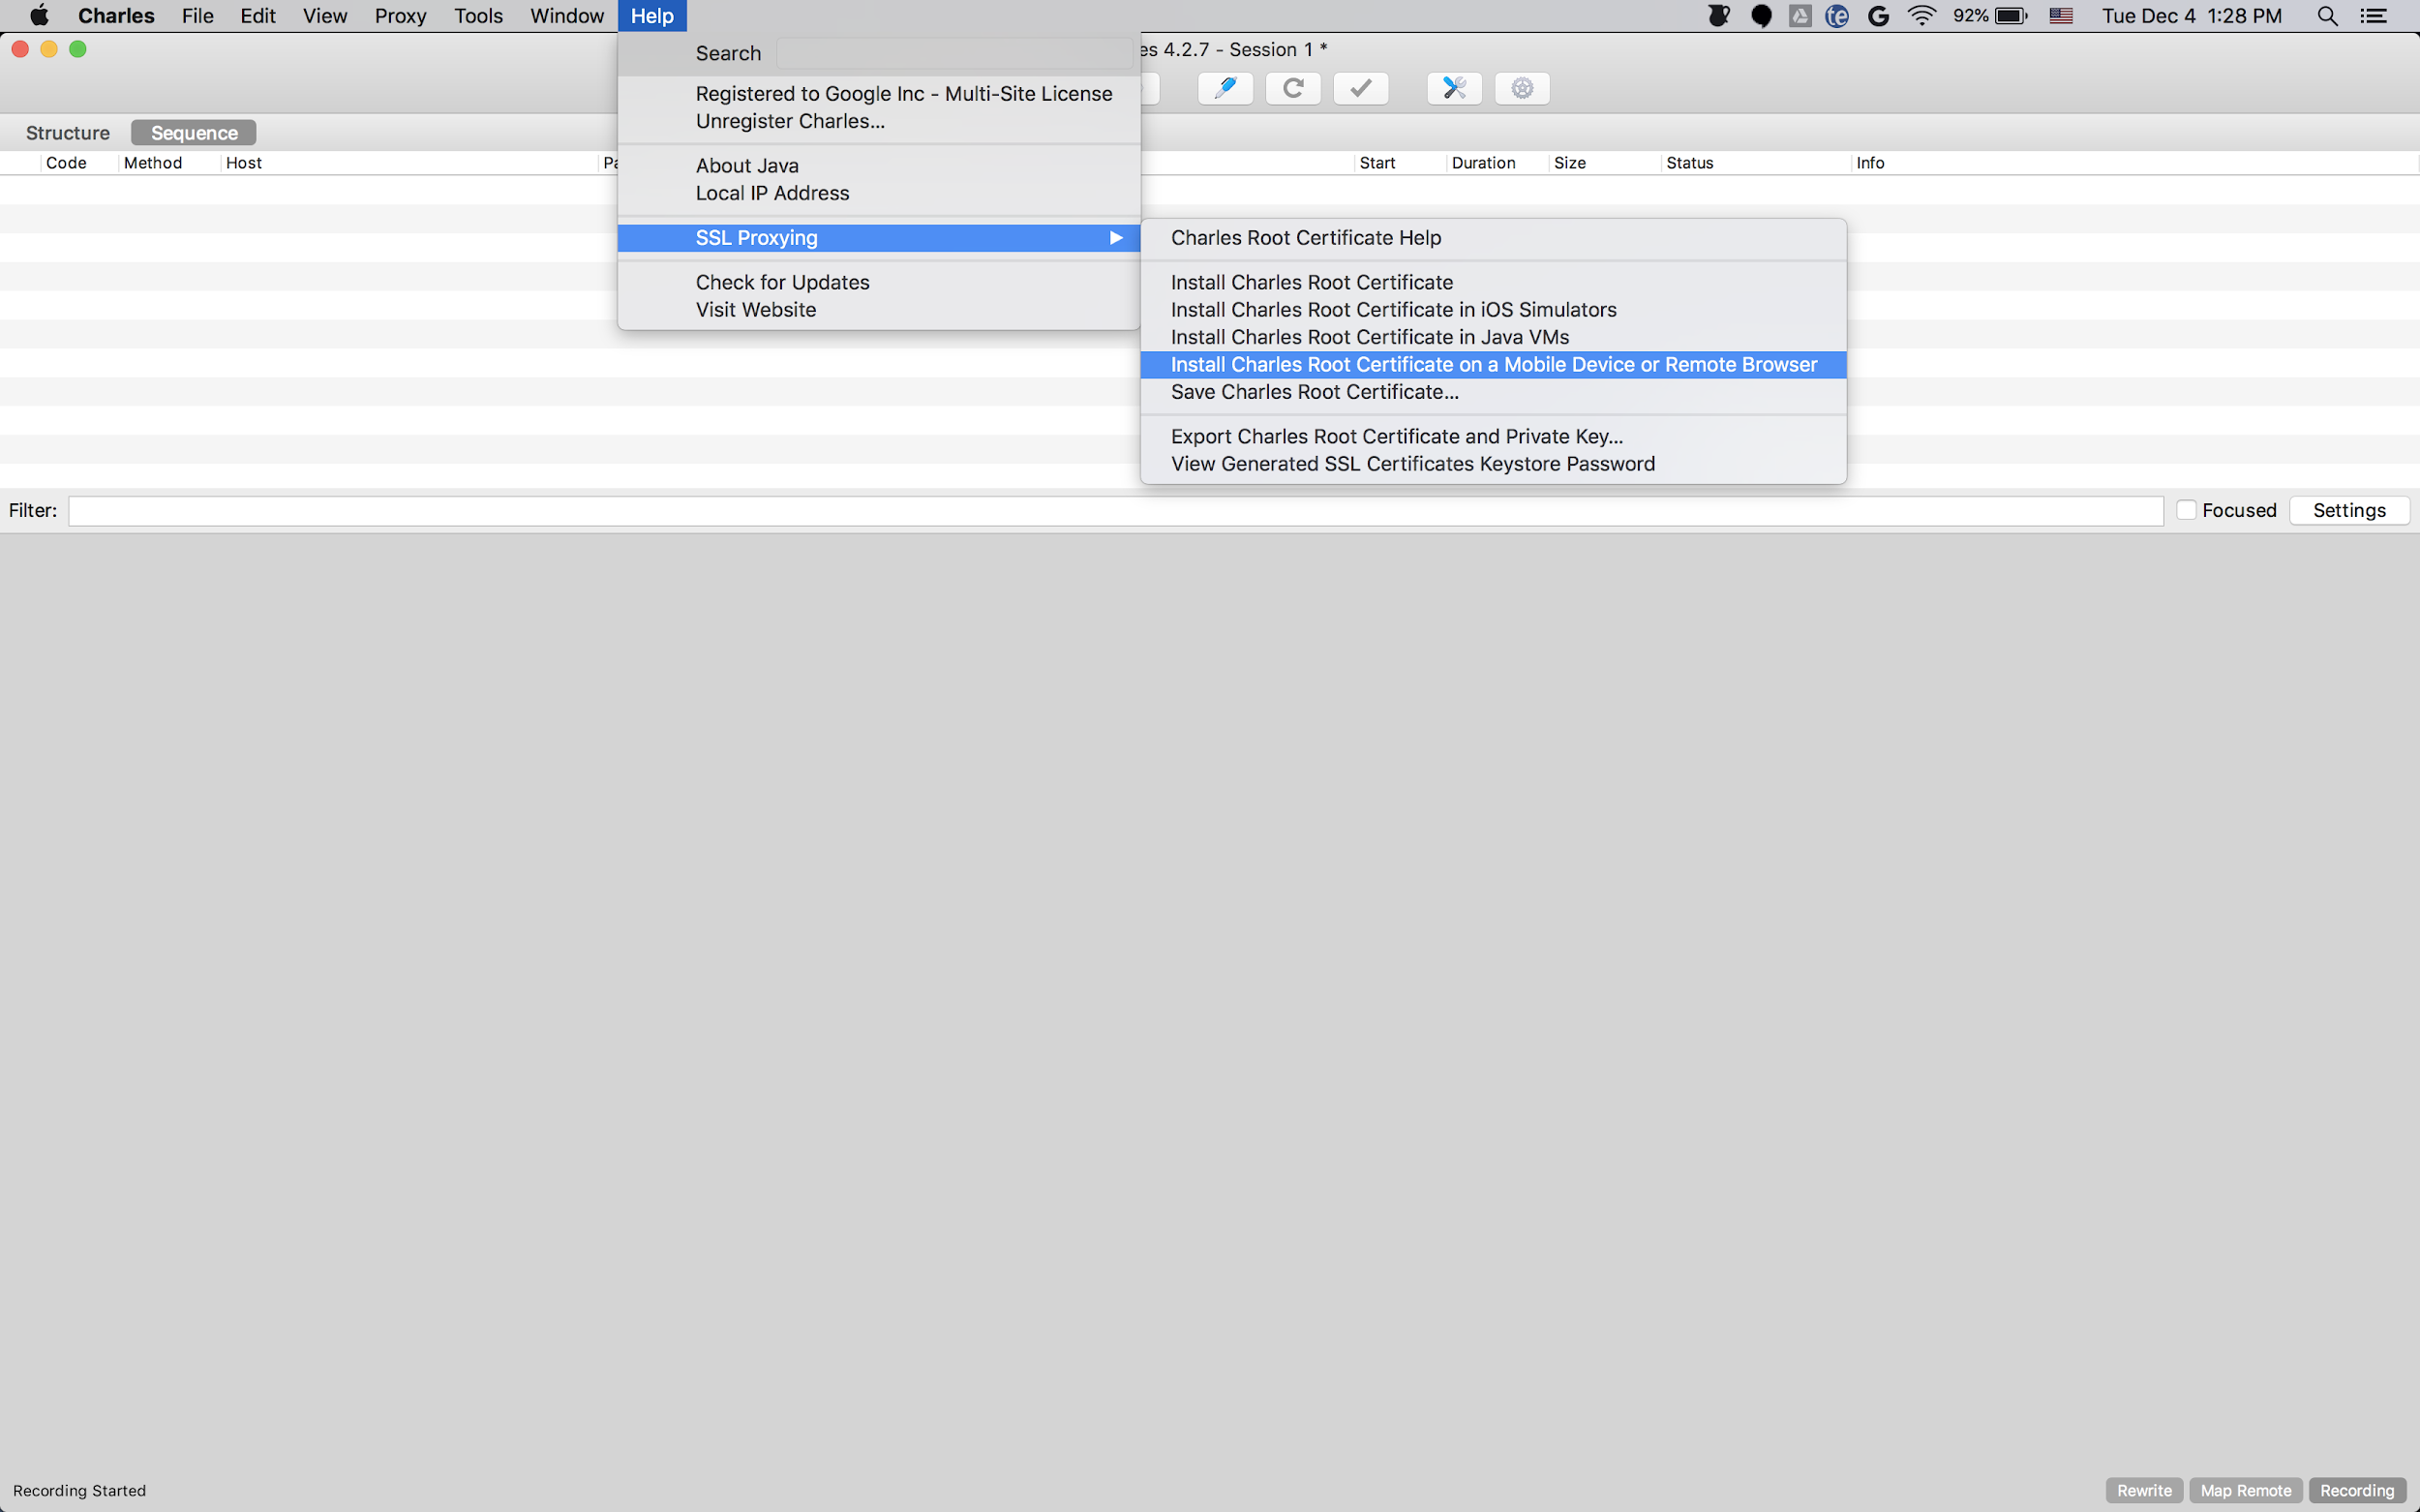
การใช้โปรแกรมจำลองกับพร็อกซีทำได้ง่ายกว่าเนื่องจากโปรแกรมจำลองเชื่อมต่อกับเครือข่าย Wi-Fi เดียวกันกับคอมพิวเตอร์ที่ใช้ Charles อยู่แล้ว เมื่อใช้โปรแกรมจำลองกับพร็อกซี ให้ตั้งค่าพร็อกซีเป็น localhost (http://127.0.0.1) และพอร์ตที่พร็อกซี Charles ทำงานอยู่ (ดูได้ในตัวเลือกเมนู Charles Proxy > Proxy Settings)
หากใช้อุปกรณ์เคลื่อนที่จริง (โทรศัพท์หรือแท็บเล็ต) คุณจะต้อง เชื่อมต่ออุปกรณ์เคลื่อนที่กับเครือข่าย Wi-Fi เดียวกันกับคอมพิวเตอร์ ที่ใช้ Charles โดยใช้การตั้งค่าเครือข่ายขั้นสูง เมื่อตั้งค่าการตั้งค่าพร็อกซีสำหรับอุปกรณ์จริง ให้ใช้ตัวเลือกเมนู Charles Help > Local IP address เพื่อรับที่อยู่ IP ของคอมพิวเตอร์เพื่อป้อนเป็นที่อยู่พร็อกซีในอุปกรณ์ (คุณต้องอยู่ในเครือข่าย Wi-Fi เดียวกันเพื่อให้การตั้งค่านี้ใช้งานได้) ใช้พอร์ตที่พร็อกซี Charles ทำงานอยู่
เปิดใช้พร็อกซี SSL สำหรับแอปบนอุปกรณ์เคลื่อนที่
หากต้องการให้ Charles สกัดกั้นการรับส่งข้อมูล SSL ของแอปบนอุปกรณ์เคลื่อนที่ คุณจะต้องประกาศว่าแอปของคุณเชื่อถือใบรับรอง SSL ที่ผู้ใช้ให้มาได้
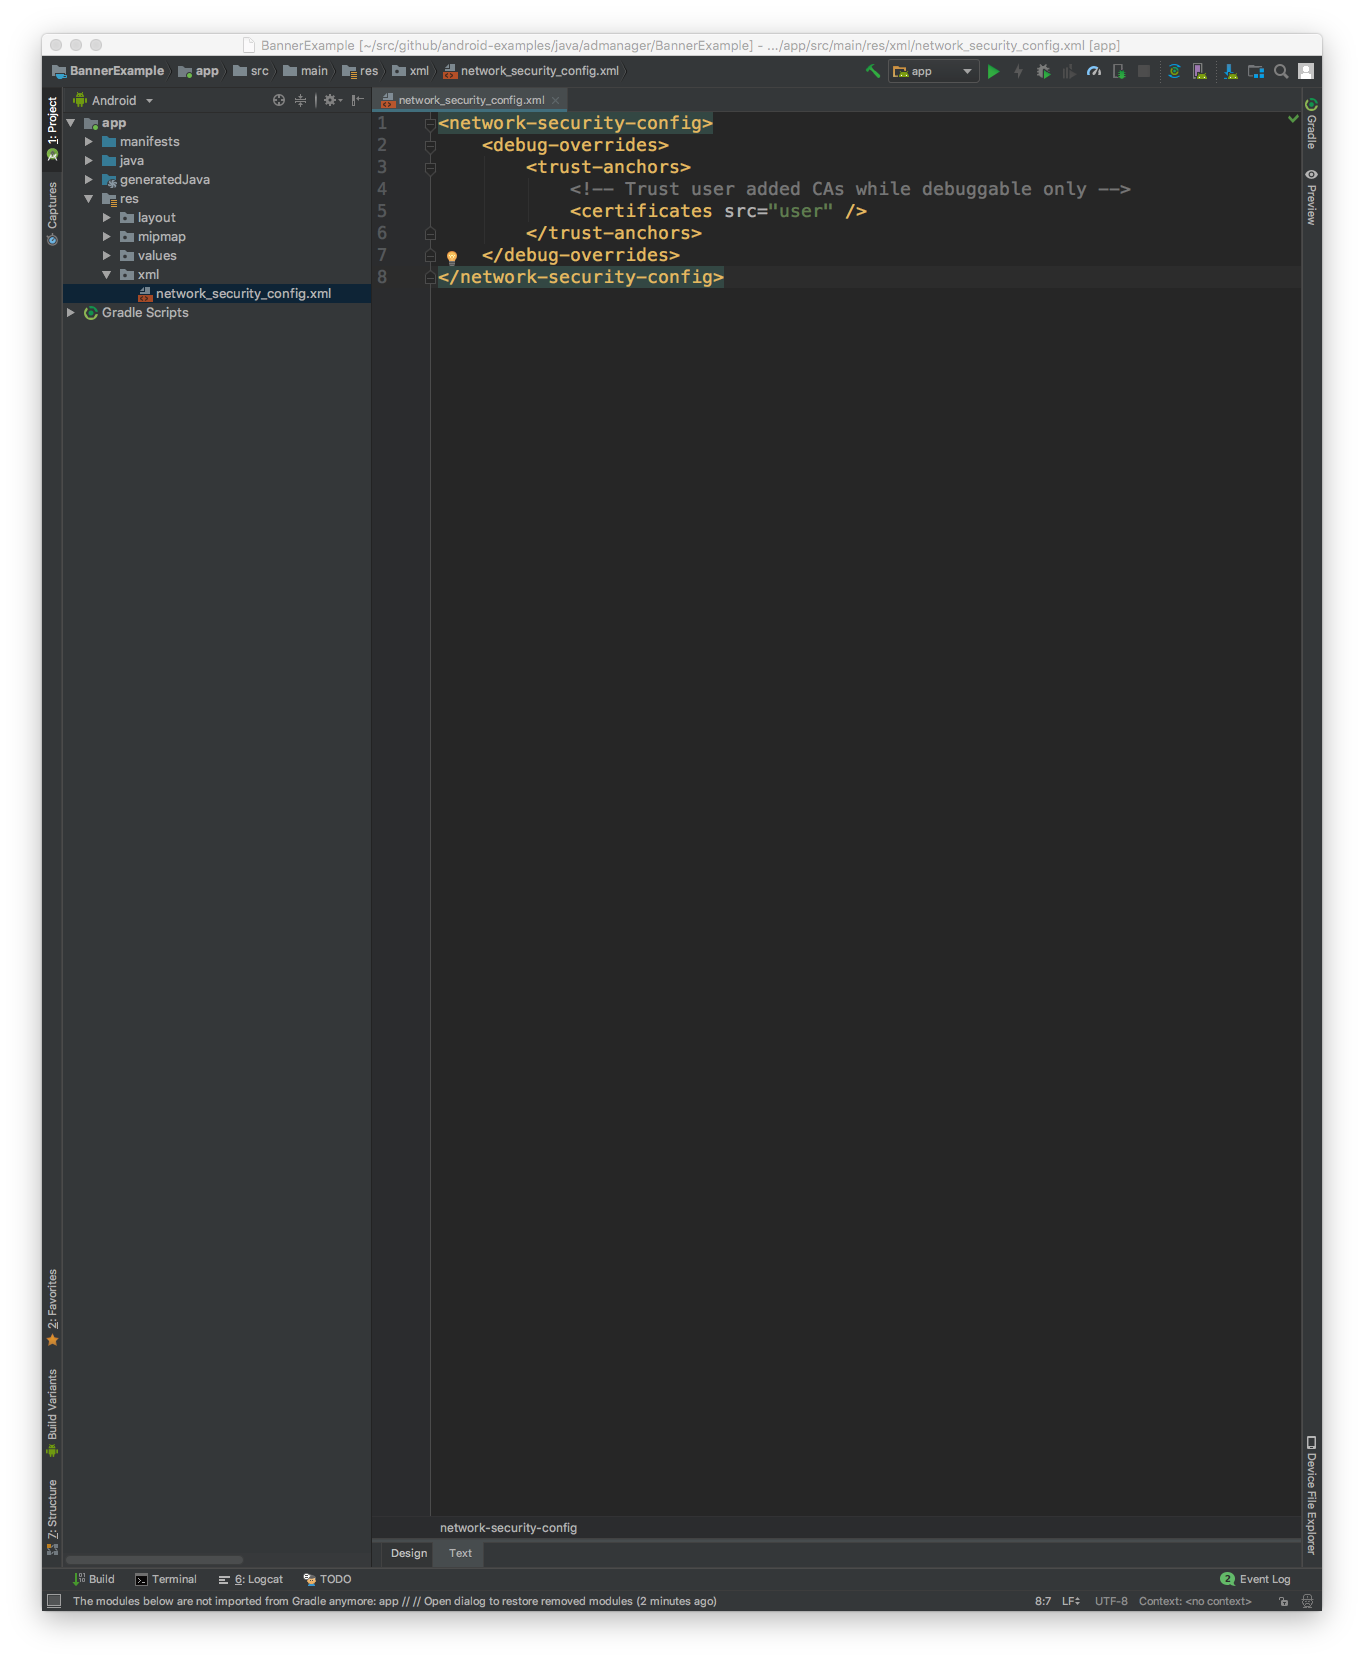
ขั้นแรก คุณจะต้องเพิ่มไฟล์ทรัพยากร XML ใหม่สำหรับ การกำหนดค่าความปลอดภัยของเครือข่าย ภายใต้
<network-security-config>
   <debug-overrides>
       <trust-anchors>
           <!-- Trust user added CAs while debuggable only -->
           <certificates src="user" />
       </trust-anchors>
   </debug-overrides>
</network-security-config>
จากนั้นอัปเดตไฟล์ AndroidManifest.xml เพื่อใช้การกำหนดค่าความปลอดภัยของเครือข่าย
<?xml version="1.0" encoding="utf-8"?>
<manifest ... >
    <application ...
                 android:networkSecurityConfig="@xml/network_security_config"
                 ... >
        ...
    </application>
</manifest>
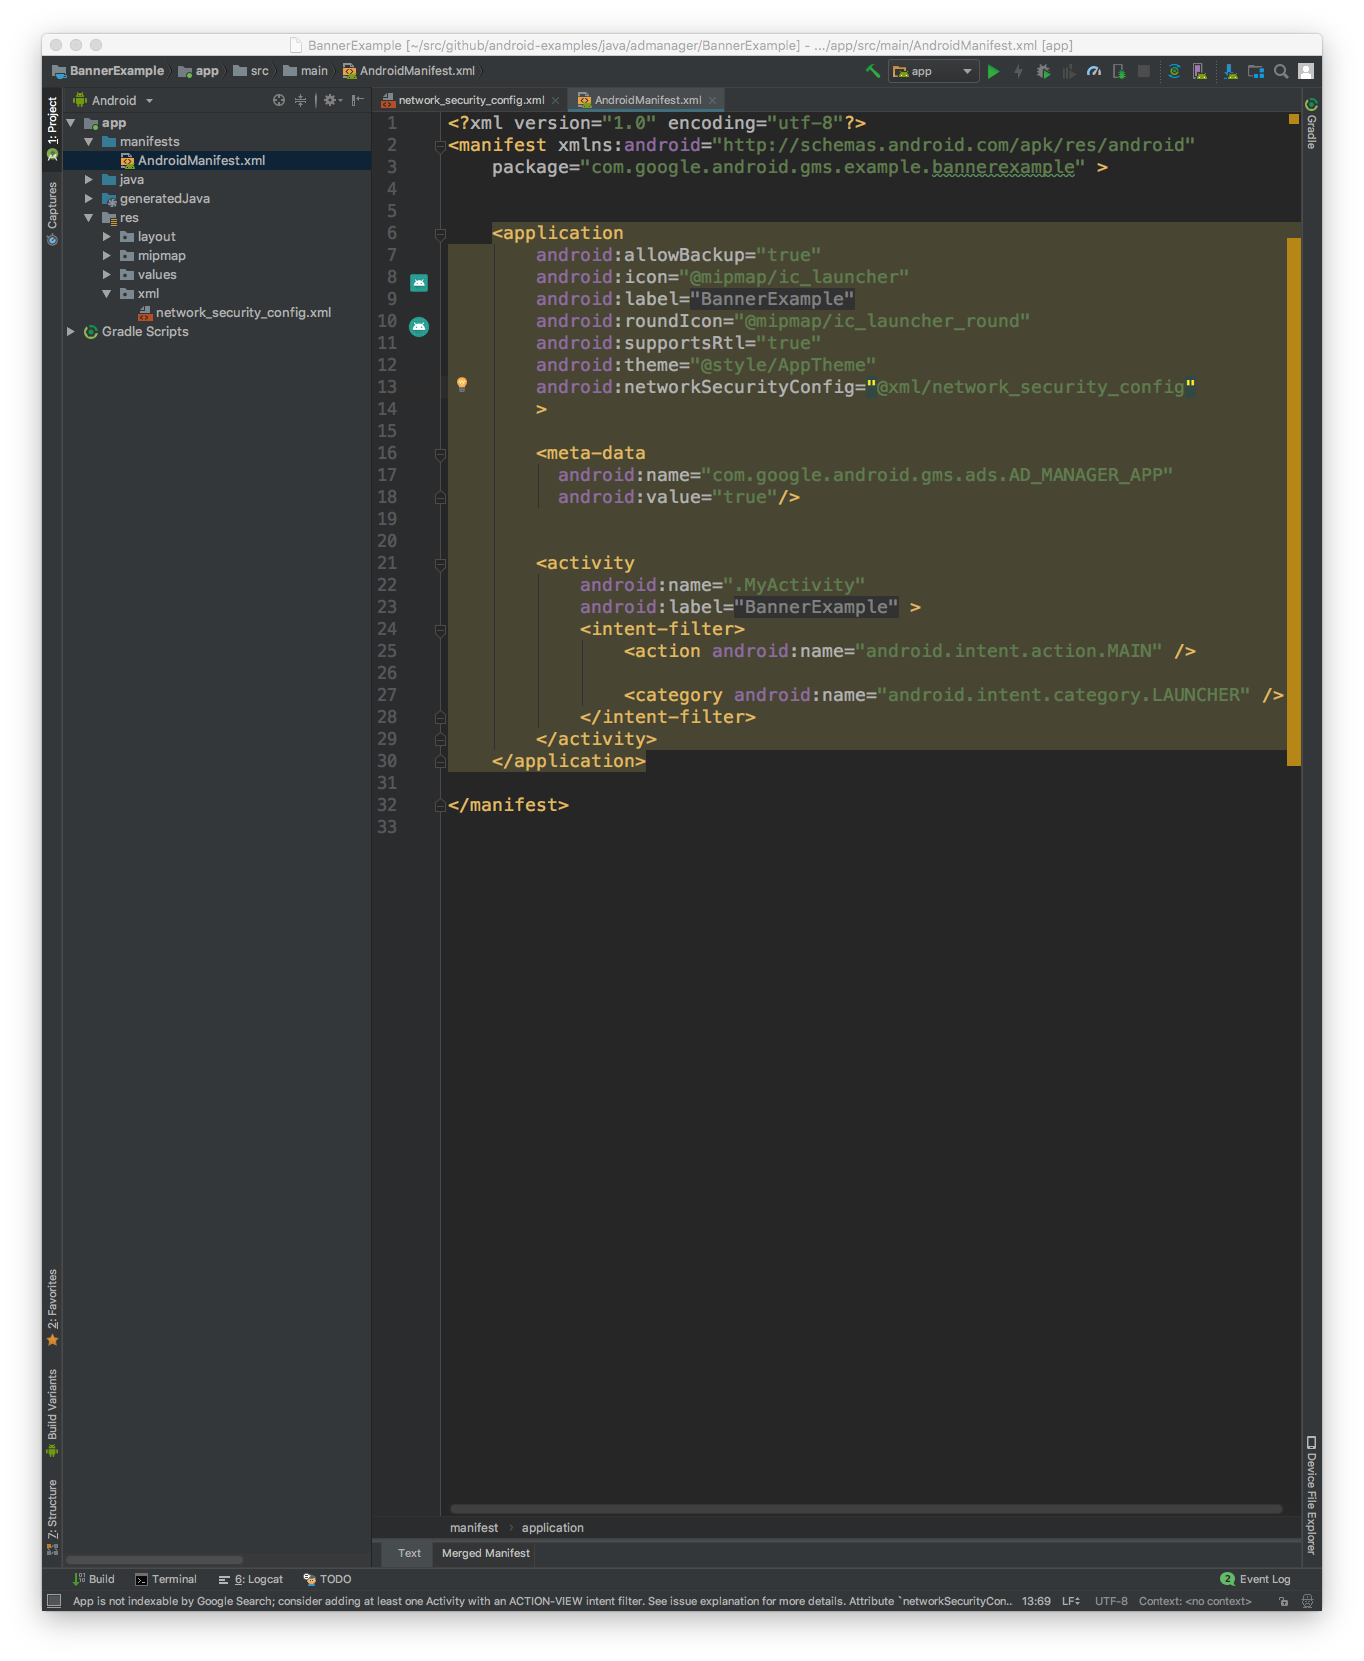
หลังจากนั้น คุณสามารถเปิดแอปบนอุปกรณ์เคลื่อนที่และค้นหาคำขอโฆษณาในบันทึกของ Charles