Page Summary
-
Enhance website speed by offloading Google Ads conversion tracking to a server-side implementation using Google Tag Manager.
-
This setup necessitates prerequisites like Google Ads & Tag Manager admin access, a configured web container, a server container, and a GA4 client.
-
The process involves creating a Conversion Linker tag, defining a Key Event in GA4 and Tag Manager, and setting up a server-side Ads Conversion Tracking tag triggered by the Key Event or specific URLs.
-
Optional enhancements include setting custom conversion values based on user-defined variables and enabling Enhanced Conversions using automatic, manual, or code-based data collection methods for improved user data and attribution.
-
Throughout the implementation, remember to save changes and thoroughly validate the setup to ensure accurate conversion tracking.
Server-side Tag Manager lets you to move your Google Ads conversion tracking tags from the web page to the server. Moving these tags to the server reduces the amount of code you have to run in the page, and helps improve page load speed. This document describes how to configure your Tag Manager web container and server container to use Ads conversion tracking.
Before you begin
This document assumes that you have:
- Admin rights in Google Ads and Google Tag Manager
- Set up Google Tag Manager
- Created a server container
- Set up the Google Analytics: GA4 client
Step 1: Set up the Conversion Linker tag
To allow Google Ads to send data to Tag Manager, you need to set up the Conversion Linker tag.
If you already have a Conversion Linker tag configured in your server container, you can skip this step.
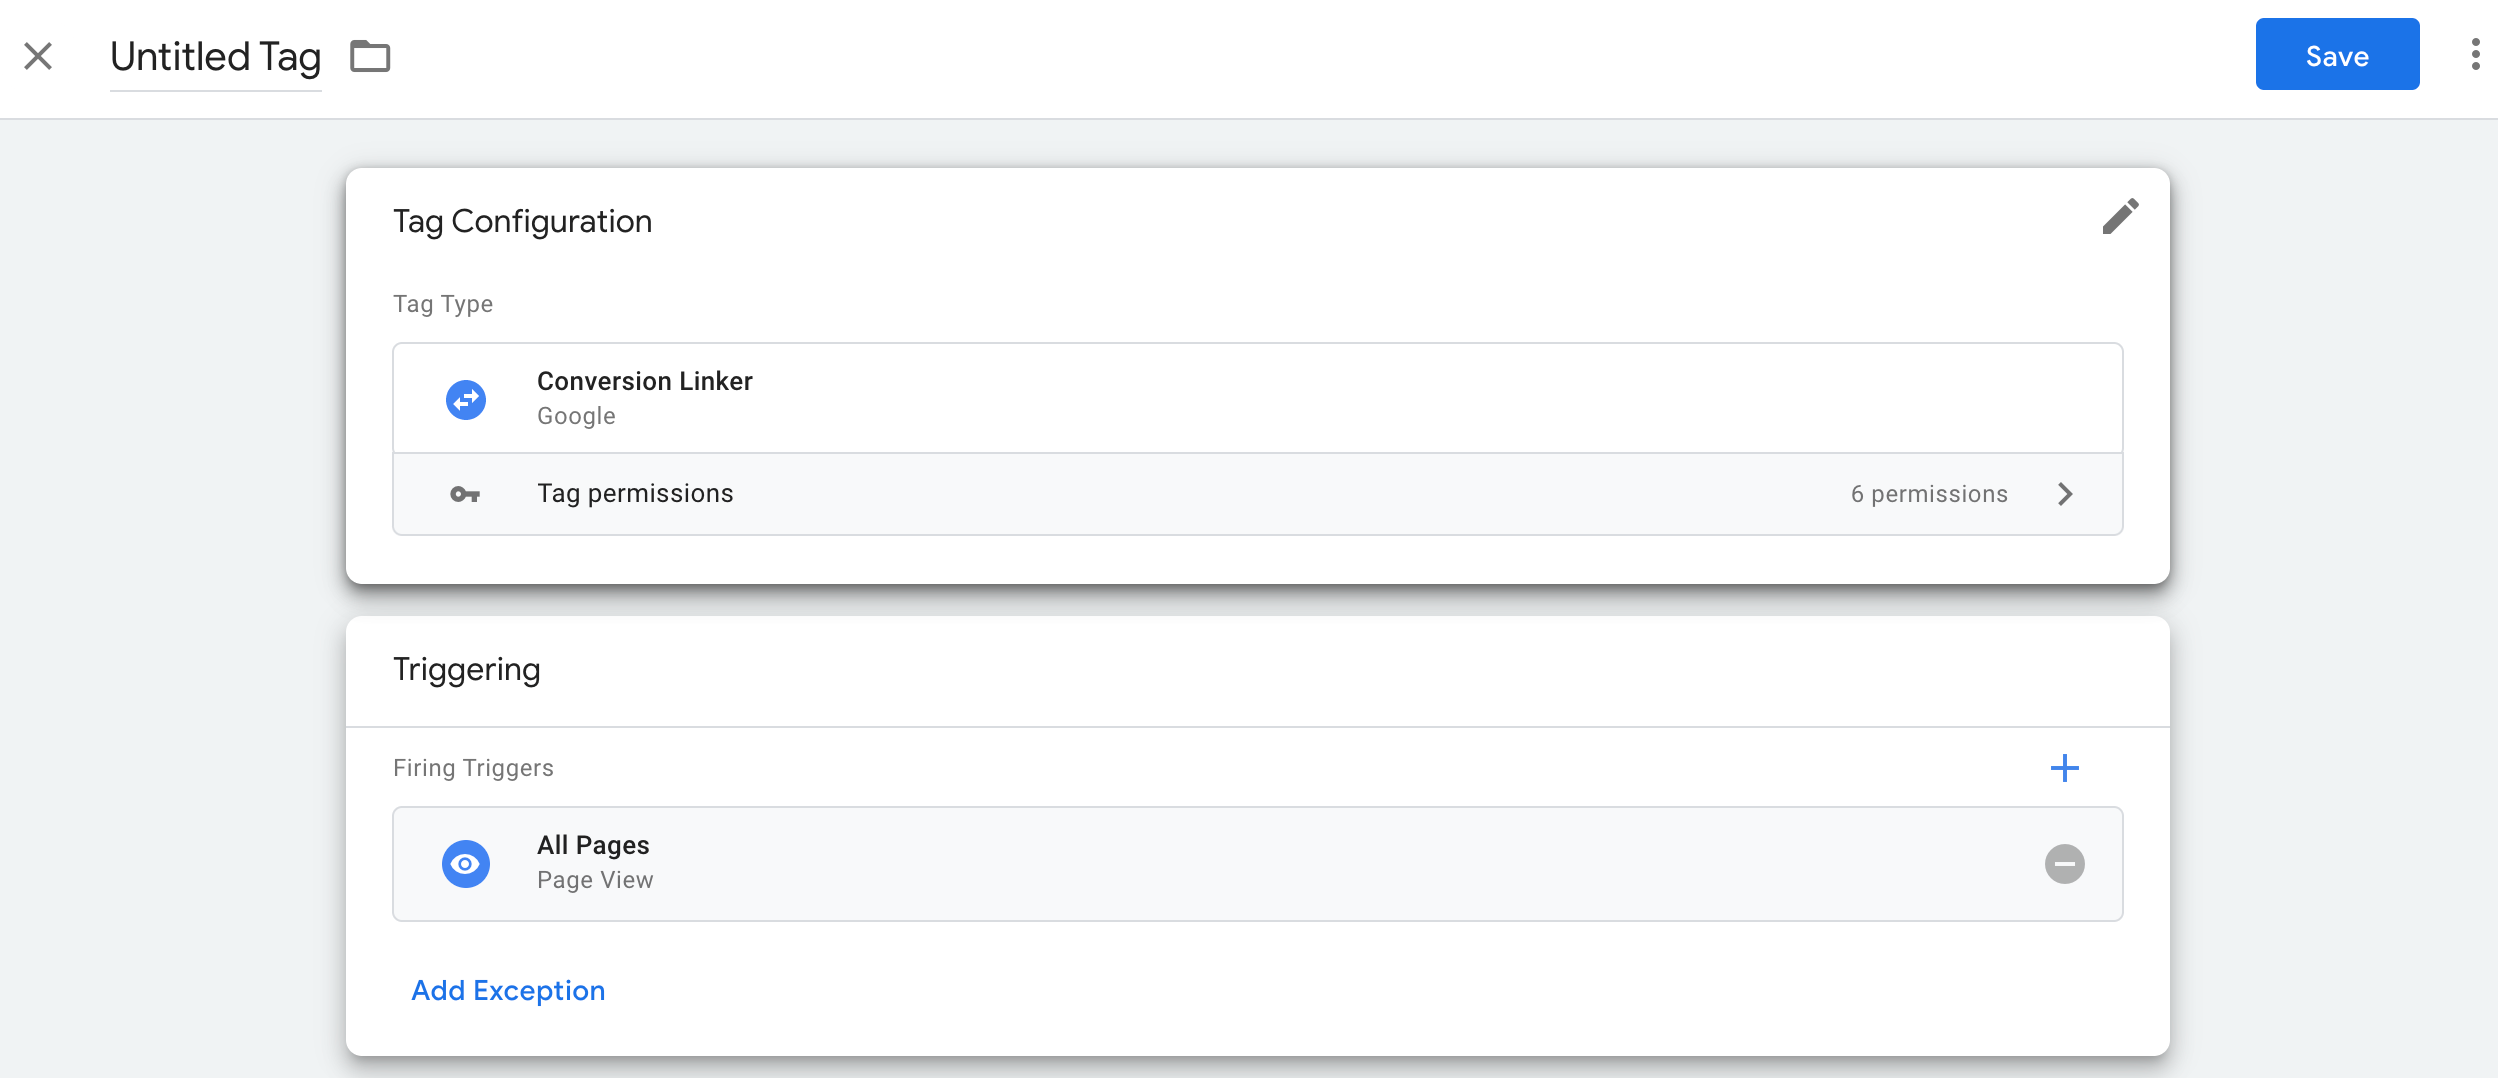
To set up the Conversion Linker tag:
- From your server container workspace, open the Tags menu on the left side of the page.
- Click New to add a new tag.
- Select the Conversion Linker tag type.
- Set up the trigger that will cause the Conversion Linker server-side tag to
fire.
In most cases, the All pages trigger is the best option. - Name the tag and click Save.
Step 2: Set up a key event
To set up a key event, you need to do two things:
- Set up Google Analytics so it recognizes an event as a key event.
- Set up a Google Analytics: GA4 Event tag in the Tag Manager web container to send key events.
If you already have set up key events, and only need to implement the server tag, skip ahead to step 3.
Set up Google Analytics to recognize custom key events
To define a new key event in Google Analytics:
- Open Google Analytics 4
- Open the
 Admin menu on the bottom left.
 - In the property settings list, select
 Key Events.
 - Click New key event button and add the key event name. This can be a recommended event name or a custom event.
- Save the event name.
Set up a key event in Google Tag Manager
If your key event triggers on a Page View event, skip ahead to step 3.
To set up a key event:
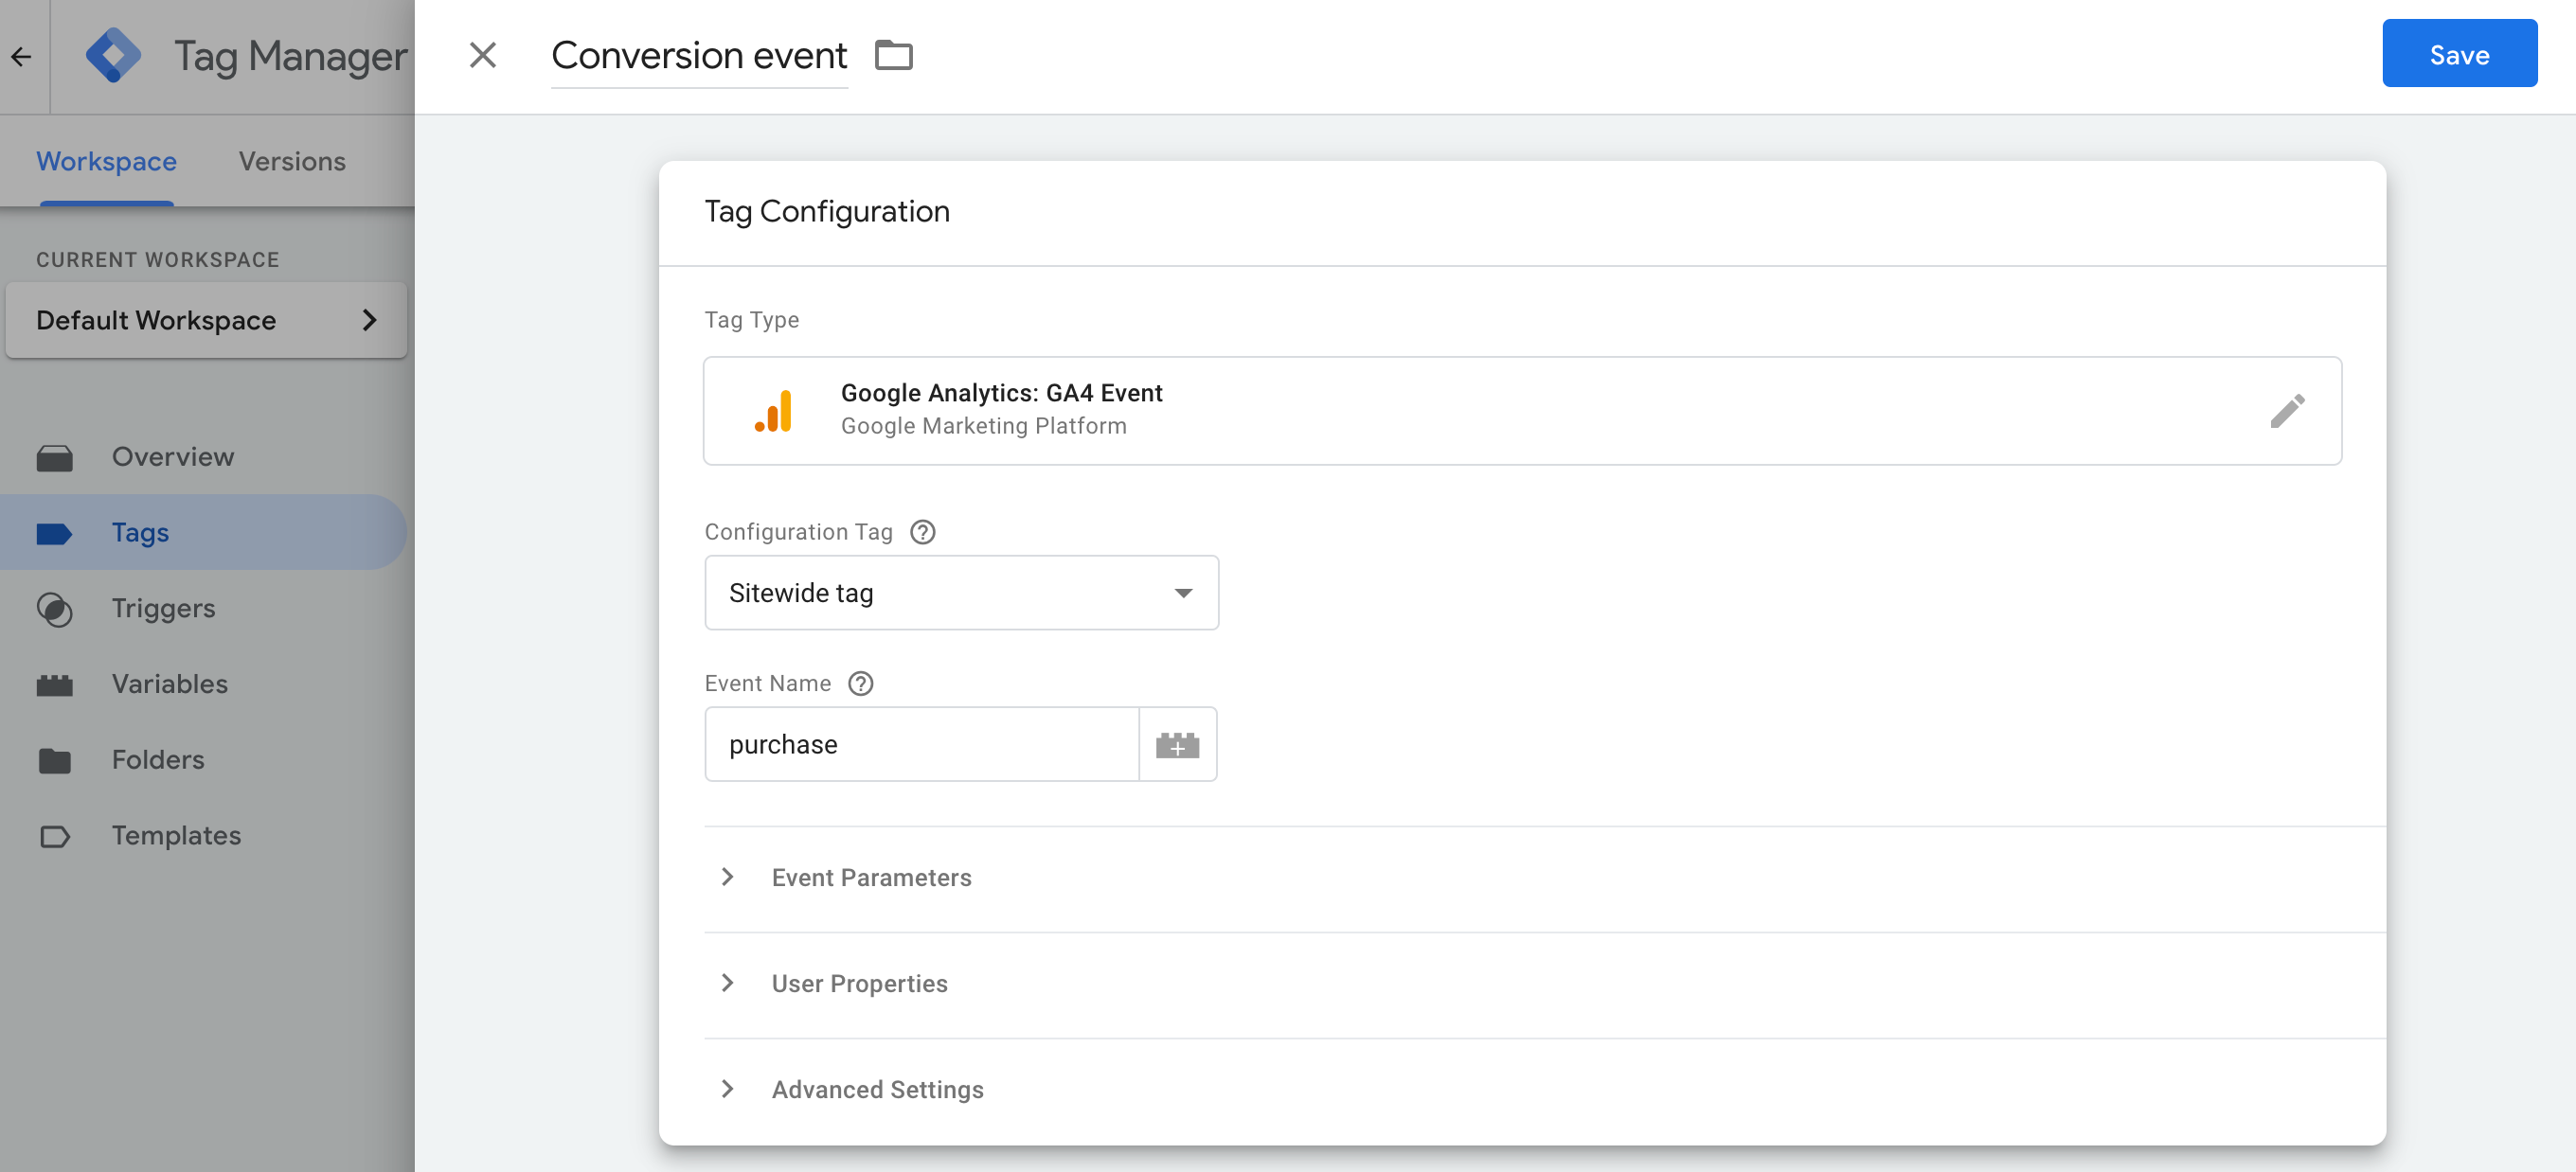
In your web container workspace, add a Google Analytics: GA4 Event tag.
In Configuration tag, select the Google tag for your website.
Enter the event name that corresponds to the key event.
Step 3: Set up the Ads Conversion Tracking tag in the server container
To set up the Ads Conversion Tracking tag:
- In your server container workspace, open the Tags menu on the left side of the page.
- Click New to add a new tag.
Select the Google Ads Conversion Tracking tag type.
Enter the required conversion information (Conversion ID and label). You can find these values in your Google Ads account.
In the Triggering menu, select an existing trigger if it fits your use case. If no pre-existing trigger covers your needs, create a new custom trigger
 .
.To trigger the tag on a custom event:
- Choose the Custom Event trigger.
- Enter the event name that matches the one used in the Google Analytics:
GA4 Event tag.

To trigger only on specific URLs:
- Select the option to trigger on Some Custom Events.
- Add the Page URL variable to equal the URL the tag should trigger on.
Name the tag and click Save.
Optional: Set a conversion value
You can specify a conversion value that is different from the default value
parameter, for example, if you store pricing data in a different database.
To specify a different basis to calculate the conversion value, you need to set
up a variable to pull data from your database in and assign it to your
Ads Conversion Tracking tag.
To create a new variable:
- In your server container, open the Variables menu.
- Create a new user-defined variable for the data input. For example, if you want to use a value from a Firestore database, create a {{Firestore Lookup}} variable.
- Specify the data sources for the variable.
- Name the variable, for example, "Profit lookup" and Save it.
Set up custom conversion values in the Ads Conversion Tracking tag:
- In your server container, open the Tags menu.
- Edit an existing Google Ads Conversion Tracking tag or create a new one.
To configure a custom conversion value, specify these two fields:
- Conversion Value: Either enter a fixed amount or specify the variable you created before.
- Currency Code

Save the tag.
Step 4: Enhanced Conversions
If you don't use Enhanced Conversions, skip ahead to Validate your setup.
To configure Enhanced Conversions follow the steps below.
Set up a user-provided data variable
There are 3 ways in which you can implement enhanced conversions in Tag Manager. You only need to choose one option to collect user-provided data.
| Automatic collection | Manual configuration | Code configuration | |
|---|---|---|---|
| Collection method | Automatically collects user-provided data based on the code of your
website. If you need control over where to collect inputs, opt for a manual or code setup. |
Specify select CSS properties or JavaScript variables to collect
user-provided data. If you need to take control over data formatting and hashing, opt for code configuration. |
Add a code snippet on your website that sends hashed customer data
for matching. This method is the best choice for maximizing the accuracy of enhanced conversions by letting you send consistently formatted data whenever your conversion tag fires. |
| Complexity | Simple | Medium | Complex |
| Skills | No special skills needed | HTML and CSS | Web development |
Automatic collection
- In your web container, open the Variables menu.
- Create a new User-Defined Variable of the type User-Provided Data.
- Set the Type to Automatic collection.
- Name the variable, for example,
My user-defined data. - Click Save.
Manual configuration
- In your web container, open the Variables menu.
- Create a new User-Defined Variable of the type User-Provided Data.
- Set the Type to Manual configuration.
For the relevant user data field that you would like to provide via enhanced conversions, add a new or existing variable.
To specify an element from the DOM, create a New Variable > Variable Configuration > DOM Element.
Under Selection Method, you can either use a CSS Selector or ID. Tip: If your CSS variables change frequently, add an HTML ID to your site and use the ID variable.
Enter the CSS selector or ID name. You can leave the Attribute name field blank.
Name and Save the DOM Element variable. Your screen will then return to the User-Provided Data settings.
Name the User-Provided Data variable, for example,
My user-defined data.Click Save.
Code configuration
Step 1: Identify and define your enhanced conversions variables
You can either send unhashed data, which Google will hash before the data
reaches the servers, or pre-hashed data. If you decide to send pre-hashed data,
please encode the data using hex-encoded SHA256. In either case, provide at
least one of the following fields: email or phone_ number.
To push unhashed data to the data layer:
On your website, store user-provided data as key-value pairs in a JavaScript variable. For example:
var leadsUserData = {
  'email': 'name@example.com',
  'phone_number': '+11234567890',
  'address': {
    first_name: 'John',
    last_name: 'Doe',
    street: '123 Lemon',
    city: 'Some city',
    region: 'CA',
    country: 'US',
    postal_code: '12345',
  },
};
Send the user data together with an event using dataLayer.push(). For example:
<script>
  dataLayer.push({
    'event': 'formSubmitted',
    'leadsUserData': {
      'email': 'name@example.com',
      'phone_number': '+11234567890',
      'address': {
         first_name: 'John',
         last_name: 'Doe',
         street: '123 Lemon',
         city: 'Some city',
         region: 'CA',
         country: 'US',
        postal_code: '12345',
       },
     },
  });
<script>
The variable leadsUserData is now available in Google Tag Manager.
To push pre-hashed data to the data layer:
On your website, hash user-provided using hex-encoded SHA256. The key for encoded data needs to start with
sha256_. For example:{'sha256_email_address':await hashEmail(email.trim()), }Send the user data together with an event using
dataLayer.push(). The example below shows a data layer implementation that assumes you have written a hashing function yourself, which you run asynchronously.<script> dataLayer.push({ 'event': 'formSubmitted', 'leadsUserData': { 'sha256_email_address': await hashEmail(email.trim()), 'sha256_phone_number': await hashPhoneNumber(phoneNumber), 'address': { sha265_first_name: await hashString(firstname), sha256_last_name: await hashString(lastname), sha256_street: await hashString(streetAddress), postal_code: '12345', }, }, }); <script>
The variable leadsUserData is now available in Google Tag Manager.
Step 2: Create the user-provided data variable
- In your web container, open the Variables menu.
- Create a new User-Defined Variable of the type User-Provided Data.
- Set the Type to Code.
- For the relevant user data field you want to provide, click the drop-down menu and select New Variable.
- Under Choose Variable Type, select Data Layer Variable.
- In the Data Layer Variable, reference your stored user data. For example,
leadsUserData. - Name and Save the Data Layer variable. Your screen will then return to the User-Provided Data settings.
- Name the User-Provided Data variable, for example,
My user-defined data. - Click Save.
Assign the variable to the Google tag
- In your web container, open the Tags menu.
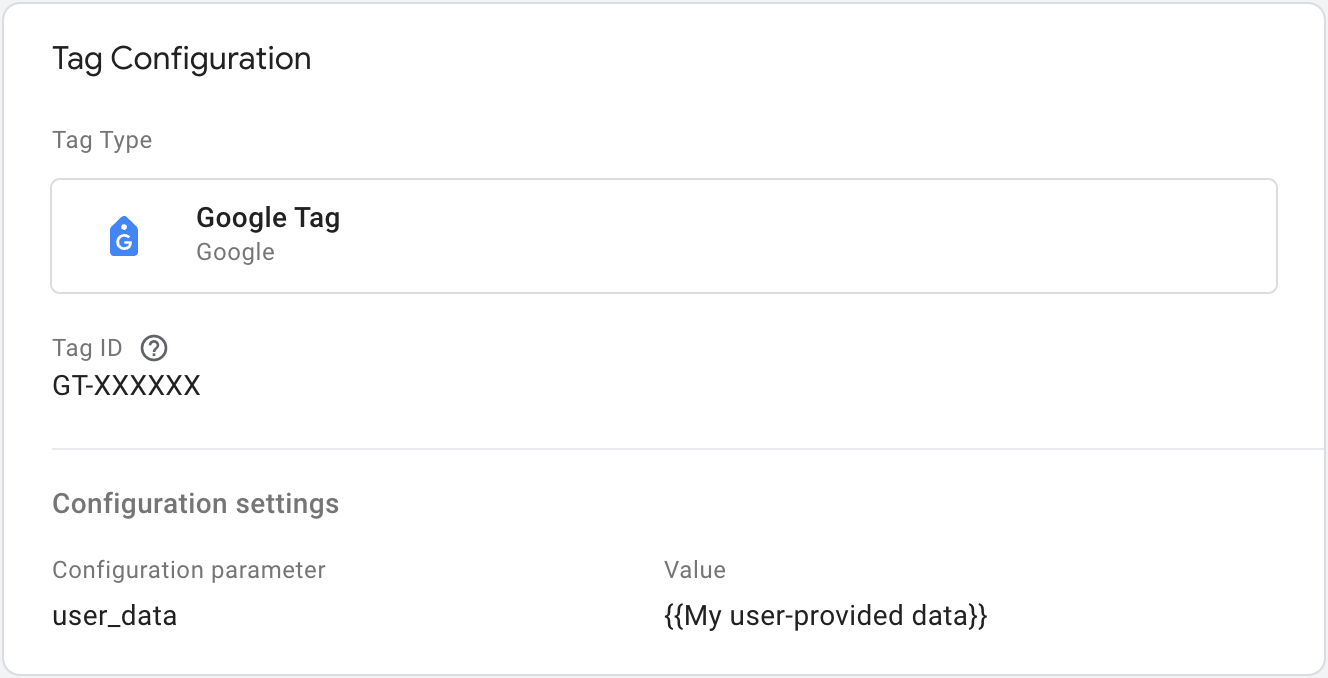
- Edit the Google tag you use to send data to the tagging server.
- Under Configuration settings, add a new Configuration parameter
called
user_data. Set the Value to the User-provided Data variable, for example,{{My user-provided data}}. Save your changes. Your tag should look like this:
Configure Server-side Ads Conversion Tracking tag
To enable Enhanced Conversions in your server container:
- In your server workspace, open the Tags menu.
- Edit the Google Ads Conversion Tracking tag.
Press Save to save your changes.

Step 5: Validate your setup
Once you start sending data with the server container, you can check to see if it’s working properly by following these steps:
- Open your website.
- In your Google Tag Manager server container, select Preview. Tag Assistant will start and load your server container.
- The Tags tab shows you all tags that have fired. Make sure to check if the tag you configured fired.
- The Console tab shows any errors that occurred during the data transmission to the server container. Check for errors and resolve them.
For more help with debugging Tag Manager containers see preview and debug help.
Next steps
Once your Google Ads Conversion Tracking tag works as intended, you can remove any equivalent Ads Conversion Tracking tags in a web container to avoid data duplication.
If you are also using Google Ads remarketing campaigns and want to measure them using server-side tagging, set up Google Ads remarketing.