Page Summary
-
The turn-by-turn data feed provides navigation guidance information (icons, road names, distances, and time) for devices with limited display capabilities.
-
Implement an event listener for the
didChangeNavInfoevent to access trip and step information and provide turn-by-turn navigation updates to users. -
Monitor the navigation state (enroute, rerouting, stopped) using the
navStateproperty ofGMSNavigationNavInfoto display appropriate guidance and handle navigation changes. -
Utilize lane guidance information from
GMSNavigationLaneandGMSNavigationLaneDirectionto visualize recommended lane directions for users. -
Create and use maneuver icons based on
GMSNavigationManeuvervalues or leverage the SDK's built-in icon generation for clear visual turn instructions.
A turn-by-turn data feed provides navigation-only information to devices not designed for map-based navigation guidance. It provides upcoming maneuvers with elements you supply:
- icons (left, right, U-turn)
- turn numbers in roundabouts
- road names
- estimated distances and time to the next navigation step or final destination
You can use the turn-by-turn feed to create experiences where the full Navigation SDK UI is not appropriate, such as for small screen displays. For example, you might use this for two-wheeled vehicle riders, where you can project navigation-only guidance to help them reach their destinations faster and more confidently with minimal distractions.
Essential navigation display elements
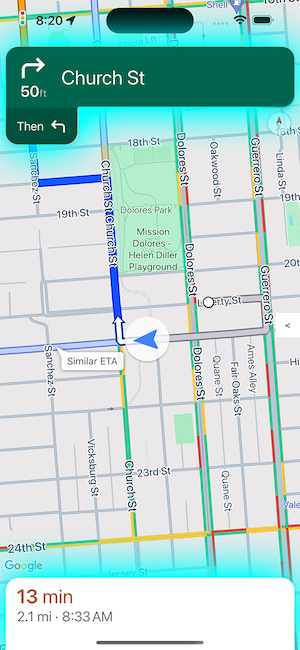
The primary fields for each navigation step are the full road name,
maneuver, and total distance of the step, which are available in
GMSNavigationStepInfo.
For the overall trip, you may want to display the remaining time and distance
to the current step or to the destination, all of which are available in
GMSNavigationNavInfo.
The image to the right shows an example of these essential navigation elements.
Set up an event listener
To use navigation-only data, you have to implement an event listener for the
didChangeNavInfo event. Within the event listener, access trip and
step information to provide turn by turn navigation to your users.
To implement event handlers, the view controller of the map must implement the
GMSNavigatorListener
protocol. For detailed information on handling events in the
Navigation SDK for iOS, see Listen for navigation events.
Handling the didChangeNavInfo event
Create a listener for the didChangeNavInfo event to add turn-by-turn support
to your app. In the event listener, use the following classes and enums to
control turn-by-turn navigation:
GMSNavigationNavInfo— Class defining information about the state of navigation.GMSNavigationStepInfo— Class defining information about a single step along a navigation route.GMSNavigationNavState— Enum defining the current state of a navigation, such as enroute, rerouting, or stopped.GMSNavigationDrivingSide— Enum defining whether this step is on a drive-on-right or drive-on-left route.GMSNavigationManeuver— Enum defining the navigation action to take, such as turn left or turn right.
Shown below are example event listeners for the didChangeNavInfo event:
Swift
  // ViewController.swift
  class SomeViewController: UIViewController {
    ...
    mapView.navigator?.add(self);
    ...
  }

  extension SomeViewController: GMSNavigatorListener {
    func navigator(_ navigator: GMSNavigator,
                   didUpdateNavInfo navInfo: GMSNavigationNavInfo) {

      // Get the current step information
      if navInfo.navState == .enroute {
        if let currentStep = navInfo.currentStep {
          ...
          roadNameLabel.text = currentStep.simpleRoadName
          ...
        }
      }
    }
  }
Objective-C
  // ViewController.h
  @interface SomeViewController () <GMSNavigatorListener>

  @end

  // ViewController.m
  @implementation SomeViewController
  // Some initialization code.
  ... {
    ...
    [_mapView.navigator addListener:self];
    ...
  }

  #pragma mark GMSNavigatorListener
  - (void)navigator:(GMSNavigator *)navigator didUpdateNavInfo:(GMSNavigationNavInfo *)navInfo {
    // Get the current step information
    if (navInfo.navState == GMSNavigationNavStateEnroute) {
      GMSNavigationStepInfo *currentStep = navInfo.currentStep;
      if (currentStep) {
        ...
        roadNameLabel.text = currentStep.simpleRoadName;
        ...
      }
    }
    ...
  }
Navigation states
Use navState property of GMSNavigationNavInfo
to get the current state of navigation, which is one of the following:
Enroute - The
GMSNavigationNavStateEnroutestate means that guided navigation is active and the user is on the provided route. Information about the current upcoming maneuver step is available.Rerouting -
GMSNavigationNavStateReroutingmeans that navigation is in progress, but the navigator is looking for a new route. The upcoming maneuver step is not available, because there's no new route yet.Stopped -
GMSNavigationNavStateStoppedmeans navigation has ended. For example, navigation stops when the user exits navigation in the app. In the sample app, aGMSNavigationNavStateStoppedstate clears the navigation info display to prevent lingering step instructions from being displayed.
Lane guidance
The Navigation SDK represents lanes in the navigation turn card as
GMSNavigationLane and GMSNavigationLaneDirection data objects. A
GMSNavigationLane object represents a specific lane during navigation and has
a list of GMSNavigationLaneDirection objects that describe all the turns that
can be made from this lane.
The recommended direction a driver should take in a lane is marked using the
recommended field.
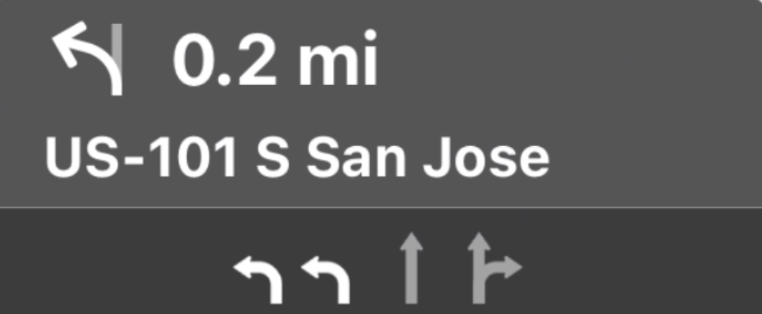
Lane guidance example
The following snippet illustrates the data representation of the lanes displayed in the preceding screenshot.
// Lane 1
GMSNavigationLaneDirections =
  [{/*GMSNavigationLaneShape=*/
GMSNavigationLaneShapeNormalLeft, /*recommended=*/ true}]

// Lane 2
GMSNavigationLaneDirections =
  [{/*GMSNavigationLaneShape=*/
GMSNavigationLaneShapeNormalLeft, /*recommended=*/ true}]

// Lane 3
GMSNavigationLaneDirections =
  [{/*GMSNavigationLaneShape=*/
GMSNavigationLaneShapeStraight, /*recommended=*/ false}]

// Lane 4
GMSNavigationLaneDirections =
  [{/*GMSNavigationLaneShape=*/
GMSNavigationLaneShapeStraight, /*recommended=*/ false},
{/*GMSNavigationLaneShape=*/ GMSNavigationLaneShapeNormalRight, /*recommended=*/ false}]
Lane guidance images
The Navigation SDK supports generation of lane images for each navigation step
as conveyed by GMSNavigationStepInfo. These icons fit CarPlay's image sizing
guidance.
Swift
let currentStepInfo = navInfo.currentStep

let options = GMSNavigationStepImageOptions()
options.maneuverImageSize = .square96
options.screenMetrics = UIScreen.mainScreen

let maneuverImage = currentStepinfo.maneuverImage(options: options)
Objective-C
GMSNavigationStepInfo *stepInfo = navInfo.currentStep;

GMSNavigationStepImageOptions *options = [[GMSNavigationStepImageOptions alloc] init];
options.maneuverImageSize = GMSNavigationManeuverImageSizeSquare96;
options.screenMetrics = UIScreen.mainScreen;

UIImage* maneuverImage = [stepInfo maneuverImageWithOptions:options];
Creating icons for maneuvers
![]()
The GMSNavigationManeuver
enum defines each possible maneuver that could occur while navigating, and you
can get the maneuver for a given step from the maneuver property of
GMSNavigationStepInfo.
You must create maneuver icons and pair them with their associated maneuvers.
For some maneuvers, you can set up a one-to-one mapping to an icon, such as
GMSNavigationManeuverDestinationLeft and
GMSNavigationManeuverDestinationRight. However, since some maneuvers share
characteristics with other maneuvers, you might want to map more than one
maneuver to a single icon. For example GMSNavigationManeuverTurnLeft and
GMSNavigationManeuverOnRampLeft could both map to the left turn icon.
Some maneuvers contain an additional "Clockwise" or "CounterClockwise" label, which the SDK determines based on the driving side of a country. For example, in countries where driving is on the left side of the road, drivers take a roundabout or U-turn in a clockwise direction, whereas right-side-of-the-road countries go counterclockwise. The Navigation SDK detects whether a maneuver occurs in left- or right-side traffic and outputs the appropriate maneuver. Therefore, your maneuver icon may be different for a clockwise versus a counterclockwise maneuver.
Expand to see examples icons for different maneuvers
| Sample Icon | Turn-By-Turn Maneuvers |
|---|---|
 |
DEPARTUNKNOWN |
 |
STRAIGHTON_RAMP_UNSPECIFIEDOFF_RAMP_UNSPECIFIEDNAME_CHANGE
|
 |
TURN_RIGHTON_RAMP_RIGHT
|
 |
TURN_LEFTON_RAMP_LEFT
|
 |
TURN_SLIGHT_RIGHTON_RAMP_SLIGHT_RIGHTOFF_RAMP_SLIGHT_RIGHT
|
 |
TURN_SLIGHT_LEFTON_RAMP_SLIGHT_LEFTOFF_RAMP_SLIGHT_LEFT
|
 |
TURN_SHARP_RIGHTON_RAMP_SHARP_RIGHTOFF_RAMP_SHARP_RIGHT
|
 |
TURN_SHARP_LEFTON_RAMP_SHARP_LEFTOFF_RAMP_SHARP_LEFT
|
 |
TURN_U_TURN_COUNTERCLOCKWISEON_RAMP_U_TURN_COUNTERCLOCKWISEOFF_RAMP_U_TURN_COUNTERCLOCKWISE
|
 |
TURN_U_TURN_CLOCKWISEON_RAMP_U_TURN_CLOCKWISEOFF_RAMP_U_TURN_CLOCKWISE
|
 |
ROUNDABOUT_SHARP_RIGHT_COUNTERCLOCKWISE
|
 |
ROUNDABOUT_SHARP_RIGHT_CLOCKWISE
|
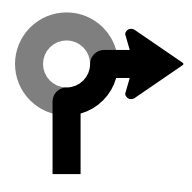 |
ROUNDABOUT_RIGHT_COUNTERCLOCKWISE
|
 |
ROUNDABOUT_RIGHT_CLOCKWISE
|
 |
ROUNDABOUT_SLIGHT_RIGHT_COUNTERCLOCKWISE
|
 |
ROUNDABOUT_SLIGHT_RIGHT_CLOCKWISE
|
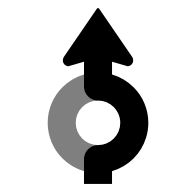 |
ROUNDABOUT_STRAIGHT_COUNTERCLOCKWISE
|
 |
ROUNDABOUT_STRAIGHT_CLOCKWISE
|
 |
ROUNDABOUT_SLIGHT_LEFT_COUNTERCLOCKWISE
|
 |
ROUNDABOUT_SLIGHT_LEFT_CLOCKWISE
|
 |
ROUNDABOUT_LEFT_COUNTERCLOCKWISE
|
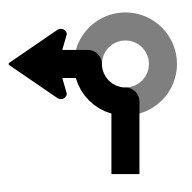 |
ROUNDABOUT_LEFT_CLOCKWISE
|
 |
ROUNDABOUT_SHARP_LEFT_COUNTERCLOCKWISE
|
 |
ROUNDABOUT_SHARP_LEFT_CLOCKWISE
|
 |
ROUNDABOUT_U_TURN_COUNTERCLOCKWISE
|
 |
ROUNDABOUT_U_TURN_CLOCKWISE
|
 |
ROUNDABOUT_COUNTERCLOCKWISE
|
 |
ROUNDABOUT_CLOCKWISE
|
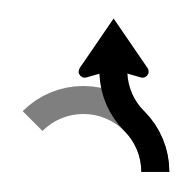 |
ROUNDABOUT_EXIT_COUNTERCLOCKWISE
|
 |
ROUNDABOUT_EXIT_CLOCKWISE
|
 |
MERGE_RIGHTOFF_RAMP_RIGHT
|
 |
MERGE_LEFTOFF_RAMP_LEFT
|
 |
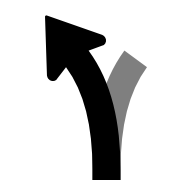
FORK_RIGHTTURN_KEEP_RIGHTON_RAMP_KEEP_RIGHTOFF_RAMP_KEEP_RIGHT
|
 |
FORK_LEFTTURN_KEEP_LEFTON_RAMP_KEEP_LEFTOFF_RAMP_KEEP_LEFT
|
 |
MERGE_UNSPECIFIED
|
 |
DESTINATION
|
 |
DESTINATION_RIGHT
|
 |
DESTINATION_LEFT
|
 |
FERRY_BOAT
|
 |
FERRY_TRAIN
|
Use generated icons
The Navigation SDK supports generation of maneuver icons for a given
GMSNavigationStepInfo. These icons fit CarPlay image sizing
guidance.
Swift
let currentStepInfo = navInfo.currentStep

let options = GMSNavigationStepImageOptions()
options.maneuverImageSize = .square96
options.screenMetrics = UIScreen.mainScreen

let maneuverImage = currentStepinfo.maneuverImage(options: options)
Objective-C
GMSNavigationStepInfo *stepInfo = navInfo.currentStep;

GMSNavigationStepImageOptions *options = [[GMSNavigationStepImageOptions alloc] init];
options.maneuverImageSize = GMSNavigationManeuverImageSizeSquare96;
options.screenMetrics = UIScreen.mainScreen;

UIImage* maneuverImage = [stepInfo maneuverImageWithOptions:options];
