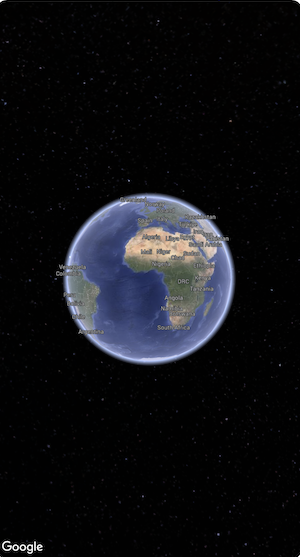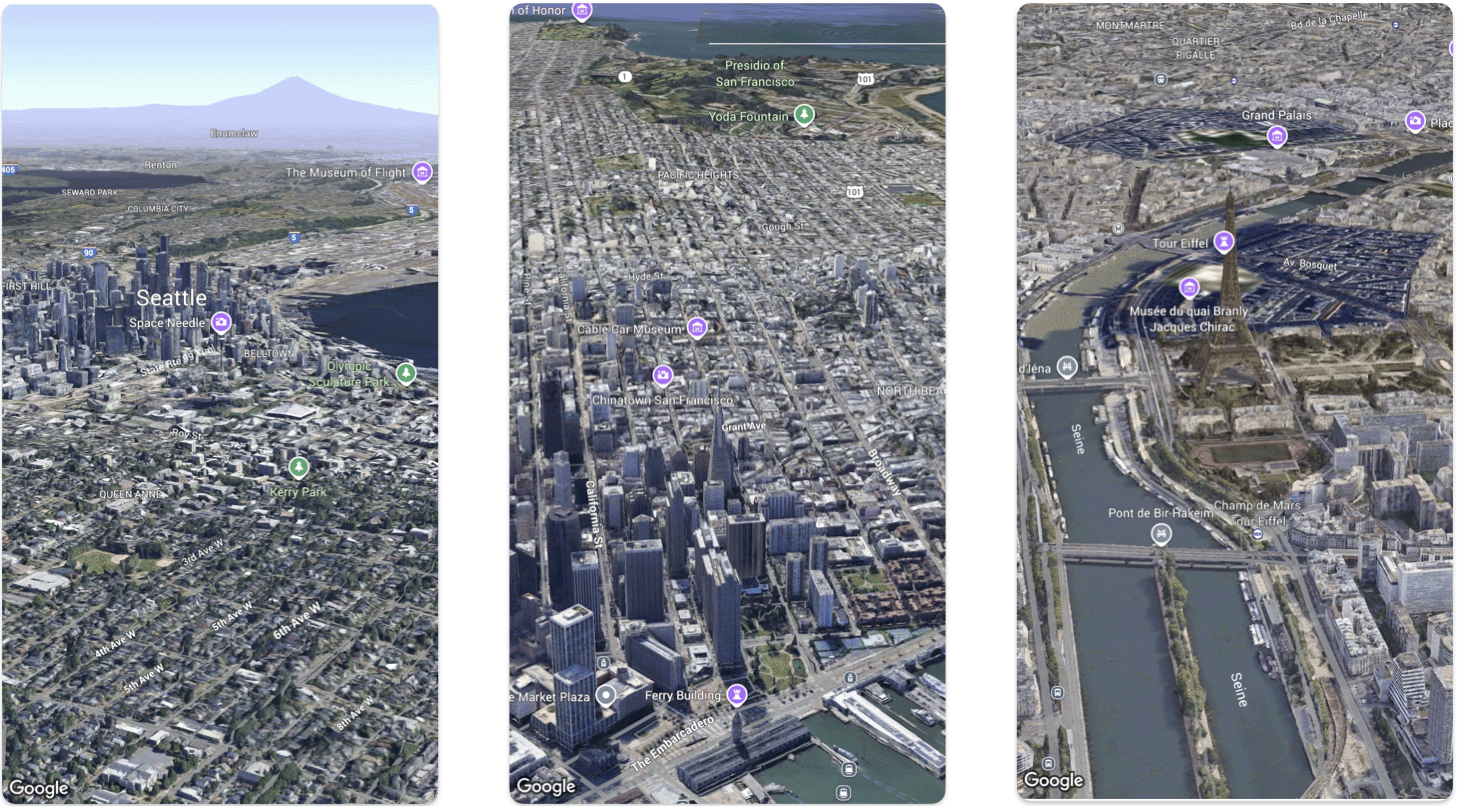
Questa pagina illustra un esempio di come aggiungere una mappa 3D di base a un'app per iOS
utilizzando l'SDK Maps 3D per iOS. Le istruzioni riportate in questa pagina presuppongono che tu abbia
già completato i passaggi nella pagina
Configurazione e che tu disponga di quanto segue:
Un progetto Google Cloud con l'SDK Maps 3D per iOS abilitato
Una chiave API SDK Maps 3D per iOS
Xcodeversione
16.0 o successive con l'aggiunta del pacchetto SDK Maps 3D per iOS.
Per ulteriori informazioni su questi prerequisiti, vedi
Configurazione.
Imposta Nome prodotto su Hello3DWorld, con l'identificatore dell'organizzazione
impostato su com.example. Il nome del pacchetto deve essere
com.example.Hello3DWorld.
La chiave API deve essere impostata prima dell'inizializzazione della mappa. A questo scopo, imposta
Map.apiKey nel gestore di eventi init() di View che contiene la
mappa.
Parte 4: utilizzare una videocamera per controllare la visualizzazione mappa
Le visualizzazioni mappa 3D sono controllate dalla classe Camera. In questo passaggio imparerai
a specificare posizione, altitudine, direzione, inclinazione, rollio e raggio per
personalizzare la visualizzazione della mappa.
Modifica la chiamata di funzione Map() in modo che includa una proprietà initialCamera.
Inizializza initialCamera per mostrare una vista del centro di Manhattan.
Il codice riportato sopra imposta i valori per questi parametri:
heading: la direzione in gradi da nord verso cui puntare la videocamera.
tilt: l'angolo di inclinazione in gradi, dove 0 è direttamente sopra la testa e 90 è
orizzontale.
roll: l'angolo di rollio attorno al piano verticale della videocamera, espresso in
gradi.
range: La distanza in metri della videocamera dalla posizione di latitudine e longitudine
altitude: l'altezza della videocamera sopra il livello del mare.
Se non fornisci nessuno di questi parametri aggiuntivi, verrà utilizzato un valore predefinito.
Per fare in modo che la visualizzazione della videocamera mostri più dati 3D, imposta i parametri iniziali in modo da mostrare una
visualizzazione più ravvicinata e inclinata.
Parte 6: visualizza l'anteprima ed esegui l'app
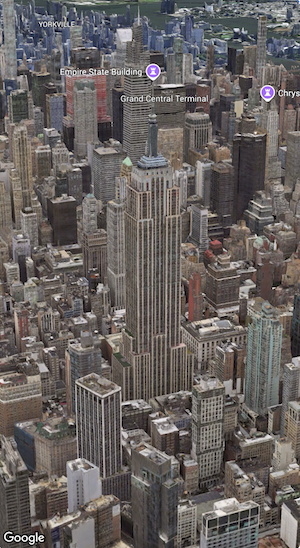
Aggiungere un'anteprima di Xcode
Le anteprime sono una potente funzionalità di Xcode che ti consente di visualizzare e interagire con
la tua app senza dover utilizzare il simulatore o un dispositivo esterno.
Per aggiungere un'anteprima, aggiungi un blocco di codice #Preview {} al di fuori della struttura.
[[["Facile da capire","easyToUnderstand","thumb-up"],["Il problema è stato risolto","solvedMyProblem","thumb-up"],["Altra","otherUp","thumb-up"]],[["Mancano le informazioni di cui ho bisogno","missingTheInformationINeed","thumb-down"],["Troppo complicato/troppi passaggi","tooComplicatedTooManySteps","thumb-down"],["Obsoleti","outOfDate","thumb-down"],["Problema di traduzione","translationIssue","thumb-down"],["Problema relativo a esempi/codice","samplesCodeIssue","thumb-down"],["Altra","otherDown","thumb-down"]],["Ultimo aggiornamento 2025-09-05 UTC."],[],[],null,["# Add a 3D map to your app\n\nSelect platform: [Android](/maps/documentation/maps-3d/android-sdk/add-a-3d-map \"View this page for the Android platform docs.\") [iOS](/maps/documentation/maps-3d/ios-sdk/add-a-3d-map \"View this page for the iOS platform docs.\") [JavaScript](/maps/documentation/javascript/3d/get-started \"View this page for the JavaScript platform docs.\")\n\n\u003cbr /\u003e\n\n\u003cbr /\u003e\n\n| This product or feature is Experimental (pre-GA). Pre-GA products and features might have limited support, and changes to pre-GA products and features might not be compatible with other pre-GA versions. Pre-GA Offerings are covered by the [Google\n| Maps Platform Service Specific Terms](https://cloud.google.com/maps-platform/terms/maps-service-terms). For more information, see the [launch stage descriptions](/maps/launch-stages).\n\n\u003cbr /\u003e\n\nThis page walks through an example of how to add a basic 3D map to an iOS app\nusing the Maps 3D SDK for iOS. The instructions on this page assume that you have\nalready completed the steps in the\n[Setup](/maps/documentation/maps-3d/ios-sdk/setup) page and have the following:\n\n- A Google Cloud project with the Maps 3D SDK for iOS enabled\n- An API key Maps 3D SDK for iOS\n- [Xcode](https://developer.apple.com/xcode/) **version\n 16.0** or later with the Maps 3D SDK for iOS package added.\n\nFor more information about these prerequisites, see\n[Setup](/maps/documentation/maps-3d/ios-sdk/setup).\n\n[Follow a more advanced codelab](/codelabs/maps-platform/maps-platform-101-3d-maps-ios).\n\n[See more code samples on\nGitHub](https://github.com/googlemaps-samples/ios-maps-3d-sdk-samples).\n\nPart 1: Create a basic SwiftUI app\n----------------------------------\n\n1. Create a new app in Xcode.\n2. Set your **Product Name** to `Hello3DWorld`, with the organization identifier set to `com.example`. The package name should be `com.example.Hello3DWorld`.\n3. Choose the SwiftUI interface.\n4. Add the Maps 3D library to your app. [See instructions in the setup\n section](/maps/documentation/maps-3d/ios-sdk/setup#step_2_create_the_xcode_project_and_install_the).\n\nPart 2: Add a map\n-----------------\n\n1. Open the file called `ContentView.swift`. This is the entry point and main\n navigation for your app.\n\n2. Import `SwiftUI` and the `GoogleMaps3D` package.\n\n3. Replace all the code inside the body declaration with Map(mode: .hybrid).\n\n The minimum initial configuration you need to supply to initialize a `Map`\n is the `MapMode`:\n - .hybrid, or\n - .satellite\n\n Your `ContentView.swift` file should look like this: \n\n import SwiftUI\n import GoogleMaps3D\n\n struct ContentView: View {\n var body: some View {\n Map(mode: .hybrid)\n }\n }\n\n #Preview {\n ContentView()\n }\n\nPart 3: Set your API key.\n-------------------------\n\n1. The API key must be set before the Map initializes. Do this by setting\n `Map.apiKey` in the `init()` event handler of the `View` that contains the\n Map.\n\n **Warning:** Don't check the API key into external or public source control \n\n import SwiftUI\n import GoogleMaps3D\n\n struct ContentView: View {\n init () {\n Map.apiKey = \"YOUR_API_KEY\"\n }\n\n var body: some View {\n Map(mode: .hybrid)\n }\n }\n\nPart 4: Use a camera to control the map view\n--------------------------------------------\n\n3D Map views are controlled by the `Camera` class. In this step you will learn\nhow to specify the location, altitude, heading, tilt, roll and range to\ncustomize the map view.\n\n1. Change the `Map()` function call to include an `initialCamera` property.\n Initialize `initialCamera` to show a view of downtown Manhattan.\n\n **Note:** Parameter order matters. The Camera is initialized by providing latitude first, then longitude. Make sure you specify the correct values for each, especially when pasting in from another source, or the camera may show an unexpected location. \n\n import SwiftUI\n import GoogleMaps3D\n\n struct ContentView: View {\n init () {\n Map.apiKey = \"YOUR_API_KEY\"\n }\n var body: some View {\n Map(initialCamera: .init(\n latitude: 40.748339,\n longitude: -73.985912,\n altitude: 211.1,\n heading: 52,\n tilt: 68,\n range: 1039\n ), mode: .hybrid)\n }\n }\n\nThe code above sets values for these parameters:\n\n- `heading`: The bearing in degrees from north to point the camera towards.\n- `tilt`: The angle of tilt in degrees, where 0 is directly overhead and 90 is looking horizontally.\n- `roll`: The angle of roll around the vertical plane of the camera, in degrees.\n- `range`: The distance in metres of the camera from the latitude, longitude location\n- `altitude`: The height of the camera above sea level.\n\nIf you don't supply any of these additional parameters, a default value will be\nused.\n| **Note:** Camera altitude is an absolute value. In areas where ground level is well above sea level, setting an altitude lower than ground level may cause strange visual effects.\n| **Note:** You can also adjust the relative altitude of the camera using tilt and range.\n\nTo make the camera view show more 3D data, set the initial parameters to show a\ncloser, tilted view.\n\nPart 6: Preview and run your App\n--------------------------------\n\n1. Add an Xcode Preview\n\n Previews are a powerful XCode feature that let you see and interact with\n your App without having to use the Simulator or an external device.\n\n To add a preview, add a `#Preview {}` code block outside your struct. \n\n #Preview {\n CameraDemo()\n }\n\n2. Run the app\n\nBuild and run the app.\n\nCongratulations!\n----------------\n\nYou've successfully added a 3D map to an app!\n\nNext, you can explore more advanced features of the Maps 3D SDK for iOS, such as\n[camera path\nanimations](/maps/documentation/maps-3d/ios-sdk/custom-camera-paths), [3D\nmarkers](/maps/documentation/maps-3d/ios-sdk/add-a-marker), or\n[polygons](/en/maps/documentation/maps-3d/ios-sdk/add-polygons)."]]