Na urządzeniach z Androidem N lub nowszym wywołania reklam są widoczne w Charles Proxy tylko wtedy, gdy wykonasz te czynności:
- Zaktualizuj Usługi Google Play na urządzeniu mobilnym.
- Włącz śledzenie sieci na urządzeniu mobilnym.
- Zainstaluj na urządzeniu certyfikat SSL Charles i skonfiguruj serwer proxy.
- Włącz serwer proxy SSL w aplikacji mobilnej.
Zaktualizuj Usługi Google Play na urządzeniu mobilnym.
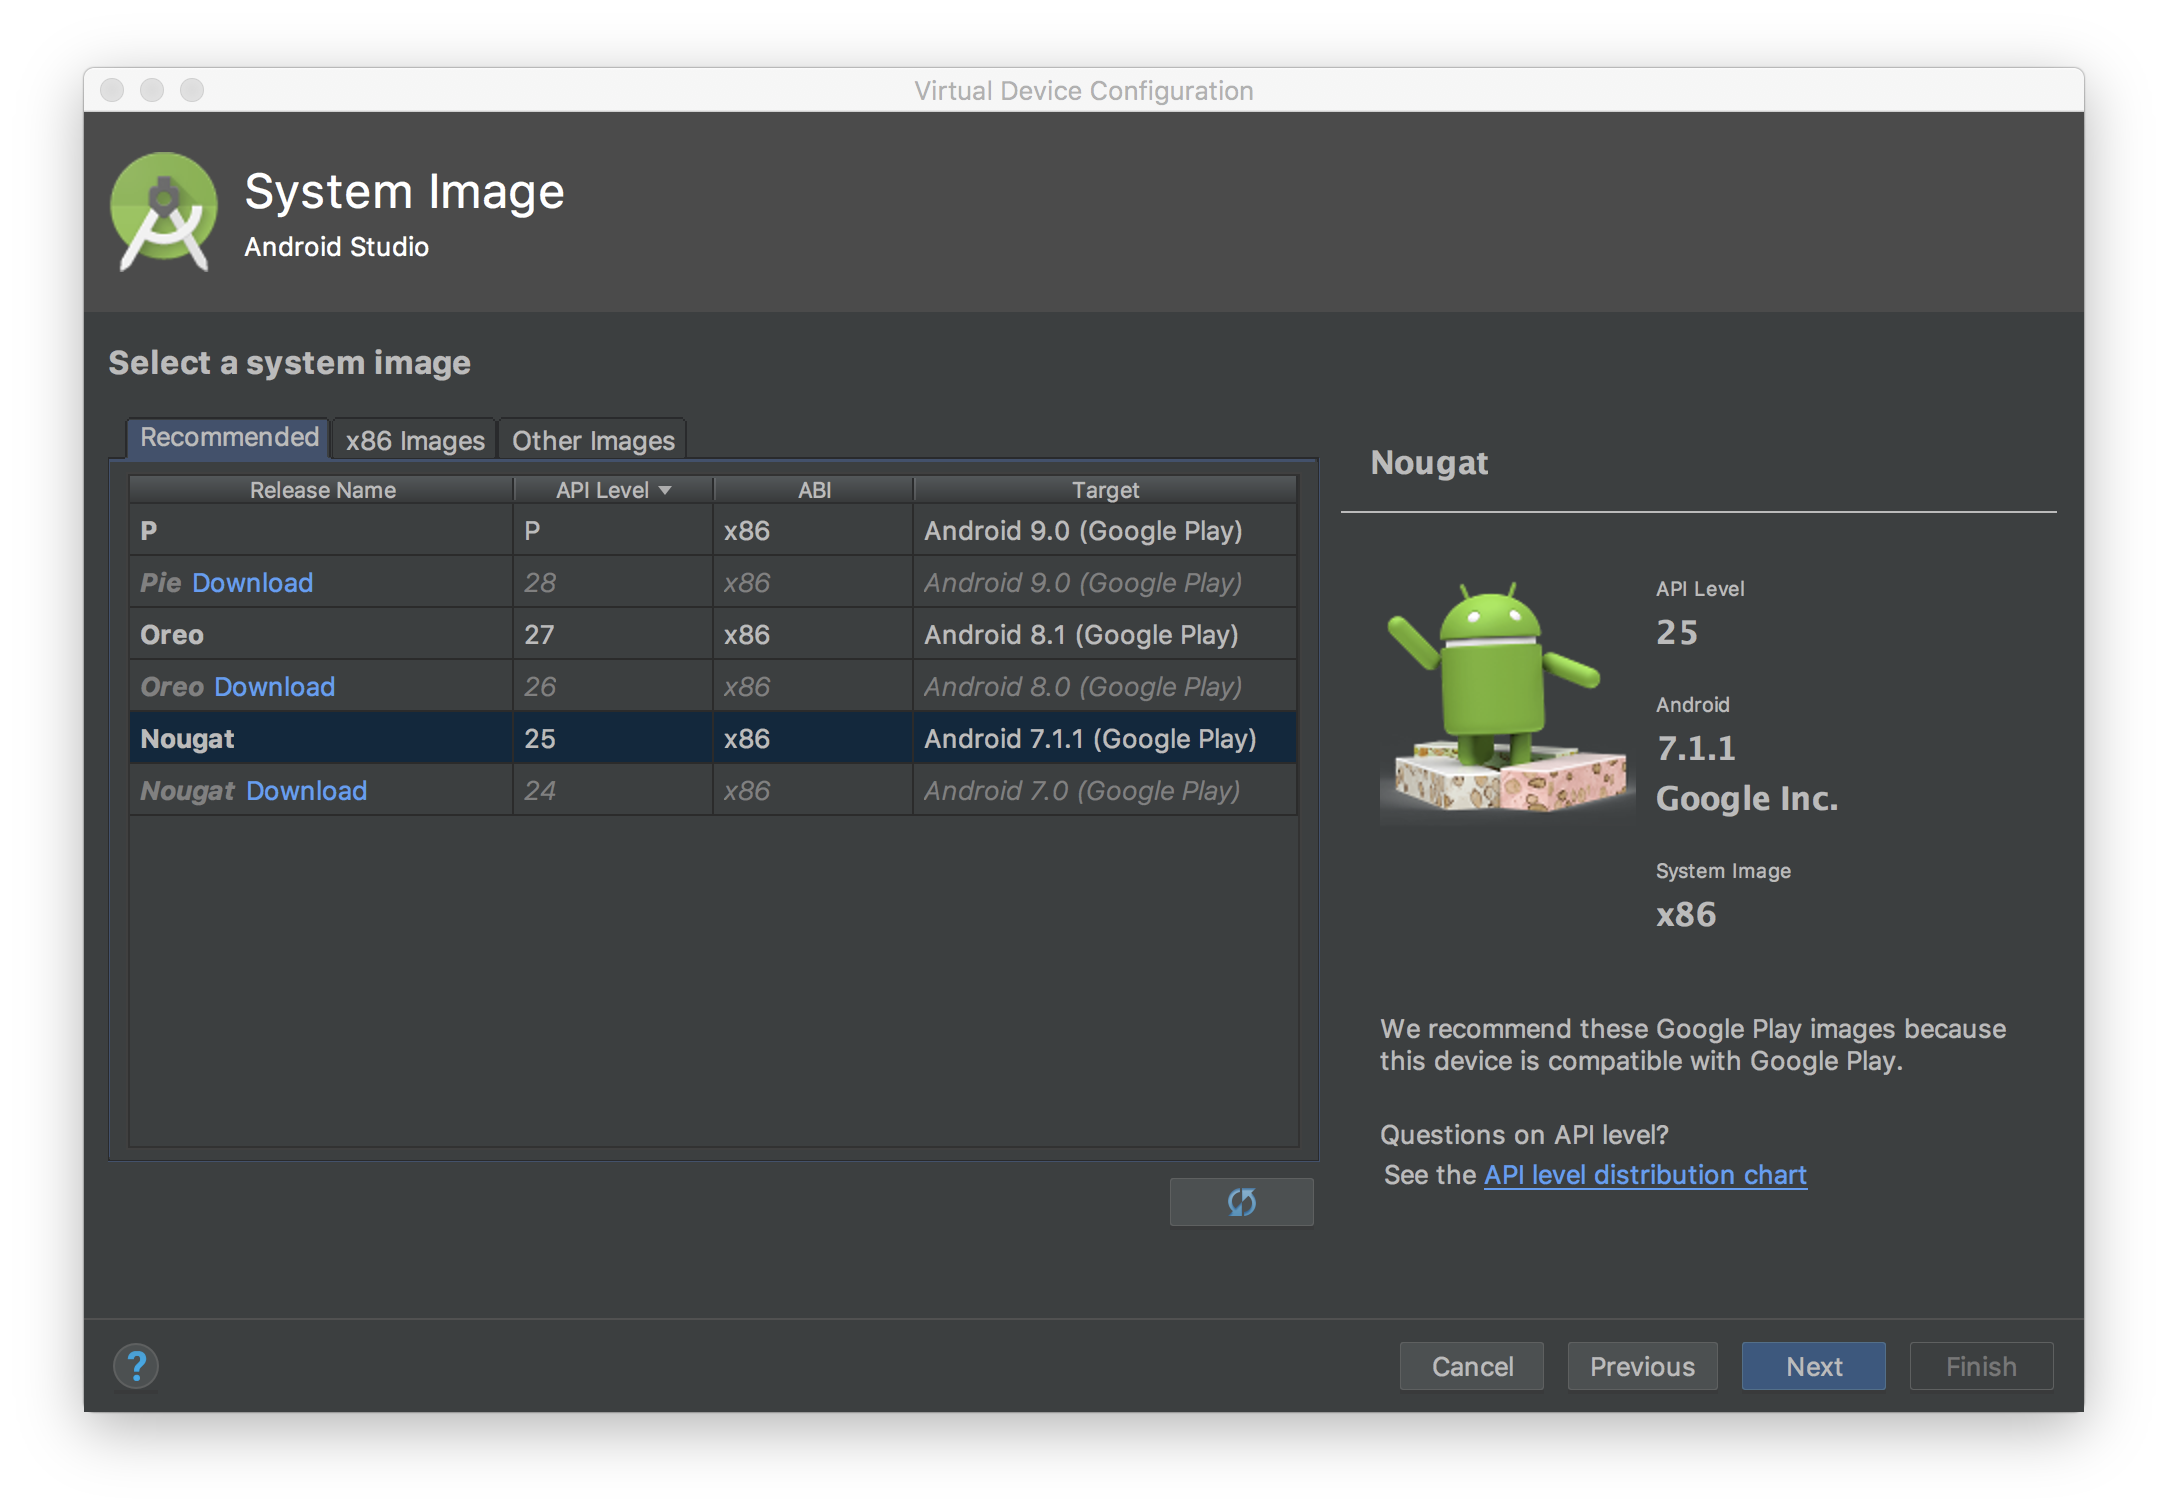
Jeśli w przypadku emulatora nie widzisz sekcji Google Play w menu bocznym, może być konieczne zaktualizowanie Android Studio i pobranie najnowszych obrazów systemu w konfiguracji urządzenia wirtualnego. Używaj obrazu systemu, w którym Google Play jest celem.
W menu bocznym sprawdź, czy Usługi Google Play są zaktualizowane do najnowszej wersji, i w razie potrzeby je zaktualizuj. Minimalna działająca wersja Usług Google Play to 14.5.74.
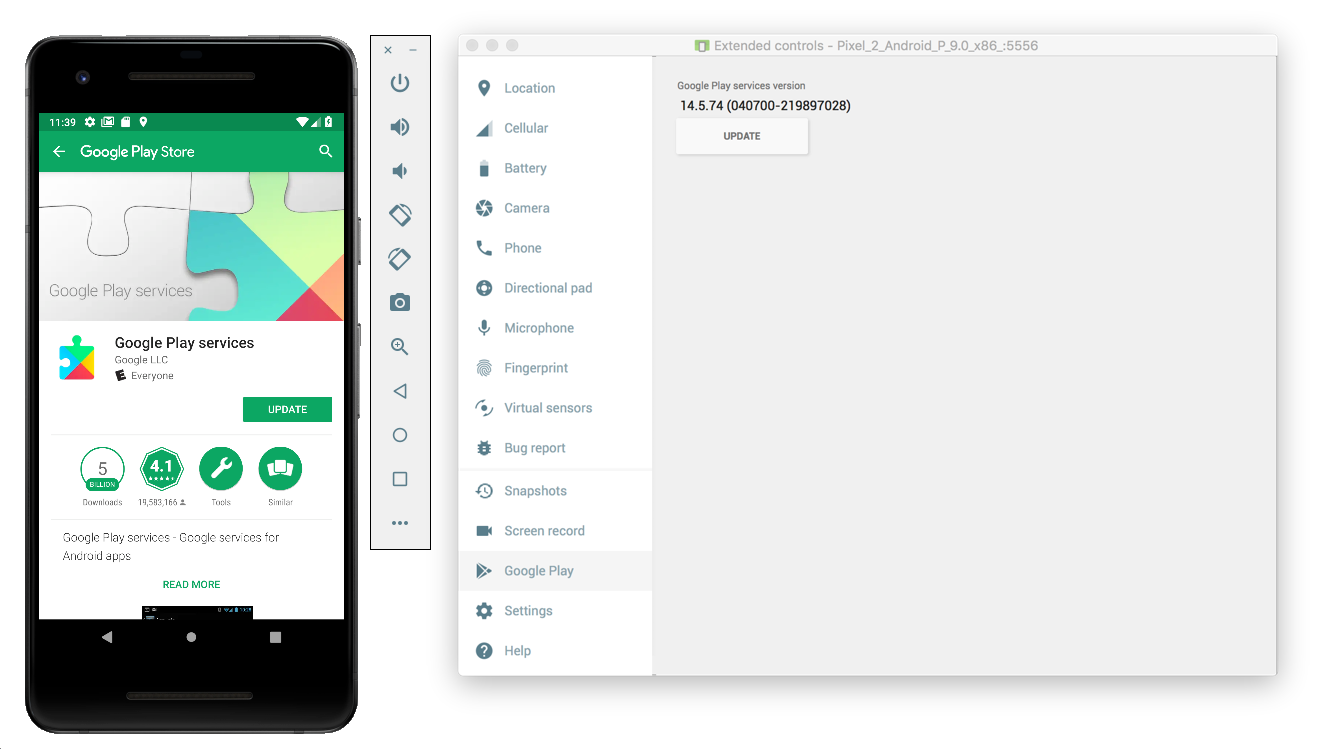
Na urządzeniu mobilnym (telefonie lub tablecie) możesz wyszukać Google Play lub kliknąć ten link, aby otworzyć Google Play bezpośrednio.
Włącz śledzenie sieci na urządzeniu mobilnym
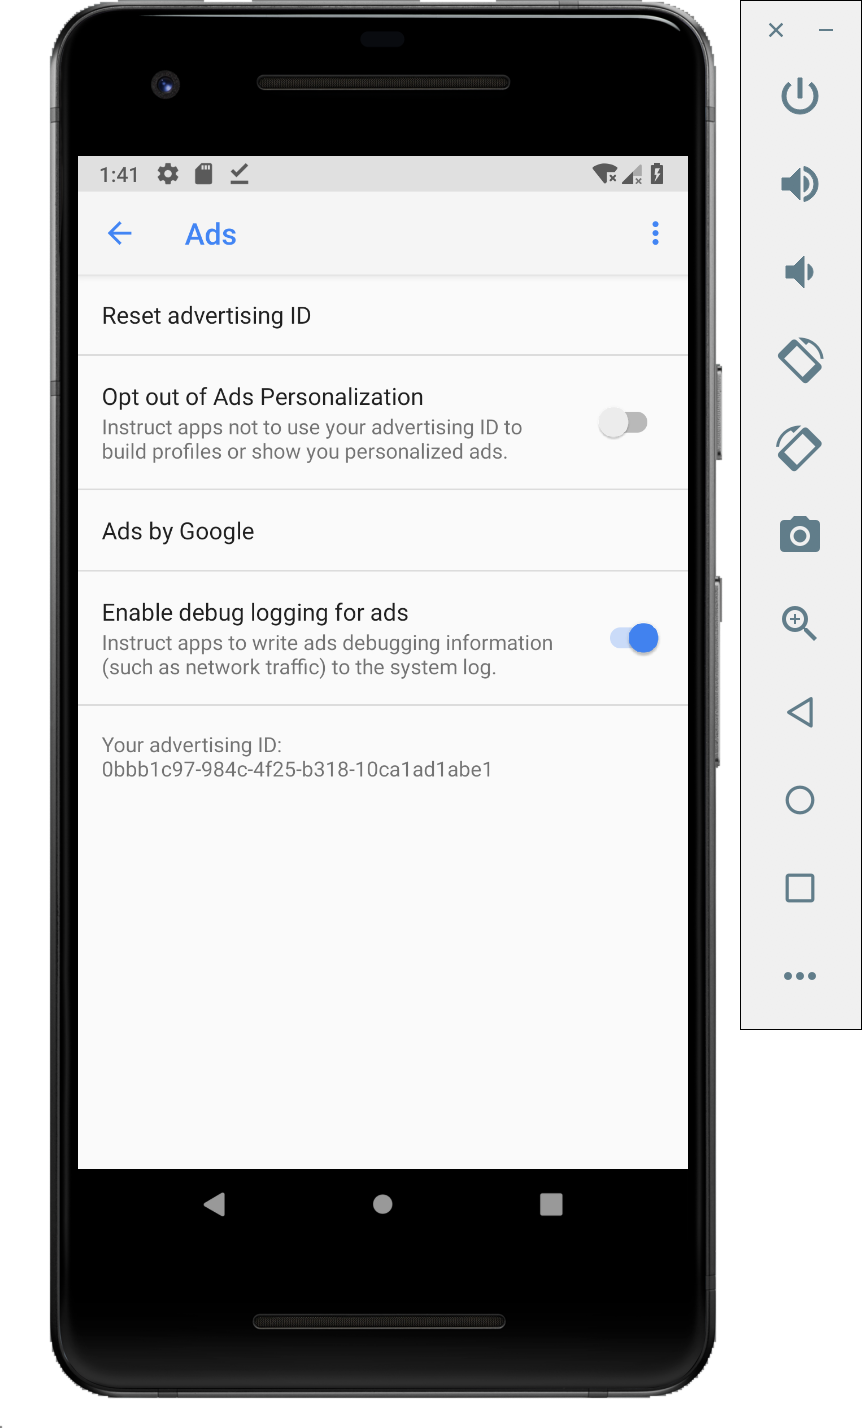
Aby włączyć śledzenie sieci, musisz włączyć opcje programisty na urządzeniu. Otwórz aplikację Ustawienia Google i wybierz Google > Reklamy > Włącz rejestrowanie debugowania reklam. Bardziej szczegółowy przewodnik jest dostępny dla wydawców korzystających z usług AdMob i Google Ad Manager.
Zainstaluj certyfikat SSL Charles na urządzeniu i skonfiguruj serwer proxy
Aby używać Charlesa jako serwera proxy dla aplikacji mobilnej, musisz pobrać i zainstalować Charlesa na komputerze. Postępuj zgodnie z instrukcjami narzędzia Charles, aby zainstalować certyfikat SSL na emulatorze Androida lub urządzeniu mobilnym.
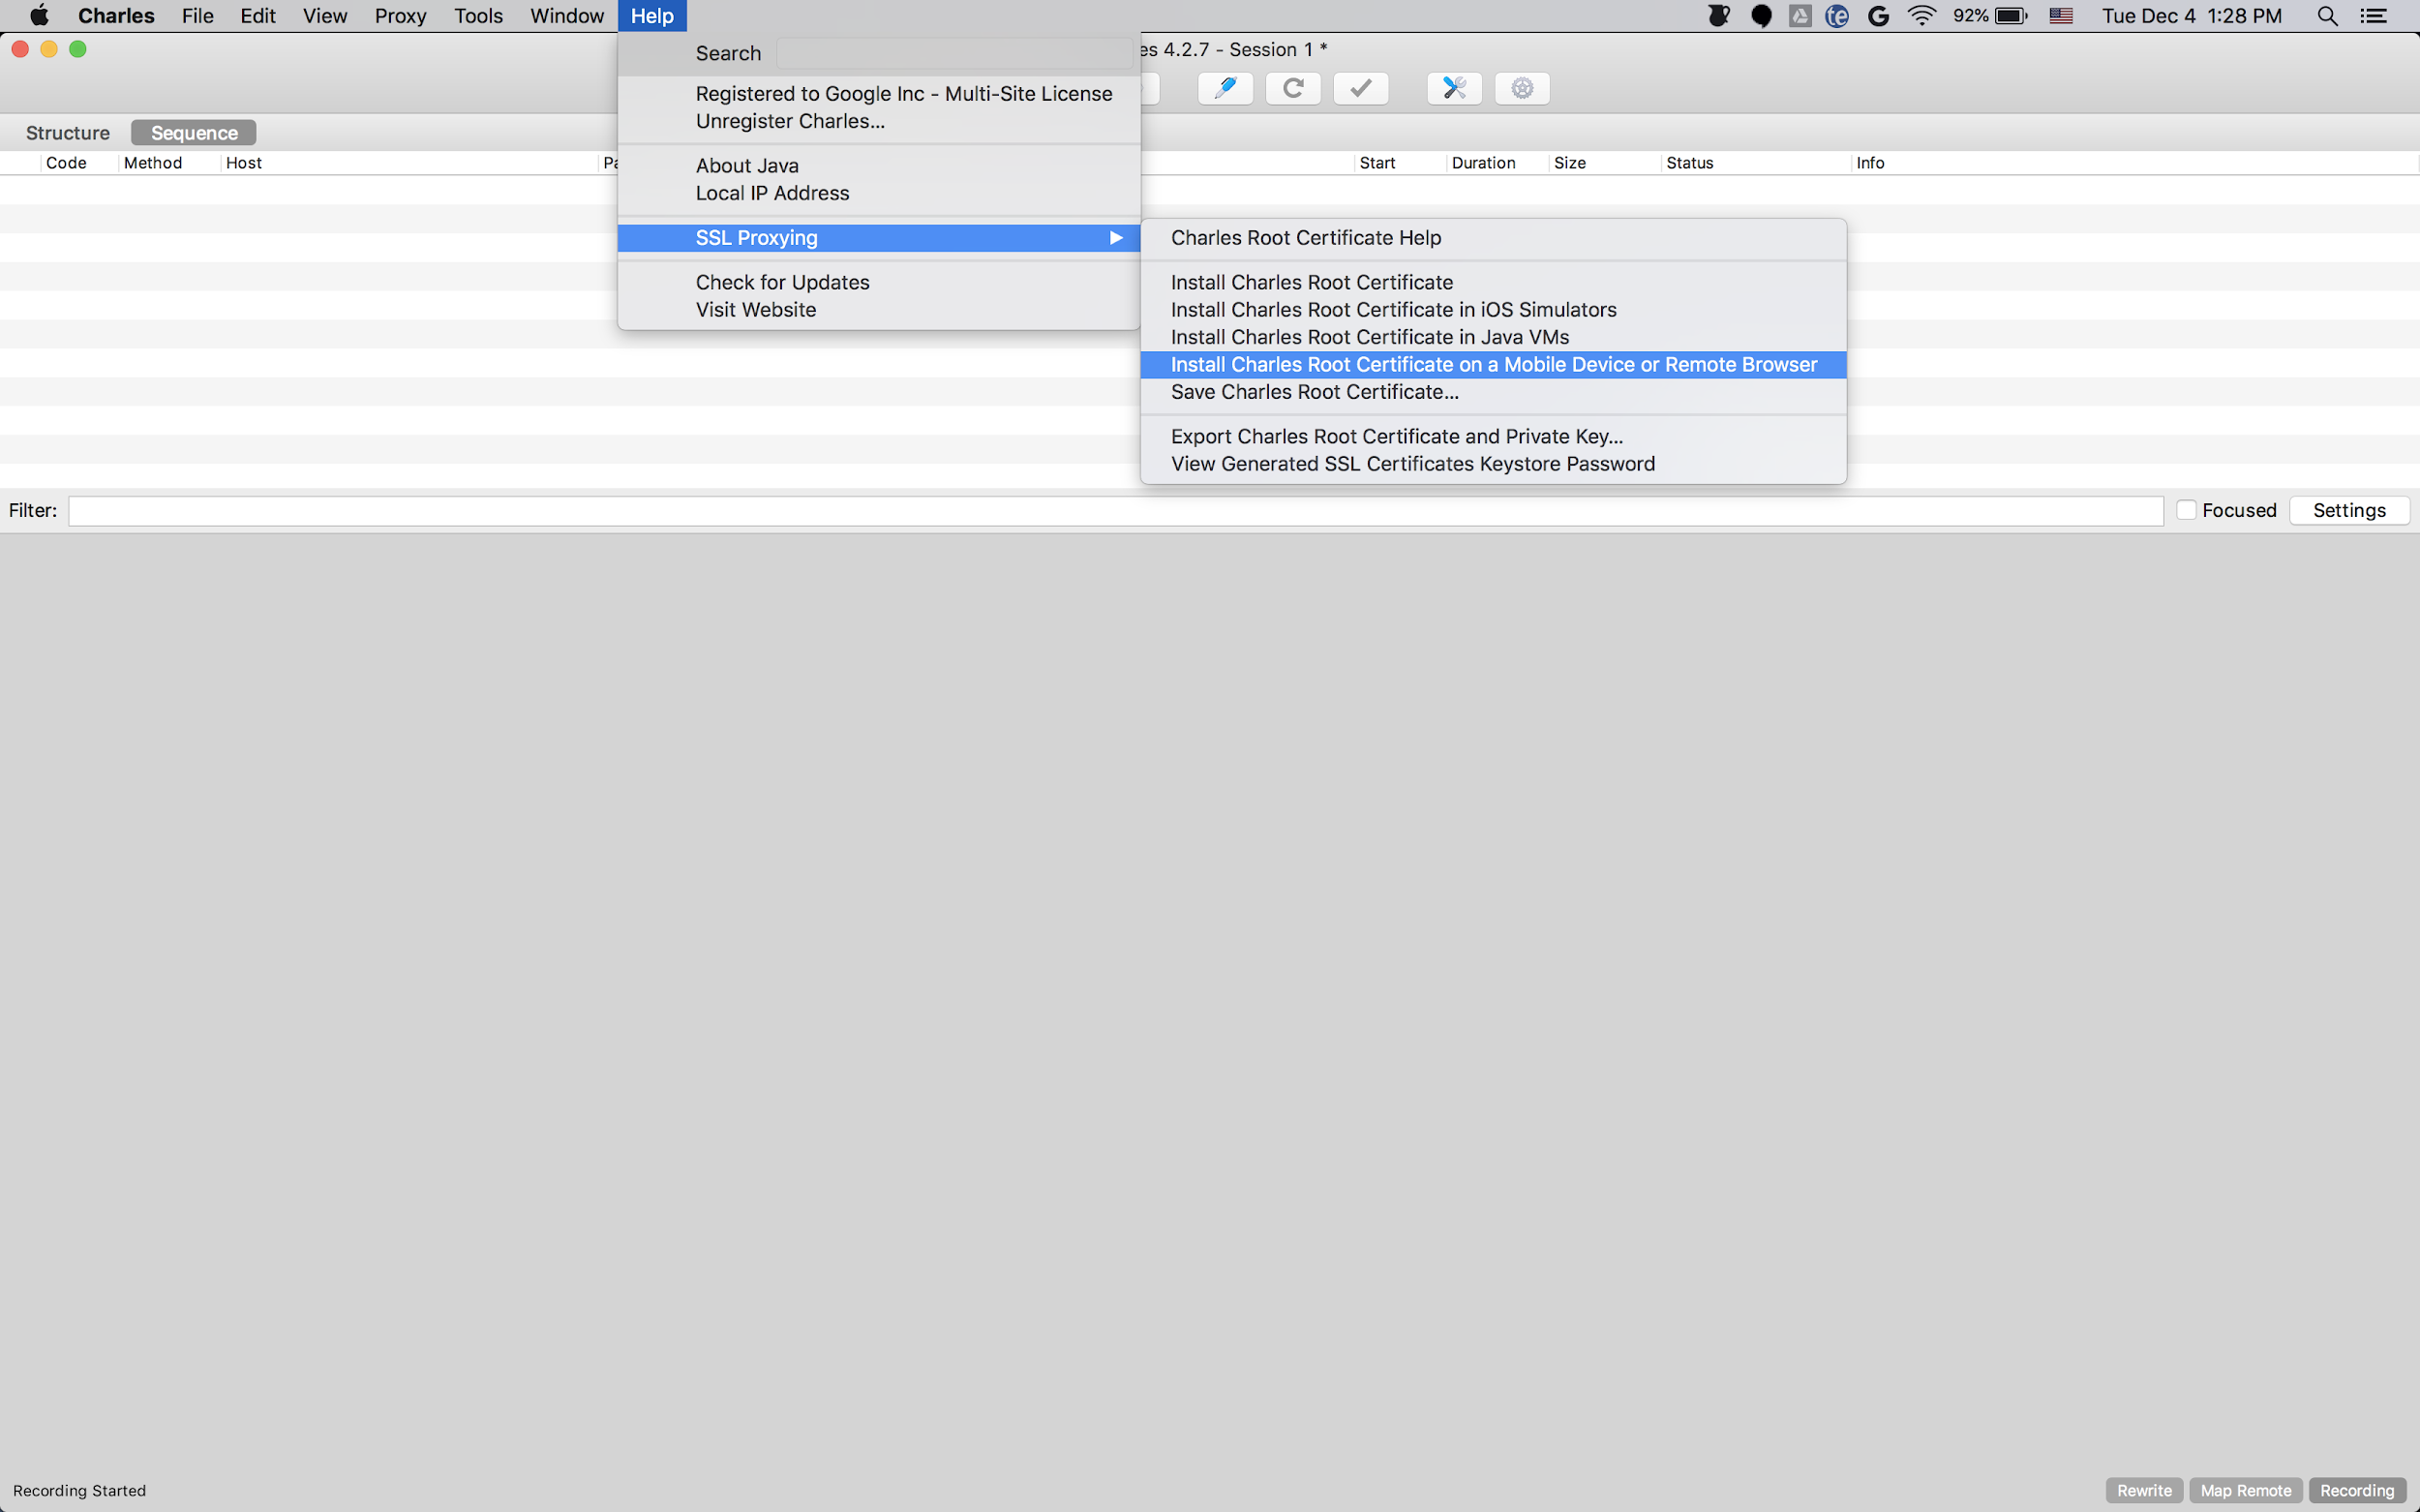
Łatwiej jest używać emulatora z serwerem proxy, ponieważ emulator jest już połączony z tą samą siecią Wi-Fi co komputer, na którym działa Charles. Jeśli używasz emulatora z serwerem proxy, ustaw serwer proxy na localhost (http://127.0.0.1) i port, na którym działa serwer proxy Charles (znajdziesz go w opcji menu Charles Proxy > Proxy Settings).
Jeśli używasz fizycznego urządzenia mobilnego (telefonu lub tabletu), musisz połączyć je z tą samą siecią Wi-Fi co komputer z uruchomionym programem Charles, korzystając z zaawansowanych ustawień sieci. Podczas konfigurowania ustawień serwera proxy na urządzeniu fizycznym użyj opcji menu Charlesa Help > Local IP address (Pomoc > Lokalny adres IP), aby uzyskać adres IP komputera, który należy wpisać jako adres serwera proxy na urządzeniu (aby to zadziałało, musisz być w tej samej sieci Wi-Fi). Użyj portu, na którym działa serwer proxy Charles.
Włączanie serwera proxy SSL w aplikacji mobilnej
Aby narzędzie Charles mogło przechwytywać ruch SSL aplikacji mobilnej, musisz zadeklarować, że aplikacja może ufać certyfikatowi SSL dostarczonemu przez użytkownika.
Najpierw musisz dodać nowy plik zasobu XML dla konfiguracji zabezpieczeń sieci w
<network-security-config>
   <debug-overrides>
       <trust-anchors>
           <!-- Trust user added CAs while debuggable only -->
           <certificates src="user" />
       </trust-anchors>
   </debug-overrides>
</network-security-config>
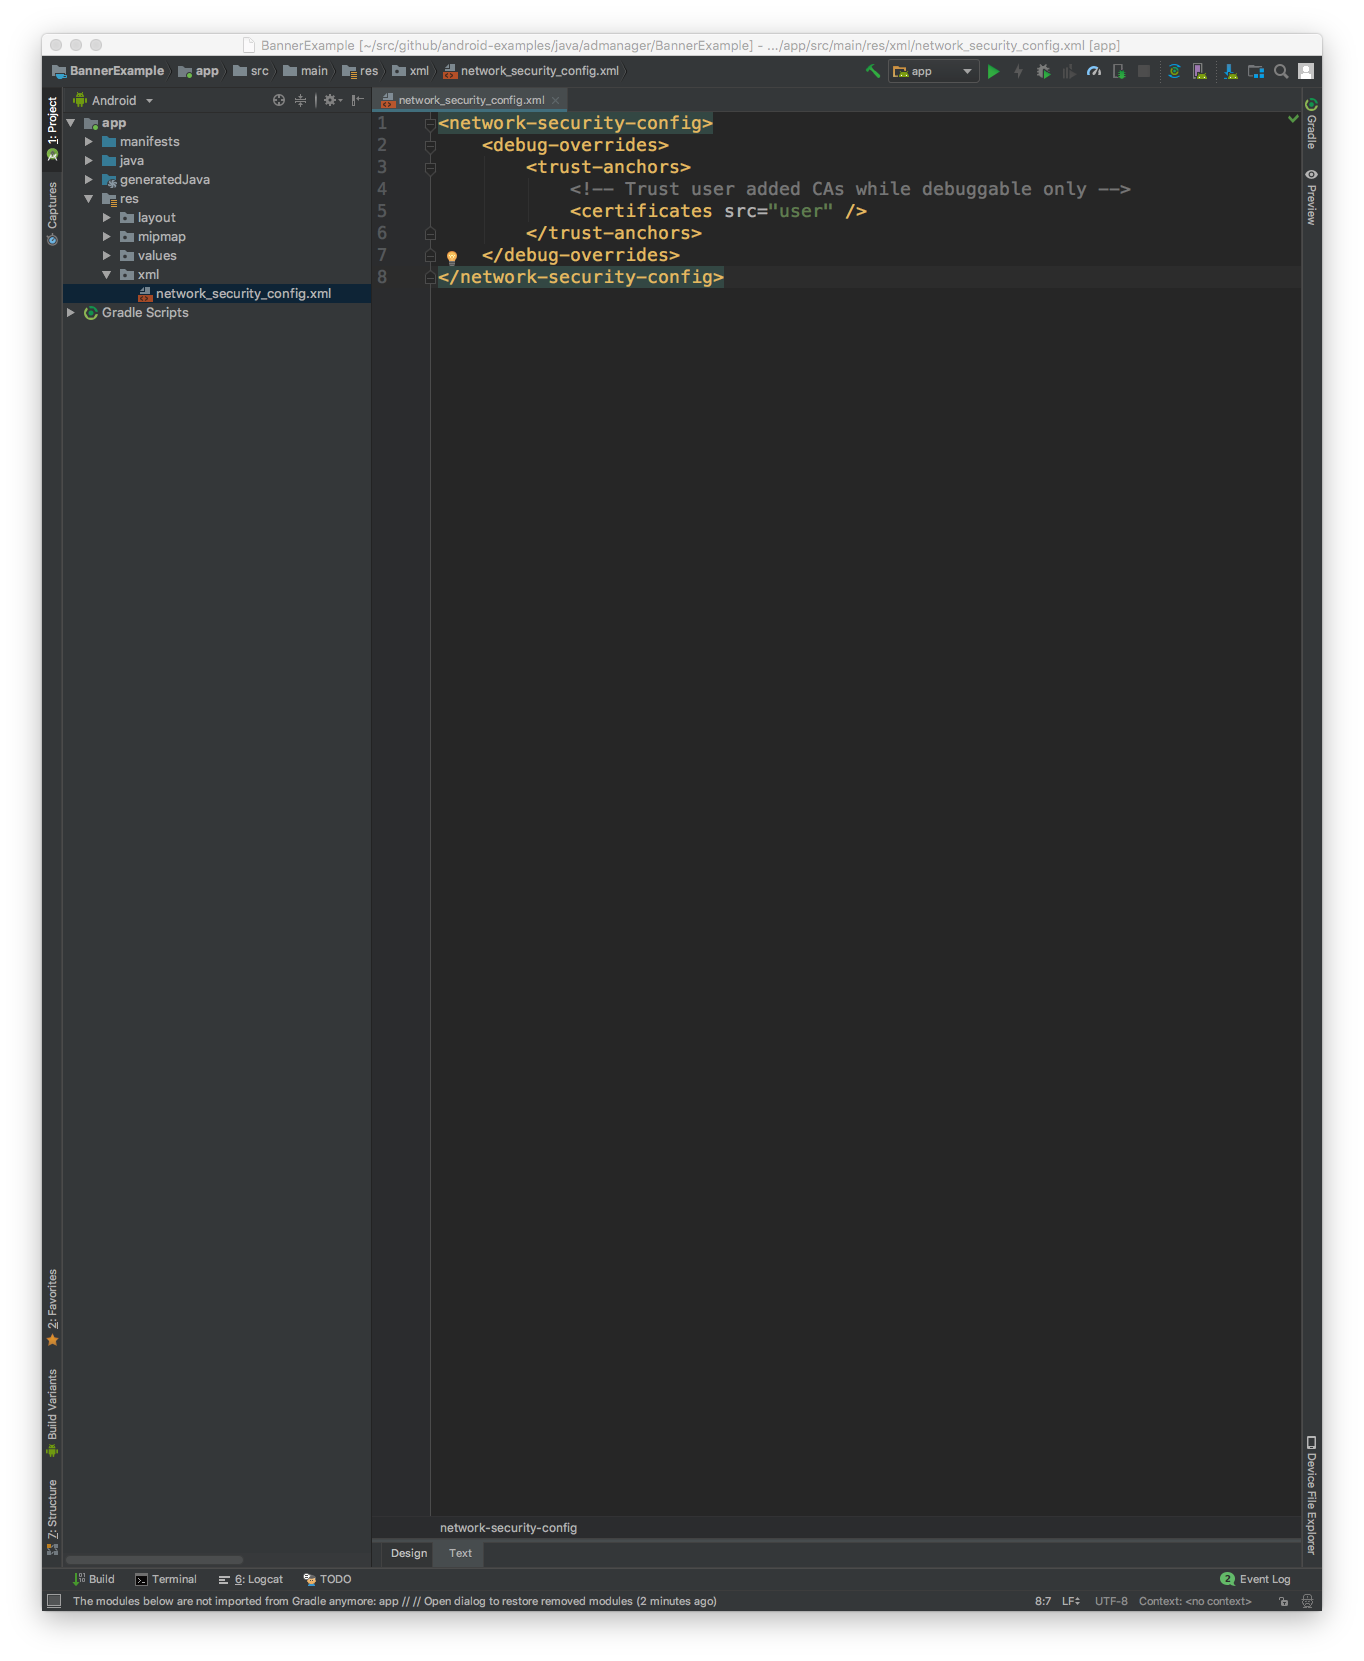
Następnie zaktualizuj plik AndroidManifest.xml, aby używać konfiguracji zabezpieczeń sieci.
<?xml version="1.0" encoding="utf-8"?>
<manifest ... >
    <application ...
                 android:networkSecurityConfig="@xml/network_security_config"
                 ... >
        ...
    </application>
</manifest>
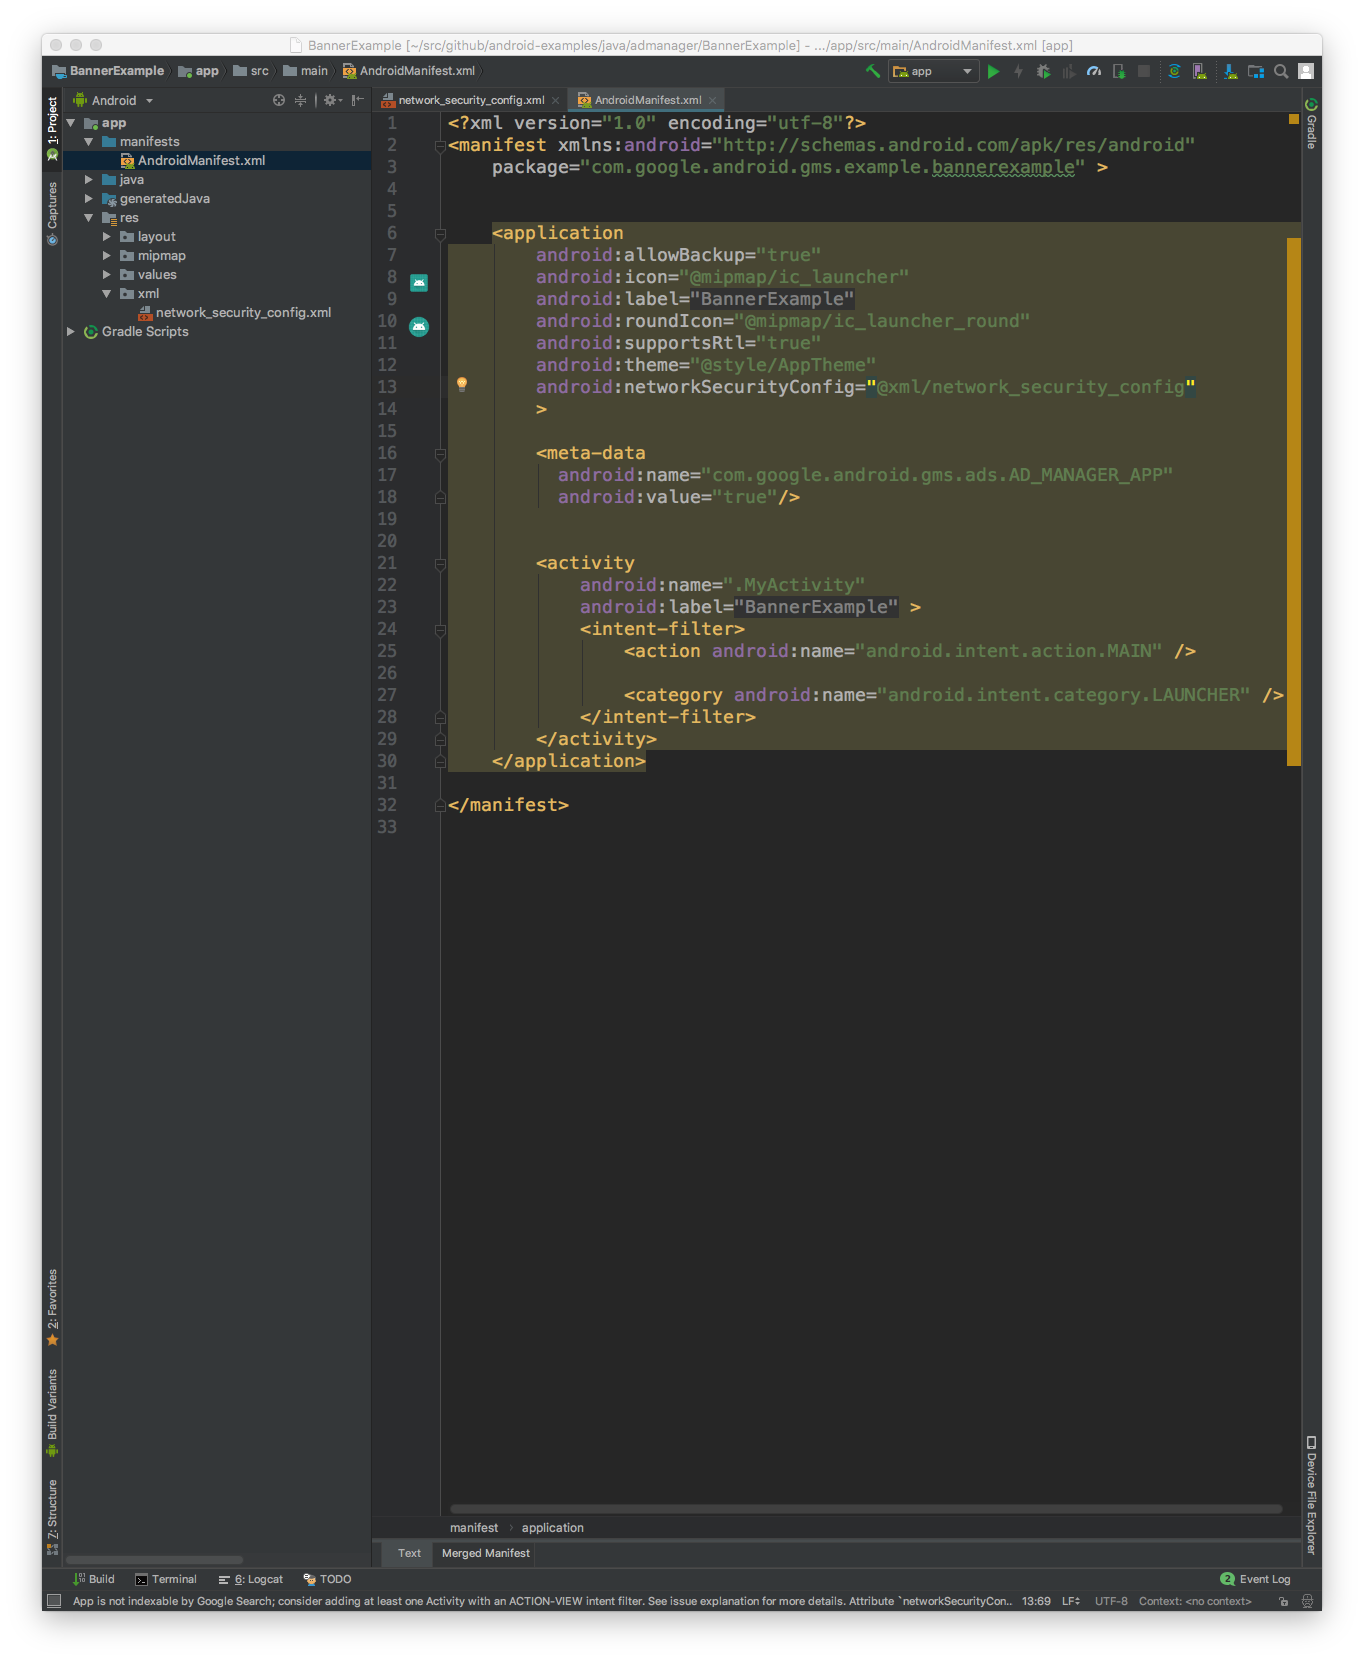
Następnie możesz uruchomić aplikację mobilną i poszukać w niej żądań reklamy w dzienniku Charlesa.
