Getting started with the Consumer SDK for JavaScript

The JavaScript SDK lets you visualize the location of vehicles and locations of interest tracked in Fleet Engine. The library contains a JavaScript map component that is a drop-in replacement for a standard google.maps.Map entity and data components to connect with Fleet Engine. Using the JavaScript SDK, you can provide a customizable, animated trip and order progress experience from your web application.

Components

The JavaScript SDK provides components for visualization of vehicles and waypoints, as well as raw data feeds for a driver's ETA or the remaining distance to drive.

Trip and Order Progress map view

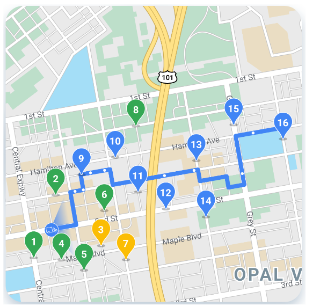
The map view component visualizes the location of vehicles and waypoints. If the route for a vehicle is known, the map view component animates that vehicle as it moves along its predicted path.

Trip location provider

The JavaScript SDK includes a trip location provider that feeds location information for tracked objects into the trip and order progress map.

You can use the trip location provider to track:

  • The pickup or dropoff location of a trip.
  • The location and route of the vehicle assigned to the trip.

Tracked location objects

The location provider tracks the location of objects such as waypoints and vehicles.

Origin location

The origin location is the location where a journey starts. It marks the pickup location.

Destination location

The destination location is the location where a journey ends. It marks the dropoff location.

Waypoint location

A waypoint location is any location along the route of a tracked journey. For example, each stop on a bus route is a waypoint location.

Vehicle location

The vehicle location is the tracked location of a vehicle. It may optionally include a route for the vehicle.

Authentication token fetcher

To control access to the location data stored in Fleet Engine, you must implement a JSON Web Token (JWT) minting service for Fleet Engine on your server. Then implement an authentication token fetcher as part of your web application, using the JavaScript SDK to authenticate access to the location data.

Styling options

Marker and polyline styles determine the look and feel of the tracked location objects on the map. You can use custom styling options to change the default styling to match the styling of your web application.

Controlling the visibility of tracked locations

This section describes the visibility rules for tracked location objects on the map for Fleet Engine predefined location providers. Custom or derived location providers may change the visibility rules.

Vehicles

A ridesharing vehicle is visible from the time it is assigned to a trip to the time of dropoff. If the trip is canceled, the vehicle is longer visible.

All other location markers

All other location markers for origin, destination, and waypoints are always shown on the map. For example, a ridesharing dropoff location or a shipment delivery location is always shown on the map, regardless of the state of the trip or delivery.

Get started with the JavaScript SDK

Before using the JavaScript SDK, make sure you are familiar with Fleet Engine and with getting an API key.

To track a ridesharing trip, first create a trip ID claim.

Create a trip ID claim

To track a trip using the trip location provider, create a JSON Web Token (JWT) with a trip ID claim.

To create the JWT payload, add an additional claim in the authorization section with the key tripid and set its value to the trip ID.

The following example shows how to create a token for tracking by trip ID:

{
  "alg": "RS256",
  "typ": "JWT",
  "kid": "private_key_id_of_consumer_service_account"
}
.
{
  "iss": "consumer@yourgcpproject.iam.gserviceaccount.com",
  "sub": "consumer@yourgcpproject.iam.gserviceaccount.com",
  "aud": "https://fleetengine.googleapis.com/",
  "iat": 1511900000,
  "exp": 1511903600,
  "scope": "https://www.googleapis.com/auth/xapi",
  "authorization": {
     "tripid": "tid_12345",
   }
}

Create an authentication token fetcher

You can create an authentication token fetcher to retrieve a token minted with the appropriate claims on your servers using a service account certificate for your project. It is important to only mint tokens on your servers and never share your certificates on any clients. Otherwise, you will compromise the security of your system.

The fetcher must return a data structure with two fields, wrapped in a Promise:

  • A string token.
  • A number expiresInSeconds. A token expires in this amount of time after fetching.

The JavaScript Consumer SDK requests a token via the authentication token fetcher when any of the following is true:

  • It does not have a valid token, such as when it hasn't called the fetcher on a fresh page load, or when the fetcher hasn't returned with a token.
  • The token it fetched previously has expired.
  • The token it fetched previously is within one minute of expiring.

Otherwise, the SDK uses the previously issued, still valid token and does not call the fetcher.

The following example shows how to create an authentication token fetcher:

JavaScript

async function authTokenFetcher(options) {
  // options is a record containing two keys called 
  // serviceType and context. The developer should
  // generate the correct SERVER_TOKEN_URL and request
  // based on the values of these fields.
  const response = await fetch(SERVER_TOKEN_URL);
  if (!response.ok) {
    throw new Error(response.statusText);
  }
  const data = await response.json();
  return {
    token: data.Token,
    expiresInSeconds: data.ExpiresInSeconds
  };
}

TypeScript

function authTokenFetcher(options: {
  serviceType: google.maps.journeySharing.FleetEngineServiceType,
  context: google.maps.journeySharing.AuthTokenContext,
}): Promise<google.maps.journeySharing.AuthToken> {
  // The developer should generate the correct
  // SERVER_TOKEN_URL based on options.
  const response = await fetch(SERVER_TOKEN_URL);
  if (!response.ok) {
    throw new Error(response.statusText);
  }
  const data = await response.json();
  return {
    token: data.jwt,
    expiresInSeconds: data.expirationTimestamp - Date.now(),
  };
}

When implementing the server-side endpoint for minting the tokens, keep the following in mind:

  • The endpoint must return an expiry time for the token; in the example above, it is given as data.ExpiresInSeconds.
  • The authentication token fetcher must pass the expiry time (in seconds, from time of fetching) to the library, as shown in the example.
  • The SERVER_TOKEN_URL depends on your provider implementation, these are the URLs for the example provider:
    • https://SERVER_URL/token/driver/VEHICLEID
    • https://SERVER_URL/token/consumer/TRIPID

Load a map from HTML

The following example shows how to load the JavaScript SDK from a specified URL. The callback parameter executes the initMap function after the API loads. The defer attribute lets the browser continue rendering the rest of your page while the API loads.

<script src="https://maps.googleapis.com/maps/api/js?key=YOUR_API_KEY&callback=initMap&libraries=journeySharing" defer></script>

Following a trip

This section shows how to use the JavaScript SDK to follow a ridesharing or delivery trip. Make sure to load the library from the callback function specified in the script tag before running your code.

Instantiate a trip location provider

The JavaScript SDK predefines a location provider for the Fleet Engine Ridesharing API. Use your project ID and a reference to your token factory to instantiate it.

JavaScript

locationProvider =
    new google.maps.journeySharing
        .FleetEngineTripLocationProvider({
          projectId: 'your-project-id',
          authTokenFetcher: authTokenFetcher, // the token fetcher defined in the previous step

          // Optionally, you may specify a trip ID to
          // immediately start tracking.
          tripId: 'your-trip-id',
});

TypeScript

locationProvider =
    new google.maps.journeySharing
        .FleetEngineTripLocationProvider({
          projectId,
          authTokenFetcher,

          // Optionally, you may specify a trip ID to
          // immediately start tracking.
          tripId: 'your-trip-id',
});

Initialize the map view

After loading the JavaScript SDK, initialize the map view and add it to the HTML page. Your page should contain a <div> element that holds the map view. The <div> element is named map_canvas in the example below.

To avoid race conditions, set the trip ID for the location provider in the callback that is invoked after the map is initialized.

JavaScript

const mapView = new
    google.maps.journeySharing.JourneySharingMapView({
  element: document.getElementById('map_canvas'),
  locationProviders: [locationProvider],
  // Styling customizations; see below.
  vehicleMarkerCustomization: vehicleMarkerCustomization,
  activePolylineCustomization: activePolylineCustomization,
  // Any undefined styling options will use defaults.
});

// If you did not specify a trip ID in the location
// provider constructor, you may do so here.
// Location tracking will start as soon as this is set.
locationProvider.tripId = 'your-trip-id';

// Give the map an initial viewport to allow it to 
// initialize; otherwise, the 'ready' event above may 
// not fire. The user also has access to the mapView
// object to customize as they wish.
mapView.map.setCenter({lat: 37.2, lng: -121.9});
mapView.map.setZoom(14);

TypeScript

const mapView = new
    google.maps.journeySharing.JourneySharingMapView({
  element: document.getElementById('map_canvas'),
  locationProviders: [locationProvider],
  // Styling customizations; see below.
  vehicleMarkerCustomization: vehicleMarkerCustomization,
  activePolylineCustomization: activePolylineCustomization,
  // Any undefined styling options will use defaults.
});

// If you did not specify a trip ID in the location
// provider constructor, you may do so here.
locationProvider.tripId = 'your-trip-id';

// Give the map an initial viewport to allow it to 
// initialize; otherwise, the 'ready' event above may 
// not fire. The user also has access to the mapView 
// object to customize as they wish.
mapView.map.setCenter({lat: 37.2, lng: -121.9});
mapView.map.setZoom(14);

Listen to change events

You can retrieve meta information about a trip from the task object using the location provider. The meta information includes the ETA and remaining distance before pickup or dropoff. Changes to the meta information trigger an update event. The following example shows how to listen to these change events.

JavaScript

locationProvider.addListener('update', e => {
  // e.trip contains data that may be useful
  // to the rest of the UI.  
  console.log(e.trip.dropOffTime);
});

TypeScript

locationProvider.addListener('update', (e: google.maps.journeySharing.FleetEngineTripLocationProviderUpdateEvent) => {
  // e.trip contains data that may be useful
  // to the rest of the UI.  
  console.log(e.trip.dropOffTime);
});

Handle errors

Errors that arise asynchronously from requesting trip information trigger error events. The following example shows how to listen for these events in order to handle errors.

JavaScript

locationProvider.addListener('error', e => {
  // e.error contains the error that triggered the 
  // event
  console.error(e.error);
});

TypeScript

locationProvider.addListener('error', (e: google.maps.ErrorEvent) => {
  // e.error contains the error that triggered the 
  // event
  console.error(e.error);
});

Note: Make sure to wrap library calls in try...catch blocks to handle unanticipated errors.

Stop tracking

To stop the location provider from tracking the trip, remove the trip ID from the location provider.

JavaScript

locationProvider.tripId = '';

TypeScript

locationProvider.tripId = '';

Remove the location provider from the map view

The following example shows how to remove a location provider from the map view.

JavaScript

mapView.removeLocationProvider(locationProvider);

TypeScript

mapView.removeLocationProvider(locationProvider);

Customizing the look and feel of the base map

To customize the look and feel of the maps component, style your map using cloud-based tooling or by setting options directly in code.

Using cloud-based map styling

Cloud-based maps styling lets you create and edit map styles for any of your apps that use Google Maps from the Google Cloud console, without requiring any changes to your code. The map styles are saved as map IDs in your Cloud project. To apply a style to your JavaScript SDK map, specify a mapId and any other mapOptions when you create the JourneySharingMapView. The mapId field cannot be changed or added after the JourneySharingMapView has been instantiated. The following example shows how to enable a previously created map style with a map ID.

JavaScript

const mapView = new google.maps.journeySharing.JourneySharingMapView({
  element: document.getElementById('map_canvas'),
  locationProviders: [locationProvider],
  mapOptions: {
    mapId: 'YOUR_MAP_ID'
  }
  // and any other styling options.
});

TypeScript

const mapView = new google.maps.journeySharing.JourneySharingMapView({
  element: document.getElementById('map_canvas'),
  locationProviders: [locationProvider],
  mapOptions: {
    mapId: 'YOUR_MAP_ID'
  }
  // and any other styling options.
});

Use code-based map styling

Another way of customizing map styling is to set mapOptions when you create the JourneySharingMapView.

JavaScript

const mapView = new google.maps.journeySharing.JourneySharingMapView({
  element: document.getElementById('map_canvas'),
  locationProviders: [locationProvider],
  mapOptions: {
    styles: [
      {
        "featureType": "road.arterial",
        "elementType": "geometry",
        "stylers": [
          { "color": "#CCFFFF" }
        ]
      }
    ]
  }
});

TypeScript

const mapView = new google.maps.journeySharing.JourneySharingMapView({
  element: document.getElementById('map_canvas'),
  locationProviders: [locationProvider],
  mapOptions: {
    styles: [
      {
        "featureType": "road.arterial",
        "elementType": "geometry",
        "stylers": [
          { "color": "#CCFFFF" }
        ]
      }
    ]
  }
});

Use marker customizations

With the JavaScript SDK, you can customize the look and feel of markers added to the map. You do this by specifying marker customizations, which the JavaScript SDK then applies before adding markers to the map and with every marker update.

The simplest customization is to specify a MarkerOptions object that will be applied to all markers of the same type. The changes specified in the object are applied after each marker has been created, overwriting any default options.

A more advanced option is to specify a customization function. Customization functions allow for styling of the markers based on data, as well as adding interactivity to markers, such as click handling. Specifically, Trip and Order Progress passes data to the customization function about the type of object the marker represents: vehicle, origin, waypoint or destination. This then allows marker styling to change based on the current state of the marker element itself; for example, the number of waypoint remaining until the vehicle finishes the trip. You can even join against data from sources outside Fleet Engine and style the marker based on that information.

The JavaScript SDK provides the following customization parameters in FleetEngineTripLocationProviderOptions:

Change the styling of markers using MarkerOptions

The following example shows how to configure a vehicle marker's styling with a MarkerOptions object. Follow this pattern to customize the styling of any marker using any of the marker customizations listed earlier.

JavaScript

vehicleMarkerCustomization = {
  cursor: 'grab'
};

TypeScript

vehicleMarkerCustomization = {
  cursor: 'grab'
};

Change the styling of markers using customization functions

The following example shows how to configure a vehicle marker's styling. Follow this pattern to customize the styling of any marker using any of the marker customization parameters listed earlier.

JavaScript

vehicleMarkerCustomization =
  (params) => {
    var distance = params.trip.remainingWaypoints.length;
    params.marker.setLabel(`${distance}`);
  };

TypeScript

vehicleMarkerCustomization =
  (params: TripMarkerCustomizationFunctionParams) => {
    const distance = params.trip.remainingWaypoints.length;
    params.marker.setLabel(`${distance}`);
};

Add click handling to markers

The following example shows how to add click handling to a vehicle marker. Follow this pattern to add click handling to any marker using any of the marker customization parameters listed earlier.

JavaScript

vehicleMarkerCustomization =
  (params) => {
    if (params.isNew) {
      params.marker.addListener('click', () => {
        // Perform desired action.
      });
    }
  };

TypeScript

vehicleMarkerCustomization =
  (params: TripMarkerCustomizationFunctionParams) => {
    if (params.isNew) {
      params.marker.addListener('click', () => {
        // Perform desired action.
      });
    }
  };

Use polyline customizations

With the JavaScript SDK, you can also customize the look and feel of the trip route on the map. The library creates a google.maps.Polyline object for each pair of coordinates in the vehicle's active or remaining path. You can style the Polyline objects by specifying polyline customizations. The library then applies these customizations in two situations: before adding the objects to the map, and when the data used for the objects have changed.

Similar to marker customization, you can specify a set of PolylineOptions to be applied to all of the matched Polyline objects when they are created or updated.

Likewise, you can specify a customization function. Customization functions allow for individual styling of the objects based on data sent by Fleet Engine. The function can change the styling of each object based on the current state of the vehicle; for example, coloring the Polyline object a deeper shade, or making it thicker when the vehicle is moving slower. You can even join against from sources outside Fleet Engine and style the Polyline object based on that information.

You can specify the customizations using parameters provided in FleetEngineTripLocationProviderOptions. You can set customizations for different path states in the vehicle's journey--already traveled, actively traveling, or not yet traveled. The parameters are as follows:

Change the styling of Polyline objects using PolylineOptions

The following example shows how to configure the styling for a Polyline object with PolylineOptions. Follow this pattern to customize the styling of any Polyline object using any of the polyline customizations listed earlier.

JavaScript

activePolylineCustomization = {
  strokeWidth: 5,
  strokeColor: 'black',
};

TypeScript

activePolylineCustomization = {
  strokeWidth: 5,
  strokeColor: 'black',
};

Change the styling of Polyline objects using customization functions

The following example shows how to configure an active Polyline object's styling. Follow this pattern to customize the styling of any Polyline object using any of the polyline customization parameters listed earlier.

JavaScript

// Color the Polyline objects in green if the vehicle is nearby.
activePolylineCustomization =
  (params) => {
    const distance = params.trip.remainingWaypoints[0].distanceMeters;
    if (distance < 1000) {

      // params.polylines contains an ordered list of Polyline objects for
      // the path.
      for (const polylineObject of params.polylines) {
        polylineObject.setOptions({strokeColor: 'green'});
      });
    }
  };

TypeScript

// Color the Polyline objects in green if the vehicle is nearby.
activePolylineCustomization =
  (params: TripPolylineCustomizationFunctionParams) => {
    const distance = params.trip.remainingWaypoints[0].distanceMeters;
    if (distance < 1000) {

      // params.polylines contains an ordered list of Polyline objects for
      // the path.
      for (const polylineObject of params.polylines) {
        polylineObject.setOptions({strokeColor: 'green'});
      });
    }
  };

Control the visibility of Polyline objects

By default, all Polyline objects are visible. To make a Polyline object invisible, set its visible property:

JavaScript

remainingPolylineCustomization = {visible: false};

TypeScript

remainingPolylineCustomization = {visible: false};

Render traffic-aware Polyline objects

Fleet Engine returns traffic speed data for the active and remaining paths for the followed vehicle. You can use this information to style the Polyline objects according to their traffic speeds:

JavaScript

// Color the Polyline objects according to their real-time traffic levels
// using '#05f' for normal, '#fa0' for slow, and '#f33' for traffic jam.
activePolylineCustomization =
  FleetEngineTripLocationProvider.
      TRAFFIC_AWARE_ACTIVE_POLYLINE_CUSTOMIZATION_FUNCTION;

// Or alter the objects further after the customization function has been
// run -- in this example, change the blue for normal to green:
activePolylineCustomization =
  (params) => {
    FleetEngineTripLocationProvider.
        TRAFFIC_AWARE_ACTIVE_POLYLINE_CUSTOMIZATION_FUNCTION(params);
    for (const polylineObject of params.polylines) {
      if (polylineObject.get('strokeColor') === '#05f') {
        polylineObject.setOptions({strokeColor: 'green'});
      }
    }
  };

TypeScript

// Color the Polyline objects according to their real-time traffic levels
// using '#05f' for normal, '#fa0' for slow, and '#f33' for traffic jam.
activePolylineCustomization =
  FleetEngineTripLocationProvider.
      TRAFFIC_AWARE_ACTIVE_POLYLINE_CUSTOMIZATION_FUNCTION;

// Or alter the objects further after the customization function has been
// run -- in this example, change the blue for normal to green:
activePolylineCustomization =
  (params: TripPolylineCustomizationFunctionParams) => {
    FleetEngineTripLocationProvider.
        TRAFFIC_AWARE_ACTIVE_POLYLINE_CUSTOMIZATION_FUNCTION(params);
    for (const polylineObject of params.polylines) {
      if (polylineObject.get('strokeColor') === '#05f') {
        polylineObject.setOptions({strokeColor: 'green'});
      }
    }
  };

Display an InfoWindow for a vehicle or location marker

You can use an InfoWindow to display additional information about a vehicle or location marker.

The following example shows how to create an InfoWindow and attach it to a vehicle marker:

JavaScript

// 1. Create an info window.
const infoWindow = new google.maps.InfoWindow(
    {disableAutoPan: true});

locationProvider.addListener('update', e => {
  const stopsCount = e.trip.remainingWaypoints.length;
  infoWindow.setContent(
      `Your vehicle is ${stopsCount} stops away.`);

  // 2. Attach the info window to a vehicle marker.   
  // This property can return multiple markers.
  const marker = mapView.vehicleMarkers[0];
  infoWindow.open(mapView.map, marker);
});

// 3. Close the info window.
infoWindow.close();

TypeScript

// 1. Create an info window.
const infoWindow = new google.maps.InfoWindow(
    {disableAutoPan: true});

locationProvider.addListener('update', (e: google.maps.journeySharing.FleetEngineTripLocationProviderUpdateEvent) => {
  const stopsCount = e.trip.remainingWaypoints.length;
  infoWindow.setContent(
      `Your vehicle is ${stopsCount} stops away.`);

  // 2. Attach the info window to a vehicle marker.   
  // This property can return multiple markers.
  const marker = mapView.vehicleMarkers[0];
  infoWindow.open(mapView.map, marker);
});

// 3. Close the info window.
infoWindow.close();

Disable automatic fitting

You can stop the map from automatically fitting the viewport to the vehicle and anticipated route by disabling automatic fitting. The following example shows how to disable automatic fitting when you configure the trip and order progress map view.

JavaScript

const mapView = new
    google.maps.journeySharing.JourneySharingMapView({
  element: document.getElementById('map_canvas'),
  locationProviders: [locationProvider],
  automaticViewportMode:
      google.maps.journeySharing
          .AutomaticViewportMode.NONE,
  ...
});

TypeScript

const mapView = new
    google.maps.journeySharing.JourneySharingMapView({
  element: document.getElementById('map_canvas'),
  locationProviders: [locationProvider],
  automaticViewportMode:
      google.maps.journeySharing
          .AutomaticViewportMode.NONE,
  ...
});

Replace an existing map

You can use the JavaScript SDK to replace an existing map that includes markers or other customizations without losing those customizations.

For example, suppose you have a web page with a standard google.maps.Map entity on which a marker is shown:

<!DOCTYPE html>
<html>
  <head>
    <style>
       /* Set the size of the div element that contains the map */
      #map {
        height: 400px;  /* The height is 400 pixels */
        width: 100%;  /* The width is the width of the web page */
       }
    </style>
  </head>
  <body>
    <h3>My Google Maps Demo</h3>
    <!--The div element for the map -->
    <div id="map"></div>
    <script>
// Initialize and add the map
function initMap() {
  // The location of Uluru
  var uluru = {lat: -25.344, lng: 131.036};
  // The map, centered at Uluru
  var map = new google.maps.Map(document.getElementById('map'));
  map.setOptions({center: {lat: 37.424069, lng: -122.0916944}, zoom: 14});

  // The marker, positioned at Uluru
  var marker = new google.maps.Marker({position: uluru, map: map});
}
    </script>
    <!-- Load the API from the specified URL.
       * The async attribute allows the browser to render the page while the API loads.
       * The key parameter will contain your own API key (which is not needed for this tutorial).
       * The callback parameter executes the initMap() function.
    -->
    <script defer src="https://maps.googleapis.com/maps/api/js?key=YOUR_API_KEY&callback=initMap">
    </script>
  </body>
</html>

To add the JavaScript SDK:

  1. Add code for the authentication token factory.
  2. Initialize a location provider in the initMap() function.
  3. Initialize the map view in the initMap() function. The view contains the map.
  4. Move your customization into the callback function for the map view initialization.
  5. Add the location library to the API loader.

The following example shows the changes to be made:

<!DOCTYPE html>
<html>
  <head>
    <style>
       /* Set the size of the div element that contains the map */
      #map {
        height: 400px;  /* The height is 400 pixels */
        width: 100%;  /* The width is the width of the web page */
       }
    </style>
  </head>
  <body>
    <h3>My Google Maps Demo</h3>
    <!--The div element for the map -->
    <div id="map"></div>
    <script>
let locationProvider;

// (1) Authentication Token Fetcher
async function authTokenFetcher(options) {
  // options is a record containing two keys called 
  // serviceType and context. The developer should
  // generate the correct SERVER_TOKEN_URL and request
  // based on the values of these fields.
  const response = await fetch(SERVER_TOKEN_URL);
      if (!response.ok) {
        throw new Error(response.statusText);
      }
      const data = await response.json();
      return {
        token: data.Token,
        expiresInSeconds: data.ExpiresInSeconds
      };
}

// Initialize and add the map
function initMap() {
  // (2) Initialize location provider.
  locationProvider = new google.maps.journeySharing.FleetEngineTripLocationProvider({
    projectId: "YOUR_PROVIDER_ID",
    authTokenFetcher,
  });

  // (3) Initialize map view (which contains the map).
  const mapView = new google.maps.journeySharing.JourneySharingMapView({
    element: document.getElementById('map'),
    locationProviders: [locationProvider],
    // any styling options
  });

  locationProvider.tripId = TRIP_ID;

    // (4) Add customizations like before.

    // The location of Uluru
    var uluru = {lat: -25.344, lng: 131.036};
    // The map, centered at Uluru
    var map = mapView.map;
    map.setOptions({center: {lat: 37.424069, lng: -122.0916944}, zoom: 14});
    // The marker, positioned at Uluru
    var marker = new google.maps.Marker({position: uluru, map: map});
  };

    </script>
    <!-- Load the API from the specified URL
      * The async attribute allows the browser to render the page while the API loads
      * The key parameter will contain your own API key (which is not needed for this tutorial)
      * The callback parameter executes the initMap() function
      *
      * (5) Add the SDK to the API loader.
    -->
    <script defer
    src="https://maps.googleapis.com/maps/api/js?key=YOUR_API_KEY&callback=initMap&libraries=journeySharing">
    </script>
  </body>
</html>

If you operate a trip with the specified ID near Uluru, it will now be rendered on the map.