
บทนำ
บทแนะนำนี้จะแสดงวิธีเพิ่ม Google Maps ลงในแอป Flutter แผนที่จะมีเครื่องหมายหรือที่เรียกว่าหมุดเพื่อระบุตำแหน่งที่เฉพาะเจาะจง
การรับรหัส
โคลนหรือดาวน์โหลดที่เก็บตัวอย่าง Flutter คุณดูโค้ด
ตัวอย่างได้ใน
ไดเรกทอรี google_maps
การตั้งค่าโปรเจ็กต์การพัฒนา
โปรดตรวจสอบว่าคุณได้ทำตามขั้นตอนที่ระบุไว้ในคำแนะนำตั้งค่าโปรเจ็กต์ Flutter แล้วก่อนที่จะดำเนินการต่อในหัวข้อนี้
1. นำเข้าแพ็กเกจ Google Maps สำหรับ Flutter
- เปิดไฟล์
main.dartใน IDE ที่ต้องการ - ตรวจสอบว่าได้เพิ่มคำสั่งนำเข้าต่อไปนี้ลงในไฟล์แล้ว
import 'package:google_maps_flutter/google_maps_flutter.dart';
2. เพิ่ม Google Maps ลงในแอป Flutter
เพิ่มวิดเจ็ต GoogleMap เป็นเนื้อหาภายในวิดเจ็ต Scaffold
GoogleMap(
   initialCameraPosition: CameraPosition(
      target: _center,
      zoom: 11.0,
   ),
   markers: {
      const Marker(
         markerId: MarkerId('Sydney'),
         position: LatLng(-33.86, 151.20),
      )
   },
)
markerIdตัวเลือกจะติดป้ายกำกับเครื่องหมาย- ตัวเลือก
positionจะกำหนดตำแหน่งที่เครื่องหมายปรากฏบนแผนที่
3. การสร้างและการเรียกใช้แอป
เริ่มแอป Flutter โดยใช้ตัวเลือกใดตัวเลือกหนึ่งต่อไปนี้
- จาก IDE ให้คลิกปุ่ม
Run - จากบรรทัดคำสั่ง ให้เรียกใช้
flutter run
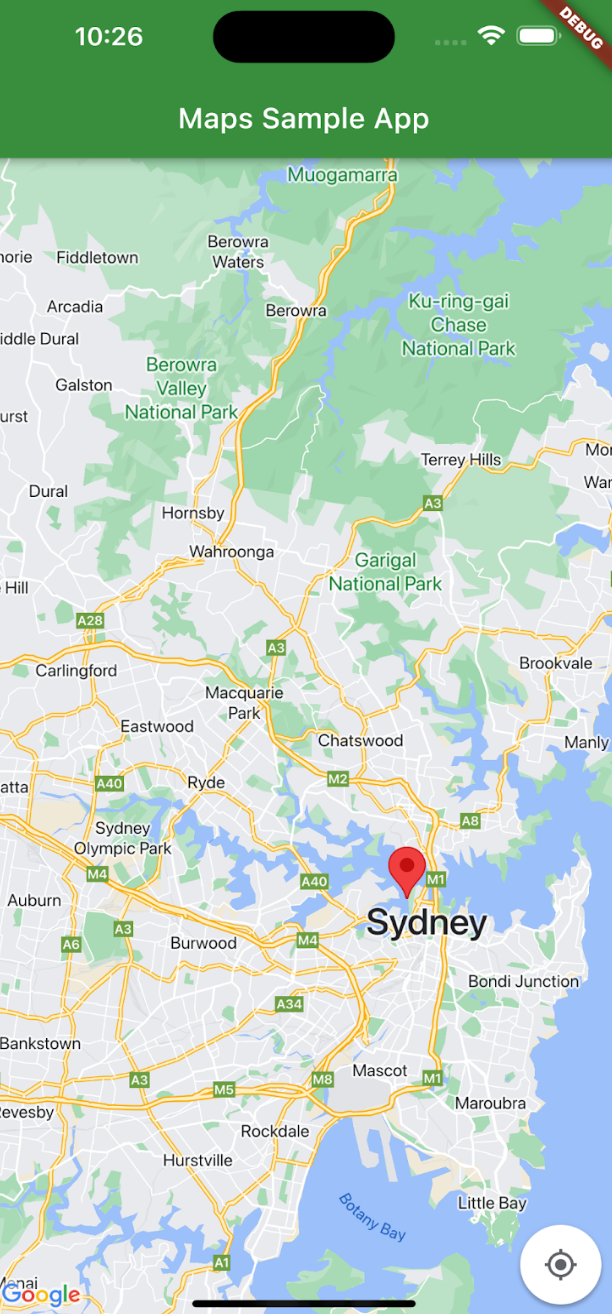
คุณควรเห็นแผนที่ที่มีเครื่องหมายอยู่ตรงกลางซิดนีย์บนชายฝั่งตะวันออกของ ออสเตรเลีย ซึ่งคล้ายกับรูปภาพในหน้านี้
การแก้ปัญหา
- หากไม่เห็นแผนที่ ให้ตรวจสอบว่าคุณได้รับคีย์ API และเพิ่มลงในแอปแล้ว
- หากใช้ตัวระบุชุด iOS เพื่อจำกัดคีย์ API ให้แก้ไขคีย์เพื่อเพิ่มตัวระบุชุดสำหรับแอป
com.google.examples.map-with-marker - ตรวจสอบว่าคุณมีการเชื่อมต่อ Wi-Fi หรือ GPS ที่ดี
- ใช้ Flutter DevTools เพื่อดูบันทึกและแก้ไขข้อบกพร่องของแอป
- ดูข้อมูลเพิ่มเติมเกี่ยวกับการเรียกใช้แอป Flutter
4. ทำความเข้าใจโค้ด
คุณดูโค้ดนี้ได้ใน GitHub
- นำเข้าแพ็กเกจที่จำเป็นและเริ่มต้นแอป
   import 'package:flutter/material.dart';
   import 'package:google_maps_flutter/google_maps_flutter.dart';

   void main() => runApp(const MyApp());

   class MyApp extends StatefulWidget {
   const MyApp({super.key});

   @override
      State<MyApp> createState() => _MyAppState();
   }
- สร้างแผนที่ที่อยู่ตรงกลางซิดนีย์ ประเทศออสเตรเลีย
class _MyAppState extends State<MyApp> {

   late GoogleMapController mapController;

   final LatLng _center = const LatLng(-33.86, 151.20);

   void _onMapCreated(GoogleMapController controller) {
      mapController = controller;
   }
- เพิ่มวิดเจ็ตที่จำเป็นเพื่อแสดงแผนที่ในแอป
@override
Widget build(BuildContext context) {
    return MaterialApp(
      home: Scaffold(
        appBar: AppBar(
          title: const Text('Maps Sample App'),
          backgroundColor: Colors.green[700],
        ),
        body: GoogleMap(
            onMapCreated: _onMapCreated,
            initialCameraPosition: CameraPosition(
              target: _center,
              zoom: 11.0,
            ), // CameraPosition
        ), // GoogleMap
      ), // Scaffold
    ); // MaterialApp
  }
}
- เพิ่มวิดเจ็ตเครื่องหมายเพื่อเพิ่มวิดเจ็ตลงในแอป
   body: GoogleMap(
      onMapCreated: _onMapCreated,
      initialCameraPosition: CameraPosition(
         target: _center,
         zoom: 11.0,
      ),
      markers: {
         const Marker(
               markerId: const MarkerId("Sydney"),
               position: LatLng(-33.86, 151.20),
            ), // Marker
      }, // markers
   ), // GoogleMap
   ...
- เพิ่มหน้าต่างข้อมูลลงในเครื่องหมาย
      const Marker(
            markerId: const MarkerId("Sydney"),
            position: LatLng(-33.86, 151.20),
            infoWindow: InfoWindow(
               title: "Sydney",
               snippet: "Capital of New South Wales",
            ), // InfoWindow
      ), //Marker
      ...
ยินดีด้วย คุณได้สร้างแอป Flutter ที่แสดงแผนที่ Google พร้อมเครื่องหมายเพื่อระบุตำแหน่งที่เฉพาะเจาะจงและให้ข้อมูลเพิ่มเติมในหน้าต่างข้อมูล นอกจากนี้ คุณยังได้เรียนรู้วิธีใช้แพ็กเกจ Google Maps สำหรับ Flutter ด้วย