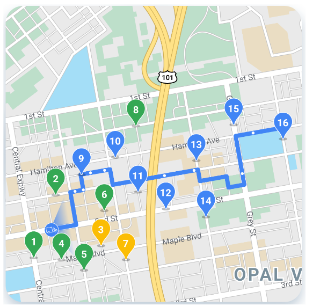
You can use the Consumer SDK to build and run a basic consumer app integrated with On-demand Rides and Deliveries Solution backend services. You can create a Trip and Order Progress app that can display an active trip, respond to trip updates, and handle trip errors.
Because the Consumer SDK has a modular architecture, you can use the parts of the API that you want to use for your particular app and integrate them with your own APIs, backend services provided by the Fleet Engine, and addition API's of the Google Maps Platform.
Minimum system requirements
The mobile device must be running Android 6.0 (API level 23) or later.
Maven configuration
Consumer SDK versions 1.99.0 and later are available using the Google Maven repository.
Gradle
Add the following to your build.gradle
file:
repositories {
...
google()
}
Maven
Add the following to your pom.xml
file:
<project>
...
<repositories>
<repository>
<id>google-maven-repository</id>
<url>https://maven.google.com</url>
</repository>
</repositories>
...
</project>
Project Configuration
To use the Consumer SDK for Android, your app must target
minSdkVersion
23 or higher.
To run an app built with the Consumer SDK, the Android device must have Google Play services installed.
Set up your development project
To set up your development project and get an API key for the project on the Google Cloud Console:
Create a new Google Cloud Console project, or select an existing project, for use with the Consumer SDK. Wait a few minutes until the new project is visible on the Google Cloud Console.
In order to run the demo app, your project must have access to the Maps SDK for Android. In the Google Cloud Console, select APIs & Services > Library, then search for and enable the Maps SDK for Android.
Get an API key for the project by selecting APIs & Services > Credentials > Create credentials > API key. For more information about getting an API key, see Get an API key.
Add the Consumer SDK to your app
The Consumer SDK is available via a private Maven repository. The repository includes the SDK's Project Object Model (.pom) files and Javadocs. To add the Consumer SDK to your app:
Set up your environment to access the host Maven repository as described in the previous section.
If you have centralized dependency management configuration declared in
settings.gradle
, disable it as follows.Remove the following code block in
settings.gradle
:import org.gradle.api.initialization.resolve.RepositoriesMode dependencyResolutionManagement { repositoriesMode.set(RepositoriesMode.FAIL_ON_PROJECT_REPOS) repositories { google() mavenCentral() } }
Add the following dependency to your Gradle or Maven configuration, substituting the
VERSION_NUMBER
placeholder for the desired version of the Consumer SDK.Gradle
Add the following to your
build.gradle
:dependencies { ... implementation 'com.google.android.libraries.mapsplatform.transportation:transportation-consumer:VERSION_NUMBER' }
Maven
Add the following to your
pom.xml
:<dependencies> ... <dependency> <groupId>com.google.android.libraries.mapsplatform.transportation</groupId> <artifactId>transportation-consumer</artifactId> <version>VERSION_NUMBER</version> </dependency> </dependencies>
Add the API key to your app
Once you have added the Consumer SDK to your app, add the API key to your app. You must use the project API key you obtained when you set up your development project.
This section describes how to store your API key so that it can be more securely
referenced by your app. You should not check your API key into your version
control system. It should be stored in the local.properties
file, which is
located in the root directory of your project. For more information about the
local.properties
file, see
Gradle properties files.
To streamline this task, you can use the Secrets Gradle Plugin for Android.
To install the plugin and store your API key:
Open your root-level
build.gradle
file and add the following code to thedependencies
element underbuildscript
.Groovy
buildscript { dependencies { // ... classpath "com.google.android.libraries.mapsplatform.secrets-gradle-plugin:secrets-gradle-plugin:2.0.0" } }
Kotlin
buildscript { dependencies { // ... classpath("com.google.android.libraries.mapsplatform.secrets-gradle-plugin:secrets-gradle-plugin:2.0.0") } }
Open your app-level
build.gradle
file and add the following code to theplugins
element.Groovy
id 'com.google.android.libraries.mapsplatform.secrets-gradle-plugin'
Kotlin
id("com.google.android.libraries.mapsplatform.secrets-gradle-plugin")
If you use Android Studio, sync your project with Gradle.
Open the
local.properties
in your project level directory, and then add the following code. ReplaceYOUR_API_KEY
with your API key.MAPS_API_KEY=YOUR_API_KEY
In your
AndroidManifest.xml
file, go tocom.google.android.geo.API_KEY
and update theandroid:value
attribute as follows:<meta-data android:name="com.google.android.geo.API_KEY" android:value="${MAPS_API_KEY}" />
The following example shows a complete manifest for a sample app:
<manifest xmlns:android="http://schemas.android.com/apk/res/android"
package="com.example.consumerapidemo">
<uses-permission android:name="android.permission.ACCESS_FINE_LOCATION" />
<application
android:allowBackup="true"
android:icon="@mipmap/ic_launcher"
android:label="@string/app_name"
android:supportsRtl="true"
android:theme="@style/_AppTheme">
<meta-data
android:name="com.google.android.geo.API_KEY"
android:value="${MAPS_API_KEY}" />
<activity android:name=".MainActivity">
<intent-filter>
<action android:name="android.intent.action.MAIN" />
<category android:name="android.intent.category.LAUNCHER" />
</intent-filter>
</activity>
</application>
</manifest>
Include the required attributions in your app
If you use the Consumer SDK in your app, you must include attribution text and open source licenses as part of your app's legal notices section. It's best to include the attributions as an independent menu item or as part of an About menu item.
You can find the required attribution text and open source licenses in the Ridesharing Consumer SDK zip file:
NOTICE.txt
LICENSES.txt
Consumer SDK Authentication
The Consumer SDK provides authentication using JSON Web Tokens. A JSON Web Token (JWT) is a JSON-base access token that provides one or more claims on a service. For example, a server could generate a token that has the claim "logged in as admin" and provide that to a client. The client could then use that token to prove that it is logged in as an admin.
The Consumer SDK uses the JSON Web Token provided by the application to communicate with the Fleet Engine. See Fleet Engine Authentication and Authorization for more information.
The authorization token provides access to the following Fleet Engine services:
TripService
- Gives the Consumer SDK access to trip details, including vehicle position, route, and ETA. Authorization tokens for the trip service must include atripid:TRIP_ID
claim in the token'sauthorization
header, whereTRIP_ID
is the trip ID.VehicleService
- Gives the Consumer SDK information about the fuzzed vehicle location for displaying the vehicle density layer and estimating pickup point ETAs. Because the Consumer SDK uses only fuzzed locations, authorization tokens for the vehicle service do not require avehicleid
claim.
JSON Web Token callbacks
The Consumer SDK registers an authorization token callback with the application during initialization. The SDK calls the application to get a token for all network requests that require authorization.
We strongly recommend that your callback implementation cache authorization
tokens and refresh them only when the expiry
time has passed. Tokens should
be issued with a one-hour expiration.
The authorization token callback specifies which service token is needed
for the TripService
service. It also provides the required tripId
for the context.
The following code example demonstrates how to implement an authorization token callback.
Java
class JsonAuthTokenFactory implements AuthTokenFactory {
private static final String TOKEN_URL =
"https://yourauthserver.example/token";
private static class CachedToken {
String tokenValue;
long expiryTimeMs;
String tripId;
}
private CachedToken token;
/*
* This method is called on a background thread. Blocking is OK. However, be
* aware that no information can be obtained from Fleet Engine until this
* method returns.
*/
@Override
public String getToken(AuthTokenContext context) {
// If there is no existing token or token has expired, go get a new one.
String tripId = context.getTripId();
if (tripId == null) {
throw new RuntimeException("Trip ID is missing from AuthTokenContext");
}
if (token == null || System.currentTimeMillis() > token.expiryTimeMs ||
!tripId.equals(token.tripId)) {
token = fetchNewToken(tripId);
}
return token.tokenValue;
}
private static CachedToken fetchNewToken(String tripId) {
String url = TOKEN_URL + "/" + tripId;
CachedToken token = new CachedToken();
try (Reader r = new InputStreamReader(new URL(url).openStream())) {
com.google.gson.JsonObject obj
= com.google.gson.JsonParser.parseReader(r).getAsJsonObject();
token.tokenValue = obj.get("ServiceToken").getAsString();
token.expiryTimeMs = obj.get("TokenExpiryMs").getAsLong();
/*
* The expiry time could be an hour from now, but just to try and avoid
* passing expired tokens, we subtract 5 minutes from that time.
*/
token.expiryTimeMs -= 5 * 60 * 1000;
} catch (IOException e) {
/*
* It's OK to throw exceptions here. The error listeners will receive the
* error thrown here.
*/
throw new RuntimeException("Could not get auth token", e);
}
token.tripId = tripId;
return token;
}
}
Kotlin
class JsonAuthTokenFactory : AuthTokenFactory() {
private var token: CachedToken? = null
/*
* This method is called on a background thread. Blocking is OK. However, be
* aware that no information can be obtained from Fleet Engine until this
* method returns.
*/
override fun getToken(context: AuthTokenContext): String {
// If there is no existing token or token has expired, go get a new one.
val tripId =
context.getTripId() ?:
throw RuntimeException("Trip ID is missing from AuthTokenContext")
if (token == null || System.currentTimeMillis() > token.expiryTimeMs ||
tripId != token.tripId) {
token = fetchNewToken(tripId)
}
return token.tokenValue
}
class CachedToken(
var tokenValue: String? = "",
var expiryTimeMs: Long = 0,
var tripId: String? = "",
)
private companion object {
const val TOKEN_URL = "https://yourauthserver.example/token"
fun fetchNewToken(tripId: String) {
val url = "$TOKEN_URL/$tripId"
val token = CachedToken()
try {
val reader = InputStreamReader(URL(url).openStream())
reader.use {
val obj = com.google.gson.JsonParser.parseReader(r).getAsJsonObject()
token.tokenValue = obj.get("ServiceToken").getAsString()
token.expiryTimeMs = obj.get("TokenExpiryMs").getAsLong()
/*
* The expiry time could be an hour from now, but just to try and avoid
* passing expired tokens, we subtract 5 minutes from that time.
*/
token.expiryTimeMs -= 5 * 60 * 1000
}
} catch (e: IOException) {
/*
* It's OK to throw exceptions here. The error listeners will receive the
* error thrown here.
*/
throw RuntimeException("Could not get auth token", e)
}
token.tripId = tripId
return token
}
}
}
Initialize the API
Before following these procedures, it is assumed that you have enabled the appropriate services and the Consumer SDK.
Get the ConsumerApi
instance
To use the Consumer SDK, your app needs to initialize
ConsumerApi
asynchronously. The API is a singleton.
The initialization method takes an AuthTokenFactory
. The factory generates new
JWT tokens for the user when necessary.
The providerId
is the Project ID of your Google Cloud Project. See the
Fleet Engine User Guide
for more information on creating the project.
Your app should implement the AuthTokenFactory
as described in
Consumer SDK Authentication.
Java
Task<ConsumerApi> consumerApiTask = ConsumerApi.initialize(
this, "myProviderId", authTokenFactory);
consumerApiTask.addOnSuccessListener(
consumerApi -> this.consumerApi = consumerApi);
Kotlin
val consumerApiTask =
ConsumerApi.initialize(this, "myProviderId", authTokenFactory)
consumerApiTask?.addOnSuccessListener { consumerApi: ConsumerApi ->
this@YourActivity.consumerApi = consumerApi
}
Initialize Maps SDK to request for preferred renderer
Consumer SDK v2.0.0 supports Maps SDK for Android v18.1.0 and above. It supports requests specifying the preferred Google Maps renderer. For details, refer to New Map Renderer(opt-in).
Add Maps SDK as a dependency
Gradle
Add the following to your build.gradle
:
dependencies {
//...
implementation "com.google.android.gms:play-services-maps:18.1.0"
}
Maven
Add the following to your pom.xml
:
<dependencies>
...
<dependency>
<groupId>com.google.android.gms</groupId>
<artifactId>play-services-maps</artifactId>
<version>18.1.0</version>
</dependency>
</dependencies>
Initialize Maps SDK before initialize Consumer SDK
In your Application
or start-up Activity
class, call
MapsInitializer.initialize()
and wait for the renderer request result before initializing
Consumer SDK.
java
@Override
protected void onCreate(Bundle savedInstanceState) {
super.onCreate(savedInstanceState);
setContentView(R.layout.main);
initViews();
MapsInitializer.initialize(getApplicationContext(), Renderer.LATEST,
new OnMapsSdkInitializedCallback() {
@Override
public void onMapsSdkInitialized(Renderer renderer) {
switch (renderer) {
case LATEST:
Log.i("maps_renderer", "LATEST renderer");
break;
case LEGACY:
Log.i("maps_renderer", "LEGACY renderer");
break;
}
initializeConsumerSdk();
}
});
}
Kotlin
fun onCreate(savedInstanceState: Bundle?) {
super.onCreate(savedInstanceState)
setContentView(R.layout.main)
initViews()
MapsInitializer.initialize(
getApplicationContext(), Renderer.LATEST,
object : OnMapsSdkInitializedCallback() {
fun onMapsSdkInitialized(renderer: Renderer?) {
when (renderer) {
LATEST -> Log.i("maps_renderer", "LATEST renderer")
LEGACY -> Log.i("maps_renderer", "LEGACY renderer")
}
initializeConsumerSdk()
}
})
}
Create the User Interface
You can use either ConsumerMapFragment
or
ConsumerMapView
to create the user interface for your
application. ConsumerMapFragment
allows you to define
your map using a
Fragment
while ConsumerMapView
allows you to use a
View
. Ride sharing
functionality is the same in both ConsumerMapView
and
ConsumerMapFragment
, so you can choose one based on
whether View
or
Fragment
is better for your application.
Add support for API 19 (KitKat) and Vector drawables
If your app design requires support for API 19 (KitKat) devices and vector drawables,
add the following code to your Activity. This codes extends
AppCompatActivity
to use the
Vector drawables in the Consumer SDK.
Java
// ...
import android.support.v7.app.AppCompatActivity;
// ...
public class ConsumerTestActivity extends AppCompatActivity {
// ...
}
Kotlin
// ...
import android.support.v7.app.AppCompatActivity
// ...
class ConsumerTestActivity : AppCompatActivity() {
// ...
}
Add the map fragment or view
You create the map for displaying journey sharing in either an Android fragment
or a view, which you define in your application layout XML file (located in
/res/layout
). The fragment (or view) then provides access to the journey
sharing map, which your app can access and modify. The map also provides a
handle to the ConsumerController
, which allows your app to control and
customize the journey sharing experience.
Journey sharing map and controller
You define the journey sharing map as either a fragment (using
ConsumerMapFragment
), or as a view (using ConsumerMapView
), as shown in the
following code example. Your onCreate()
method should then call
getConsumerGoogleMapAsync(callback)
, which returns the ConsumerGoogleMap
asynchronously in the callback. You then use the ConsumerGoogleMap
to display
journey sharing, and it can be updated as needed by your app.
ConsumerMapFragment
You define the fragment in your application layout XML file, as demonstrated in the following code example.
<fragment
xmlns:android="http://schemas.android.com/apk/res/android"
android:name="com.google.android.libraries.mapsplatform.transportation.consumer.view.ConsumerMapFragment"
android:id="@+id/consumer_map_fragment"
android:layout_width="match_parent"
android:layout_height="match_parent" />
The call to getConsumerGoogleMapAsync()
should come from the onCreate()
method.
Java
public class SampleAppActivity extends AppCompatActivity {
@Override
protected void onCreate(Bundle savedInstanceState) {
// Find the ConsumerMapFragment.
ConsumerMapFragment consumerMapFragment =
(ConsumerMapFragment) fragmentManager.findFragmentById(R.id.consumer_map_fragment);
// Initiate the callback that returns the map.
if (consumerMapFragment != null) {
consumerMapFragment.getConsumerGoogleMapAsync(
new ConsumerMapReadyCallback() {
// The map returned in the callback is used to access the ConsumerController.
@Override
public void onConsumerMapReady(@NonNull ConsumerGoogleMap consumerGoogleMap) {
ConsumerController consumerController = consumerGoogleMap.getConsumerController();
}
});
}
}
}
Kotlin
class SampleAppActivity : AppCompatActivity() {
override fun onCreate(savedInstanceState: Bundle?) {
// Find the ConsumerMapFragment.
val consumerMapFragment =
fragmentManager.findFragmentById(R.id.consumer_map_fragment) as ConsumerMapFragment
consumerMapFragment.getConsumerGoogleMapAsync(
object : ConsumerMapReadyCallback() {
override fun onConsumerMapReady(consumerGoogleMap: ConsumerGoogleMap) {
val consumerController = consumerGoogleMap.getConsumerController()!!
}
}
)
}
}
ConsumerMapView
The view can be used either in a fragment or in an activity, as defined in your XML file.
<com.google.android.libraries.mapsplatform.transportation.consumer.view.ConsumerMapView
xmlns:android="http://schemas.android.com/apk/res/android"
android:id="@+id/consumer_map_view"
android:layout_width="match_parent"
android:layout_height="match_parent" />
The call to getConsumerGoogleMapAsync()
should be from onCreate()
. In
addition to the callback parameter, it requires the containing activity or
fragment, and GoogleMapOptions
(which can be null), containing configuration
attributes for the MapView
. The activity or fragment base class must be either
a FragmentActivity
or a support Fragment
(respectively), since they provide
access to its lifecycle.
Java
public class SampleAppActivity extends AppCompatActivity {
@Override
protected void onCreate(Bundle savedInstanceState) {
ConsumerMapView mapView = findViewById(R.id.consumer_map_view);
if (mapView != null) {
mapView.getConsumerGoogleMapAsync(
new ConsumerMapReadyCallback() {
// The map returned in the callback is used to access the ConsumerController.
@Override
public void onConsumerMapReady(@NonNull ConsumerGoogleMap consumerGoogleMap) {
ConsumerController consumerController = consumerGoogleMap.getConsumerController();
}
}, this, null);
}
}
}
Kotlin
class SampleAppActivity : AppCompatActivity() {
override fun onCreate(savedInstanceState: Bundle?) {
val mapView = findViewById(R.id.consumer_map_view) as ConsumerMapView
mapView.getConsumerGoogleMapAsync(
object : ConsumerMapReadyCallback() {
// The map returned in the callback is used to access the ConsumerController.
override fun onConsumerMapReady(consumerGoogleMap: ConsumerGoogleMap) {
val consumerController = consumerGoogleMap.getConsumerController()!!
}
},
/* fragmentActivity= */ this,
/* googleMapOptions= */ null,
)
}
}
A MapView
in a fragment is the same as for the example above for MapView
in
an activity, except that the fragment inflates the layout that includes the
MapView
in the fragment onCreateView()
method.
Java
public class MapViewInFragment extends Fragment {
@Override
public View onCreateView(
@NonNull LayoutInflater layoutInflater,
@Nullable ViewGroup viewGroup,
@Nullable Bundle bundle) {
return layoutInflater.inflate(R.layout.consumer_map_view, viewGroup, false);
}
}
Kotlin
class MapViewInFragment : Fragment() {
override fun onCreateView(
layoutInflater: LayoutInflater,
container: ViewGroup?,
savedInstanceState: Bundle?,
): View {
return layoutInflater.inflate(R.layout.consumer_map_view, viewGroup, false)
}
}
Adjusting the camera zoom to focus on a journey
The default My Location button built in to the Maps SDK centers the camera on the device location.
If there is an active Journey Sharing session, you may want to center the camera to focus on the journey instead of the device location.
Consumer SDK for Android built-in solution: AutoCamera
To let you focus on the journey instead of the device location, the Consumer SDK provides an AutoCamera feature that is enabled by default. The camera zooms to focus on the journey sharing route and the next trip waypoint.
Customizing camera behavior
If you require more control of the camera behavior, you can disable or enable autocamera using ConsumerController.setAutoCameraEnabled().
ConsumerController.getCameraUpdate() returns the recommended camera bounds at that moment. You can then provide this CameraUpdate
as an argument to
GoogleMap.moveCamera() or GoogleMap.animateCamera().
Access ridesharing and maps
To support ridesharing and map interaction in your application, you need access
to ConsumerGoogleMap
and
ConsumerController
.
ConsumerMapFragment
and
ConsumerMapView
both asynchronously return
ConsumerGoogleMap
in ConsumerMapReadyCallback
.
ConsumerGoogleMap
returns
ConsumerController
from getConsumerController()
. You
can access ConsumerGoogleMap
and
ConsumerController
as follows.
Java
private ConsumerGoogleMap consumerGoogleMap;
private ConsumerController consumerController;
private ConsumerMapView consumerMapView;
consumerMapView.getConsumerGoogleMapAsync(
new ConsumerMapReadyCallback() {
@Override
public void onConsumerMapReady(@NonNull ConsumerGoogleMap consumerMap) {
consumerGoogleMap = consumerMap;
consumerController = consumerMap.getConsumerController();
}
},
this, null);
Kotlin
var consumerGoogleMap: ConsumerGoogleMap
var consumerController: ConsumerController
val consumerMapView = findViewById(R.id.consumer_map_view) as ConsumerMapView
consumerMapView.getConsumerGoogleMapAsync(
object : ConsumerMapReadyCallback() {
override fun onConsumerMapReady(consumerMap: ConsumerGoogleMap) {
consumerGoogleMap = consumerMap
consumerController = consumerMap.getConsumerController()
},
/* fragmentActivity= */ this,
/* googleMapOptions= */ null,
}
)
ConsumerGoogleMap
ConsumerGoogleMap
is a wrapper class for the
GoogleMap
class. It provides your app with the ability to
interact with the map using an API that is equivalent to
GoogleMap
. Using the consumer map allows your app and ride
sharing to interact seamlessly with the same underlying GoogleMap. For example,
GoogleMap
only allows a single callback registration, but
ConsumerGoogleMap
supports dual registered callbacks.
These callbacks allow your app and ride sharing to register callbacks which are
called sequentially.
ConsumerController
ConsumerController
provides access to ride sharing functionality such
as monitoring trips, controlling trip status, and setting locations.
Set up journey sharing
After the backend has matched a consumer with a vehicle, use JourneySharingSession
to start the journey sharing user interface. Journey sharing shows the matched
vehicle location and route. After implementing the SDK in your app, you can add
the functionality for monitoring trips, listening for updates, and handling errors.
The following procedures assume the backend services are in place and that your
services for matching consumers with vehicles is operational.
Register a listener on a
TripModel
object to get details about the trip such as the ETA (Estimated Time of Arrival) and the distance that the vehicle needs to travel before arrival.Java
// Create a TripModel instance for listening to updates to the trip specified by this trip name. String tripName = ...; TripModelManager tripModelManager = consumerApi.getTripModelManager(); TripModel tripModel = tripModelManager.getTripModel(tripName); // Create a JourneySharingSession instance based on the TripModel. JourneySharingSession session = JourneySharingSession.createInstance(tripModel); // Add the JourneySharingSession instance on the map for updating the UI. consumerController.showSession(session); // Register for trip update events. tripModel.registerTripCallback(new TripModelCallback() { @Override public void onTripETAToNextWaypointUpdated( TripInfo tripInfo, @Nullable Long timestampMillis) { // ... } @Override public void onTripActiveRouteRemainingDistanceUpdated( TripInfo tripInfo, @Nullable Integer distanceMeters) { // ... } // ... });
Kotlin
// Create a TripModel instance for listening to updates to the trip specified by this trip name. val tripName = "tripName" val tripModelManager = consumerApi.getTripModelManager() val tripModel = tripModelManager.getTripModel(tripName) // Create a JourneySharingSession instance based on the TripModel. val session = JourneySharingSession.createInstance(tripModel) // Add the JourneySharingSession instance on the map for updating the UI. consumerController.showSession(session) // Register for trip update events. tripModel.registerTripCallback( object : TripModelCallback() { override fun onTripETAToNextWaypointUpdated( tripInfo: TripInfo, timestampMillis: Long?, ) { // ... } override fun onTripActiveRouteRemainingDistanceUpdated( tripInfo: TripInfo, distanceMeters: Int?, ) { // ... } // ... })
Configure your trip using
TripModelOptions
.Java
// Set refresh interval to 2 seconds. TripModelOptions tripOptions = TripModelOptions.builder().setRefreshIntervalMillis(2000).build(); tripModel.setTripModelOptions(tripOptions);
Kotlin
// Set refresh interval to 2 seconds. val tripOptions = TripModelOptions.builder().setRefreshIntervalMillis(2000).build() tripModel.setTripModelOptions(tripOptions)
Stop journey sharing
Ensure that you stop journey sharing when it is no longer needed, such as when the host activity is destroyed. Stopping journey sharing also stops network requests to Fleet Engine, and prevents memory leaks.
The following sample code demonstrates how to stop journey sharing.
Java
public class MainActivity extends AppCompatActivity
implements ConsumerViewModel.JourneySharingListener {
// Class implementation
@Override
protected void onDestroy() {
super.onDestroy();
if (journeySharingSession != null) {
journeySharingSession.stop();
}
}
}
Kotlin
class SampleAppActivity : AppCompatActivity(), ConsumerViewModel.JourneySharingListener {
// Class implementation
override fun onDestroy() {
super.onDestroy()
journeySharingSession?.stop()
}
}
Handle trip errors
The onTripRefreshError
method surfaces errors that occur during trip monitoring.
The mapping for Consumer SDK
errors follow the same HTTP/RPC guidelines established for
Google Cloud Platform.
Common errors surfaced during trip monitoring include following:
HTTP | RPC | Description |
---|---|---|
400 | INVALID_ARGUMENT | Client specified an invalid trip name. The
trip name must follow the format
providers/{provider_id}/trips/{trip_id} .
The provider_id must be the ID of the
Cloud Project owned by the service provider. |
401 | UNAUTHENTICATED | Request not authenticated due to an invalid JWT token. This error will occur if the JWT token is signed without a trip id or the JWT token has expired. |
403 | PERMISSION_DENIED | Client does not have sufficient permission. This error occurs if the JWT token is invalid, the client does not have permission, or the API is not enabled for the client project. The JWT token might be missing or the token is signed with a trip id that does not match requested trip id. |
429 | RESOURCE_EXHAUSTED | The resource quota is at zero or the rate of traffic exceeds the limit. |
503 | UNAVAILABLE | Service unavailable. Typically the server is down. |
504 | DEADLINE_EXCEEDED | Request deadline exceeded. This will happen only if the caller sets a deadline that is shorter than the method's default deadline (i.e. requested deadline is not enough for the server to process the request) and the request did not finish within the deadline. |
For more information, see Consumer SDK Error Handling.