Page Summary
-
This guide explains how to customize the map display in your Android app during trip following, such as styling, camera adjustments, and marker/polyline customizations.
-
Cloud-based maps styling allows you to change the map's look and feel without altering your code, using the
mapIdfield withConsumerMapVieworConsumerMapFragment. -
You can adjust the camera to focus on a trip using the built-in
AutoCamerafeature or by manually customizing the camera behavior to gain more control. -
Further customization options are available for markers and polylines, allowing for a more personalized user experience.
This guide describes ways you can customize the map that is displayed in your Android app when you follow a trip. You can customize the look and feel of the map in the following ways:
- Style the map with cloud-based maps styling
- Adjust the camera to focus on the trip
- Customize markers
- Customize polylines
Style the map with cloud-based maps styling
Customize the look and feel of the maps component using cloud-based maps styling. You create and edit map styles on the Google Cloud console for any of your apps that use Google Maps, without requiring any changes to your code. For more information, select your platform at Cloud-based maps styling.
Both the
ConsumerMapView
and the
ConsumerMapFragment
classes support cloud-based maps styling.
In order to use cloud-based maps styling, ensure that the selected maps
renderer is LATEST. The following sections show examples of how to use
cloud-based maps styling with your project.
ConsumerMapView
To use cloud-based maps styling in the ConsumerMapView, set the
mapId field on GoogleMapOptions and pass the GoogleMapOptions to
getConsumerGoogleMapAsync(ConsumerMapReadyCallback, Fragment,
GoogleMapOptions)
or getConsumerGoogleMapAsync(ConsumerMapReadyCallback, FragmentActivity,
GoogleMapOptions)
Example
Java
public class SampleAppActivity extends AppCompatActivity {

  @Override
  protected void onCreate(Bundle savedInstanceState) {
    super.onCreate(savedInstanceState);
    ConsumerMapView mapView = findViewById(R.id.consumer_map_view);

    if (mapView != null) {
      GoogleMapOptions optionsWithMapId = new GoogleMapOptions().mapId("map-id");
      mapView.getConsumerGoogleMapAsync(
          new ConsumerMapReadyCallback() {
            @Override
            public void onConsumerMapReady(@NonNull ConsumerGoogleMap consumerGoogleMap) {
              // ...
            }
          },
          /* fragmentActivity= */ this,
          /* googleMapOptions= */ optionsWithMapId);
    }
  }
}
Kotlin
class SampleAppActivity : AppCompatActivity() {
  override fun onCreate(savedInstanceState: Bundle?) {
    super.onCreate(savedInstanceState)
    val mapView = findViewById(R.id.consumer_map_view) as ConsumerMapView

    val optionsWithMapId = GoogleMapOptions().mapId("map-id")
    mapView.getConsumerGoogleMapAsync(
      object : ConsumerGoogleMap.ConsumerMapReadyCallback() {
        override fun onConsumerMapReady(consumerGoogleMap: ConsumerGoogleMap) {
          // ...
        }
      },
      /* fragmentActivity= */ this,
      /* googleMapOptions= */ optionsWithMapId)
  }
}
ConsumerMapFragment
There are two ways to use cloud-based maps styling in ConsumerMapFragments:
- Statically with the XML.
- Dynamically with
newInstance.
Statically with the XML
To use cloud-based maps styling with the XML in the
ConsumerMapFragment, add the map:mapId XML attribute with the specified
mapId. See the following example:
<fragment
    xmlns:android="http://schemas.android.com/apk/res/android"
    xmlns:map="http://schemas.android.com/apk/res-auto"
    android:name="com.google.android.libraries.mapsplatform.transportation.consumer.view.ConsumerMapFragment"
    android:id="@+id/consumer_map_fragment"
    map:mapId="map-id"
    android:layout_width="match_parent"
    android:layout_height="match_parent"/>
Dynamically with newInstance
To use cloud-based maps styling with newInstance in
ConsumerMapFragment, set the mapId field on GoogleMapOptions and pass the
GoogleMapOptions to newInstance. See the following example:
Java
public class SampleFragmentJ extends Fragment {

  @Override
  public View onCreateView(
      @NonNull LayoutInflater inflater,
      @Nullable ViewGroup container,
      @Nullable Bundle savedInstanceState) {

    final View view = inflater.inflate(R.layout.consumer_map_fragment, container, false);

    GoogleMapOptions optionsWithMapId = new GoogleMapOptions().mapId("map-id");
    ConsumerMapFragment consumerMapFragment = ConsumerMapFragment.newInstance(optionsWithMapId);

    getParentFragmentManager()
        .beginTransaction()
        .add(R.id.consumer_map_fragment, consumerMapFragment)
        .commit();

    consumerMapFragment.getConsumerGoogleMapAsync(
        new ConsumerMapReadyCallback() {
          @Override
          public void onConsumerMapReady(@NonNull ConsumerGoogleMap consumerGoogleMap) {
            // ...
          }
        });

    return view;
  }
}
Kotlin
class SampleFragment : Fragment() {
  override fun onCreateView(
    inflater: LayoutInflater,
    container: ViewGroup?,
    savedInstanceState: Bundle?): View? {

    val view = inflater.inflate(R.layout.consumer_map_fragment, container, false)

    val optionsWithMapId = GoogleMapOptions().mapId("map-id")
    val consumerMapFragment = ConsumerMapFragment.newInstance(optionsWithMapId)

    parentFragmentManager
      .beginTransaction()
      .add(R.id.consumer_map_fragment, consumerMapFragment)
      .commit()

    consumerMapFragment.getConsumerGoogleMapAsync(
      object : ConsumerMapReadyCallback() {
        override fun onConsumerMapReady(consumerGoogleMap: ConsumerGoogleMap) {
          // ...
        }
      })

    return view
  }
}
Adjust the camera zoom to focus on a trip
During an active trip sharing session, you can handle camera zoom and focus in one of two ways:
AutoCamera: If you want to useAutoCamera, you don't have to do anything. The camera follows the trip. For details, seeAutoCamera.Customize camera behavior: To customize camera behavior, you must disable
AutoCameraand then make your customizations. For details, see Customize camera behavior.
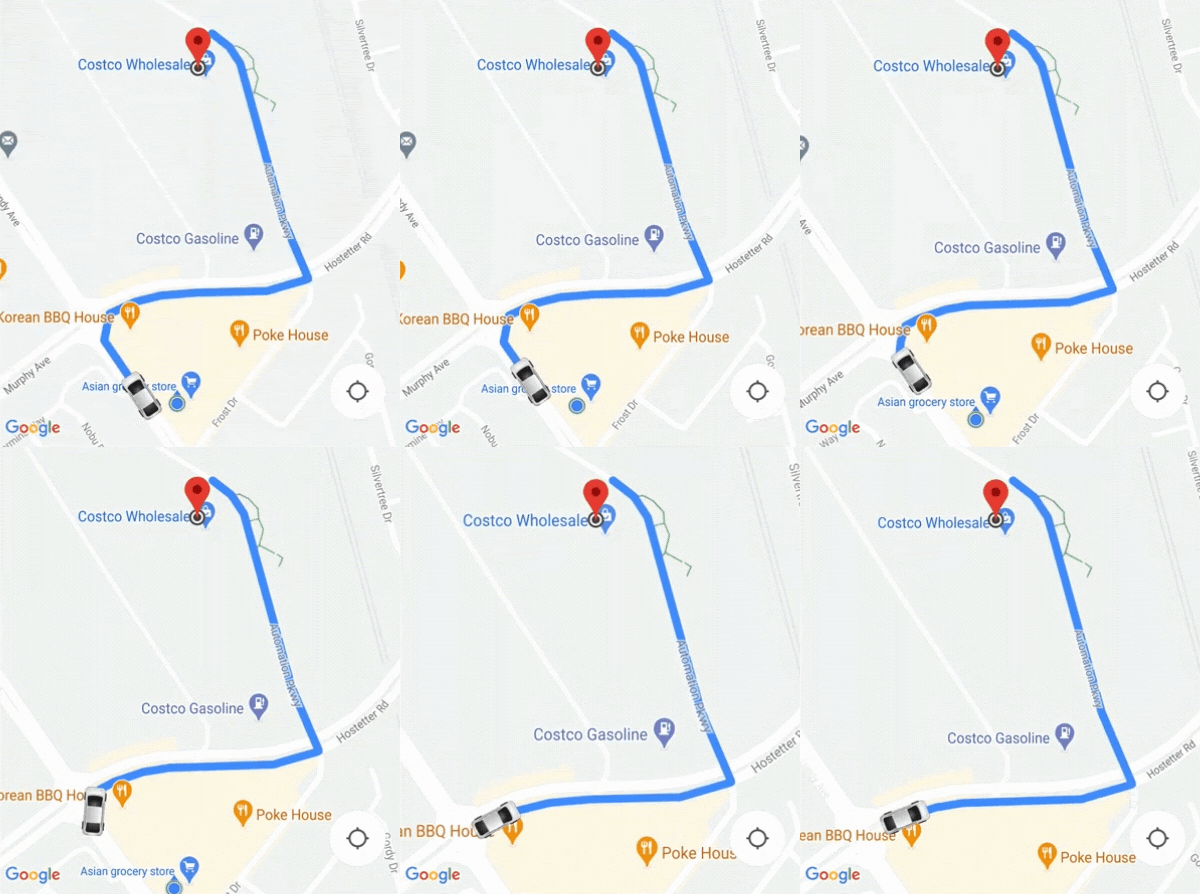
AutoCamera centers the camera
The Consumer SDK provides an AutoCamera feature that is enabled by default
on the built-in My Location button for the Maps SDK. The camera zooms to
focus on the trip route and the next trip waypoint.
If you want to use AutoCamera, make sure to enable it. For more details, see
isAutoCameraEnabled.

For details on the My Location button, see My Location button in the Maps JavaScript API documentation.
Customize camera behavior
For more control of the camera behavior, follow these steps to disable
AutoCamera and customize the camera behavior manually.
Disable
AutoCamerausing ConsumerController.setAutoCameraEnabled().Get the recommended camera bounds using ConsumerController.getCameraUpdate().
Provide the
CameraUpdateas an argument to one of these Android functions:
