
Agar Asisten Google dapat merespons perintah yang sesuai dengan perangkat dan konteks yang diberikan, Asisten memerlukan informasi tentang perangkat tertentu. Anda memberikan informasi ini, yang meliputi {i>field<i} seperti jenis perangkat, dan produsen perangkat, sebagai model perangkat. Anda dapat menganggap model ini sebagai kelas perangkat secara umum -- seperti lampu, speaker, atau robot mainan.
Informasi ini kemudian dapat diakses Asisten dan dapat yang terkait dengan Project Konsol Actions. Tidak ada project lain yang memiliki akses ke informasi model dan perangkat Anda.
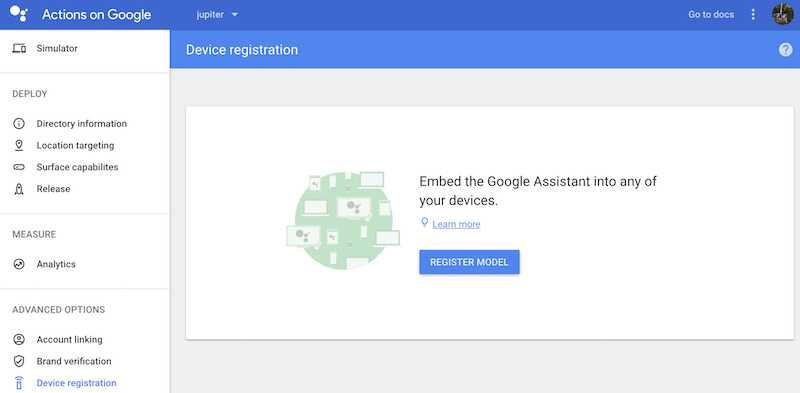
Menggunakan UI pendaftaran
Menggunakan UI pendaftaran di Konsol Actions untuk mendaftarkan model perangkat.
Klik tombol DAFTAR MODEL.
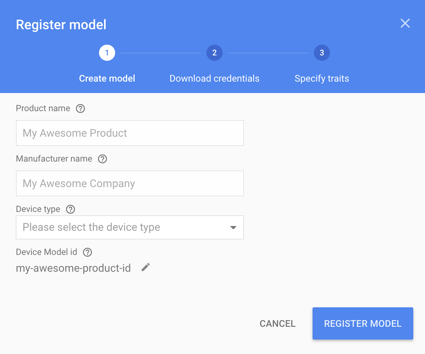
Buat model
Isi semua kolom untuk perangkat Anda. Pilih jenis perangkat, seperti Ringan.
Melihat JSON model perangkat referensi untuk mengetahui informasi selengkapnya tentang kolom ini.
Setelah selesai, klik DAFTAR MODEL.
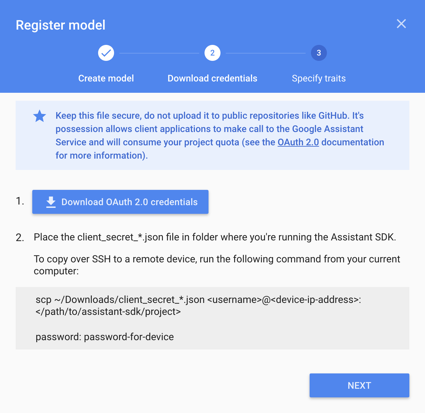
Download kredensial
File client_secret_<client-id>.json harus berada di perangkat. File ini berisi
ID klien dan rahasia klien, tetapi tanpa token akses. Nantinya, Anda akan menjalankan
alat otorisasi dan merujuk file ini untuk mengotorisasi
Contoh SDK Asisten untuk membuat kueri Asisten Google (lihat OAuth 2.0
dokumentasi untuk informasi selengkapnya). Jangan mengganti nama file ini.
Download file ini dan transfer ke perangkat. Klik BERIKUTNYA.
Hanya untuk Raspberry Pi
Pastikan file ini terletak di /home/pi. Jika Anda ingin mengunggah file
ke perangkat, lakukan hal berikut:
Buka jendela terminal baru. Jalankan perintah berikut di terminal baru ini:
scp ~/Downloads/client_secret_client-id.json pi@raspberry-pi-ip-address:/home/pi/
password: password-for-device
Tutup jendela terminal ini.
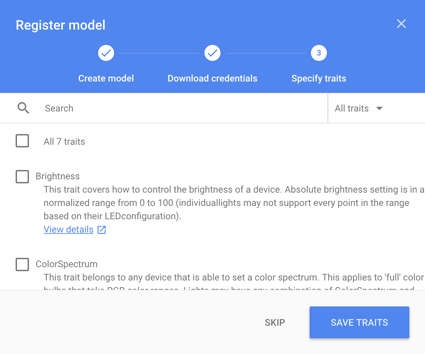
Menentukan trait
Kemudian, Anda akan menentukan berbagai kemampuan yang didukung perangkat Anda layar ini. Namun untuk saat ini, klik tombol LEWATI.
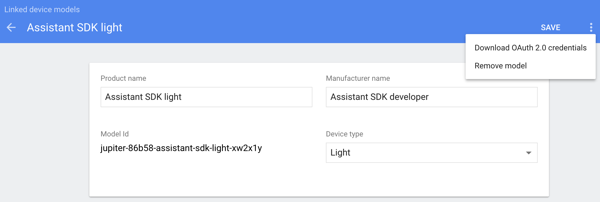
Edit model
Jika Anda perlu mengedit model, klik barisnya dalam daftar. Pastikan untuk mengklik SAVE setelah diedit.

Jika Anda perlu mendownload file kredensial lagi, klik elipsis. Anda dapat menghapus model dari menu ini.
Cara alternatif untuk mendaftar
Anda juga dapat menggunakan alat pendaftaran (disertakan dengan contoh SDK Asisten Google) atau REST API untuk mendaftarkan model perangkat.
Anda harus menjadi Pemilik atau Editor project Actions Console tertentu untuk mendaftar yang sangat besar untuknya. Tambahkan peran ini untuk pengguna lain di Cloud Platform Console—lihat Dokumentasi IAM.