
Page Summary
-
A Google Cloud Platform project in the Actions Console gives you access to the Google Assistant API, tracks quota usage, and provides metrics.
-
You need to enable the Google Assistant API and configure the OAuth consent screen for your project in the Cloud Platform Console.
-
To use the Google Assistant, you must enable Web & App Activity (including Chrome history and activity), Device Information, and Voice & Audio Activity controls for your Google account.
Configure an Actions Console project
A Google Cloud Platform project, managed by the Actions Console, gives your project access to the Google Assistant API. The project tracks quota usage and gives you valuable metrics for the requests made from your hardware.
To enable access to the Google Assistant API, perform the following steps:
Open the Actions Console.
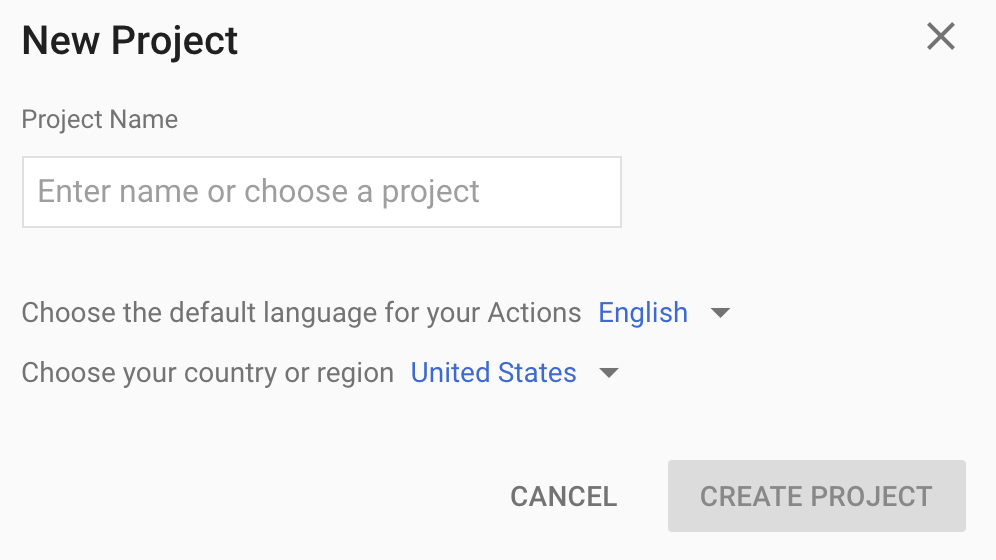
Click Add/import project.
To create a new project, enter a name in the Project name box and click CREATE PROJECT.
If you already have an existing Google Cloud Platform project, you can select that project and import it rather than creating a new one.
If you created a new project, click the Device registration box near the bottom of the page. If you imported a previously-created project, this box does not appear; select the Device registration tab (under ADVANCED OPTIONS) from the left navbar.

Keep this browser tab open. You will use it to register a device model in a later step.
Enable the Google Assistant API on the project you selected (see the Terms of Service). You need to do this in the Cloud Platform Console.
Click Enable.
You must configure the OAuth consent screen for your project in the Cloud Platform Console. Note that most fields on this page are optional.

Set activity controls for your account
In order to use the Google Assistant, you must share certain activity data with Google. The Google Assistant needs this data to function properly; this is not specific to the SDK. To share this data, create a Google account if you don't already have one.
Open the Activity Controls page for the Google account that you want to use with the Assistant. You can use any Google account—it does not need to be your developer account.
Ensure the following toggle switches are enabled (blue):
- Web & App Activity
- In addition, be sure to select the Include Chrome history and activity from sites, apps, and devices that use Google services checkbox.
- Device Information
- Voice & Audio Activity