L'association de compte basée sur OAuth (App Flip) permet à vos utilisateurs d'associer rapidement leurs comptes dans votre système d'authentification à leurs comptes Google. Si votre application est installée sur le téléphone de l'utilisateur lorsqu'il lance le processus d'association de compte, il est redirigé de manière fluide vers votre application pour obtenir l'autorisation de l'utilisateur.
Cette approche permet d'associer les comptes plus rapidement, car l'utilisateur n'a pas besoin de saisir à nouveau son nom d'utilisateur et son mot de passe pour s'authentifier. Au lieu de cela, App Flip utilise les identifiants du compte de l'utilisateur dans votre application. Une fois qu'un utilisateur a associé son compte Google à votre application, il peut profiter de toutes les intégrations que vous avez développées.
Vous pouvez configurer App Flip pour les applications iOS et Android.
Conditions requises
Pour implémenter App Flip, vous devez remplir les conditions suivantes :
- Vous devez disposer d'une application Android ou iOS.
- Vous devez posséder, gérer et entretenir un serveur OAuth 2.0 compatible avec le flux avec code d'autorisation OAuth 2.0.
Flux d'échange d'application basé sur OAuth
Le schéma de séquence suivant détaille l'interaction entre l'utilisateur, l'appli Google, votre appli et votre serveur d'autorisation pour l'échange d'applis.
Rôles et responsabilités
Le tableau suivant définit les rôles et les responsabilités des acteurs du flux App Flip.
| Acteur / Composant | Rôle dans la LAG | Responsabilités |
|---|---|---|
| Application / Serveur Google | Client OAuth | Lance le processus d'association, déclenche un lien profond vers votre application mobile, échange le code d'autorisation contre des jetons et les stocke de manière sécurisée pour accéder aux API de votre service. |
| Votre application | Agent d'autorisation | Authentifie l'utilisateur (généralement à l'aide des identifiants existants de l'application), obtient son consentement et récupère un code d'autorisation auprès de votre serveur. |
| Votre serveur d'autorisation | Serveur d'autorisation | Valide les codes d'autorisation et les jetons d'actualisation, et émet des jetons d'accès au serveur Google. |
Pour en savoir plus sur le flux de code d'autorisation d'association OAuth, consultez Implémenter votre serveur OAuth.
Principes de conception
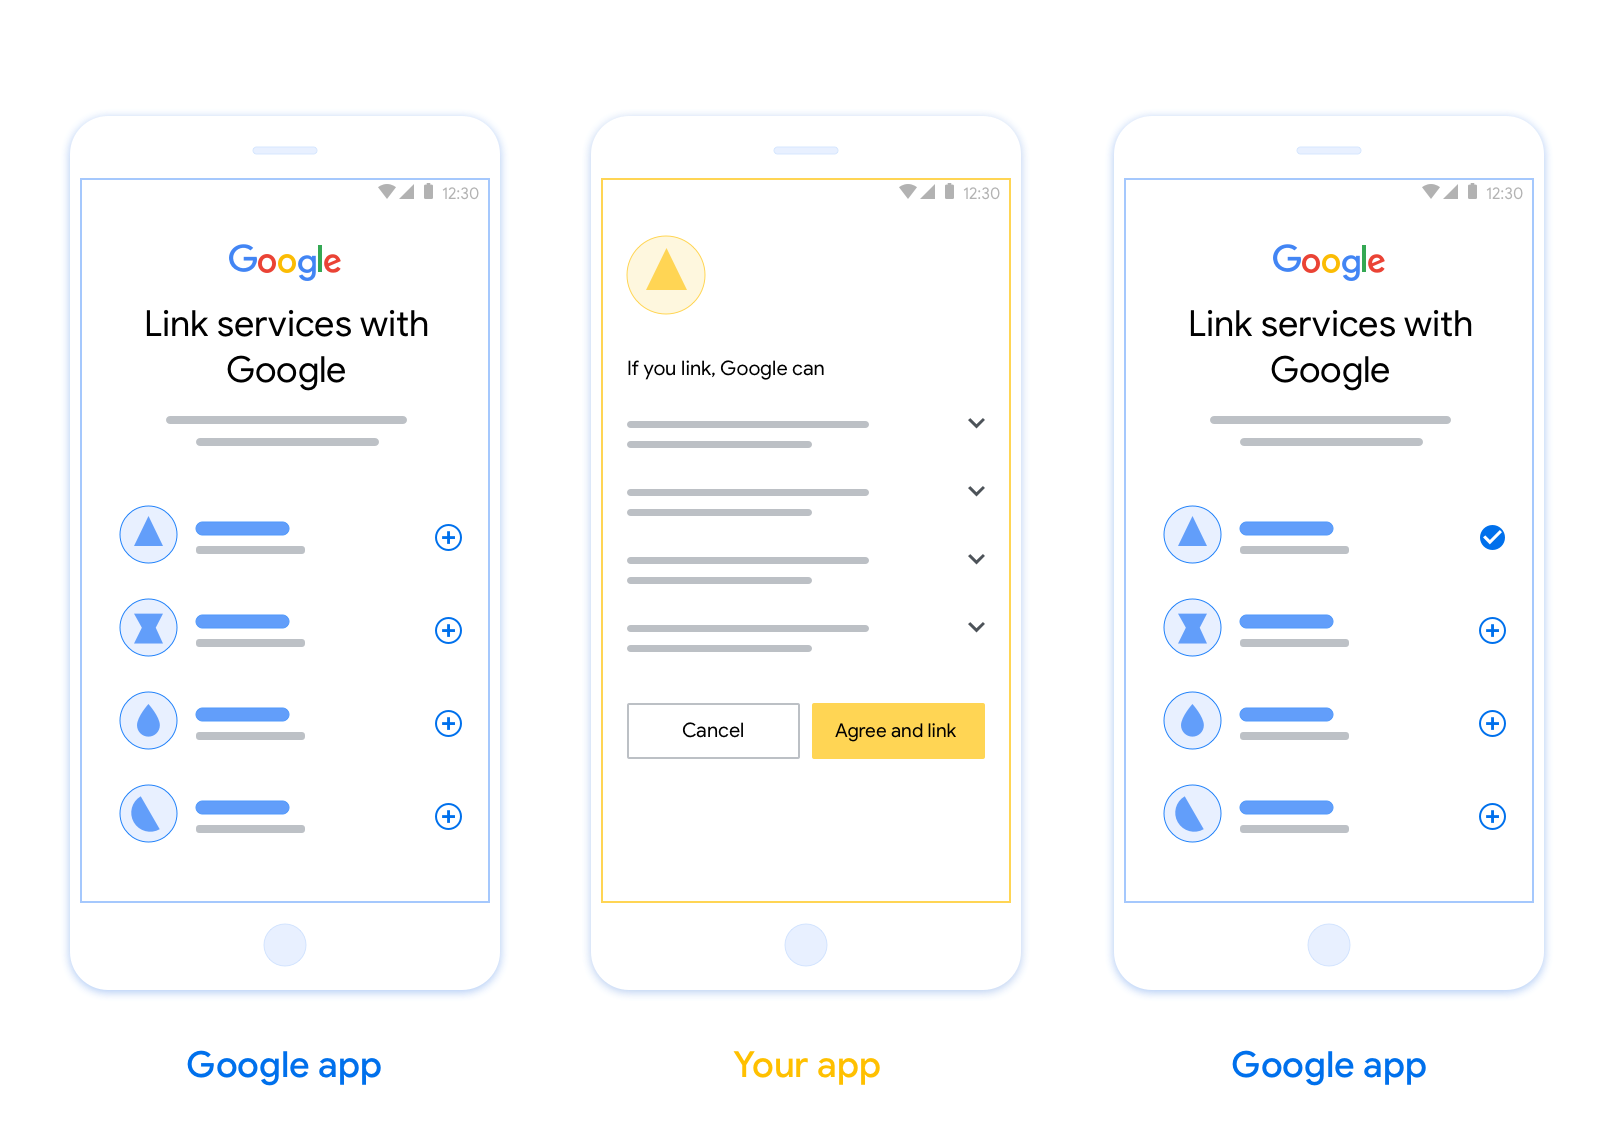
Cette section décrit les exigences et les recommandations de conception pour l'écran de consentement à l'association de compte App Flip. Une fois que Google a appelé votre application, celle-ci affiche l'écran de consentement à l'utilisateur.
Conditions requises
- Vous devez indiquer que le compte de l'utilisateur est associé à Google, et non à un produit Google spécifique, tel que Google Home ou l'Assistant Google.
Recommandations
Nous vous recommandons d'effectuer les opérations suivantes :
Affichez les règles de confidentialité de Google. Incluez un lien vers les Règles de confidentialité de Google sur l'écran de consentement.
Données à partager : Utilisez un langage clair et concis pour indiquer à l'utilisateur les données dont Google a besoin et pourquoi.
Incitation à l'action claire : Indiquez clairement l'incitation à l'action sur votre écran de consentement, par exemple "Accepter et associer". En effet, les utilisateurs doivent comprendre quelles données ils doivent partager avec Google pour associer leurs comptes.
Possibilité de refuser ou d'annuler Fournissez aux utilisateurs un moyen de revenir en arrière, de refuser ou d'annuler s'ils choisissent de ne pas associer leur compte.
Possibilité de dissocier le compte. Offrez aux utilisateurs un mécanisme pour dissocier leur compte, par exemple une URL vers les paramètres de leur compte sur votre plate-forme. Vous pouvez également inclure un lien vers le compte Google où les utilisateurs peuvent gérer leur compte associé.
Possibilité de modifier le compte utilisateur Suggérez aux utilisateurs une méthode pour changer de compte. Cela est particulièrement utile si les utilisateurs ont tendance à posséder plusieurs comptes.
- Si un utilisateur doit fermer l'écran d'autorisation pour changer de compte, envoyez une erreur récupérable à Google afin qu'il puisse se connecter au compte souhaité avec l'association OAuth et le flux implicite.
Incluez votre logo. Affichez le logo de votre entreprise sur l'écran de consentement. Utilisez vos consignes de style pour placer votre logo. Si vous souhaitez également afficher le logo de Google, consultez Logos et marques déposées.
Configurer App Flip basé sur OAuth
Les sections suivantes décrivent les conditions préalables pour l'échange d'applications basé sur OAuth et expliquent comment configurer votre projet d'échange d'applications dans la console Actions.
Créez une action et configurez un serveur OAuth 2.0.
Avant de pouvoir configurer App Flip, vous devez effectuer les opérations suivantes :
- Créez une action. Pour créer une action, suivez les instructions de la section Créer un projet.
- Configurez un serveur OAuth 2.0. Pour en savoir plus sur la configuration d'un serveur OAuth, consultez Implémenter l'association de compte OAuth.
Configurer App Flip dans la console Actions
La section suivante explique comment configurer App Flip dans la console Actions.
- Dans la barre de navigation en haut de l'écran, cliquez sur Develop (Développer). Dans le panneau de navigation de gauche, cliquez sur Association de compte.
- Activez le bouton bascule à côté de Association de comptes.
- Sous Création de compte, sélectionnez Non, je souhaite uniquement autoriser la création de compte sur mon site Web.
- Cliquez sur Suivant.
- Sous Type d'association, sélectionnez OAuth et Code d'autorisation dans les menus déroulants.
- Cliquez sur Suivant.
- Renseignez tous les champs sous Informations sur le client OAuth. (Si App Flip n'est pas compatible, OAuth standard est utilisé comme solution de secours.)
- Cliquez sur Suivant.
- Sous Utiliser votre application pour l'association de compte (facultatif), cochez Activer pour iOS.
- Renseignez le champ Lien universel. Pour en savoir plus sur les liens universels, consultez Autoriser les applications et les sites Web à créer des liens vers votre contenu .
- Si vous souhaitez configurer votre client, ajoutez des niveaux d'accès et cliquez sur Ajouter un niveau d'accès sous Configurer votre client (facultatif). Si ce n'est pas le cas, cliquez sur Suivant.
- Sous "Instructions de test", saisissez
test(ou toute autre chaîne) comme espace réservé. (Il n'est nécessaire de remplir ce champ avec un compte de test que si vous envoyez réellement votre action pour publication.) - Cliquez sur Enregistrer.
Vous pouvez maintenant passer à la section suivante pour implémenter App Flip dans votre application iOS ou Android.
Implémenter App Flip dans vos applications natives
Pour implémenter App Flip, vous devez modifier le code d'autorisation de l'utilisateur dans votre application afin d'accepter un lien profond de Google.
Tester le changement d'application sur votre appareil
Maintenant que vous avez créé une action et configuré App Flip dans la console et dans votre application, vous pouvez tester App Flip sur votre appareil mobile. Vous pouvez utiliser l'application Assistant Google pour tester le transfert d'application.
Pour tester App Flip depuis l'application Assistant :
- Accédez à la console Actions, puis sélectionnez votre projet.
- Dans la barre de navigation en haut de l'écran, cliquez sur Test (Tester).
- Déclenchez le processus d'association de compte depuis l'application Assistant :
- Ouvrez l'application Assistant Google.
- Cliquez sur Paramètres.
- Dans l'onglet "Assistant", cliquez sur Contrôle de la maison.
- Cliquez sur Ajouter(+).
- Sélectionnez votre action dans la liste des fournisseurs. Il sera précédé de "[test]" dans la liste. Lorsque vous sélectionnez votre action [test] dans la liste, votre application doit s'ouvrir.
- Vérifiez que votre application a été lancée et commencez à tester votre flux d'autorisation.