تنظيم صفحاتك في مجموعات
يمكنك حفظ المحتوى وتصنيفه حسب إعداداتك المفضّلة.
في وحدة تحكّم الإجراءات، يمكنك النقر على القائمة المنسدلة في شريط التنقّل الرئيسي
للتبديل بين المشاريع، كما هو موضّح في لقطة الشاشة التالية:
الشكل 1. اختيار مشروع مختلف في "وحدة تحكّم المهام"
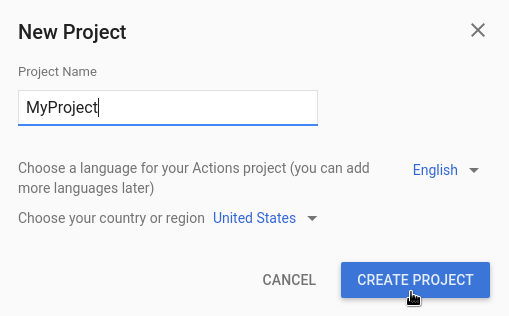
إنشاء مشروع
لتطوير إجراء معيّن، عليك أولاً إنشاء مشروع إجراءات. يتيح هذا المشروع الوصول إلى وحدة تحكّم "المهام" بالإضافة إلى بيئة التطوير المتكاملة لأداة إنشاء المهام.
قد تحتاج إلى استيراد مشروع حالي لمشاركة خدمات السحابة الإلكترونية وFirebase،
مثل دوال Cloud، مع الإجراء الخاص بك.
وإذا أردت إنشاء الإجراء الخاص بك فوق مشروع حالي على السحابة الإلكترونية أو مشروع حالي في Firebase، اختَر هذا المشروع من القائمة المنسدلة داخل مربّع الحوار مشروع جديد. أثناء الكتابة، تظهر أسماء المشاريع الحالية.
انقر على المشروع الذي تريد استيراده.
لاستيراد مشروع، انقر على المشروع الذي تريد استيراده. بعد ذلك، في نافذة
مشروع جديد، انقر على استيراد مشروع.
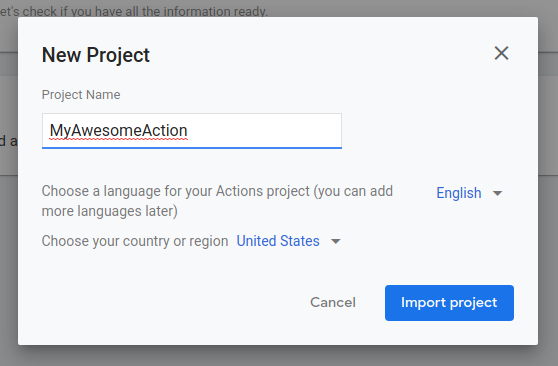
الشكل 2. يتغيّر مربّع حوار المشروع الجديد عند اختيار مشروع "إجراءات" حالي للاستيراد.
حذف مشروع
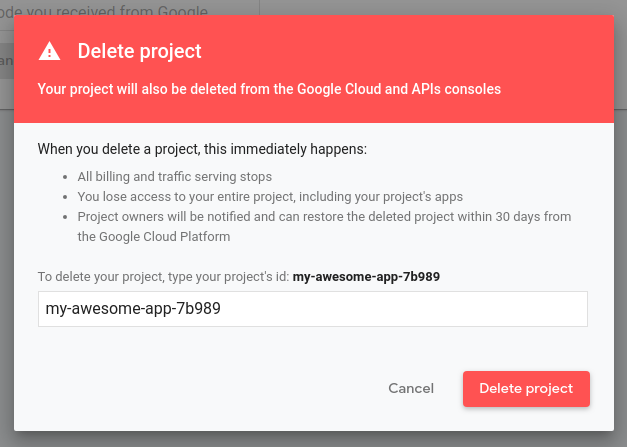
لحذف مشروع، يُرجى اتّباع الخطوات التالية:
انقر على رمز المزيد more_vert > إعدادات المشروع > حذف المشروع.
أدخِل رقم تعريف المشروع المعروض أعلى حقل النص.
انقر على حذف المشروع.
بعد حذف مشروع، يتوقف "مساعد Google" عن عرض الإجراء الخاص بك للمستخدمين ويتم إلغاء أي مراجعات في انتظار المراجعة. لديك 7 أيام لعكس الحذف
واستعادة المشروع. لاستعادة مشروع محذوف، راجِع استعادة مشروع.
إضافة متعاونين
لإضافة متعاونين إلى مشروع معيّن، انقر على رمز المزيد more_vert> إدارة وصول المستخدمين.
من هناك، يتم توجيهك إلى "نظام إدارة المشروعات في السحابة الإلكترونية". انقر على إضافة
لتعديل المتعاونين وتحديد أدوارهم.
إذا أردت أن يحصل أحد المستخدمين على أذونات كاملة، أضِفه بصفته محرِّر للمشروع.
وإذا أردت أن يتمكّنوا من الاطّلاع على المشروع واختبار الإجراء فقط، يمكنك إضافتهم كمُشاهد للمشروع.
البانر والإشعارات
أثناء العمل في وحدة التحكم، تظهر المعلومات المتعلقة بالنظام الأساسي والحساب
في مكانين:
البانر: يتم عرض مشاكل النظام الأساسي والإشعارات على مستوى الخدمة في بانر أعلى وحدة التحكّم.
مركز الإشعارات: يعرض رمز الإشعار notifications
في أعلى الصفحة الإشعارات ذات الصلة بالحساب والمشروع.
تتطلب منك هذه العناصر بشكل عام اتخاذ إجراء.

تاريخ التعديل الأخير: 2025-07-26 (حسب التوقيت العالمي المتفَّق عليه)
[[["يسهُل فهم المحتوى.","easyToUnderstand","thumb-up"],["ساعَدني المحتوى في حلّ مشكلتي.","solvedMyProblem","thumb-up"],["غير ذلك","otherUp","thumb-up"]],[["لا يحتوي على المعلومات التي أحتاج إليها.","missingTheInformationINeed","thumb-down"],["الخطوات معقدة للغاية / كثيرة جدًا.","tooComplicatedTooManySteps","thumb-down"],["المحتوى قديم.","outOfDate","thumb-down"],["ثمة مشكلة في الترجمة.","translationIssue","thumb-down"],["مشكلة في العيّنات / التعليمات البرمجية","samplesCodeIssue","thumb-down"],["غير ذلك","otherDown","thumb-down"]],["تاريخ التعديل الأخير: 2025-07-26 (حسب التوقيت العالمي المتفَّق عليه)"],[[["\u003cp\u003eGoogle Actions projects provide access to the Actions console and Actions Builder IDE for Action development.\u003c/p\u003e\n"],["\u003cp\u003eYou can create, import, or delete projects within the Actions console and manage user access by adding collaborators.\u003c/p\u003e\n"],["\u003cp\u003eWhen creating a project, you can import an existing Cloud or Firebase project or start fresh; be cautious when naming projects to avoid unintended creation or import.\u003c/p\u003e\n"],["\u003cp\u003eDeleting a project stops your Action from serving to users and cancels pending reviews, with a 7-day window for reversal before permanent deletion.\u003c/p\u003e\n"],["\u003cp\u003eThe Actions console provides banners for platform-wide announcements and a notification center for account and project-specific alerts requiring action.\u003c/p\u003e\n"]]],[],null,["# Manage projects\n\nIn the Actions console, you can click the drop-down menu in the main navigation\nto switch between projects, as shown in the following screenshot:\n**Figure 1.** Selecting a different project in the Actions console.\n\nCreate a project\n----------------\n\nTo develop an Action, you first need to create an Actions project. This project grants access to the Actions console, as well as the integrated Actions Builder IDE.\n\nTo create a project, follow these steps:\n\n1. Go to the [Actions console](//console.actions.google.com/).\n2. Click **New project**.\n3. Enter a name for your project and click **Create Project** .\n\nOnce the project is created, you're taken to the Actions console on-boarding page, where you choose a category for the Action you're building.\n\nSee additional documentation on building for these specific Action types:\n\n- [App Actions](/assistant/app/overview)\n- [Web content](/assistant/content/overview)\n- [Interactive Canvas](/assistant/interactivecanvas)\n- [Smart Home](/assistant/smarthome/overview)\n- [Custom Actions](/assistant/conversational)\n\nImport a project\n----------------\n\nYou may want to import an existing project to share Cloud and Firebase services,\nlike Cloud Functions, with your Action.\n\nIf you want to build your Action on top of an existing Cloud project or an\nexisting Firebase project, choose that project in the drop-down menu inside\nthe **New project** dialog. As you start typing, existing project names appear.\nClick on the project you want to import.\n\nTo import a project, click the project you want to import. Then, in the\n**New Project** window, click **Import Project**.\n**Figure 2.** The new project dialog changes when an existing Actions project is selected for import. **Note:** Entering the name of an existing project verbatim will still create a new project with that name. If you're about to create a new project with the same name, you'll see the **Create project** button instead of the **Import project** button.\n\nDelete a project\n----------------\n\nTo delete a project, follow these steps:\n\n1. Click on the more *more_vert* icon \\\u003e **Project Settings** \\\u003e **Delete Project**.\n2. Enter the **Project id** displayed above the text field.\n3. Click **Delete project**.\n\nOnce a project is deleted, Assistant no longer serves your Action to users and\nany pending reviews are canceled. You have 7 days to reverse the deletion and\nrestore the project. To restore a deleted project, see\n[Restoring a project](https://cloud.google.com/resource-manager/docs/creating-managing-projects?visit_id=637517042878694670-4109780680&rd=1#restoring_a_project).\n| **Note:** While Google Cloud documentation says you have 30 days to reverse the deletion, the Actions console adheres to its own seven day reversal limitation.\n\nAdd collaborators\n-----------------\n\nTo add collaborators to a project, click on the more\n*more_vert* icon **\\\u003e Manage user access**.\n\nFrom there, you're directed to the Cloud Project Management System. Click **Add**\nto edit collaborators and specify their role.\n\nIf you want someone to have full permissions, add them as a project **Editor** .\nIf you only want them to be able to see the project and test the Action, add\nthem as a project **Viewer**.\n\nBanners and notifications\n-------------------------\n\nWhile working in the console, platform and account related information shows up\nin two places:\n\n- **Banner:** Platform issues and service-wide announcements are displayed in a banner at the top of the console.\n- **Notification center** : The notification *notifications* icon at the top of the page shows account and project related notifications. These items generally require you to take action."]]