
Google Dokümanlar, Google E-Tablolar veya Google Formlar'a bağlı Google Apps Komut Dosyası projeleri, önceden oluşturulmuş uyarılar, istemler, kısa mesajlar, iletişim kutuları ve kenar çubukları gibi kullanıcı arayüzü öğelerini gösterebilir. Bu öğeler genellikle özel HTML hizmeti içeriği içerir ve çoğu zaman menü öğelerinden açılır. Formlar'da kullanıcı arayüzü öğeleri yalnızca formu değiştirmek için açan bir düzenleyiciye görünür, yanıtlayana görünmez.
Uyarı iletişim kutuları
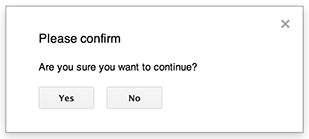
Uyarı, Dokümanlar, E-Tablolar, Slaytlar veya Formlar düzenleyicisinde açılan önceden oluşturulmuş bir iletişim kutusudur. Bir mesaj ve Tamam düğmesi gösterir. Başlık ve alternatif düğmeler isteğe bağlıdır. Bu, bir web tarayıcısında istemci tarafı JavaScript'te
window.alert
çağırmaya benzer.
Uyarılar, iletişim kutusu açıkken sunucu tarafı komut dosyasını askıya alır. Kullanıcı iletişim kutusunu kapattıktan sonra komut dosyası devam eder ancak JDBC bağlantıları askıya alma işlemi sırasında kalıcı olmaz.
Aşağıdaki örnekte gösterildiği gibi Dokümanlar, Formlar, Slaytlar ve E-Tablolar'ın tümünde, üç varyantı bulunan Ui.alert yöntemi kullanılır. Varsayılan Tamam düğmesini geçersiz kılmak için Ui.ButtonSet enum'ından bir değeri buttons bağımsız değişkeni olarak iletin. Kullanıcının hangi düğmeyi tıkladığını değerlendirmek için alert döndürme değerini Ui.Button enum'u ile karşılaştırın.
function onOpen() {
  SpreadsheetApp.getUi() // Or DocumentApp or SlidesApp or FormApp.
    .createMenu("Custom Menu")
    .addItem("Show alert", "showAlert")
    .addToUi();
}

function showAlert() {
  const ui = SpreadsheetApp.getUi(); // Same variations.

  const result = ui.alert(
    "Please confirm",
    "Are you sure you want to continue?",
    ui.ButtonSet.YES_NO,
  );

  // Process the user's response.
  if (result === ui.Button.YES) {
    // User clicked "Yes".
    ui.alert("Confirmation received.");
  } else {
    // User clicked "No" or X in the title bar.
    ui.alert("Permission denied.");
  }
}
İstem iletişim kutuları
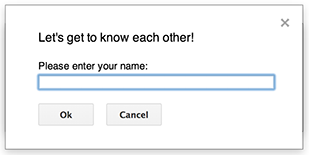
İstem, Dokümanlar, E-Tablolar, Slaytlar veya Formlar düzenleyicisinde açılan önceden oluşturulmuş bir iletişim kutusudur. Bir mesaj, metin giriş alanı ve Tamam düğmesi gösterir. Başlık ve alternatif düğmeler isteğe bağlıdır. Bu, bir web tarayıcısında istemci tarafı JavaScript'te
window.prompt
çağırmaya benzer.
İstemler, iletişim kutusu açıkken sunucu tarafı komut dosyasını askıya alır. Kullanıcı iletişim kutusunu kapattıktan sonra komut dosyası devam eder ancak JDBC bağlantıları askıya alma işlemi sırasında kalıcı olmaz.
Aşağıdaki örnekte gösterildiği gibi Dokümanlar, Formlar, Slaytlar ve E-Tablolar'da Ui.prompt yöntemi kullanılır. Bu yöntem üç varyantta kullanılabilir. Varsayılan Tamam düğmesini geçersiz kılmak için Ui.ButtonSet enum'ından bir değeri buttons bağımsız değişkeni olarak iletin. Kullanıcının yanıtını değerlendirmek için prompt dönüş değerini yakalayın, ardından kullanıcının girişini almak için PromptResponse.getResponseText işlevini çağırın ve PromptResponse.getSelectedButton dönüş değerini Ui.Button enum'ı ile karşılaştırın.
function onOpen() {
  SpreadsheetApp.getUi() // Or DocumentApp or SlidesApp or FormApp.
    .createMenu("Custom Menu")
    .addItem("Show prompt", "showPrompt")
    .addToUi();
}

function showPrompt() {
  const ui = SpreadsheetApp.getUi(); // Same variations.

  const result = ui.prompt(
    "Let's get to know each other!",
    "Please enter your name:",
    ui.ButtonSet.OK_CANCEL,
  );

  // Process the user's response.
  const button = result.getSelectedButton();
  const text = result.getResponseText();
  if (button === ui.Button.OK) {
    // User clicked "OK".
    ui.alert("Your name is " + text + ".");
  } else if (button === ui.Button.CANCEL) {
    // User clicked "Cancel".
    ui.alert("I didn't get your name.");
  } else if (button === ui.Button.CLOSE) {
    // User clicked X in the title bar.
    ui.alert("You closed the dialog.");
  }
}
E-tablo bildirimleri
"Toast", bir mesaj görüntüleyen ancak komut dosyasını askıya almayan, bir E-Tablolar düzenleyicisinin sağ alt köşesindeki küçük bir iletişim kutusu penceresidir. Kullanıcı etkileşimi gerektirmeyen durum mesajlarını veya güncellemeleri göstermek için iyi bir yöntemdir.
Aşağıdaki örnekte gösterildiği gibi, E-Tablolar Spreadsheet.toast yöntemini kullanır.
Bildirimler yalnızca E-Tablolar'da kullanılabilir.
function showToast() {
  SpreadsheetApp.getActiveSpreadsheet().toast("Task completed successfully.");
}
Özel iletişim kutuları
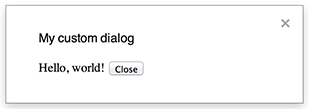
Özel bir iletişim kutusu, Dokümanlar, E-Tablolar, Slaytlar veya Formlar düzenleyicisinde HTML hizmeti kullanıcı arayüzü gösterebilir.
Özel iletişim kutuları, iletişim kutusu açıkken sunucu tarafı komut dosyasını askıya almaz.
Asenkron oldukları için iletişim kutusunu açan sunucu tarafı işlevi hemen tamamlanır. Özel iletişim kutusundan sunucuya veri iletmek için istemci tarafı kodunuzda google.script API'sini kullanın.
İletişim kutusu, bir HTML hizmeti arayüzünün istemci tarafında google.script.host.close çağrılarak kendi kendini kapatabilir. İletişim kutusu diğer arayüzler tarafından kapatılamaz, yalnızca kullanıcı veya kendisi tarafından kapatılabilir.
Aşağıdaki örnekte gösterildiği gibi, Dokümanlar, Formlar, Slaytlar ve E-Tablolar iletişim kutusunu açmak için Ui.showModalDialog yöntemini kullanır.
Code.gs
function onOpen() {
  SpreadsheetApp.getUi() // Or DocumentApp or SlidesApp or FormApp.
      .createMenu('Custom Menu')
      .addItem('Show dialog', 'showDialog')
      .addToUi();
}

function showDialog() {
  const html = HtmlService.createHtmlOutputFromFile('Page')
      .setWidth(400)
      .setHeight(300);
  SpreadsheetApp.getUi() // Or DocumentApp or SlidesApp or FormApp.
      .showModalDialog(html, 'My custom dialog');
}
Page.html
Hello, world! <input type="button" value="Close" onclick="google.script.host.close()" />
Özel kenar çubukları

Bir kenar çubuğu, Dokümanlar, Formlar, Slaytlar ve E-Tablolar düzenleyicisinde HTML hizmeti kullanıcı arayüzü gösterebilir.
Kenar çubukları, iletişim kutusu açıkken sunucu tarafı komut dosyasını askıya almaz. İstemci tarafı bileşen, HTML hizmeti arayüzleri için google.script API'sini kullanarak sunucu tarafı komut dosyasına eşzamansız çağrılar yapabilir.
Kenar çubuğu, bir HTML hizmeti arayüzünün istemci tarafında google.script.host.close çağrılarak kendi kendini kapatabilir. Kenar çubuğu, diğer arayüzler tarafından kapatılamaz. Yalnızca kullanıcı veya kendisi tarafından kapatılabilir.
Aşağıdaki örnekte gösterildiği gibi Dokümanlar, Formlar, Slaytlar ve E-Tablolar'da kenar çubuğunu açmak için Ui.showSidebar yöntemi kullanılır.
Code.gs
function onOpen() {
  SpreadsheetApp.getUi() // Or DocumentApp or SlidesApp or FormApp.
      .createMenu('Custom Menu')
      .addItem('Show sidebar', 'showSidebar')
      .addToUi();
}

function showSidebar() {
  const html = HtmlService.createHtmlOutputFromFile('Page')
      .setTitle('My custom sidebar');
  SpreadsheetApp.getUi() // Or DocumentApp or SlidesApp or FormApp.
      .showSidebar(html);
}
Page.html
Hello, world! <input type="button" value="Close" onclick="google.script.host.close()" />
Dosya açma iletişim kutuları
Google Picker, kullanıcıların Google Drive dosyalarını seçmesine veya yüklemesine olanak tanıyan bir JavaScript API'dir. Kullanıcıların mevcut dosyaları seçmesine veya yeni dosyalar yüklemesine olanak tanıyan özel bir iletişim kutusu oluşturmak için HTML hizmetindeki Google Picker kitaplığını kullanın, ardından seçimi komut dosyanıza geri iletin.
Şartlar
Google Seçici'yi Google Apps Komut Dosyası ile kullanmak için çeşitli şartlar gerekir:
Google Seçici için ortamınızı ayarlayın.
Komut dosyası projeniz standart bir Google Cloud projesi kullanmalıdır.
drive.filekapsamı kullanılıyorsa aynı Cloud proje numarasınıPickerBuilder.setAppId'ye iletin.Apps Komut Dosyası proje manifesti, Google Picker API'nin gerektirdiği yetkilendirme kapsamlarını belirtmelidir. Böylece
ScriptApp.getOAuthToken,PickerBuilder.setOauthtokeniçin doğru jetonu döndürür.PickerBuilder.setDeveloperKeyiçinde ayarlanan API anahtarını Apps Komut Dosyası ile kısıtlayın. Uygulama kısıtlamaları bölümünde aşağıdaki adımları uygulayın:- HTTP yönlendirenleri (web sitesi)'ni seçin.
- Web sitesi kısıtlamaları bölümünde Öğe ekle'yi tıklayın.
- Tıklama yönlendiren'i tıklayın ve
*.google.comgirin. - Başka bir öğe ekleyin ve yönlendiren olarak
*.googleusercontent.comgirin. - Bitti'yi tıklayın.
PickerBuilder.setOriginnumaralı telefonu arayın.
Örnek
Aşağıdaki örnekte, Apps Komut Dosyası'nda Google Picker gösterilmektedir.