
L'Azione può inviare notifiche push agli utenti quando sono pertinenti, ad esempio inviando un promemoria quando si avvicina la data di scadenza per un'attività.
Questa guida descrive come configurare le notifiche push per l'Azione.
Piattaforme supportate
Le notifiche push sono disponibili sui dispositivi Android e iOS (per ricevere le notifiche push, sui dispositivi iOS deve essere installata l'app dell'assistente). Al momento non sono supportati su speaker ad attivazione vocale, smart display o altre piattaforme.
Prerequisiti
Il progetto deve contenere almeno un intent globale, che viene richiamato quando l'utente tocca una notifica push ricevuta dall'assistente.
Inizia
Le seguenti sezioni descrivono come impostare le notifiche push nell'Azione.
Crea un intent per l'attivazione
L'intent che crei in questa sezione attiva il flusso delle notifiche. Per creare questo intent:
- Vai alla console di Actions e fai clic su Sviluppa nel menu in alto.
- Fai clic su Intent nel menu a sinistra per espandere la sezione.
- Fai clic sulla in fondo all'elenco e inserisci un nome per il nuovo intent.
- Premi
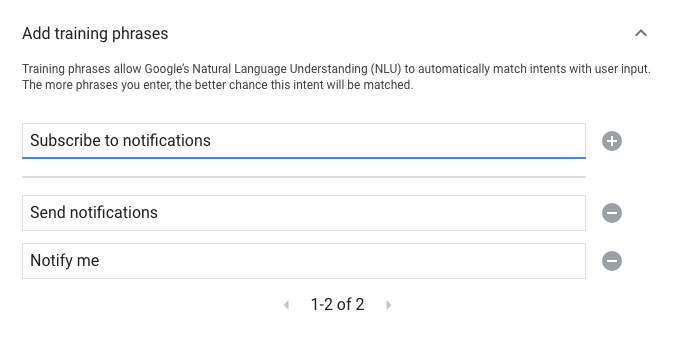
Enter/Returnper creare il nuovo intent. Aggiungi frasi di addestramento per attivare il flusso di notifiche. Ecco alcuni esempi:
Notify meSend notificationsSubscribe to notifications
Fai clic su Salva.
Transizione all'intent di sistema
Per configurare la transizione alla scena di sistema Notifications:
- In Scene, nel menu a sinistra, fai clic sulla scena a cui vuoi aggiungere il flusso di iscrizione alle notifiche.
- Nella sezione Gestione dell'intent utente della scena, fai clic su + per aggiungere un nuovo gestore di intent.
- In Intent, seleziona l'intent che hai creato nella sezione precedente.
In Transizione, seleziona la scena di sistema Notifiche.
Fai clic su Salva.
![]()
Configura scena di sistema
Per configurare la scena di sistema Notifications, segui questi passaggi:
- In Scene nel menu a sinistra, seleziona la nuova scena di sistema Notifiche.
- Nella sezione Configura intent, fai clic su Seleziona intent.
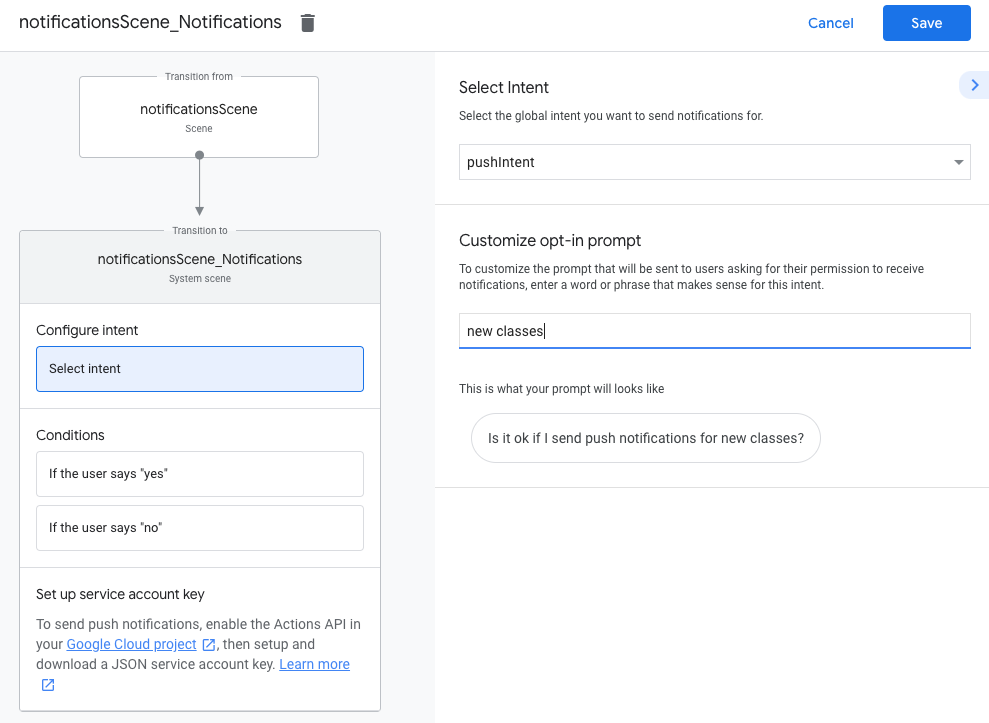
Nella sezione Seleziona intent, seleziona l'intent che deve corrispondere quando un utente tocca una notifica push.
In Personalizza la richiesta di attivazione, inserisci una richiesta da mostrare agli utenti quando viene chiesto loro di iscriversi alle notifiche push. Il messaggio ha il seguente formato: "Is it ok if I send push notifications for $prompt" (va bene se invio notifiche push per $prompt).
Fai clic su Salva.
Configura l'attivazione
Per configurare l'attivazione delle notifiche push, procedi nel seguente modo:
- In Scene, seleziona la scena di sistema Notifiche.
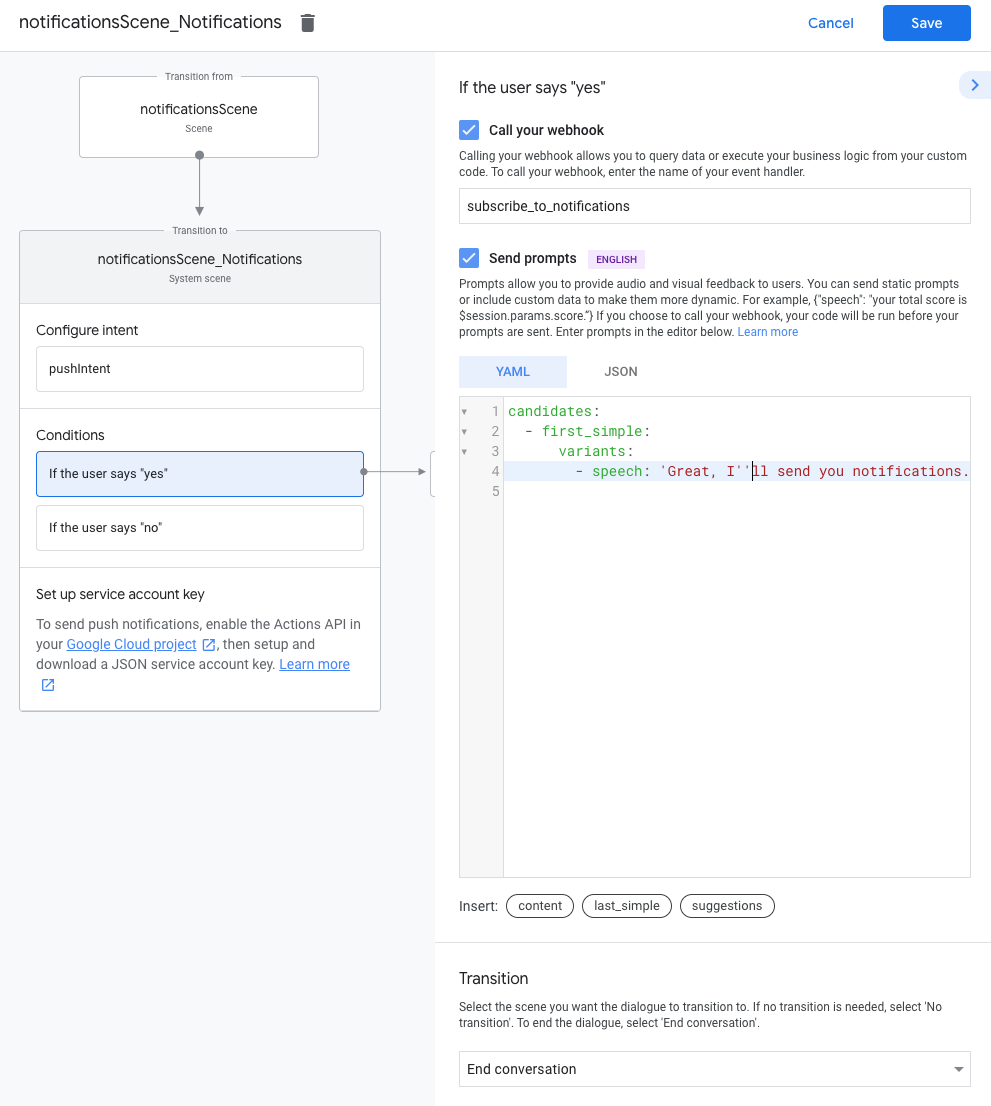
- In Condizioni, seleziona Se l'utente dice "sì".
- Attiva Chiama il webhook e fornisci un nome per il gestore di eventi, ad esempio
subscribe_to_notifications. Attiva l'opzione Invia prompt e fornisci un messaggio semplice per far sapere all'utente che riceveranno notifiche:
candidates:
- first simple:
  variants:
  - speech: 'Great, I'll send you notifications.'
In Transizione, seleziona Termina conversazione per terminare la conversazione dopo che l'utente si è iscritto alle notifiche.
Configura la disattivazione
Per configurare la disattivazione delle notifiche push, segui questi passaggi:
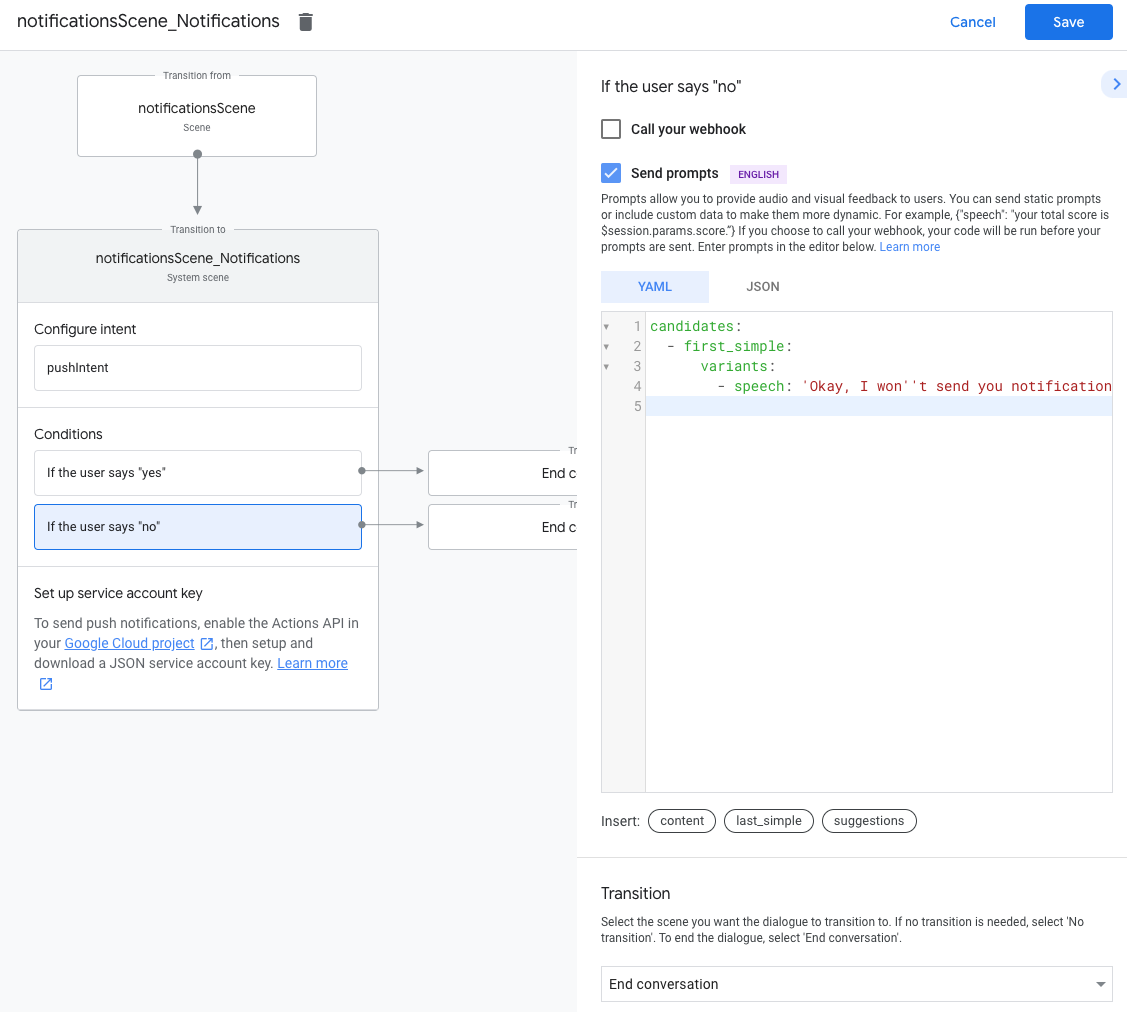
- In Condizioni, seleziona Se l'utente dice "no".
Attiva l'opzione Invia prompt e fornisci un messaggio semplice per far sapere all'utente che non riceverà notifiche:
candidates:
- first simple:
  variants:
  - speech: Okay, I won't send you notifications.
In Transizione, seleziona Termina conversazione per terminare la conversazione dopo che un utente ha disattivato le notifiche.
Configura webhook
Per configurare il webhook, segui questi passaggi:
Nel webhook, aggiungi un gestore di intent per l'archiviazione di
updatesUserId:app.handle('subscribe_to_notifications', conv => { const intentName = '<name_of_intent_to_trigger>'; const notificationsSlot = conv.session.params['NotificationSlot_${intentName}']; if(notificationsSlot.permissionStatus == 'PERMISSION_GRANTED') { const updateUserId = notificationsSlot.additionalUserData.updateUserId; // Store the user ID and the notification's target intent for later use. // (Use a database, like Firestore, for best practice.) } });
Invia notifiche
Le notifiche push vengono inviate agli utenti utilizzando l'API Actions. Per utilizzare questa API, devi attivarla nel tuo progetto Google Cloud e configurare e scaricare una chiave dell'account di servizio JSON.
Puoi quindi utilizzare la libreria client OAuth2 di Google per scambiare la chiave dell'account di servizio con un token di accesso e utilizzare il token per autenticare le tue richieste all'API Actions.
Generazione di una chiave dell'account di servizio
- Vai alla console API di Google e seleziona il tuo progetto dal menu a discesa Seleziona un progetto.
- Fai clic su Abilita per abilitare l'API Actions per il progetto.
- Vai alla pagina delle credenziali della console Google Cloud e seleziona il tuo progetto dal menu a discesa Seleziona un progetto.
- Fai clic su Crea credenziali > Account di servizio.
- Inserisci un nome per l'account di servizio e fai clic su Crea.
- Nel menu a discesa Seleziona un ruolo, seleziona Progetto > Proprietario.
- Fai clic su Continua.
- Fai clic su Crea chiave per scaricare il file JSON dell'account di servizio.
Scambia la chiave con un token di accesso e invia una notifica
Per inviare notifiche push tramite l'API Actions, devi scambiare la chiave dell'account di servizio con un token di accesso. A questo scopo, consigliamo di utilizzare una libreria client API di Google. Nella serie di snippet di codice che segue, utilizziamo la libreria client Node.js dell'API di Google.
Installa la libreria client dell'API di Google e richiedi:
npm install googleapis request --saveUtilizza il codice seguente per ottenere un token di accesso dalla chiave dell'account di servizio e inviare una notifica push:
// Use the Actions API to send a Google Assistant push notification.
let client = auth.fromJSON(require('./service-account.json'));
client.scopes = ['https://www.googleapis.com/auth/actions.fulfillment.conversation'];
let notification = {
  userNotification: {
    title: 'Example notification title',
  },
  target: {
    userId: '<UPDATES_USER_ID>',
    intent: 'Notifications Intent',
  },
};
client.authorize((err, tokens) => {
  if (err) {
    throw new Error('Auth error: ${err}');
  }
  request.post('https://actions.googleapis.com/v2/conversations:send', {
    'auth': {
      'bearer': tokens.access_token,
    },
    'json': true,
    'body': {'customPushMessage': notification, 'isInSandbox': true},
  }, (err, httpResponse, body) => {
    if (err) {
      throw new Error('API request error: ${err}');
    }
    console.log('${httpResponse.statusCode}: ' + '${httpResponse.statusMessage}');
    console.log(JSON.stringify(body));
  });
});