
Votre action peut envoyer des notifications push aux utilisateurs chaque fois que cela est pertinent, par exemple en envoyant un rappel lorsque la date limite d'une tâche approche.
Ce guide explique comment configurer les notifications push pour votre action.
Surfaces compatibles
Les notifications push sont disponibles sur les appareils Android et iOS (l'application Assistant doit être installée sur les appareils iOS pour recevoir des notifications push). Elles ne sont actuellement pas compatibles avec les enceintes à commande vocale, les écrans connectés ou d'autres surfaces.
Prérequis
Votre projet doit contenir au moins un intent global, qui est appelé lorsque l'utilisateur appuie sur une notification push reçue de l'Assistant.
Commencer
Les sections suivantes décrivent comment configurer les notifications push dans votre action.
Créer un intent pour le déclenchement
L'intent que vous créez dans cette section déclenche le flux de notifications. Pour créer cet intent, procédez comme suit:
- Accédez à la console Actions, puis cliquez sur Développer dans le menu supérieur.
- Cliquez sur Intents dans le menu de gauche pour développer la section.
- Cliquez sur en bas de la liste et saisissez un nom pour le nouvel intent.
- Appuyez sur
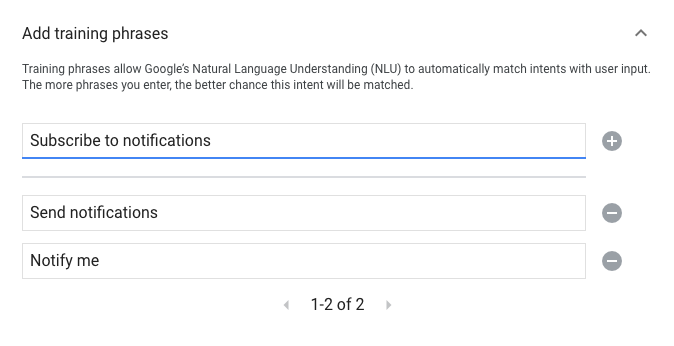
Enter/Returnpour créer l'intent. Ajoutez des phrases d'entraînement pour déclencher le flux de notifications. Par exemple :
Notify meSend notificationsSubscribe to notifications
Cliquez sur Enregistrer.
Transition vers l'intent système
Pour configurer la transition vers la scène système Notifications, procédez comme suit:
- Sous Scenes (Scènes) dans le menu de gauche, cliquez sur la scène à laquelle vous souhaitez ajouter le flux de notifications.
- Dans la section User intent management (Gestion des intents utilisateur) de la scène, cliquez sur + pour ajouter un gestionnaire d'intents.
- Sous Intent, sélectionnez l'intent que vous avez créé dans la section précédente.
Sous Transition, sélectionnez la scène système Notifications.
Cliquez sur Enregistrer.
![]()
Configurer la scène système
Pour configurer la scène système Notifications, procédez comme suit:
- Sous Scenes (Scènes) dans le menu de gauche, sélectionnez la nouvelle scène système Notifications.
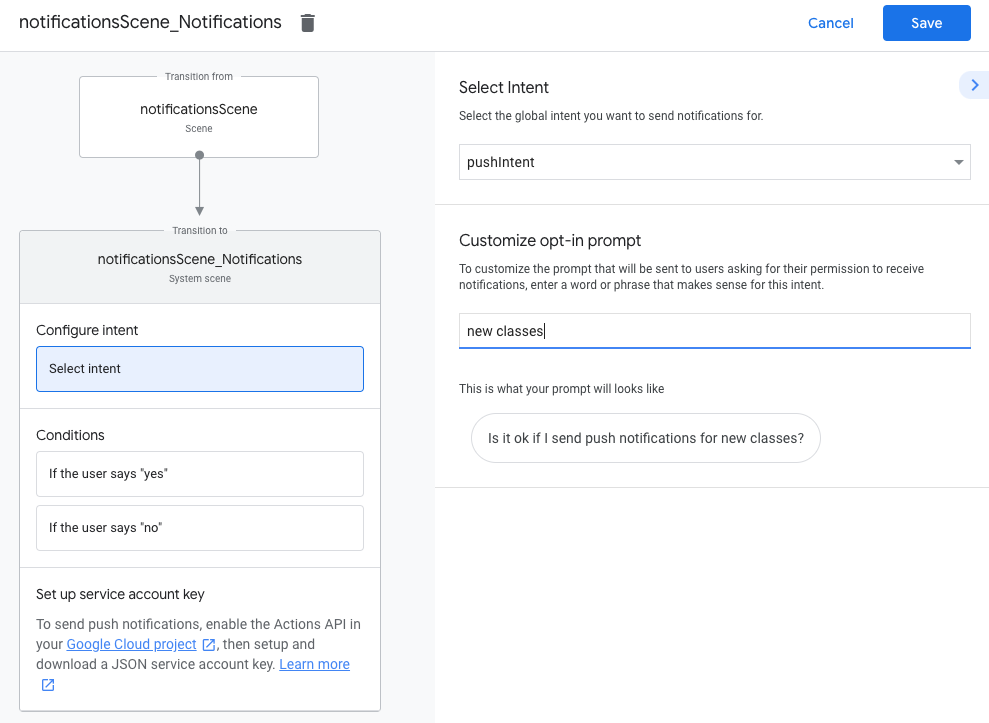
- Dans la section Configure intent (Configurer l'intent), cliquez sur Select intent (Sélectionner un intent).
Dans la section Sélectionner un intent, sélectionnez l'intent que vous souhaitez mettre en correspondance lorsqu'un utilisateur appuie sur une notification push.
Dans le champ Personnaliser l'invite d'activation, saisissez une invite qui s'affiche lorsque les utilisateurs sont invités à s'abonner aux notifications push. L'invite se présente sous la forme "Puis-je envoyer des notifications push pour $prompt ?".
Cliquez sur Enregistrer.
Configurer l'activation
Pour configurer l'activation des notifications push, procédez comme suit:
- Sous Scenes (Scènes), sélectionnez la scène système Notifications.
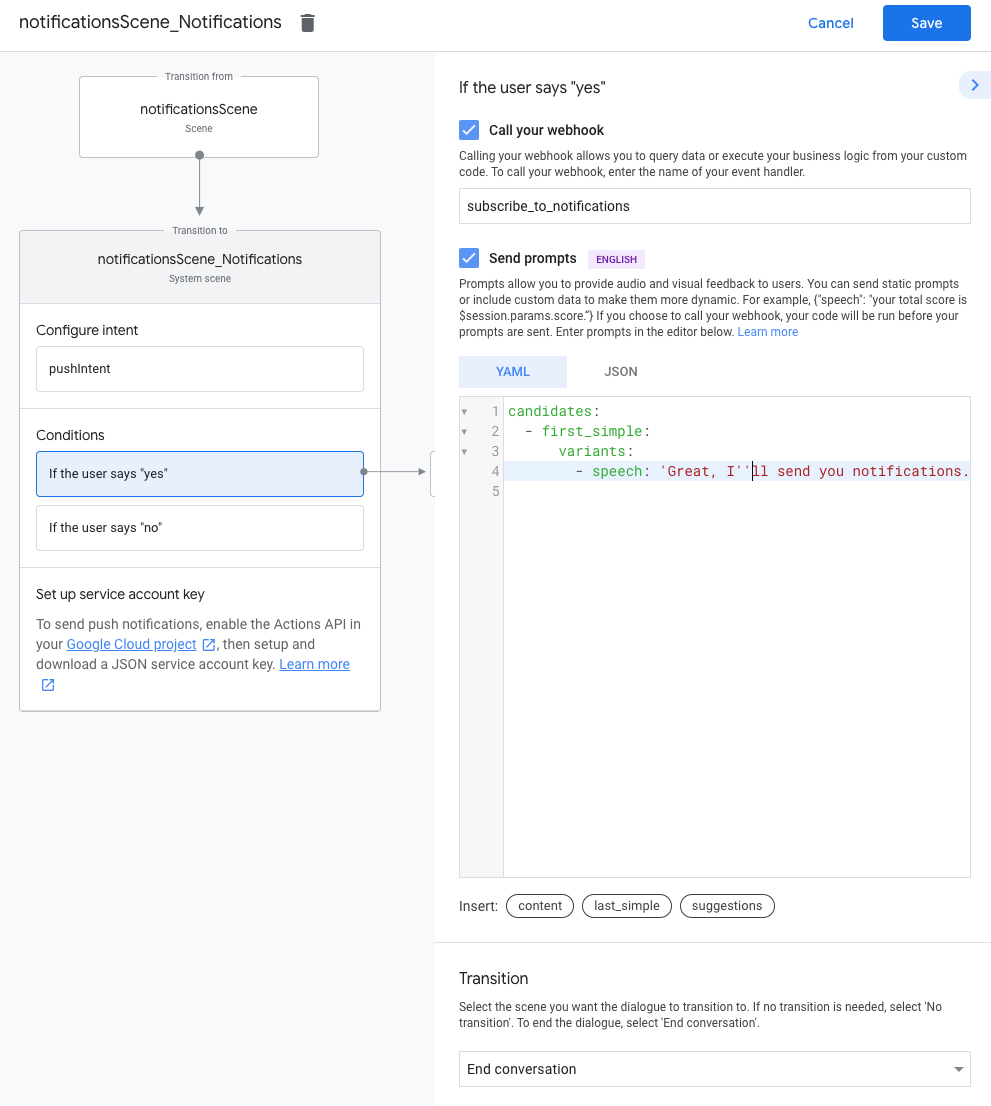
- Sous Conditions, sélectionnez Si l'utilisateur dit "oui".
- Activez l'option Call your webhook (Appeler votre webhook) et indiquez un nom de gestionnaire d'événements, tel que
subscribe_to_notifications. Activez l'option Send invites (Envoyer des invites) et fournissez une invite simple pour informer l'utilisateur qu'il recevra des notifications:
candidates:
- first simple:
  variants:
  - speech: 'Great, I'll send you notifications.'
Sous Transition, sélectionnez End conversation (Terminer la conversation) pour mettre fin à la conversation une fois qu'un utilisateur s'est abonné aux notifications.
Configurer la désactivation
Pour configurer la désactivation des notifications push, procédez comme suit:
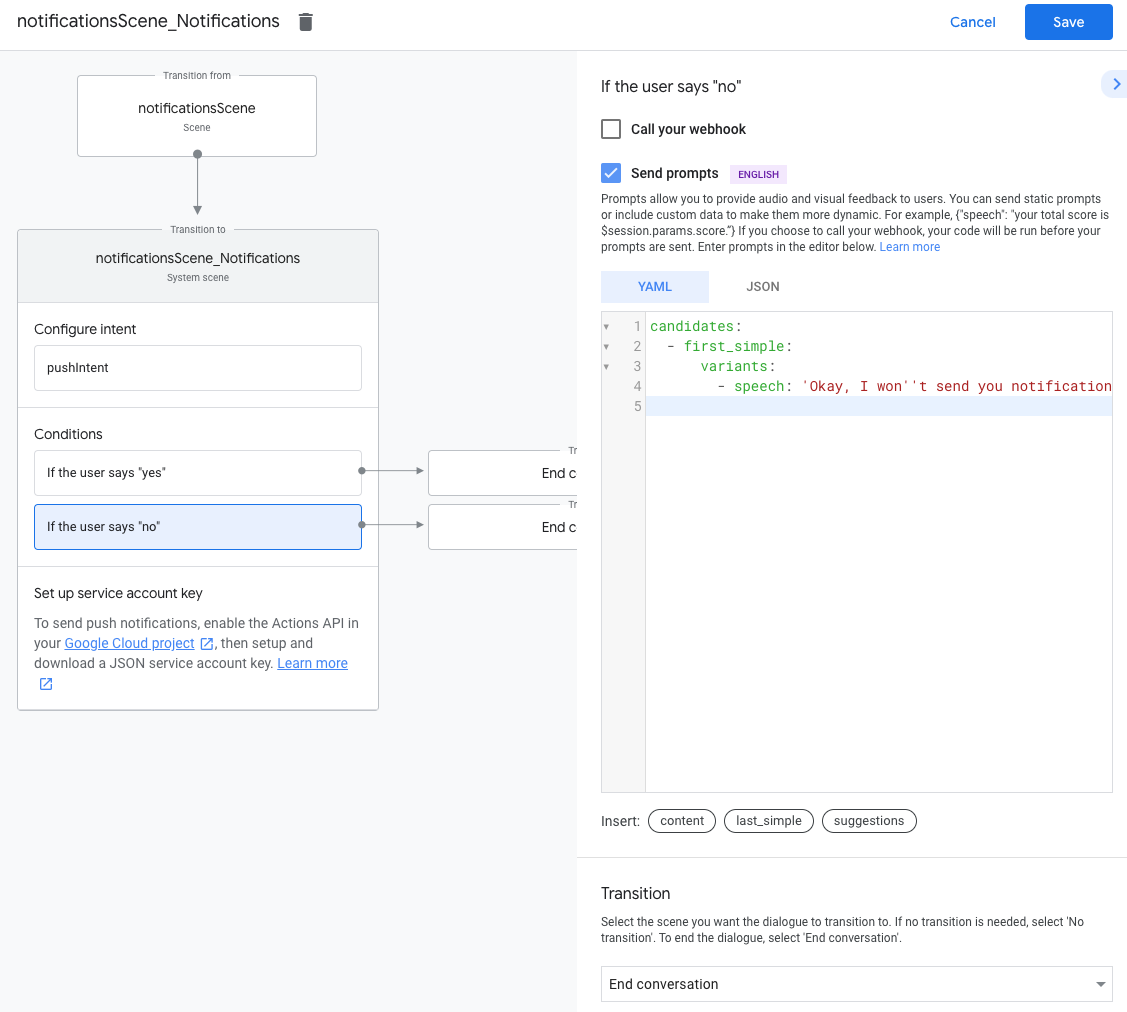
- Sous Conditions, sélectionnez Si l'utilisateur dit "non".
Activez l'option Send invites (Envoyer des invites) et fournissez une invite simple pour informer l'utilisateur qu'il ne recevra pas de notifications:
candidates:
- first simple:
  variants:
  - speech: Okay, I won't send you notifications.
Sous Transition, sélectionnez End conversation (Terminer la conversation) pour mettre fin à la conversation une fois qu'un utilisateur a désactivé les notifications.
Configurer le webhook
Pour configurer votre webhook, procédez comme suit:
Dans votre webhook, ajoutez un gestionnaire d'intent pour stocker
updatesUserId:app.handle('subscribe_to_notifications', conv => { const intentName = '<name_of_intent_to_trigger>'; const notificationsSlot = conv.session.params['NotificationSlot_${intentName}']; if(notificationsSlot.permissionStatus == 'PERMISSION_GRANTED') { const updateUserId = notificationsSlot.additionalUserData.updateUserId; // Store the user ID and the notification's target intent for later use. // (Use a database, like Firestore, for best practice.) } });
Envoyer des notifications
Les notifications push sont envoyées aux utilisateurs à l'aide de l'API Actions. Pour utiliser cette API, vous devez l'activer dans votre projet Google Cloud, puis configurer et télécharger une clé de compte de service JSON.
Vous pouvez ensuite utiliser la bibliothèque cliente Google OAuth2 pour échanger la clé du compte de service contre un jeton d'accès, puis utiliser ce jeton pour authentifier vos requêtes auprès de l'API Actions.
Obtenir une clé de compte de service
- Accédez à la console Google APIs, puis sélectionnez votre projet dans le menu déroulant Sélectionner un projet.
- Cliquez sur Activer pour activer l'API Actions pour votre projet.
- Accédez à la page des identifiants de la console Google Cloud, puis sélectionnez votre projet dans le menu déroulant Sélectionner un projet.
- Cliquez sur Créer des identifiants > Compte de service.
- Saisissez un nom de compte de service, puis cliquez sur Créer.
- Dans le menu déroulant Sélectionnez un rôle, sélectionnez Projet > Propriétaire.
- Cliquez sur Continuer.
- Cliquez sur Créer une clé pour télécharger le fichier JSON du compte de service.
Échanger la clé contre un jeton d'accès et envoyer une notification
Pour envoyer des notifications push via l'API Actions, vous devez échanger la clé du compte de service contre un jeton d'accès. Pour cela, nous vous recommandons d'utiliser une bibliothèque cliente des API Google. Dans la série d'extraits de code qui suit, nous utilisons la bibliothèque cliente Node.js de l'API Google.
Installez la bibliothèque cliente des API Google et exécutez la requête suivante:
npm install googleapis request --saveUtilisez le code suivant pour obtenir un jeton d'accès à partir de la clé du compte de service et envoyer une notification push:
// Use the Actions API to send a Google Assistant push notification.
let client = auth.fromJSON(require('./service-account.json'));
client.scopes = ['https://www.googleapis.com/auth/actions.fulfillment.conversation'];
let notification = {
  userNotification: {
    title: 'Example notification title',
  },
  target: {
    userId: '<UPDATES_USER_ID>',
    intent: 'Notifications Intent',
  },
};
client.authorize((err, tokens) => {
  if (err) {
    throw new Error('Auth error: ${err}');
  }
  request.post('https://actions.googleapis.com/v2/conversations:send', {
    'auth': {
      'bearer': tokens.access_token,
    },
    'json': true,
    'body': {'customPushMessage': notification, 'isInSandbox': true},
  }, (err, httpResponse, body) => {
    if (err) {
      throw new Error('API request error: ${err}');
    }
    console.log('${httpResponse.statusCode}: ' + '${httpResponse.statusMessage}');
    console.log(JSON.stringify(body));
  });
});