
Typ połączenia OAuth obsługuje 2 standardowe przepływy OAuth 2.0: implicit i autoryzacji.
W pośrednim przepływie kodu Google otwiera punkt końcowy autoryzacji w przeglądarce użytkownika. Po udanym logowaniu zwracasz token dostępu o długim czasie do Google. Ten token dostępu jest teraz dołączany do każdego żądania wysyłanego przez Asystenta do działania.
W ramach procesu kodu autoryzacji potrzebujesz 2 punktów końcowych:
- Punkt końcowy autoryzacji, który odpowiada za wyświetlanie interfejsu logowania użytkownikom, którzy nie są jeszcze zalogowani, i rejestrowanie zgody w żądanym terminie w postaci kodu o ograniczonym czasie ważności.
- Punkt końcowy giełdy tokenów odpowiedzialny za 2 typy giełd:
- Wymienia kod autoryzacji tokena długoterminowego i tokena dostępu o ograniczonym czasie ważności. Ta wymiana ma miejsce, gdy użytkownik przechodzi przez proces łączenia kont.
- Wymienia długotrwały token odświeżania na token dostępu o ograniczonym czasie ważności. Ta giełda ma miejsce, gdy Google potrzebuje nowego tokena dostępu, ponieważ wygasł.
Implementacja niejawnego przepływu kodu jest prostsza, ale Google zaleca, aby tokeny dostępu wydane z wykorzystaniem niejawnego przepływu nigdy nie wygasały, ponieważ korzystanie z tożsamości w wyniku takiego działania wymusza na użytkowniku ponowne połączenie konta. Jeśli ze względów bezpieczeństwa zależy Ci na wygaśnięciu tokena, rozważ użycie kodu uwierzytelniania.
Wdrażanie łączenia kont OAuth
Konfigurowanie projektu
Aby skonfigurować w projekcie połączenie z kontami OAuth, wykonaj te czynności:
- Otwórz konsolę Actions i wybierz projekt, którego chcesz użyć.
- Kliknij kartę Programowanie i wybierz Łączenie kont.
- Włącz przełącznik obok opcji Łączenie kont.
- W sekcji Tworzenie konta wybierz Nie, chcę zezwolić na tworzenie konta tylko w mojej witrynie.
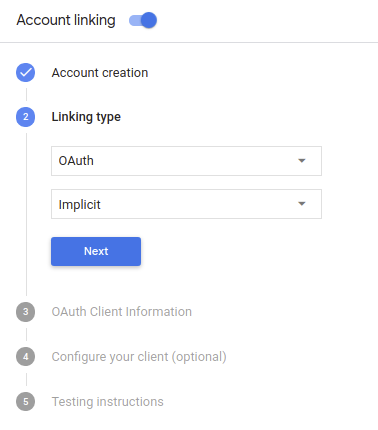
W sekcji Typ połączenia wybierz OAuth i Niejednoznaczne.
W sekcji Informacje o kliencie:
- Przypisz wartość do identyfikatora klienta wystawionego przez Twoje działania dla Google, aby zidentyfikować: pochodzących od Google.
- Wstaw adresy URL punktów końcowych Authorization i Token Exchange.
- Kliknij Zapisz.
Wdróż serwer OAuth
Aby obsługiwać niejawny przepływ OAuth 2.0, Twoja usługa wymaga autoryzacji punktu końcowego dostępnego przez HTTPS. Ten punkt końcowy odpowiada za uwierzytelnianie i uzyskiwania od użytkowników zgody na dostęp do danych. Punkt końcowy autoryzacji wyświetla interfejs logowania użytkownikom, którzy nie są jeszcze zalogowani, wyrazić zgodę na żądany dostęp.
Gdy akcja musi wywołać jeden z autoryzowanych interfejsów API usługi, Google używa ten punkt końcowy, aby uzyskać od użytkowników uprawnienia do wywoływania tych interfejsów API w imieniu Google.
Typowa sesja niejawnego przepływu zainicjowana przez Google w języku OAuth 2.0 ma następujący przepływ:
- Google otworzy punkt końcowy autoryzacji w przeglądarce użytkownika. loguje się, jeśli jeszcze nie jest zalogowany, i zezwala Google na dostęp swoich danych za pomocą interfejsu API, jeśli nie udzielili jeszcze zgody.
- Usługa tworzy token dostępu i zwraca go do Google przez przekierowanie przeglądarki użytkownika z powrotem do Google wraz z tokenem dostępu. do żądania.
- Google wywołuje interfejsy API Twojej usługi i łączy token dostępu z każdego żądania. Usługa sprawdza, czy token dostępu przyznaje Google aby uzyskać dostęp do interfejsu API, a następnie wykonać jego wywołanie.
Obsługa żądań autoryzacji
Jeśli akcja musi połączyć konta przez niejawny przepływ OAuth2, Google wysyła użytkownika do punktu końcowego autoryzacji z żądaniem zawierającym ciąg następujące parametry:
| Parametry punktu końcowego autoryzacji | |
|---|---|
client_id |
Identyfikator klienta przypisany przez Ciebie do Google. |
redirect_uri |
Adres URL, na który została wysłana odpowiedź na to żądanie. |
state |
wartości księgowej, która jest przesyłana do Google bez zmian w identyfikator URI przekierowania. |
response_type |
Typ wartości do zwrócenia w odpowiedzi. W przypadku protokołu OAuth 2.0 implicit
przepływu, typ odpowiedzi to zawsze token. |
Jeśli na przykład punkt końcowy autoryzacji jest dostępny pod adresem https://myservice.example.com/auth,
żądanie może wyglądać tak:
GET https://myservice.example.com/auth?client_id=GOOGLE_CLIENT_ID&redirect_uri=REDIRECT_URI&state=STATE_STRING&response_type=token
Aby punkt końcowy autoryzacji mógł obsługiwać żądania logowania, wykonaj te czynności:
Sprawdź wartości
client_idiredirect_uriw zapobiegaj przyznawaniu dostępu do niezamierzonych lub błędnie skonfigurowanych aplikacji klienckich:- Sprawdź, czy identyfikator
client_idjest zgodny z Twoim identyfikatorem klienta przypisane do Google. - Sprawdź, czy URL podany w pliku
redirect_urima taką postać:https://oauth-redirect.googleusercontent.com/r/YOUR_PROJECT_ID
- Sprawdź, czy identyfikator
Sprawdź, czy użytkownik jest zalogowany w Twojej usłudze. Jeśli użytkownik nie jest zalogowany dokończ proces logowania lub rejestracji w usłudze.
Wygeneruj token dostępu, którego Google będzie używać, aby uzyskiwać dostęp do Twojego interfejsu API. token dostępu może być dowolną wartością ciągu, ale musi jednoznacznie reprezentować i klienta, dla którego jest przeznaczony token, i nie może być odgadywany.
Wyślij odpowiedź HTTP przekierowującą przeglądarkę użytkownika na ten adres URL wskazywaną przez parametr
redirect_uri. Uwzględnij wszystkie następujące parametry we fragmencie adresu URL:access_token: wygenerowany właśnie przez Ciebie token dostępu.token_type: ciąg znakówbearerstate: niezmodyfikowana wartość stanu pierwotnego, prośba Oto przykład powstałego adresu URL:https://oauth-redirect.googleusercontent.com/r/YOUR_PROJECT_ID#access_token=ACCESS_TOKEN&token_type=bearer&state=STATE_STRING
Moduł obsługi przekierowań OAuth 2.0 od Google otrzyma token dostępu i potwierdzi
że wartość state się nie zmieniła. Po uzyskaniu przez Google
dla Twojej usługi, Google będzie dołączać ten token do kolejnych wywołań
do akcji w ramach żądania AppRequest.
Rozpoczynanie procesu uwierzytelniania
Użyj intencji Asystenta logowania się na konto. aby rozpocząć proces uwierzytelniania. Fragmenty kodu poniżej opisują, wysłać odpowiedź w Dialogflow i Action SDK, aby użyć tego pomocnika.
Dialogflow:
const {dialogflow, SignIn} = require('actions-on-google');
const app = dialogflow({
  // REPLACE THE PLACEHOLDER WITH THE CLIENT_ID OF YOUR ACTIONS PROJECT
  clientId: CLIENT_ID,
});
// Intent that starts the account linking flow.
app.intent('Start Signin', (conv) => {
  conv.ask(new SignIn('To get your account details'));
});
@ForIntent("Start Signin")
public ActionResponse text(ActionRequest request) {
  ResponseBuilder rb = getResponseBuilder(request);
  return rb.add(new SignIn().setContext("To get your account details")).build();
}
{
  "payload": {
    "google": {
      "expectUserResponse": true,
      "richResponse": {
        "items": [
          {
            "simpleResponse": {
              "textToSpeech": "PLACEHOLDER"
            }
          }
        ]
      },
      "userStorage": "{\"data\":{}}",
      "systemIntent": {
        "intent": "actions.intent.SIGN_IN",
        "data": {
          "@type": "type.googleapis.com/google.actions.v2.SignInValueSpec",
          "optContext": "To get your account details"
        }
      }
    }
  },
  "outputContexts": [
    {
      "name": "/contexts/_actions_on_google",
      "lifespanCount": 99,
      "parameters": {
        "data": "{}"
      }
    }
  ]
}
Pakiet SDK Actions:
const {actionssdk, SignIn} = require('actions-on-google');
const app = actionssdk({
  // REPLACE THE PLACEHOLDER WITH THE CLIENT_ID OF YOUR ACTIONS PROJECT
  clientId: CLIENT_ID,
});
// Intent that starts the account linking flow.
app.intent('actions.intent.TEXT', (conv) => {
  conv.ask(new SignIn('To get your account details'));
});
@ForIntent("actions.intent.TEXT")
public ActionResponse text(ActionRequest request) {
  ResponseBuilder rb = getResponseBuilder(request);
  return rb.add(new SignIn().setContext("To get your account details")).build();
}
{
  "expectUserResponse": true,
  "expectedInputs": [
    {
      "inputPrompt": {
        "richInitialPrompt": {
          "items": [
            {
              "simpleResponse": {
                "textToSpeech": "PLACEHOLDER"
              }
            }
          ]
        }
      },
      "possibleIntents": [
        {
          "intent": "actions.intent.SIGN_IN",
          "inputValueData": {
            "@type": "type.googleapis.com/google.actions.v2.SignInValueSpec",
            "optContext": "To get your account details"
          }
        }
      ]
    }
  ],
  "conversationToken": "{\"data\":{}}",
  "userStorage": "{\"data\":{}}"
}
Obsługa żądań dostępu do danych
Jeśli prośba o Asystenta zawiera token dostępu, najpierw sprawdź, czy token dostępu jest prawidłowy (i nie stracił ważności), a następnie pobierz powiązane konto użytkownika z bazy danych.