ปรับปรุงประสบการณ์ของผู้ใช้แอปด้วยการผสานรวมการตรวจสอบสิทธิ์แบบไม่ใช้รหัสผ่านกับพาสคีย์ได้อย่างราบรื่นโดยใช้เครื่องมือจัดการข้อมูลเข้าสู่ระบบ เครื่องมือจัดการข้อมูลเข้าสู่ระบบเป็นไลบรารีของ Android Jetpack ที่ผนวกการรองรับ API สำหรับวิธีการตรวจสอบสิทธิ์หลักๆ ส่วนใหญ่ ซึ่งรวมถึงพาสคีย์ รหัสผ่าน และโซลูชันการลงชื่อเข้าใช้แบบรวมศูนย์ (เช่น การลงชื่อเข้าใช้ด้วย Google)
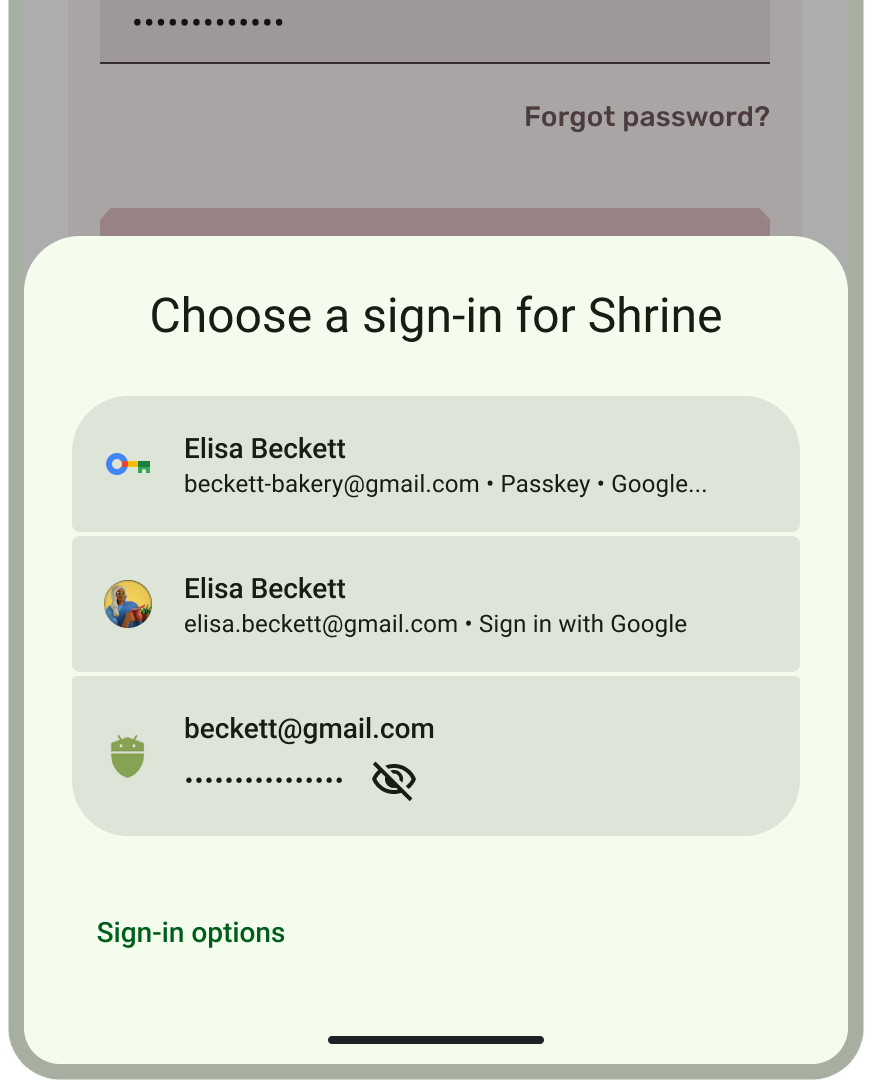
เครื่องมือจัดการข้อมูลเข้าสู่ระบบจะแสดงไฟล์ด้านล่างแบบรวมโดยอัตโนมัติสำหรับวิธีการตรวจสอบสิทธิ์สมัยใหม่ และเป็นการมาแทนที่แบบใหม่สำหรับการใช้งานการตรวจสอบสิทธิ์เดิม ซึ่งรวมถึง Smart Lock สำหรับรหัสผ่านใน Android และ One Tap อินเทอร์เฟซการลงชื่อเข้าใช้แบบรวมของเครื่องมือจัดการข้อมูลเข้าสู่ระบบช่วยให้ผู้ใช้ได้รับประสบการณ์การใช้งานที่ชัดเจน คุ้นเคย และสอดคล้องกัน ลดการเลิกใช้งาน ตลอดจนเพิ่มความเร็วในการลงทะเบียนและการลงชื่อเข้าใช้
ดูข้อมูลเพิ่มเติมเกี่ยวกับวิธีผสานรวมเครื่องมือจัดการข้อมูลเข้าสู่ระบบกับแอป Android
- ลงชื่อเข้าใช้ผู้ใช้ด้วยคู่มือนักพัฒนาซอฟต์แวร์สำหรับเครื่องมือจัดการข้อมูลเข้าสู่ระบบ
- คู่มือการตรวจสอบสิทธิ์ผู้ใช้ด้วยพาสคีย์สำหรับพาสคีย์
- ผสานรวมเครื่องมือจัดการข้อมูลเข้าสู่ระบบกับฟีเจอร์ลงชื่อเข้าใช้ด้วย Google
- อัปเกรดจากขั้นตอนเดิมของปุ่ม "ลงชื่อเข้าใช้ด้วย Google"
- ผสานรวมเครื่องมือจัดการข้อมูลเข้าสู่ระบบกับ WebView
- ย้ายข้อมูลจาก Smart Lock สำหรับรหัสผ่านไปยังเครื่องมือจัดการข้อมูลเข้าสู่ระบบ
- ย้ายข้อมูลจาก FIDO2 ไปยังเครื่องมือจัดการข้อมูลเข้าสู่ระบบ
- ย้ายข้อมูลจาก Google Sign-In เดิมไปยังเครื่องมือจัดการข้อมูลเข้าสู่ระบบ
- เอกสารประกอบของ androidx.credentials API
- พาสคีย์บนเส้นทางการเรียนรู้ของ Android
- Codelab: ดูวิธีทำให้เส้นทางการตรวจสอบสิทธิ์ง่ายขึ้นโดยใช้ Credential Manager API ในแอป Android ของคุณ
ดูข้อมูลเพิ่มเติมเกี่ยวกับวิธีเพิ่มประสิทธิภาพ API สำหรับข้อมูลระบุตัวตนและการตรวจสอบสิทธิ์ที่มีอยู่เพื่อรองรับพาสคีย์และปรับปรุงความสามารถในการใช้งาน API ของ Credential Manager