Earth Engine assets (e.g. images, tables) may be legacy assets (i.e. not associated with a Cloud Project) or assets associated with a Google Cloud Project. This guide describes how to use the Asset Manager to upload and/or use assets associated with a Cloud Project.
Cloud Asset Manager
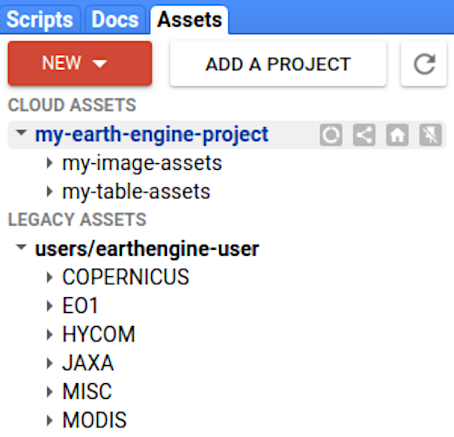
The Cloud Asset Manager contains the Cloud Assets section,
the Legacy Assets section and the Add A Project button.

Cloud Assets
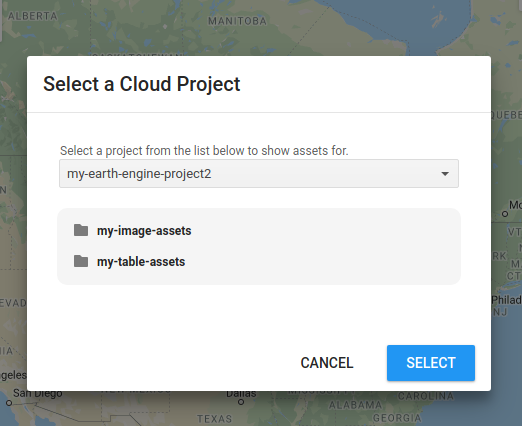
The Cloud Assets section contains assets which belong to any of the Cloud Projects that are pinned to the Asset Manager. The Cloud Project which is selected for the Code Editor session (as indicated in the top-right of the Code Editor) is here by default. Additional projects may be pinned by choosing the Add A Project button and selecting a project in the Select a Cloud Project dialog. The assets within these projects will be displayed in an initially expanded zippy, with nested folders initially collapsed.
Legacy Assets
Legacy assets are assets associated with your Earth Engine account before Earth Engine's Cloud integration.
Add a Project
Clicking the Add a Project button will open the Select a Cloud Project dialog.

This dialog which will present a drop down to select a Cloud Project and show the Earth Engine assets that are present in that project. Projects which you have pinned previously are displayed as Earth Engine Enabled Projects. Selecting a Cloud Project in the drop down and clicking Select will pin the project to the Cloud Assets section and display the assets contained within the project.
Selecting a project that is already pinned will provide the option to unpin the project instead.
Uploading assets
Upload assets using the Upload Assets button. The uploaded assets by default will be associated with the project selected in the Code Editor. If you want the new asset(s) to be associated with a different project, select a different project through the project picker provided by the upload dialog.
Managing assets
Assets can be managed through the Code Editor
Asset Manager tab, the
command line, a client library (for example,
ee.data.getAsset) or via the
REST API directly.
Managing asset permissions
To give other users access to your assets for the purpose of reading, writing or full administrative control, you may set permissions on the asset, the project or both. See the Access Control page for details.
Accessing assets
Asset paths are of the form projects/${PROJECT_NAME}/assets/${ASSET_NAME}.
These paths are used in client library constructors, when doing exports through one of the
client libraries, at ingest or upload time and in REST API calls.
Public assets
Images in the public catalog can be accessed from paths like
projects/earthengine-public/assets/path/to/asset/asset-id. For example, here's
a Landsat scene:
projects/earthengine-public/assets/LANDSAT/LC08/C02/T1_RT/LC08_001004_20140609
Note that PROJECT_NAME in this example is earthengine-public.
These paths can be passed directly to constructors such as Image,
ImageCollection or FeatureCollection. You also pass asset
paths to the REST API.
Here
is a very simple example from the REST quickstart.
Personal assets
To access an Earth Engine asset stored in a project you own or have permission to view,
set PROJECT_NAME to the ID of the project that owns the asset. For example:
projects/my-ee-enabled-project-id/assets/my-asset-id
In this example, my-ee-enabled-project-id is the name of a project through which
assets have previously been uploaded or created. See the
Projects page for more information on how to
enable the Earth Engine API on a Cloud Project.
Legacy assets
Legacy assets are assets stored in legacy users/ or projects/
folders. When accessing these assets, the PROJECT_NAME is
earthengine-legacy. For example:
projects/earthengine-legacy/assets/users/user-name/my-asset-id
Accessing images in Cloud Storage
You can access Cloud Optimized GeoTIFFs (COGs) directly from a Cloud Storage bucket using
ee.Image.loadGeoTIFF().
You can also create COG-backed Earth Engine assets as described in
this REST API example.