مستوى الترميز: مبتدئ
المدة: 10 دقائق
نوع المشروع: تشغيل آلي مع قائمة مخصّصة
الأهداف
- فهم ما يفعله الحل.
- تعرّف على ما تفعله خدمات "برمجة التطبيقات"
ضمن الحل.
- أعِدّ النص البرمجي.
- شغِّل النص البرمجي.
لمحة عن هذا الحلّ
يمكنك تعبئة نموذج رسالة إلكترونية تلقائيًا ببيانات من "جداول بيانات Google". يتم إرسال الرسائل الإلكترونية من حسابك على Gmail حتى تتمكن من الرد على ردود المستلِمين.
ملاحظة مهمة: يخضع نموذج "دمج البريد" هذا لحدود البريد الإلكتروني الموضحة في حصص خدمات Google.

آلية العمل
يمكنك إنشاء قالب مسودة Gmail يحتوي على عناصر نائبة
تتوافق مع البيانات في جدول بيانات جداول البيانات. يمثل كل عنوان عمود في
الورقة علامة عنصر نائب. يرسل النص البرمجي معلومات عن كل عنصر نائب من جدول البيانات إلى موقع علامة العنصر النائب المقابلة في مسودة بريدك الإلكتروني.
خدمات "برمجة التطبيقات"
يستخدم هذا الحل الخدمات التالية:
- خدمة Gmail: تتلقّى مسودة الرسالة الإلكترونية التي تريد إرسالها إلى المستلِمين وتقرأها وترسلها.
- خدمة جدول البيانات - تملأ العناصر النائبة للبريد الإلكتروني
بالمعلومات المخصصة
لكل مستلم.
المتطلبات الأساسية
لاستخدام هذا النموذج، ستحتاج إلى المتطلّبات الأساسية التالية:
- حساب Google (قد تتطلب حسابات Google Workspace
موافقة المشرف).
- متصفح ويب يمكنه الوصول إلى الإنترنت.
إعداد النص البرمجي
إنشاء مشروع "برمجة تطبيقات Google"
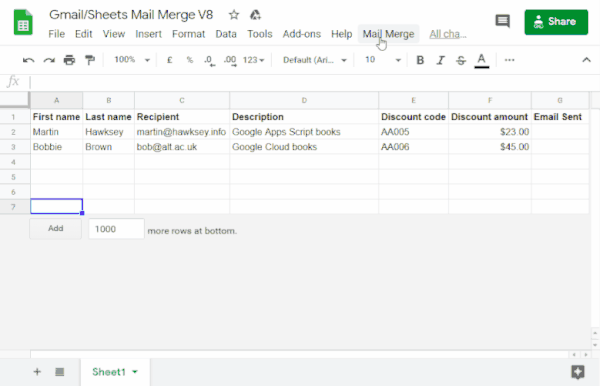
- انقر على الزر التالي لإنشاء نسخة من نموذج جدول بيانات
دمج البريد في Gmail/جداول بيانات Google.
يتم إرفاق مشروع "برمجة تطبيقات Google"
لهذا الحل بجدول البيانات.
إنشاء نسخة
- في جدول البيانات المنسوخ، عدِّل عمود المستلِمون باستخدام عناوين البريد الإلكتروني التي تريد استخدامها في ميزة "دمج البريد".
- (اختياري) أضِف أعمدة أو عدِّلها أو أزِلها لتخصيص البيانات التي تريد تضمينها
في نموذج البريد الإلكتروني.
إذا غيّرت اسم عمود المستلِم أو إرسال
البريد الإلكتروني، عليك تعديل الرمز المقابل في مشروع "برمجة التطبيقات". يمكنك فتح مشروع برمجة التطبيقات
من جدول البيانات عن طريق
النقر على
الإضافات >
برمجة التطبيقات.
إنشاء نموذج رسالة إلكترونية
- في حسابك على Gmail، أنشئ مسودة رسالة إلكترونية. لتضمين البيانات من
جدول البيانات في بريدك الإلكتروني، استخدِم العناصر النائبة التي تتوافق مع أسماء الأعمدة
المحاطة بالأقواس المعقوفة، مثل
{{First name}}
.
- إذا قمت بتنسيق النص في رسالة البريد الإلكتروني، يجب عليك أيضًا تنسيق
أقواس العنصر النائب.
- العناصر النائبة حساسة لحالة الأحرف ويجب أن تتطابق تمامًا مع عناوين الأعمدة.
- انسخ سطر الموضوع في مسودة الرسالة الإلكترونية.
تشغيل النص البرمجي
- في جدول البيانات، انقر على دمج البريد >
إرسال رسائل إلكترونية. قد تحتاج إلى تحديث الصفحة حتى تظهر
هذه القائمة المخصّصة.
امنح الإذن للنصّ البرمجي عند مطالبتك بذلك.
إذا عرضت شاشة طلب الموافقة المتعلّقة ببروتوكول OAuth التحذير، لم يتم التحقّق من هذا التطبيق،
يمكنك المتابعة من خلال اختيار إعدادات متقدّمة >
الانتقال إلى {Project Name} (غير آمن).
انقر على دمج البريد > إرسال رسائل إلكترونية
مرة أخرى.
الصِق سطر موضوع نموذج الرسالة الإلكترونية وانقر على حسنًا.
إذا طبقت فلترًا على ورقة البيانات، فسيظل النص البرمجي يرسل رسالة إلكترونية إلى المشاركين
المفلترين، لكنه لن يضيف الطابع الزمني.
مراجعة الرمز
لمراجعة رمز برمجة التطبيقات لهذا الحل، انقر على
عرض رمز المصدر أدناه:
عرض رمز المصدر
Code.gs
// To learn how to use this script, refer to the documentation:
// https://developers.google.com/apps-script/samples/automations/mail-merge
/*
Copyright 2022 Martin Hawksey
Licensed under the Apache License, Version 2.0 (the "License");
you may not use this file except in compliance with the License.
You may obtain a copy of the License at
https://www.apache.org/licenses/LICENSE-2.0
Unless required by applicable law or agreed to in writing, software
distributed under the License is distributed on an "AS IS" BASIS,
WITHOUT WARRANTIES OR CONDITIONS OF ANY KIND, either express or implied.
See the License for the specific language governing permissions and
limitations under the License.
*/
/**
* @OnlyCurrentDoc
*/
/**
* Change these to match the column names you are using for email
* recipient addresses and email sent column.
*/
const RECIPIENT_COL = "Recipient";
const EMAIL_SENT_COL = "Email Sent";
/**
* Creates the menu item "Mail Merge" for user to run scripts on drop-down.
*/
function onOpen() {
const ui = SpreadsheetApp.getUi();
ui.createMenu('Mail Merge')
.addItem('Send Emails', 'sendEmails')
.addToUi();
}
/**
* Sends emails from sheet data.
* @param {string} subjectLine (optional) for the email draft message
* @param {Sheet} sheet to read data from
*/
function sendEmails(subjectLine, sheet=SpreadsheetApp.getActiveSheet()) {
// option to skip browser prompt if you want to use this code in other projects
if (!subjectLine){
subjectLine = Browser.inputBox("Mail Merge",
"Type or copy/paste the subject line of the Gmail " +
"draft message you would like to mail merge with:",
Browser.Buttons.OK_CANCEL);
if (subjectLine === "cancel" || subjectLine == ""){
// If no subject line, finishes up
return;
}
}
// Gets the draft Gmail message to use as a template
const emailTemplate = getGmailTemplateFromDrafts_(subjectLine);
// Gets the data from the passed sheet
const dataRange = sheet.getDataRange();
// Fetches displayed values for each row in the Range HT Andrew Roberts
// https://mashe.hawksey.info/2020/04/a-bulk-email-mail-merge-with-gmail-and-google-sheets-solution-evolution-using-v8/#comment-187490
// @see https://developers.google.com/apps-script/reference/spreadsheet/range#getdisplayvalues
const data = dataRange.getDisplayValues();
// Assumes row 1 contains our column headings
const heads = data.shift();
// Gets the index of the column named 'Email Status' (Assumes header names are unique)
// @see http://ramblings.mcpher.com/Home/excelquirks/gooscript/arrayfunctions
const emailSentColIdx = heads.indexOf(EMAIL_SENT_COL);
// Converts 2d array into an object array
// See https://stackoverflow.com/a/22917499/1027723
// For a pretty version, see https://mashe.hawksey.info/?p=17869/#comment-184945
const obj = data.map(r => (heads.reduce((o, k, i) => (o[k] = r[i] || '', o), {})));
// Creates an array to record sent emails
const out = [];
// Loops through all the rows of data
obj.forEach(function(row, rowIdx){
// Only sends emails if email_sent cell is blank and not hidden by a filter
if (row[EMAIL_SENT_COL] == ''){
try {
const msgObj = fillInTemplateFromObject_(emailTemplate.message, row);
// See https://developers.google.com/apps-script/reference/gmail/gmail-app#sendEmail(String,String,String,Object)
// If you need to send emails with unicode/emoji characters change GmailApp for MailApp
// Uncomment advanced parameters as needed (see docs for limitations)
GmailApp.sendEmail(row[RECIPIENT_COL], msgObj.subject, msgObj.text, {
htmlBody: msgObj.html,
// bcc: 'a.bcc@email.com',
// cc: 'a.cc@email.com',
// from: 'an.alias@email.com',
// name: 'name of the sender',
// replyTo: 'a.reply@email.com',
// noReply: true, // if the email should be sent from a generic no-reply email address (not available to gmail.com users)
attachments: emailTemplate.attachments,
inlineImages: emailTemplate.inlineImages
});
// Edits cell to record email sent date
out.push([new Date()]);
} catch(e) {
// modify cell to record error
out.push([e.message]);
}
} else {
out.push([row[EMAIL_SENT_COL]]);
}
});
// Updates the sheet with new data
sheet.getRange(2, emailSentColIdx+1, out.length).setValues(out);
/**
* Get a Gmail draft message by matching the subject line.
* @param {string} subject_line to search for draft message
* @return {object} containing the subject, plain and html message body and attachments
*/
function getGmailTemplateFromDrafts_(subject_line){
try {
// get drafts
const drafts = GmailApp.getDrafts();
// filter the drafts that match subject line
const draft = drafts.filter(subjectFilter_(subject_line))[0];
// get the message object
const msg = draft.getMessage();
// Handles inline images and attachments so they can be included in the merge
// Based on https://stackoverflow.com/a/65813881/1027723
// Gets all attachments and inline image attachments
const allInlineImages = draft.getMessage().getAttachments({includeInlineImages: true,includeAttachments:false});
const attachments = draft.getMessage().getAttachments({includeInlineImages: false});
const htmlBody = msg.getBody();
// Creates an inline image object with the image name as key
// (can't rely on image index as array based on insert order)
const img_obj = allInlineImages.reduce((obj, i) => (obj[i.getName()] = i, obj) ,{});
//Regexp searches for all img string positions with cid
const imgexp = RegExp('<img.*?src="cid:(.*?)".*?alt="(.*?)"[^\>]+>', 'g');
const matches = [...htmlBody.matchAll(imgexp)];
//Initiates the allInlineImages object
const inlineImagesObj = {};
// built an inlineImagesObj from inline image matches
matches.forEach(match => inlineImagesObj[match[1]] = img_obj[match[2]]);
return {message: {subject: subject_line, text: msg.getPlainBody(), html:htmlBody},
attachments: attachments, inlineImages: inlineImagesObj };
} catch(e) {
throw new Error("Oops - can't find Gmail draft");
}
/**
* Filter draft objects with the matching subject linemessage by matching the subject line.
* @param {string} subject_line to search for draft message
* @return {object} GmailDraft object
*/
function subjectFilter_(subject_line){
return function(element) {
if (element.getMessage().getSubject() === subject_line) {
return element;
}
}
}
}
/**
* Fill template string with data object
* @see https://stackoverflow.com/a/378000/1027723
* @param {string} template string containing {{}} markers which are replaced with data
* @param {object} data object used to replace {{}} markers
* @return {object} message replaced with data
*/
function fillInTemplateFromObject_(template, data) {
// We have two templates one for plain text and the html body
// Stringifing the object means we can do a global replace
let template_string = JSON.stringify(template);
// Token replacement
template_string = template_string.replace(/{{[^{}]+}}/g, key => {
return escapeData_(data[key.replace(/[{}]+/g, "")] || "");
});
return JSON.parse(template_string);
}
/**
* Escape cell data to make JSON safe
* @see https://stackoverflow.com/a/9204218/1027723
* @param {string} str to escape JSON special characters from
* @return {string} escaped string
*/
function escapeData_(str) {
return str
.replace(/[\\]/g, '\\\\')
.replace(/[\"]/g, '\\\"')
.replace(/[\/]/g, '\\/')
.replace(/[\b]/g, '\\b')
.replace(/[\f]/g, '\\f')
.replace(/[\n]/g, '\\n')
.replace(/[\r]/g, '\\r')
.replace(/[\t]/g, '\\t');
};
}
التعديلات
يمكنك تعديل التشغيل الآلي لميزة "دمج البريد" بالقدر الذي تريده بالشكل الذي تريده.
في ما يلي بعض التغييرات الاختيارية التي يمكنك إجراؤها على رمز المصدر.
إضافة معلمات البريد الإلكتروني في الحقل "نسخة مخفية الوجهة" أو "نسخة إلى" أو "الرد إلى" أو "من"
ويتضمّن نموذج الرمز عددًا من المَعلمات الإضافية التي تم التعليق عليها حاليًا والتي تسمح لك بالتحكّم في اسم الحساب الذي يتم إرسال الرسالة الإلكترونية منه، والردّ على عناوين البريد الإلكتروني، بالإضافة إلى عناوين البريد الإلكتروني في الحقل "نسخة مخفية الوجهة" و"نسخة إلى".
فعِّل المَعلمات التي تريد إضافتها عن طريق إزالة الشرطة المائلة للأمام
//
أمام كل منها.
يعرض النموذج التالي مقتطفًا من الدالة sendEmails
التي تفعّل معظم معلَمات البريد الإلكتروني:
GmailApp.sendEmail(row[RECIPIENT_COL], msgObj.subject, msgObj.text, {
htmlBody: msgObj.html,
bcc: 'bcc@example.com',
cc: 'cc@example.com',
from: 'from.alias@example.com',
name: 'name of the sender',
replyTo: 'reply@example.com',
// noReply: true, // if the email should be sent from a generic no-reply email address (not available to gmail.com users)
في النموذج أعلاه، لا يزال يتم التعليق على المعلَمة noReply
بسبب ضبط المعلَمة replyTo
.
تضمين أحرف بترميز يونيكود في رسائلك الإلكترونية
إذا أردت تضمين أحرف يونيكود، مثل الرموز التعبيرية، في رسائلك الإلكترونية، عليك
تعديل الرمز لاستخدام خدمة "البريد" بدلاً من خدمة Gmail.
في نموذج الرمز، حدِّث السطر التالي:
GmailApp.sendEmail(row[RECIPIENT_COL], msgObj.subject, msgObj.text, {
استبدل السطر بالتعليمة البرمجية التالية:
MailApp.sendEmail(row[RECIPIENT_COL], msgObj.subject, msgObj.text, {
المساهمون
تم إعداد النموذج بواسطة مارتن هوكسي، مدير قسم تصميم التعليم والتكنولوجيا في معهد Edinburgh Futures Institute، والمدوّن، وخبير مختصّ في التطوير في Google.
تحتفظ Google بهذا النموذج بمساعدة خبراء التطوير في Google.
الخطوات التالية