
本教學課程說明如何建立 Google Chat 擴充應用程式,即時回應各種事件。在回應事件時,這個應用程式會建立並填入 Chat 聊天室、透過訊息、應用程式指令和對話方塊協助解決事件,並使用 AI 產生 Google 文件,摘要說明事件應變措施。
事件是指需要團隊立即處理以解決的問題。事件範例包括:
- 在客戶關係管理 (CRM) 平台中建立時效性案件,需要服務團隊合作解決。
- 系統離線,並向一組網站穩定性工程師 (SRE) 發出快訊,讓他們可以共同作業,使系統恢復連線。
- 發生強震,緊急應變人員需要協調應變措施。
在本教學課程中,當有人在網頁上點選按鈕回報事件時,就會觸發事件快訊。網頁會要求使用者輸入基本事件資訊 (標題、說明和回應者的電子郵件地址),模擬事件發生。
查看事件管理 Chat 應用程式的實際運作情形:
-
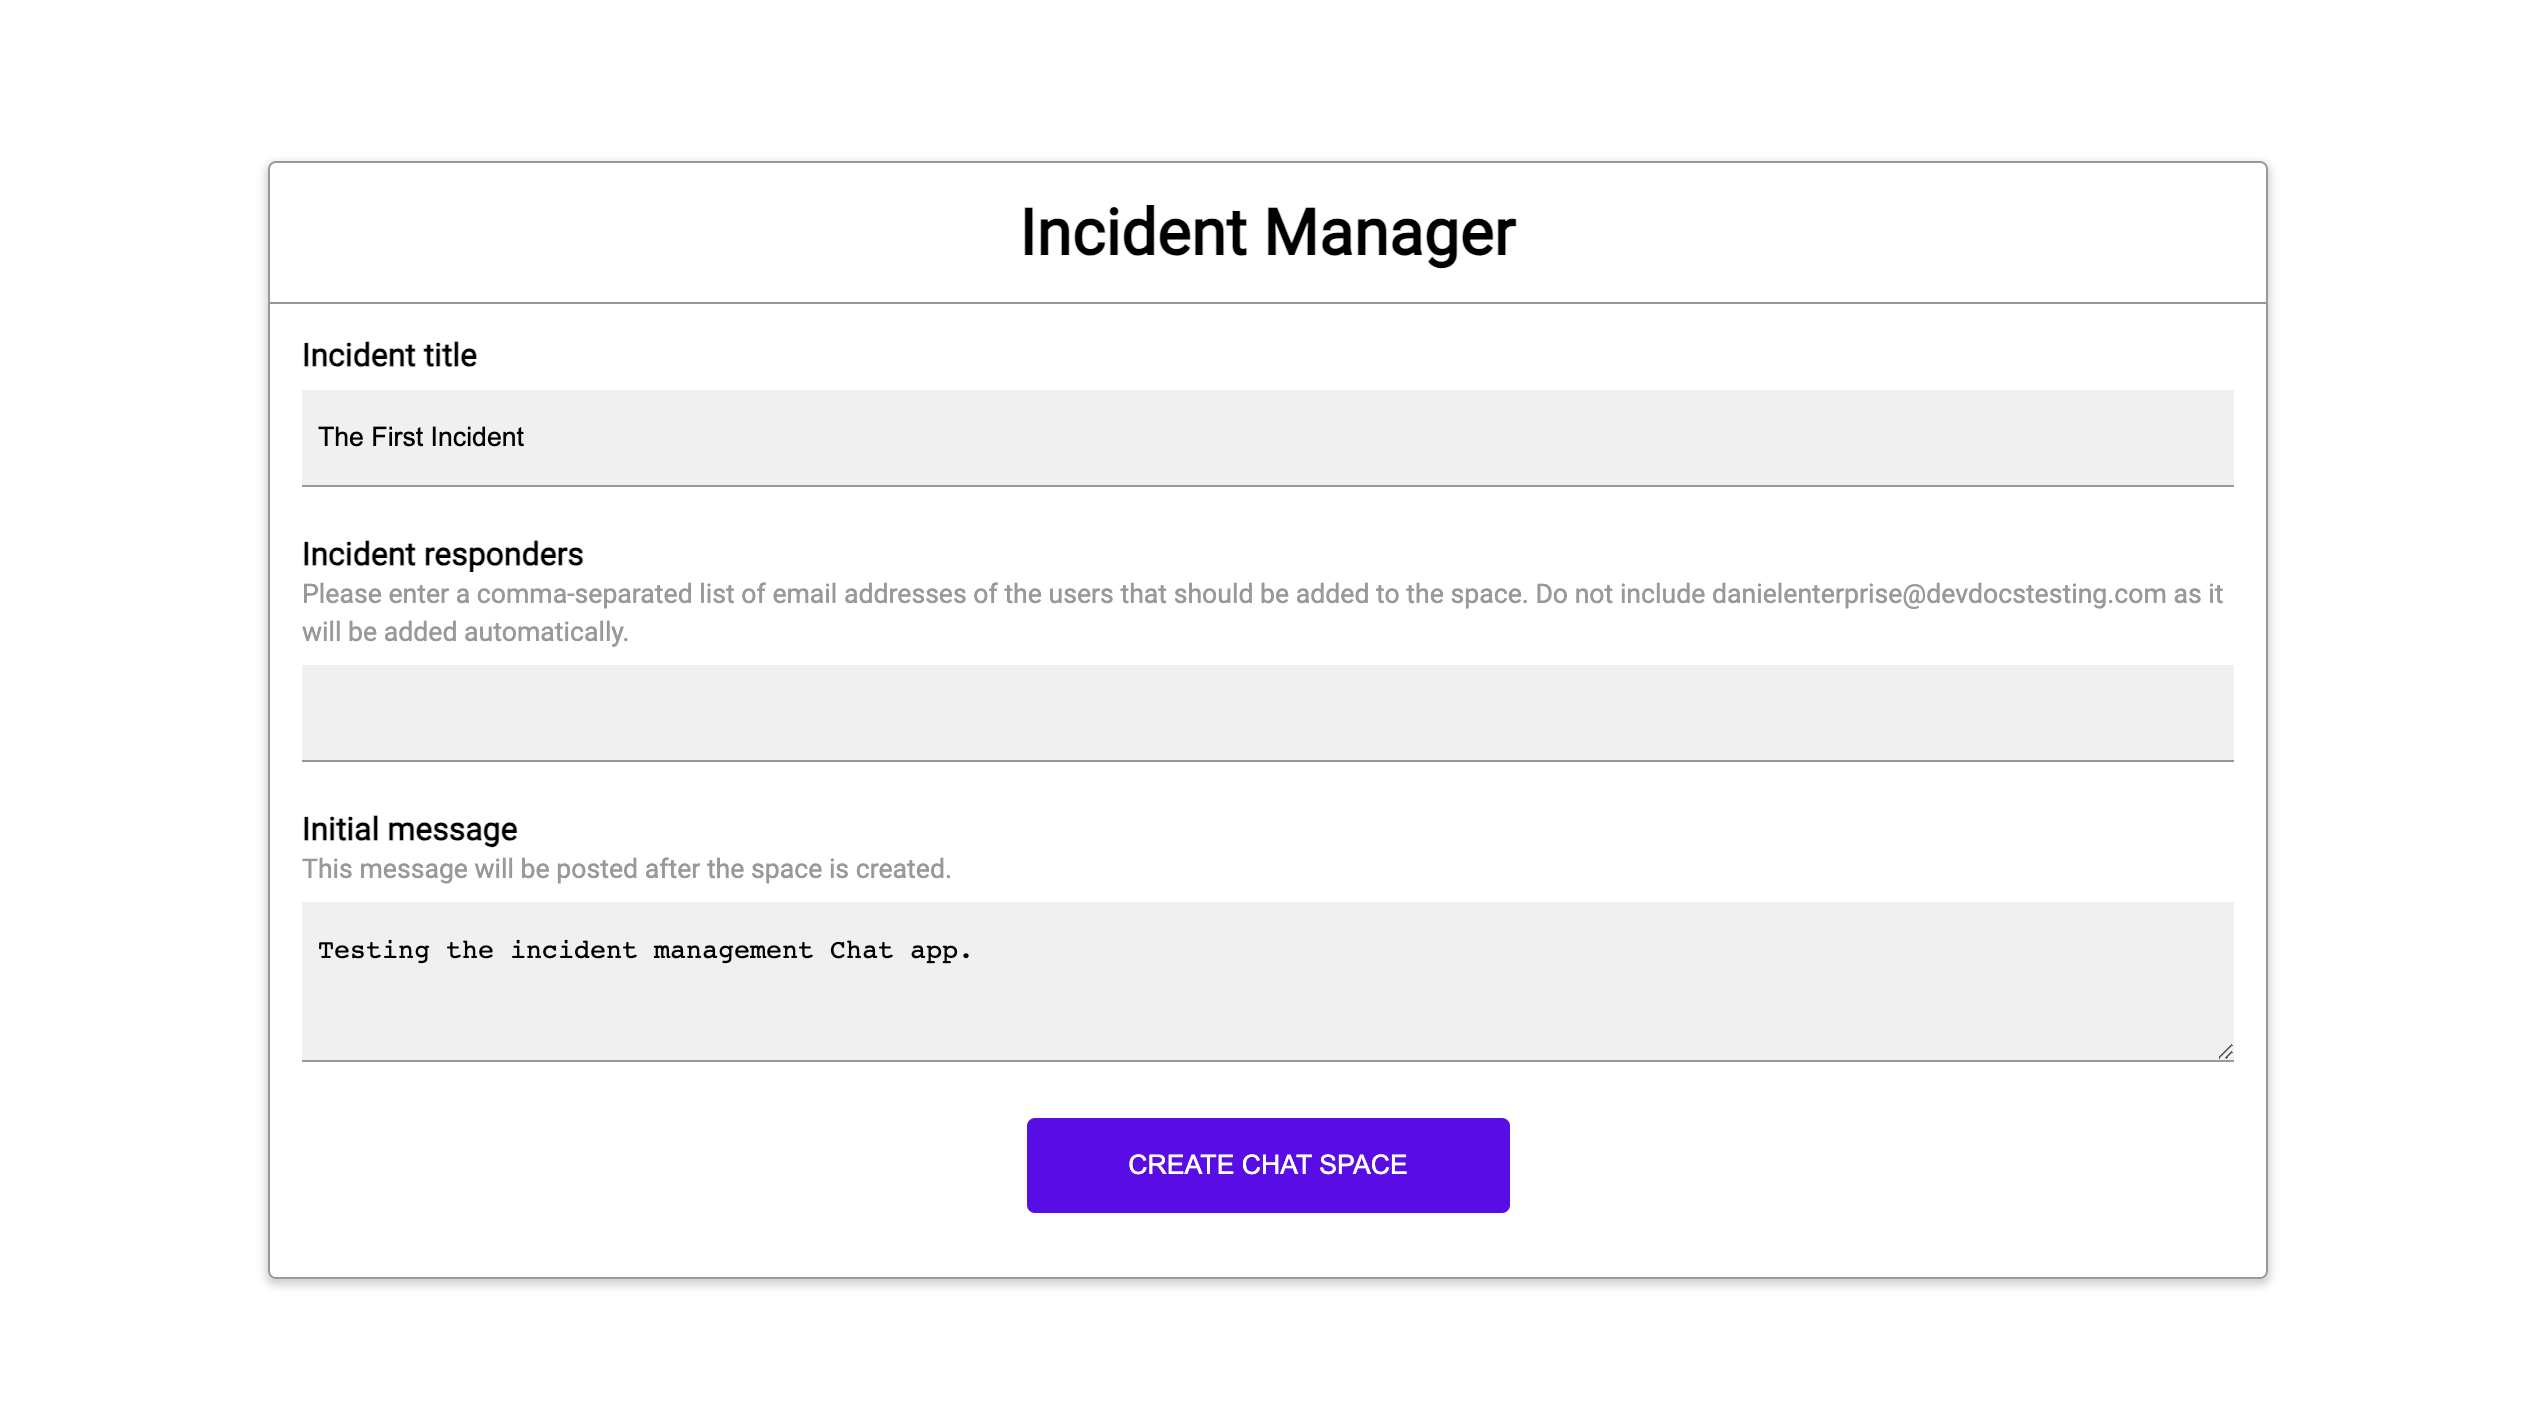
圖 1. 使用者可透過這個網站回報事件。 -
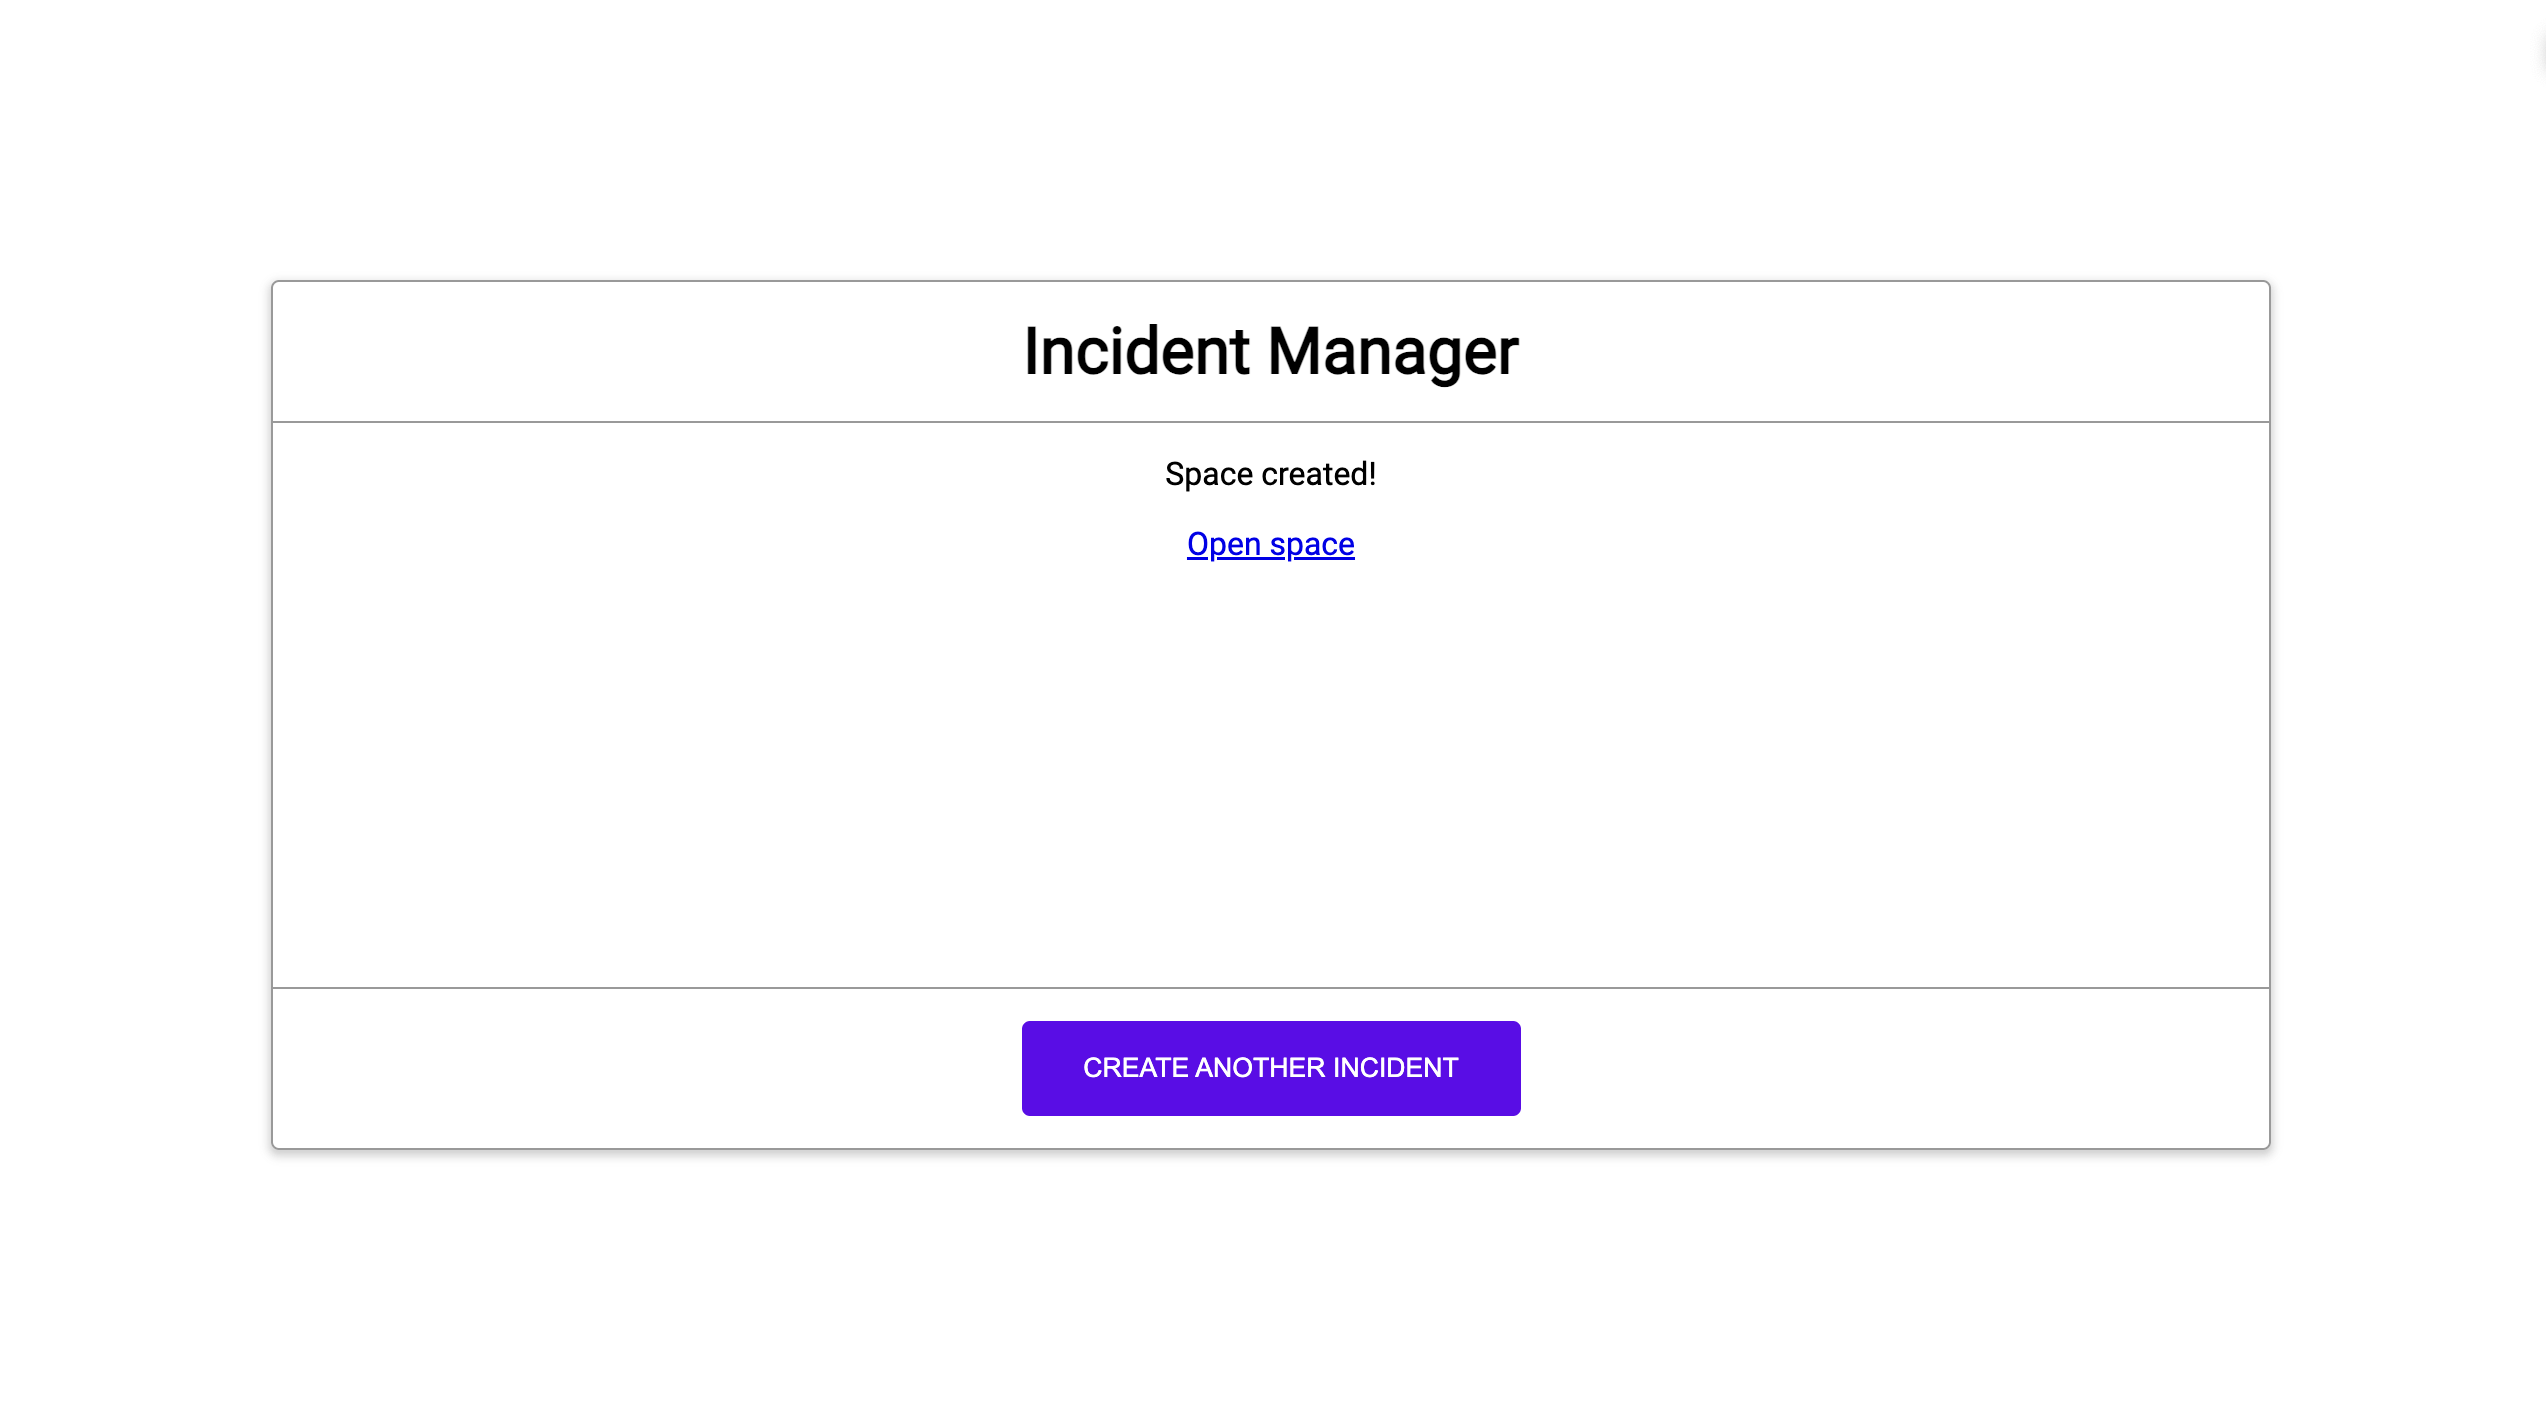
圖 2. 通知:已建立事件 Chat 聊天室。 -
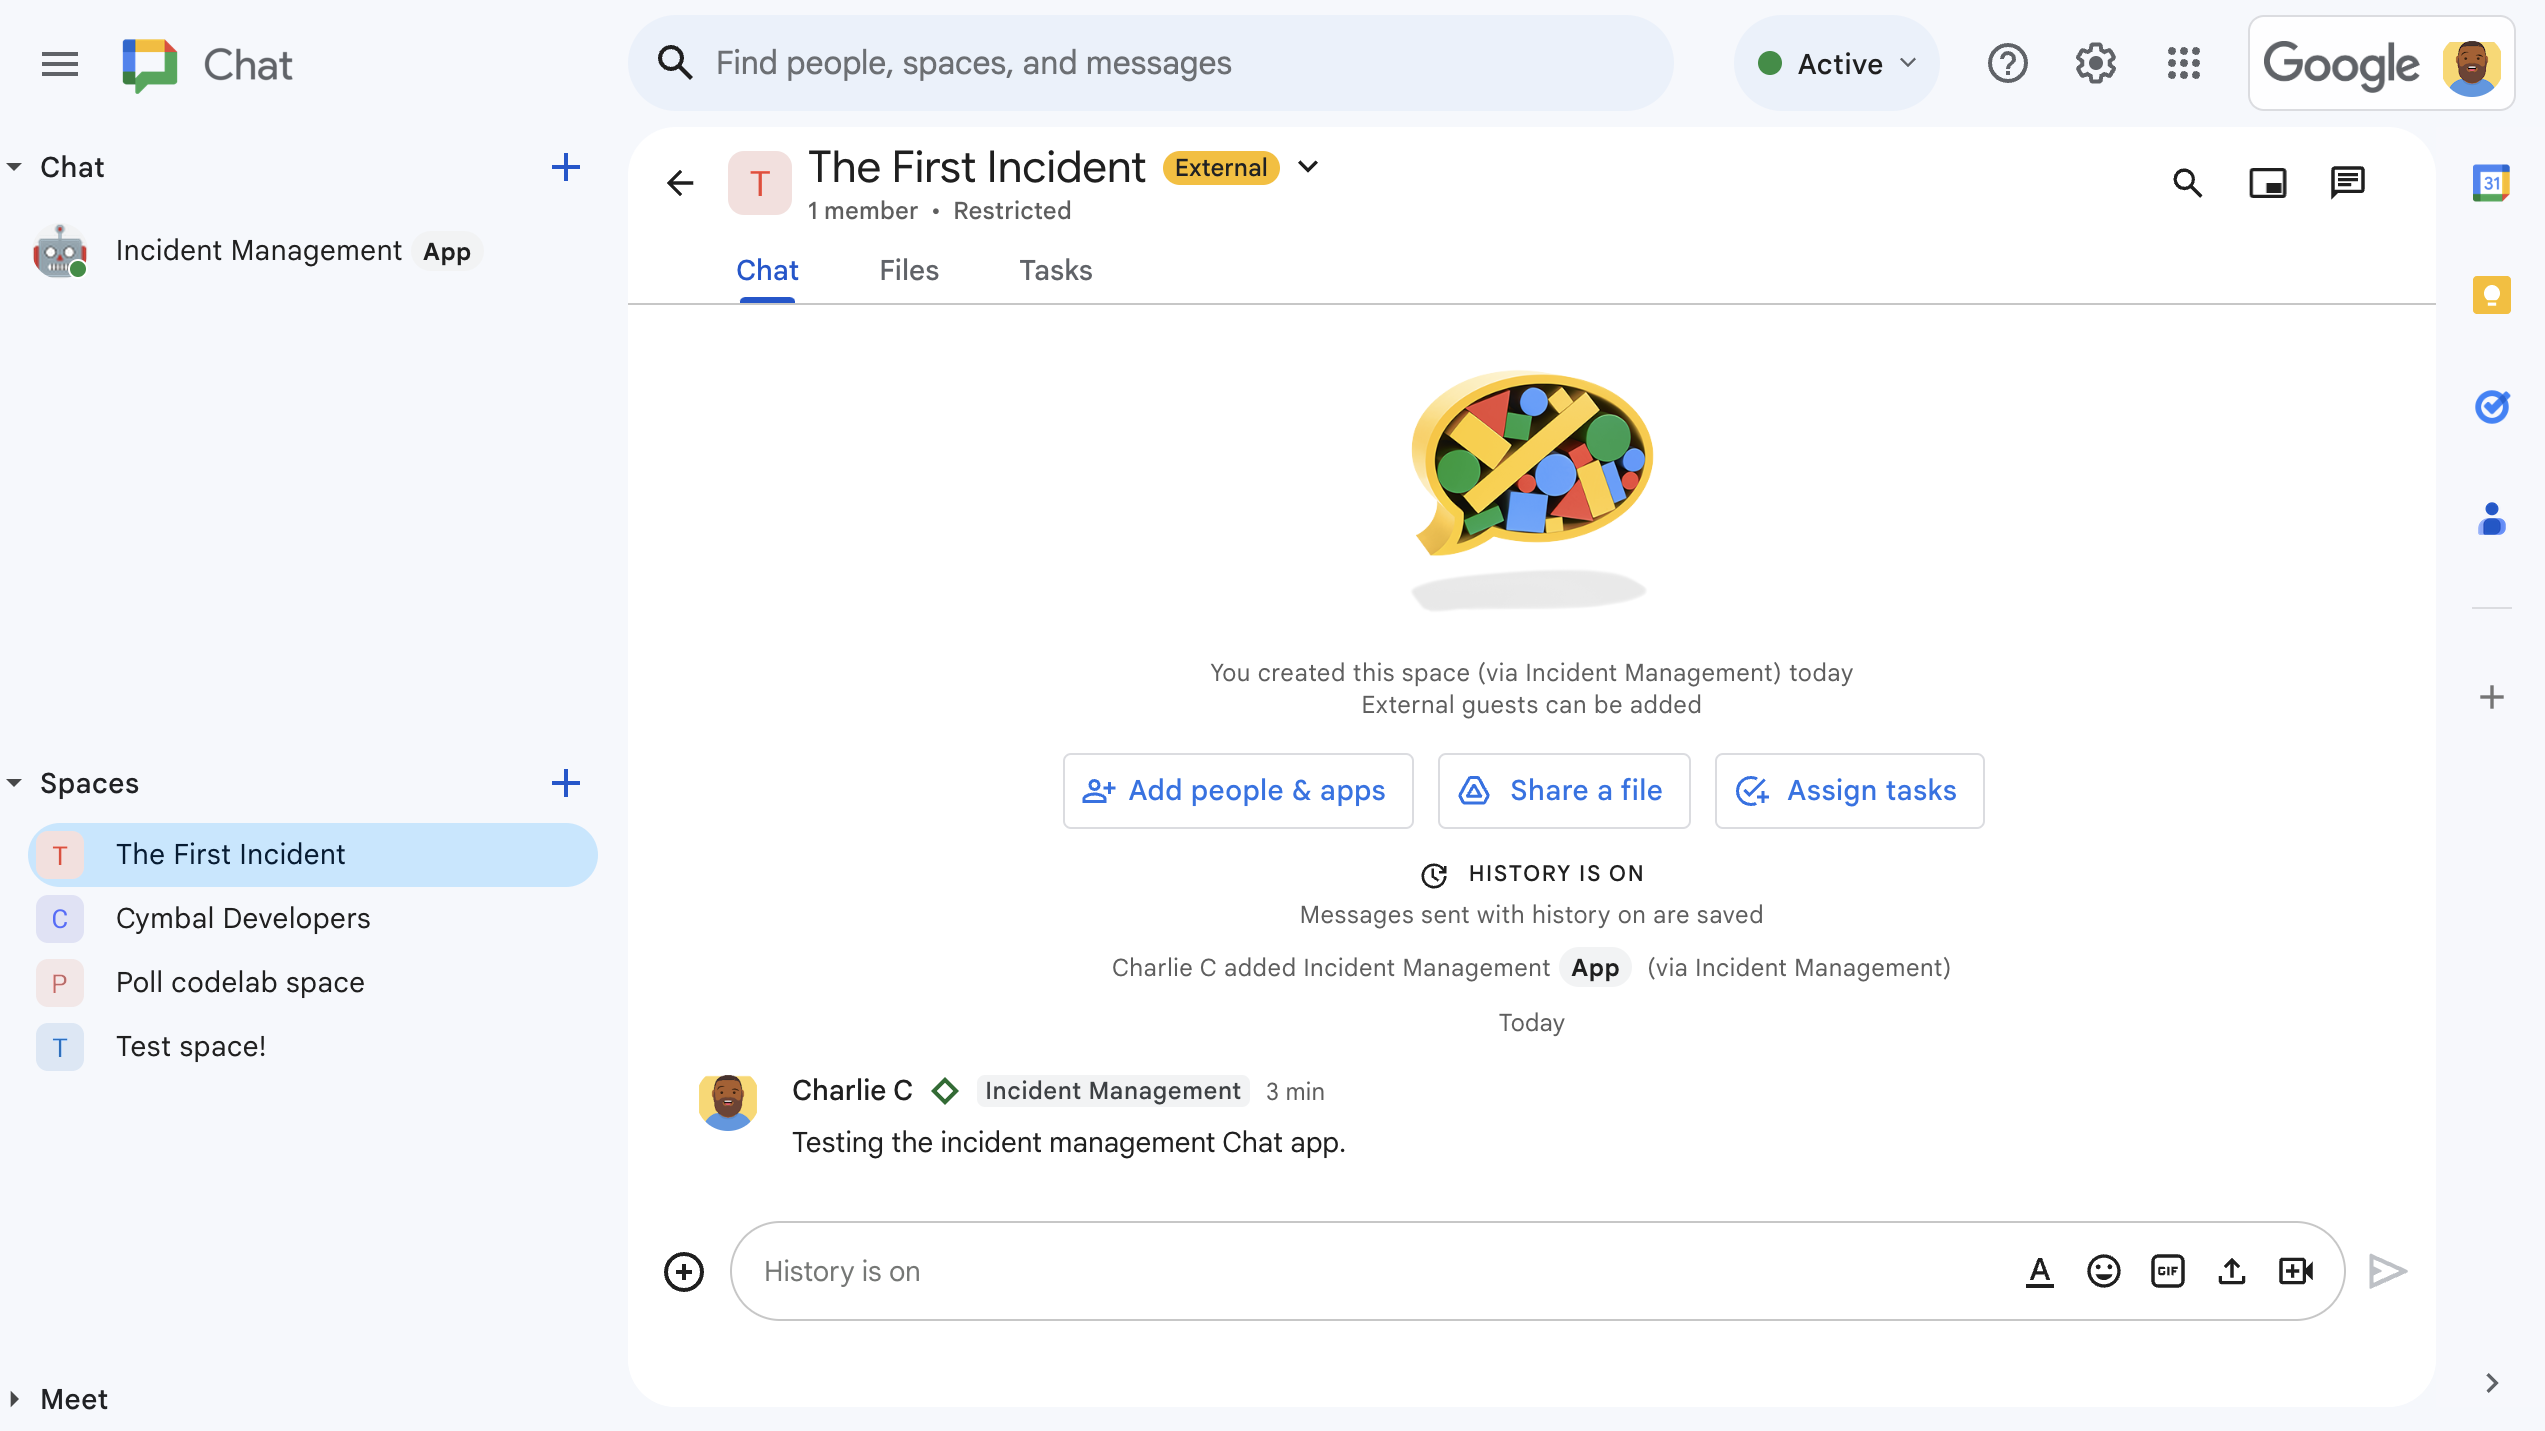
圖 3. 事件應變 Chat 聊天室。 -
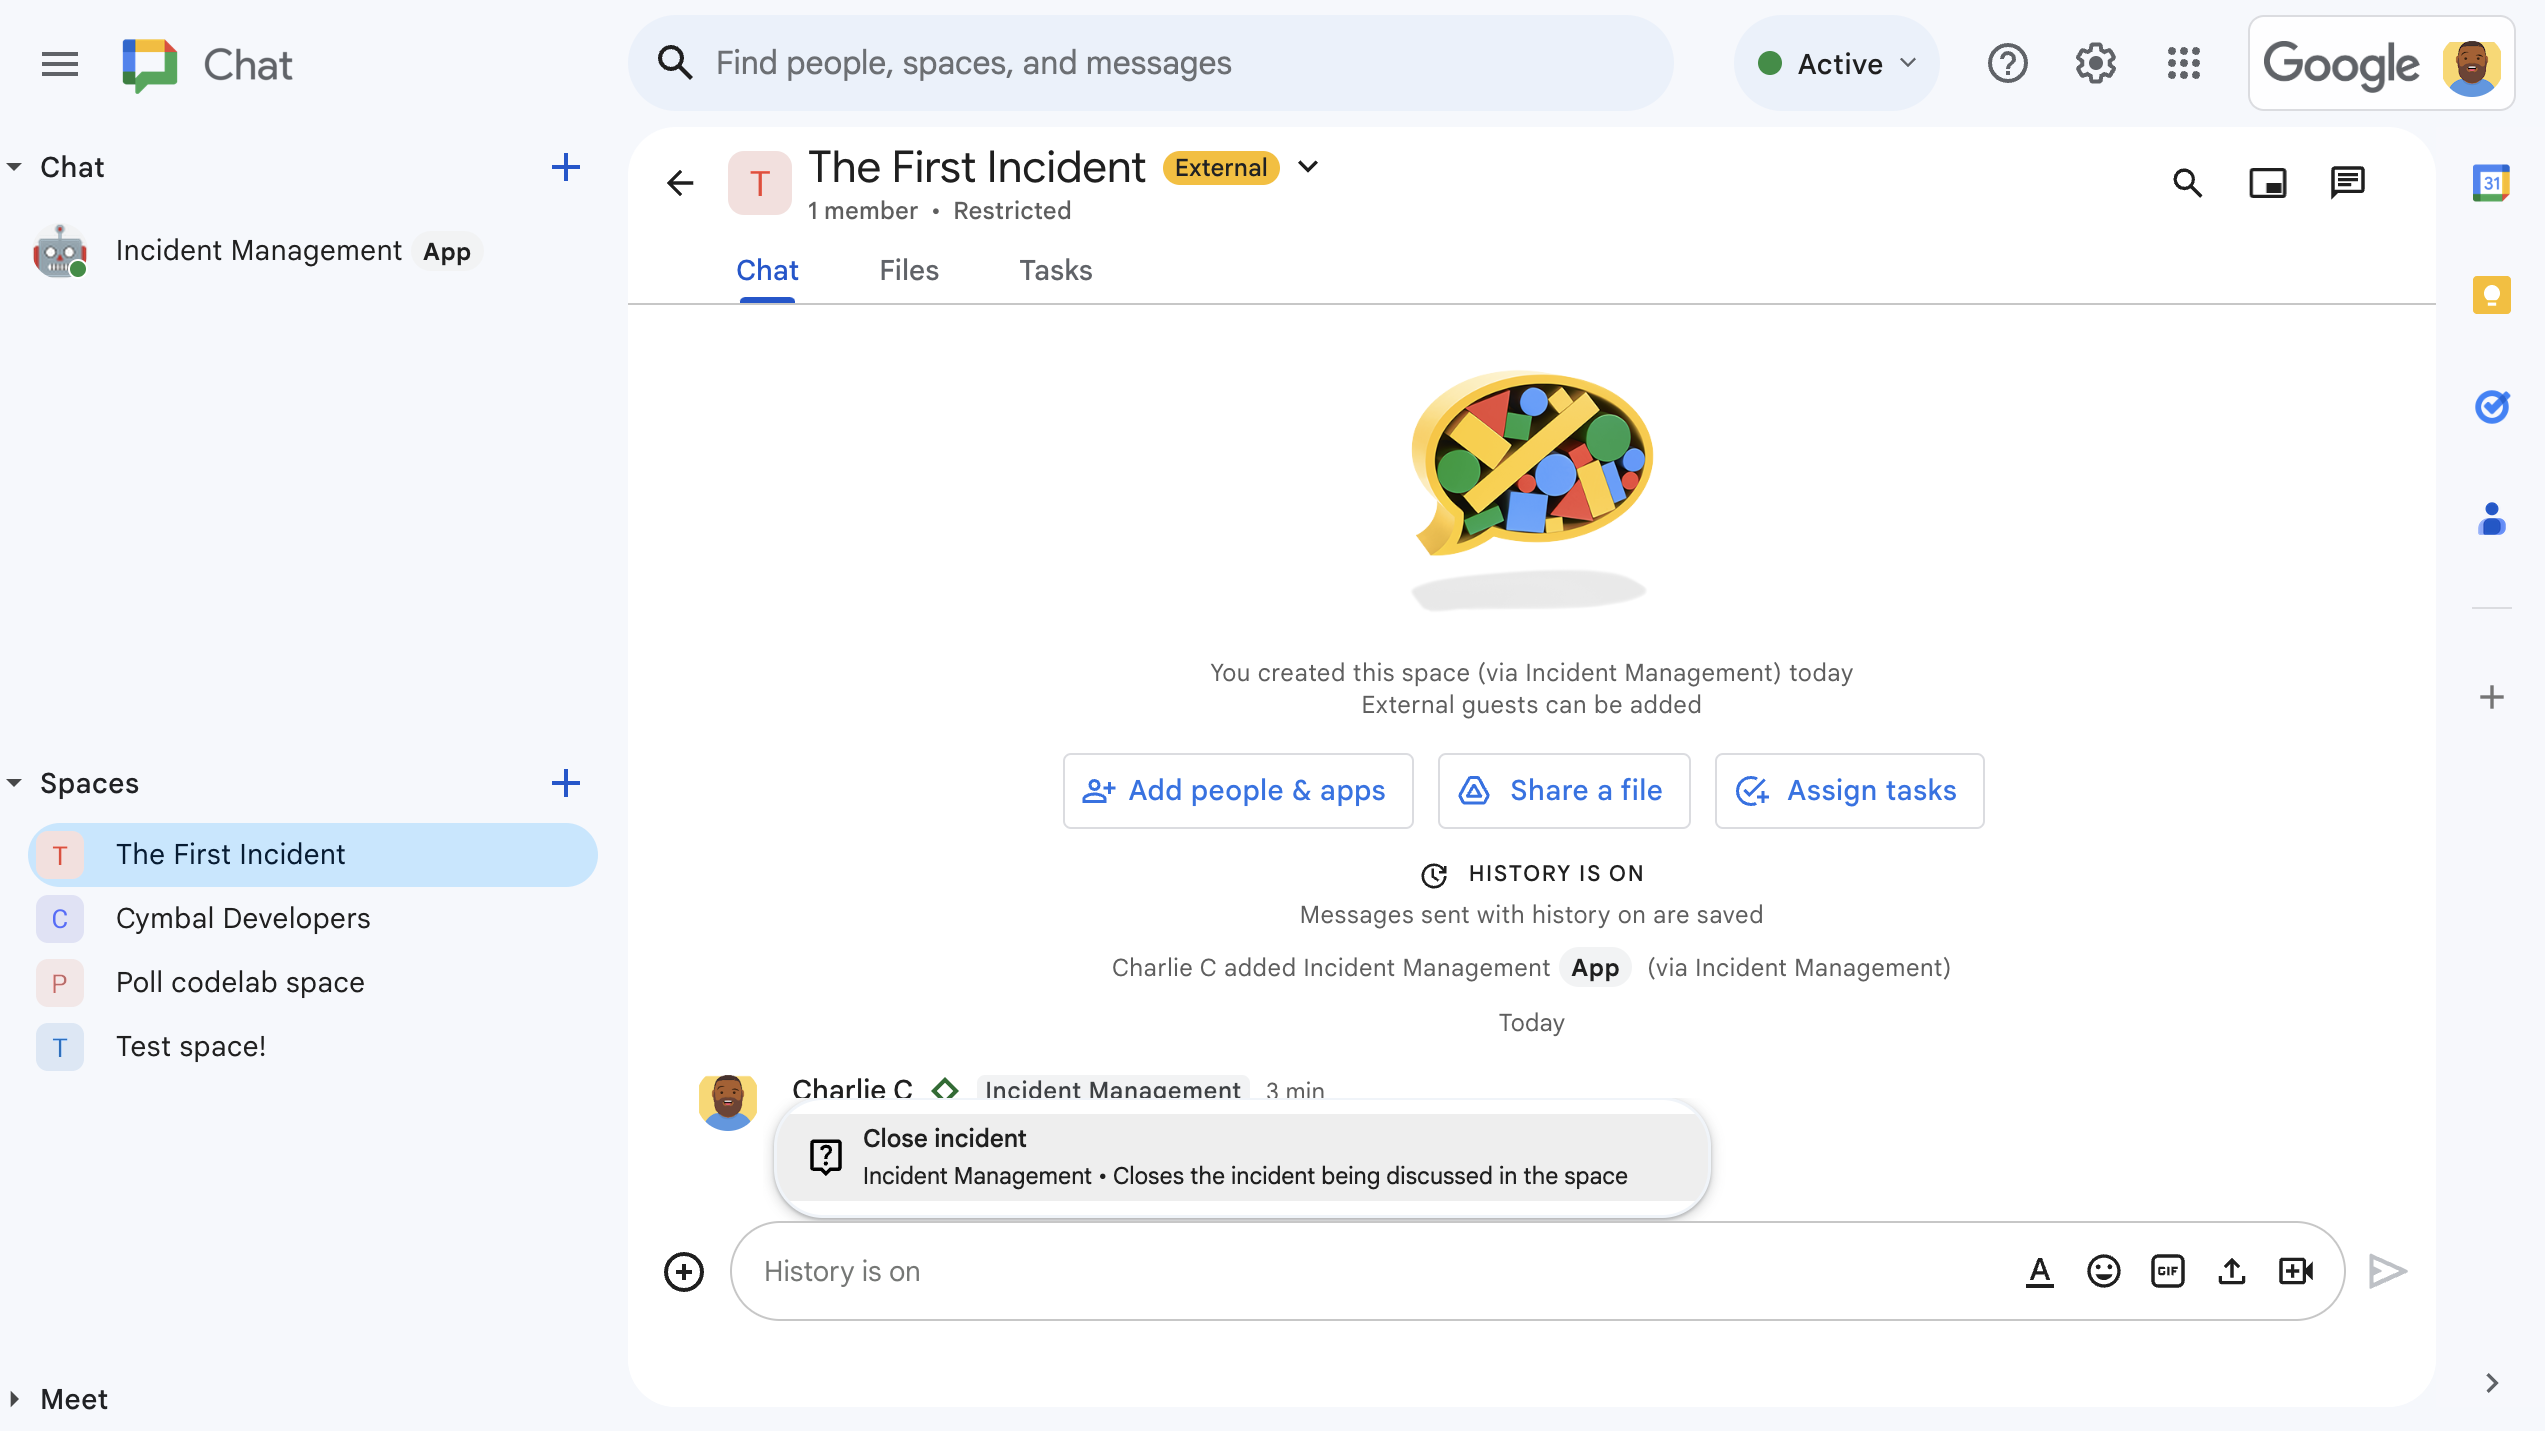
圖 4. 使用快速指令解決事件。 -
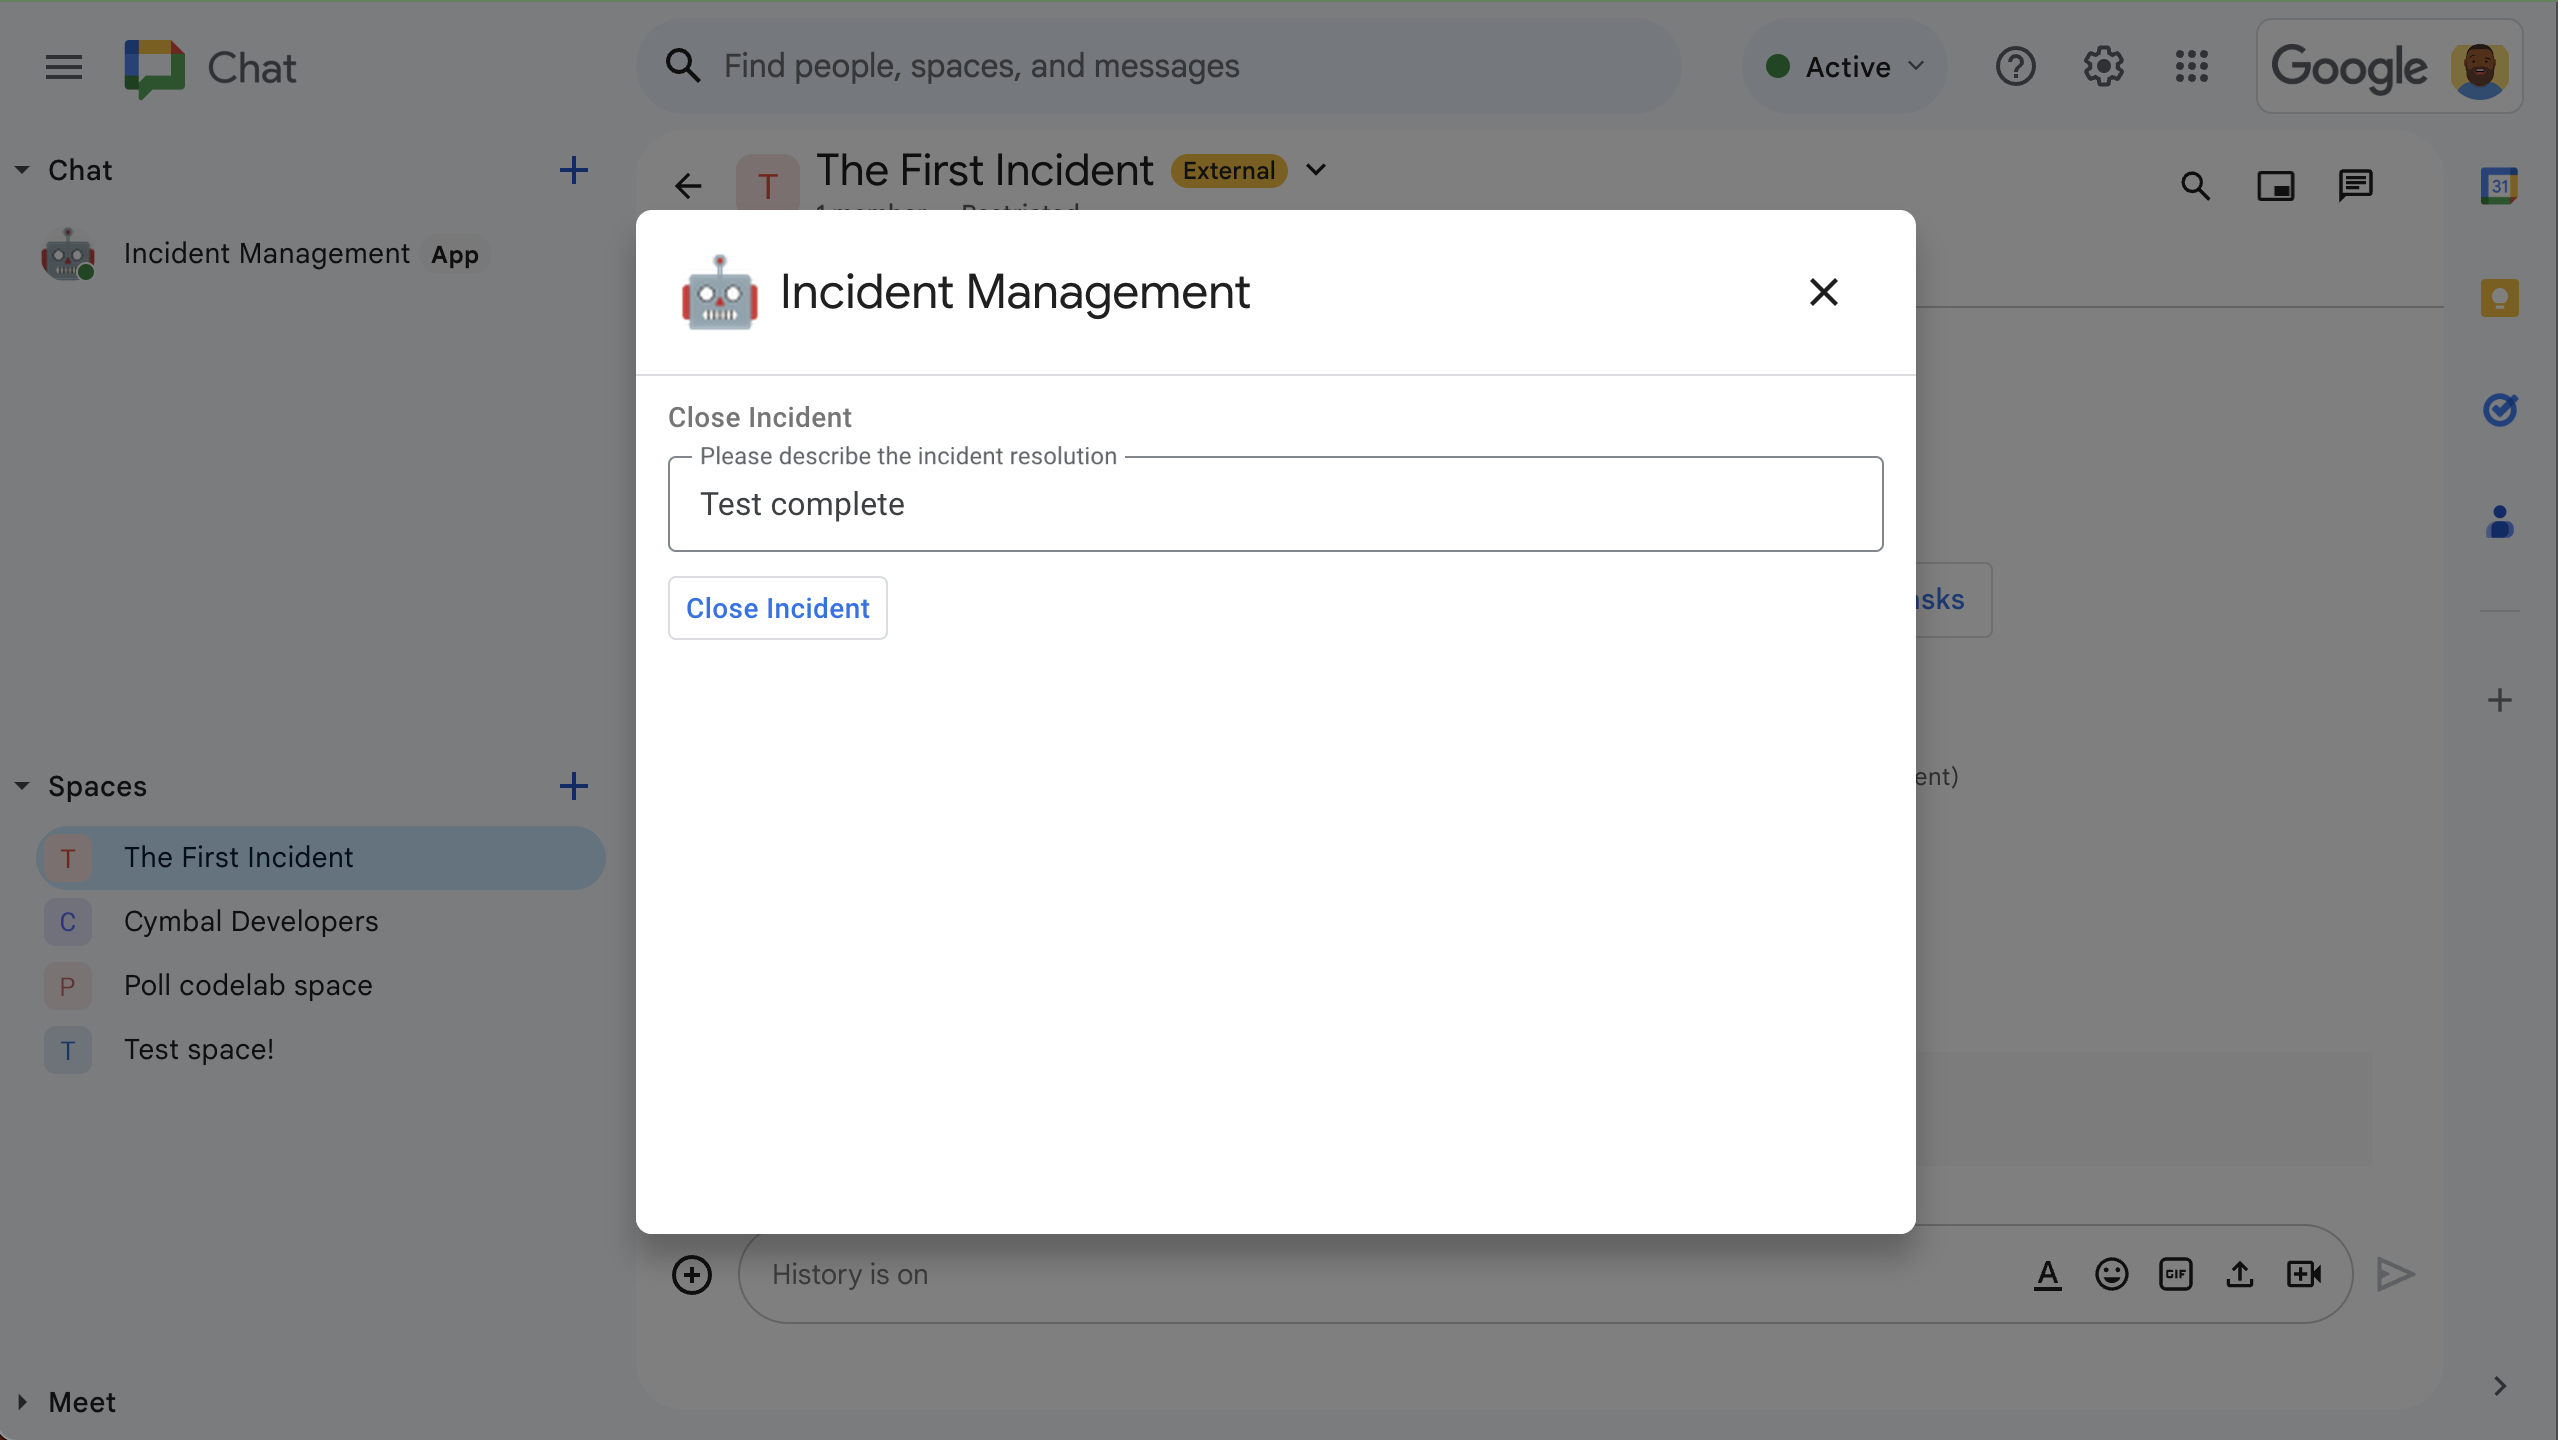
圖 5. 事件解決對話方塊。 -
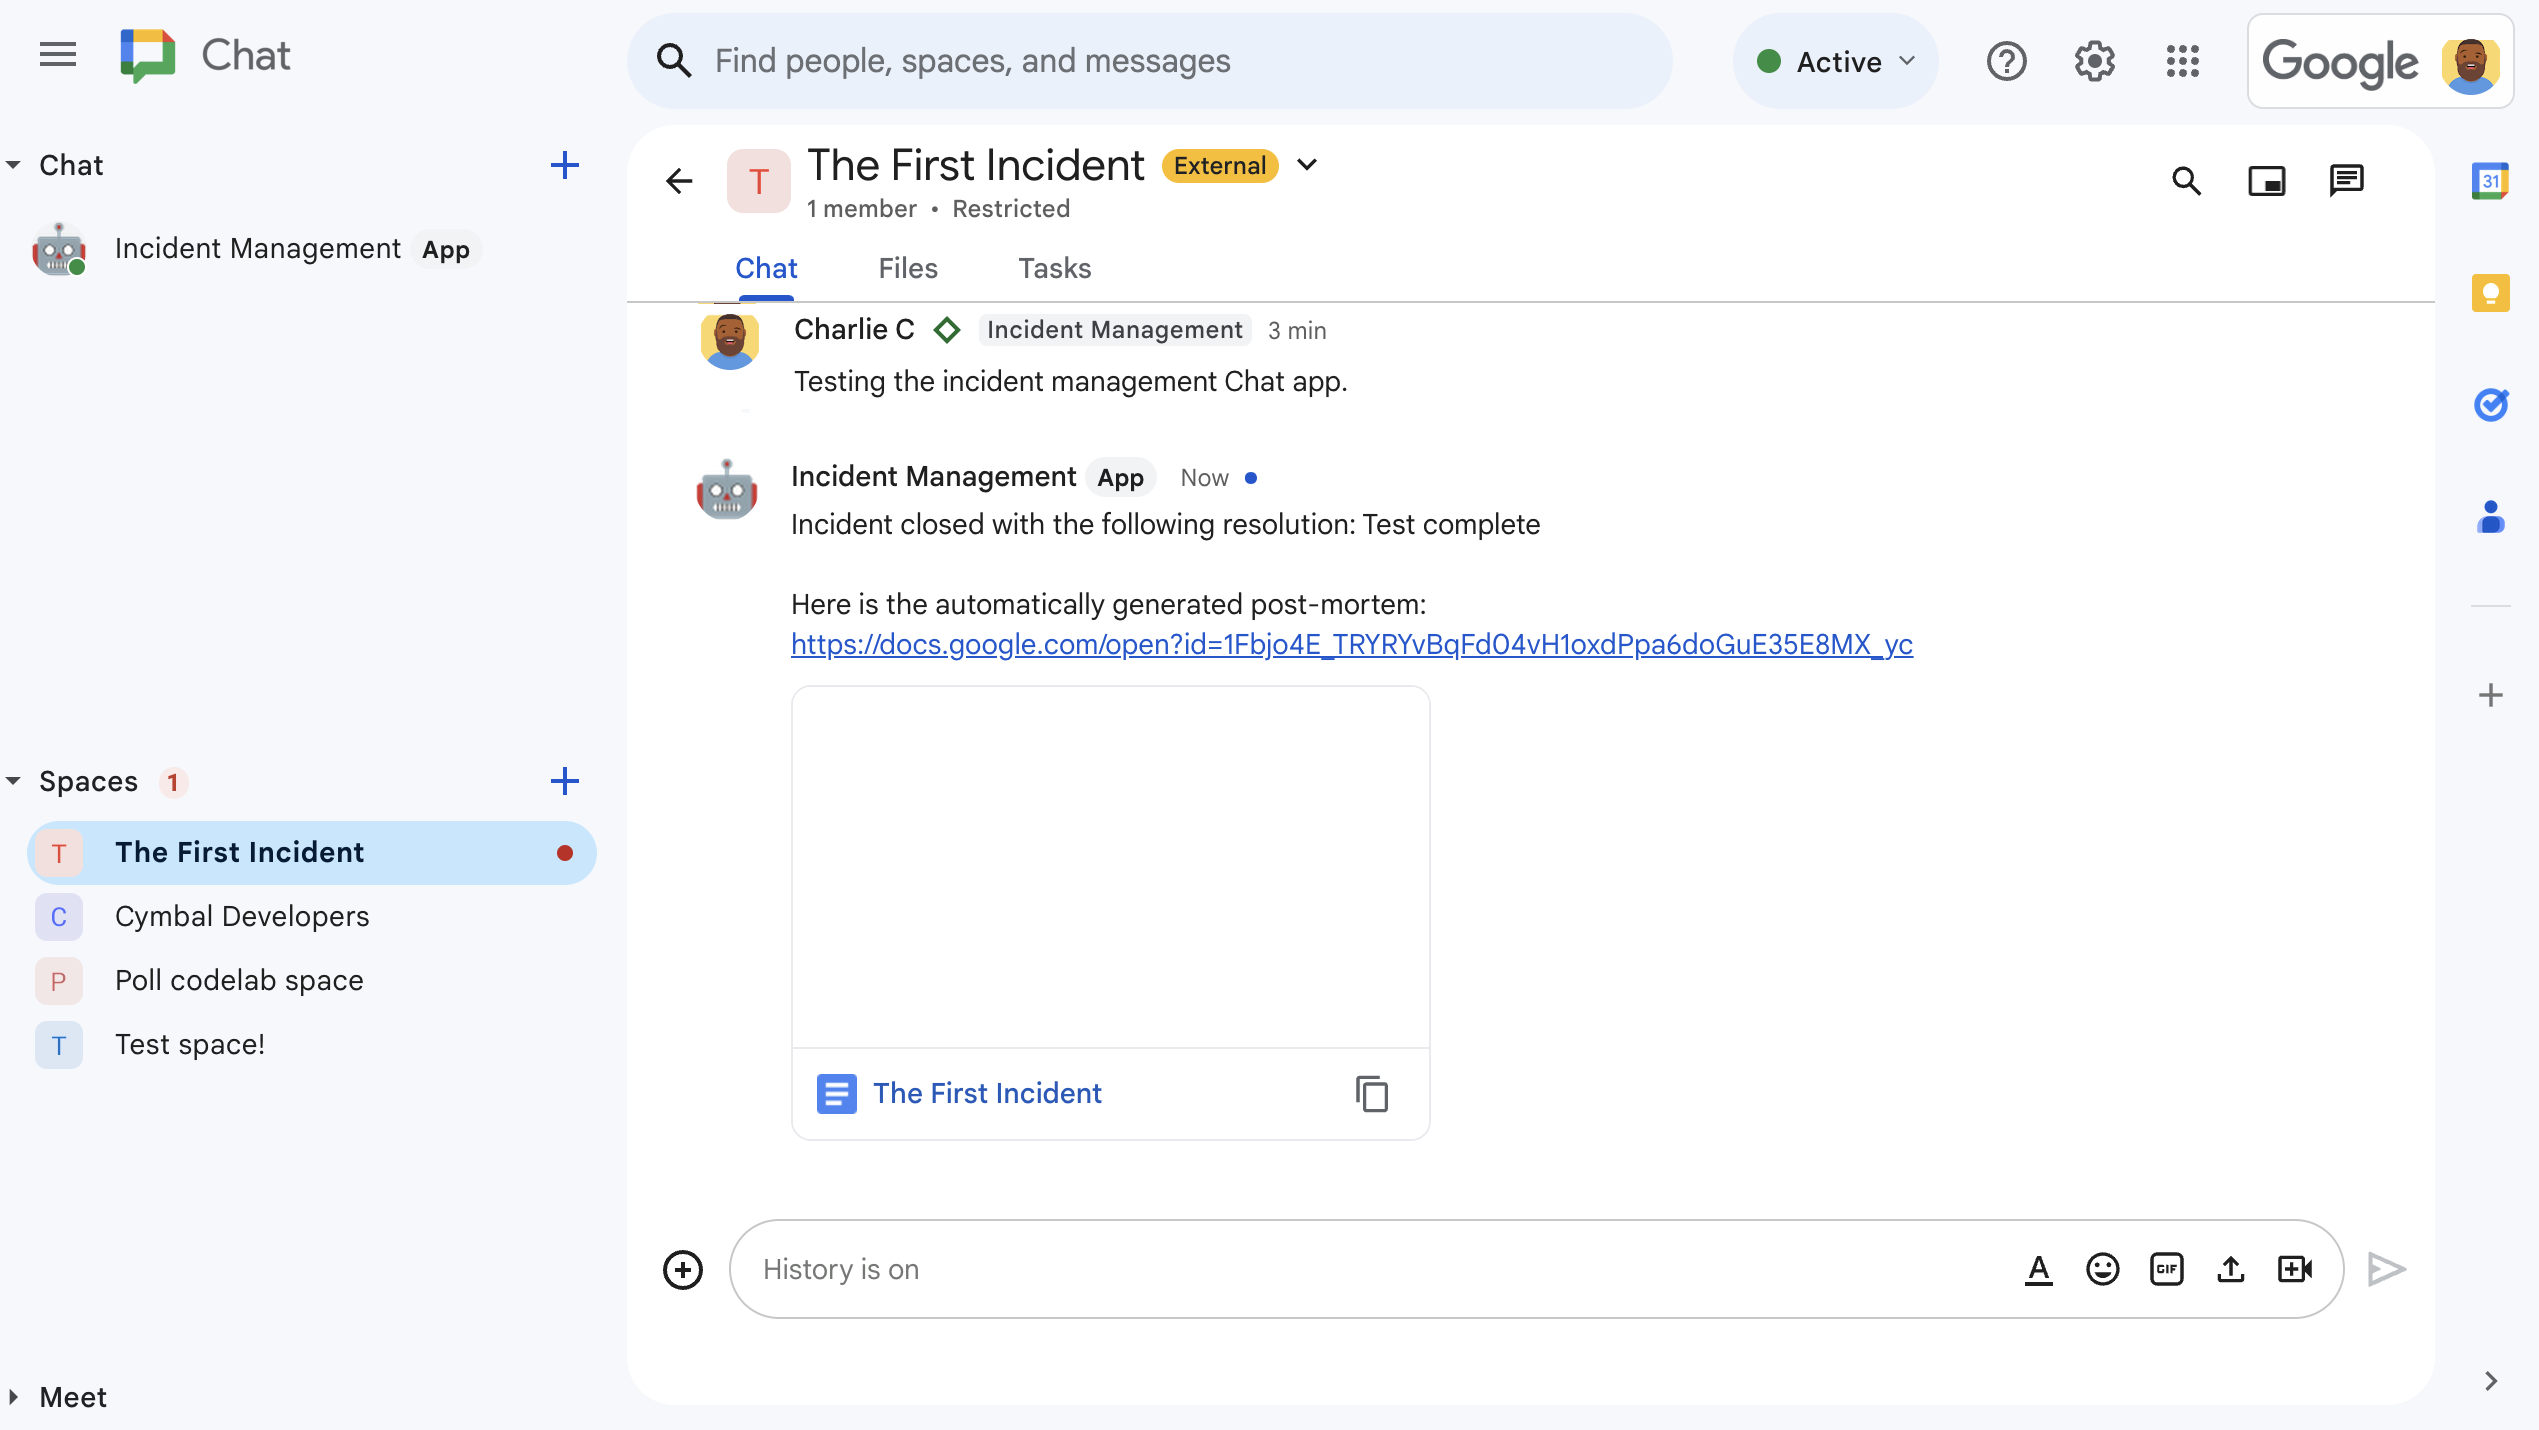
圖 6. 聊天室中分享的事件解決方式 Google 文件。 -
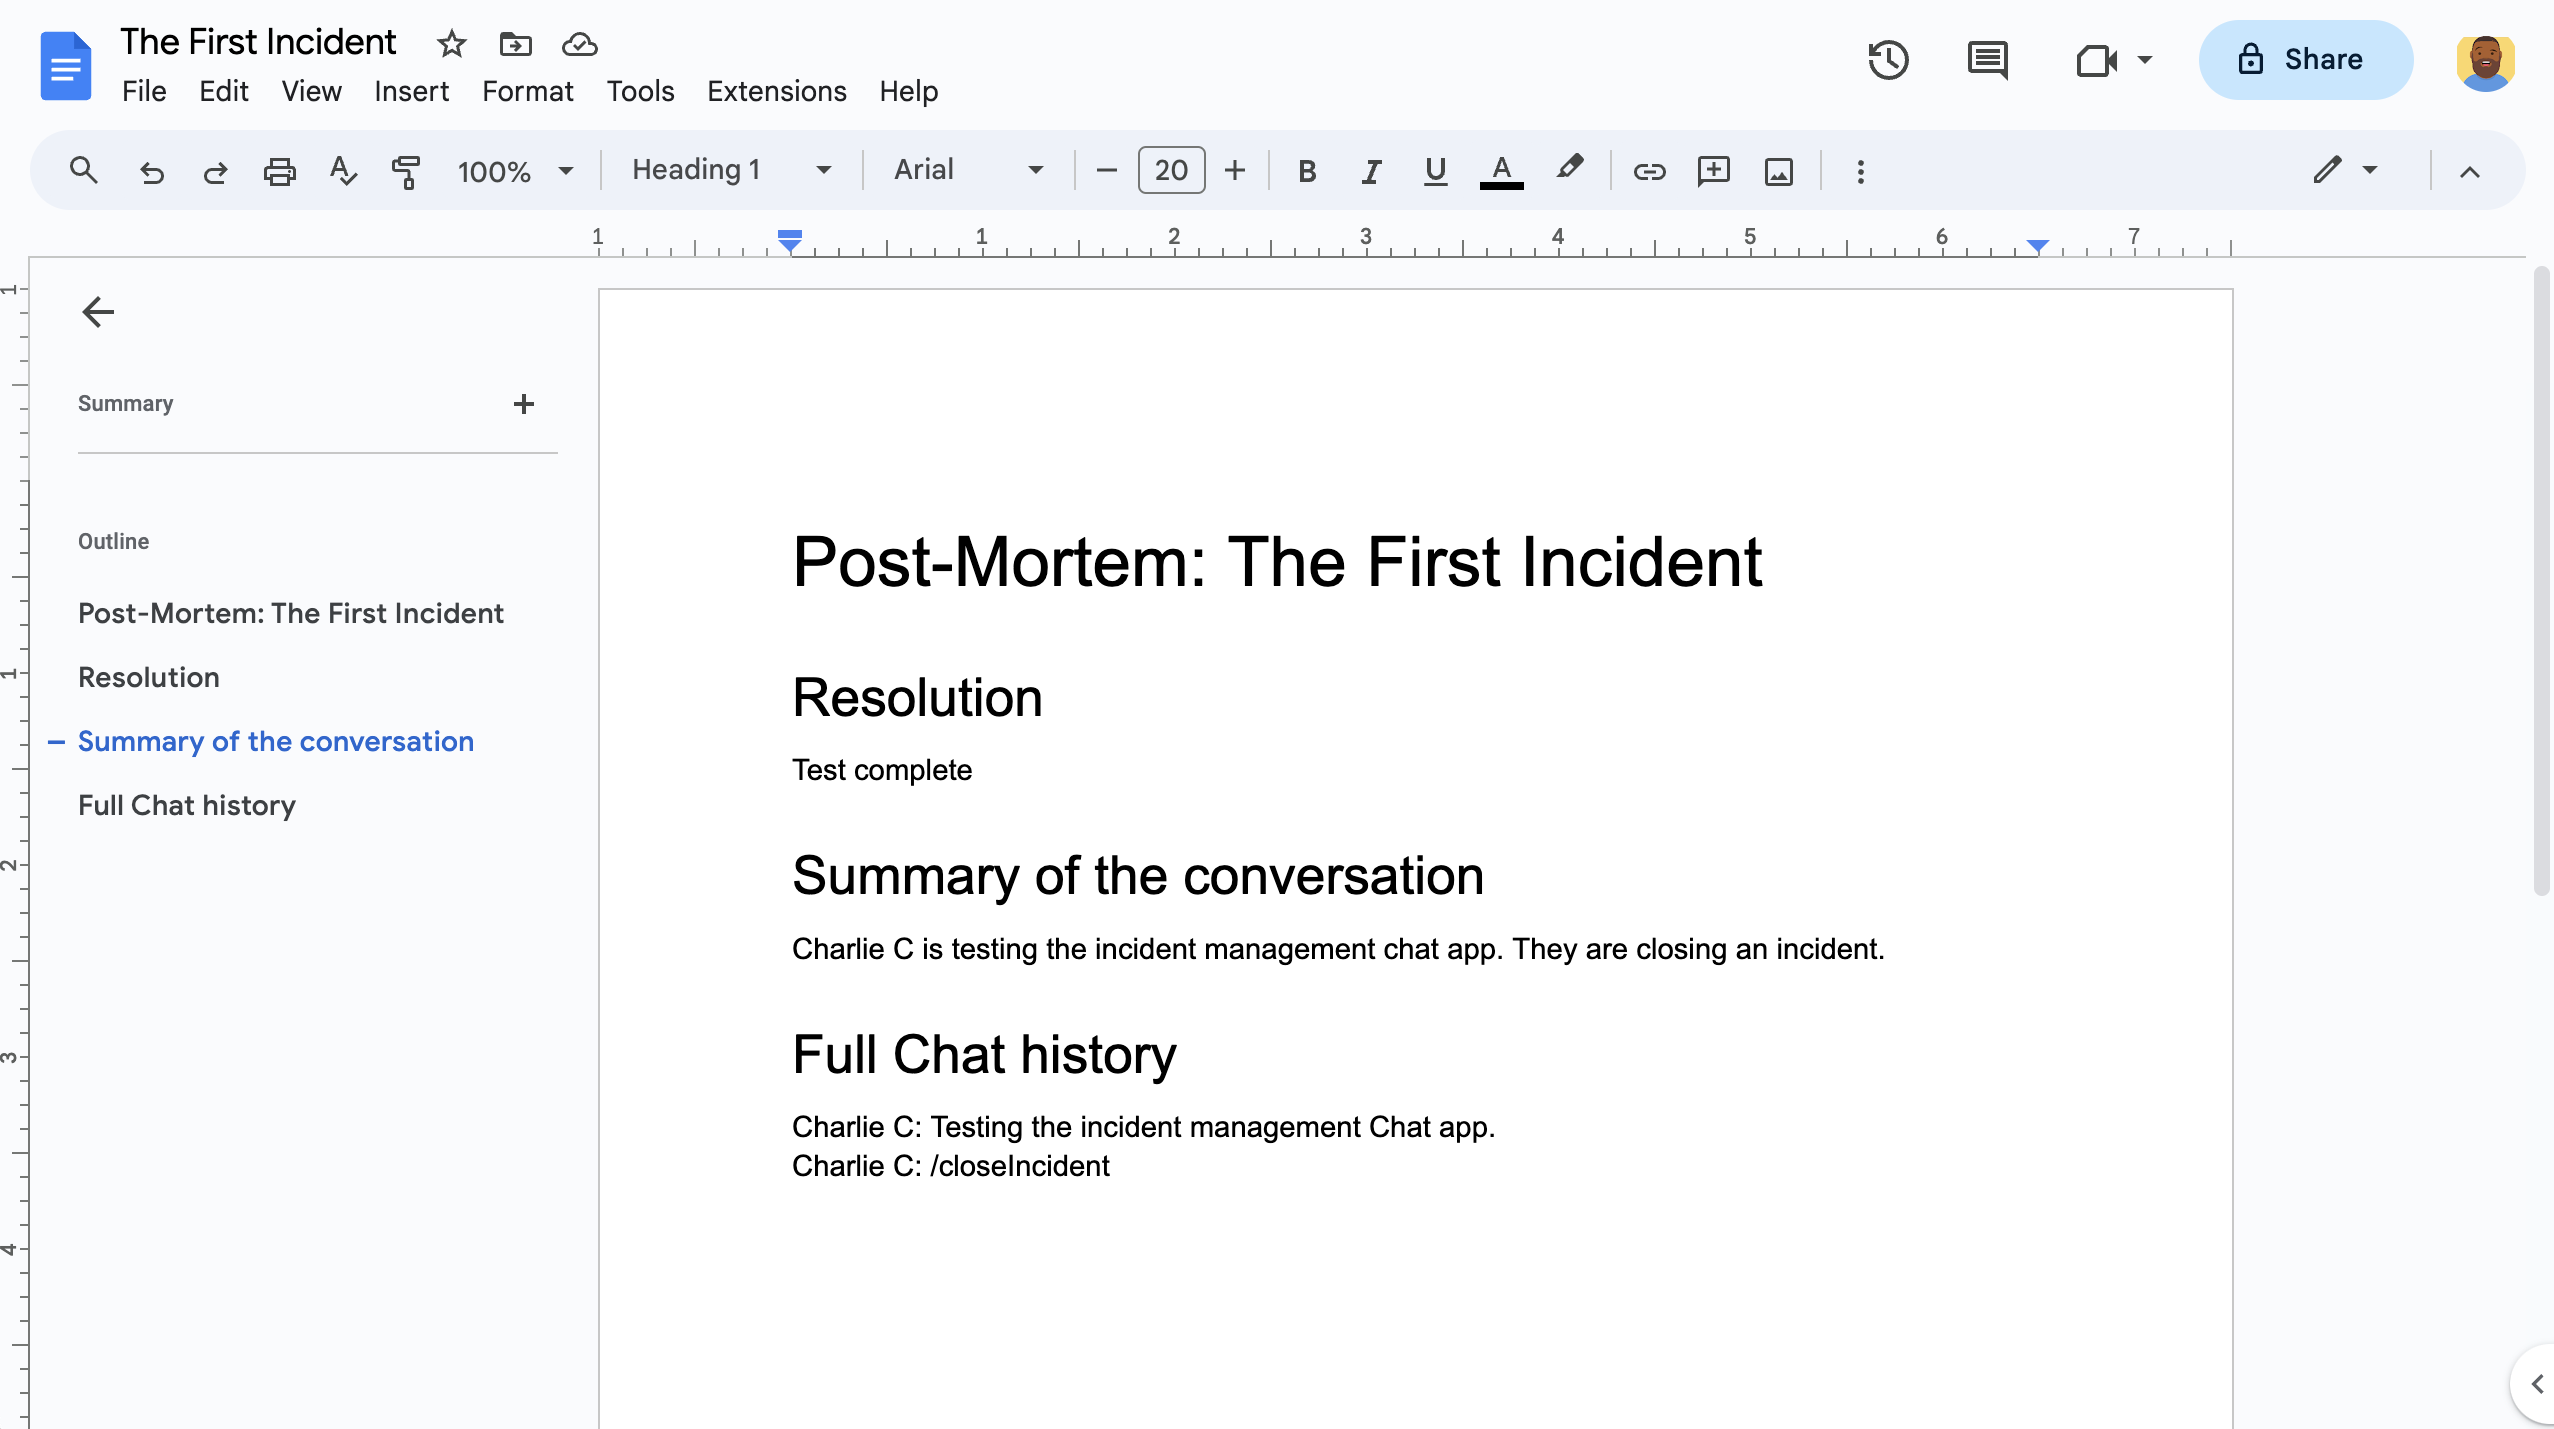
圖 7. AI 摘要事件解決方案 Google 文件。
必要條件
如要為貴機構啟用上述任一必要條件,請要求 Google Workspace 管理員開啟:
- 具有 Google Chat 存取權的 Business 或 Enterprise 版 Google Workspace 帳戶。
- 為 Google Workspace 啟用目錄 (聯絡人共用)。事件應用程式會使用目錄查詢事件回應者的聯絡資訊,例如姓名和電子郵件地址。事件回應人員必須是 Google Workspace 機構中擁有 Google Chat 帳戶的使用者。
目標
- 建構可回應事件的 Chat 應用程式。
- 請按照下列步驟,協助使用者回應事件:
- 建立事件應變協作聊天室。
- 發布訊息,總結事件和回應。
- 透過互動式 Chat 應用程式功能,支援協作。
- 使用 Vertex AI 產生對話和解決方案摘要。
架構
下圖顯示事件回應 Google Chat 應用程式使用的 Google Workspace 和 Google Cloud 資源架構。
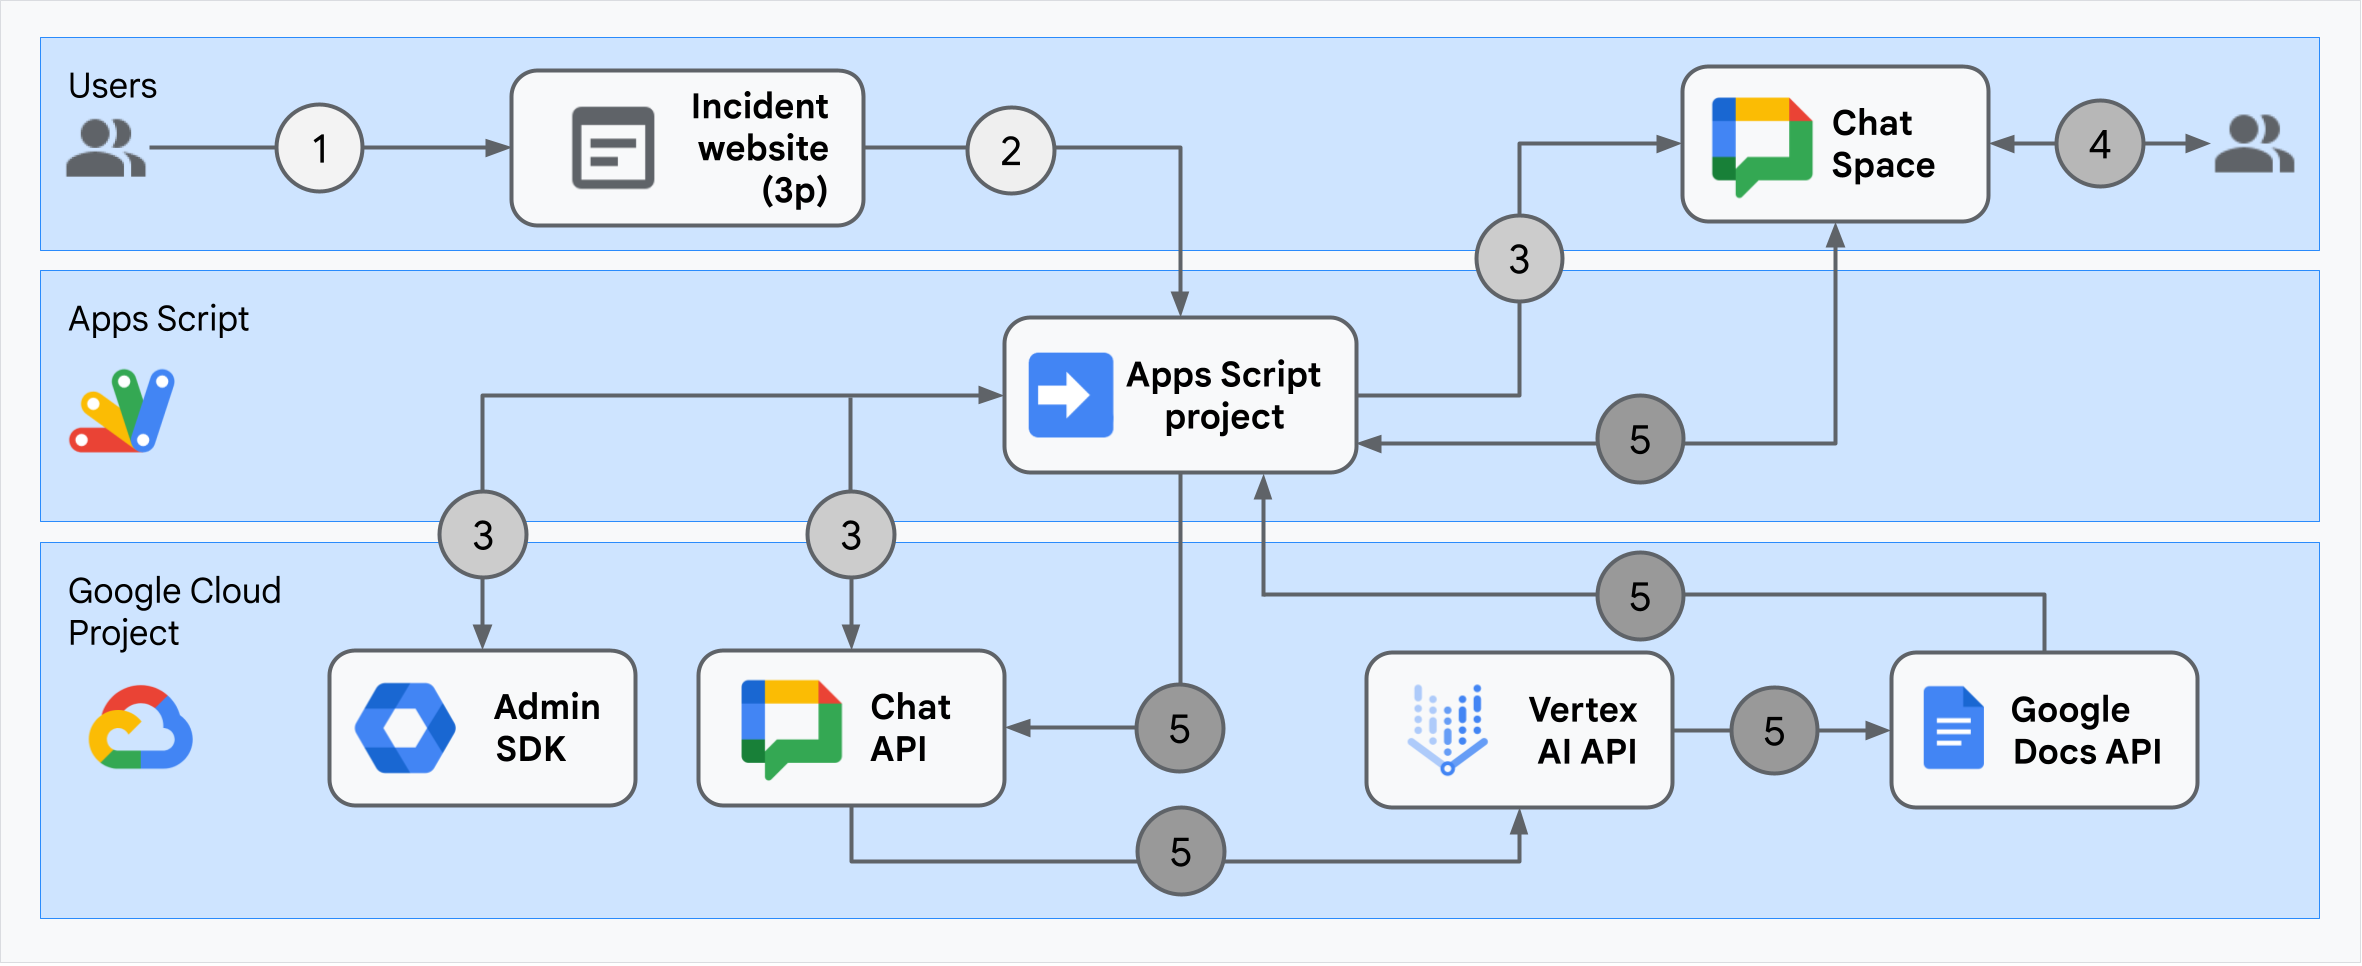
這個架構說明事件應變 Google Chat 應用程式如何處理事件和解決問題。
使用者透過以 Apps Script 代管的外部網站啟動事件。
網站會將非同步 HTTP 要求傳送至 Google Chat 應用程式,該應用程式也託管於 Apps Script。
事件應變 Google Chat 應用程式會處理要求:
Apps Script Admin SDK 服務會取得團隊成員資訊,例如使用者 ID 和電子郵件地址。
透過 Apps Script Advanced Chat 服務向 Chat API 發出 HTTP 要求後,事件回應 Google Chat 應用程式就會建立事件 Chat 聊天室、加入團隊成員,並在聊天室中傳送訊息。
團隊成員在 Chat 聊天室中討論事件。
團隊成員會叫用快速指令,表示事件已解決。
使用 Apps Script 進階 Chat 服務對 Chat API 進行 HTTP 呼叫,即可列出所有 Chat 聊天室的訊息。
Vertex AI 會收到列出的訊息,並生成摘要。
Apps Script
DocumentApp服務會建立 Google 文件,並在文件中加入 Vertex AI 產生的摘要。事件回應 Google Chat 應用程式會呼叫 Chat API,傳送訊息並分享摘要 Google 文件連結。
準備環境
本節說明如何為 Chat 應用程式建立及設定 Google Cloud 專案。
建立 Google Cloud 專案
Google Cloud 控制台
- 前往 Google Cloud 控制台的「選單」 >「IAM 與管理」 >「建立專案」。
-
在「Project Name」(專案名稱) 欄位中,輸入專案的描述性名稱。
選用:如要編輯「專案 ID」,請按一下「編輯」。專案建立後就無法變更專案 ID,因此請選用符合專案執行期間需求的 ID。
- 在「位置」欄位中,按一下「瀏覽」,顯示專案的可能位置。然後按一下「選取」。
- 按一下「建立」,Google Cloud 控制台會前往「資訊主頁」頁面,並在幾分鐘內建立專案。
gcloud CLI
在下列任一開發環境中存取 Google Cloud CLI (gcloud):
-
Cloud Shell:如要使用已設定 gcloud CLI 的線上終端機,請啟用 Cloud Shell。
啟用 Cloud Shell -
本機殼層:如要使用本機開發環境,請安裝並初始化 gcloud CLI。
如要建立 Cloud 專案,請使用gcloud projects create指令:gcloud projects create PROJECT_ID
啟用 Cloud 專案的計費功能
Google Cloud 控制台
- 前往 Google Cloud 控制台的「帳單」頁面。依序點選「選單」「帳單」「我的專案」。
- 在「選取機構」中,選擇與 Google Cloud 專案相關聯的機構。
- 在專案列中開啟「動作」選單 (),按一下「變更帳單」,然後選擇 Cloud 帳單帳戶。
- 按一下 [設定帳戶]。
gcloud CLI
- 如要列出可用的帳單帳戶,請執行:
gcloud billing accounts list - 將帳單帳戶連結至 Google Cloud 專案:
gcloud billing projects link PROJECT_ID --billing-account=BILLING_ACCOUNT_ID更改下列內容:
PROJECT_ID是要啟用計費功能的 Cloud 專案的專案 ID。BILLING_ACCOUNT_ID是要連結至 Google Cloud 專案的帳單帳戶 ID。
啟用 API
Google Cloud 控制台
在 Google Cloud 控制台中,啟用 Google Chat API、Google 文件 API、Admin SDK API 和 Vertex AI API。
確認您要在正確的 Cloud 專案中啟用 API,然後按一下「下一步」。
確認要啟用的 API 正確無誤,然後按一下「啟用」。
gcloud CLI
如有必要,請使用
gcloud config set project指令,將目前的 Cloud 專案設為您建立的專案:gcloud config set project PROJECT_ID將 PROJECT_ID 替換為您建立的 Cloud 專案的專案 ID。
使用
gcloud services enable指令啟用 Google Chat API、Google Docs API、Admin SDK API 和 Vertex AI API:gcloud services enable chat.googleapis.com docs.googleapis.com admin.googleapis.com aiplatform.googleapis.com
設定驗證與授權
驗證和授權可讓 Chat 應用程式存取 Google Workspace 和 Google Cloud 中的資源,以處理事件回應。
在本教學課程中,您會發布內部應用程式,因此可以使用預留位置資訊。對外發布應用程式前,請將同意畫面中的預留位置資訊替換為實際資訊。
在 Google Cloud 控制台中,依序前往「Menu」(選單) > Google Auth platform > 「Branding」(品牌)。
如果您已設定 Google Auth platform,可以在「Branding」(品牌)、「Audience」(目標對象)和「Data Access」(資料存取權) 中設定下列 OAuth 同意畫面設定。 如果看到「Get Started」(尚未設定)Google Auth platform 訊息,請按一下「開始使用」:
- 在「App Information」(應用程式資訊) 下方的「App name」(應用程式名稱),輸入
Incident Management with User Auth。 - 在「User support email」(使用者支援電子郵件) 中,選取您的電子郵件地址或適當的 Google 群組。
- 點選 [下一步]。
- 在「目標對象」下方,選取「內部」。如果無法選取「Internal」(內部),請選取「External」(外部)。
- 點選 [下一步]。
- 在「Contact Information」(聯絡資訊)下方,輸入可接收專案異動通知的電子郵件地址。
- 點選 [下一步]。
- 在「完成」部分,請詳閱《Google API 服務使用者資料政策》,然後選取「我同意《Google API 服務:使用者資料政策》」。
- 按一下「繼續」。
- 點選「建立」。
- 如果為使用者類型選取「外部」,請新增測試使用者:
- 按一下「目標對象」。
- 在「測試使用者」下方,按一下「新增使用者」。
- 輸入您的電子郵件地址和任何其他授權測試使用者,然後按一下「儲存」。
- 在「App Information」(應用程式資訊) 下方的「App name」(應用程式名稱),輸入
依序按一下「資料存取權」>「新增或移除範圍」。系統會顯示面板,列出您在 Google Cloud 專案中啟用的各項 API 範圍。
在「手動新增範圍」下方,貼上下列範圍:
https://www.googleapis.com/auth/chat.spaces.createhttps://www.googleapis.com/auth/chat.membershipshttps://www.googleapis.com/auth/chat.memberships.apphttps://www.googleapis.com/auth/chat.messageshttps://www.googleapis.com/auth/documentshttps://www.googleapis.com/auth/admin.directory.user.readonlyhttps://www.googleapis.com/auth/script.external_requesthttps://www.googleapis.com/auth/userinfo.emailhttps://www.googleapis.com/auth/cloud-platform
按一下「新增至表格」。
按一下「更新」。
選取應用程式所需的範圍後,在「資料存取」 頁面中,按一下「儲存」。
建立及部署 Chat 擴充應用程式
在下一節中,您將複製並更新整個 Apps Script 專案,其中包含 Chat 應用程式的所有必要應用程式碼,因此不必複製及貼上每個檔案。
部分函式名稱結尾會加上底線,例如 ChatApp.gs 中的 concatenateAllSpaceMessages_()。底線會隱藏在瀏覽器中開啟事件初始化網頁時的函式。詳情請參閱私有函式。
Apps Script 支援兩種檔案類型:.gs 指令碼和 .html 檔案。為遵守這項支援規定,應用程式的用戶端 JavaScript 會納入 <script /> 標記內,而 CSS 則會納入 HTML 檔案內的 <style /> 標記內。
您也可以選擇在 GitHub 上查看整個專案。
以下簡要說明各個檔案:
Consts.gs定義其他程式碼檔案參照的常數,包括 Cloud 專案 ID、Vertex AI 位置 ID、用來結案的快速指令 ID,以及 Gemini 模型。
查看
Consts.gs程式碼ChatApp.gs處理 Chat 互動事件,包括訊息、按鈕點擊、應用程式指令和對話方塊。回應
Close incident快速指令,開啟對話方塊來收集事件解決詳細資料。呼叫 Chat API 中的spaces.messages.list方法,讀取聊天室中的訊息。使用 Apps Script 中的 Admin SDK Directory 服務取得使用者 ID。查看
ChatApp.gs程式碼ChatSpaceCreator.gs接收使用者在事件初始化網頁上輸入的表單資料,並用來建立及填入 Chat 空間,然後發布事件相關訊息。
查看
ChatSpaceCreator.gs程式碼DocsApi.gs呼叫 Google 文件 API,在使用者 Google 雲端硬碟中建立 Google 文件,並將
VertexAiApi.gs中建立的事件資訊摘要寫入文件。查看
DocsApi.gs程式碼VertexAiApi.gs使用 Vertex AI 摘要顯示 Chat 空間中的對話。這份摘要會發布在
DocsAPI.gs中特別建立的文件中。查看
VertexAiApi.gs程式碼WebController.gs提供事件初始化網站。
查看
WebController.gs程式碼Index.html組成事件初始化網站的 HTML。
查看
Index.html程式碼JavaScript.html處理表單行為,包括提交、錯誤和清除,適用於事件初始化網站。
WebController.gs中的自訂include函式會將其納入Index.html。查看
JavaScript.html程式碼Stylesheet.html事件初始化網站的 CSS。自訂
WebController.gs中的include函式會將其納入Index.html。查看
Stylesheet.html程式碼
找出 Cloud 專案編號和 ID
在 Google Cloud 控制台中,前往您的 Cloud 專案。
依序點選「設定和公用程式」 >「專案設定」。
記下「專案編號」和「專案 ID」欄位中的值。您會在後續章節中使用這些值。
建立 Apps Script 專案
如要建立 Apps Script 專案並連結至 Cloud 專案,請按照下列步驟操作:
- 按一下下列按鈕,開啟「Incident Management Chat app with User Auth」 Apps Script 專案。
開啟專案 - 按一下「總覽」。
- 在總覽頁面中,按一下
 「建立副本」。
 為 Apps Script 專案副本命名:
按一下「Copy of Incident Management Chat app with User Auth」(具有使用者驗證功能的事件管理 Chat 應用程式副本)。
在「專案標題」中輸入
Incident Management Chat app with User Auth。按一下 [重新命名]。
在 Apps Script 專案副本中,前往
Consts.gs檔案,並使用 Cloud 專案的 ID 設定PROJECT_ID。
設定 Apps Script 專案的 Cloud 專案
- 在 Apps Script 專案中,按一下
 「專案設定」。
 - 點選「Google Cloud Platform (GCP) 專案」下方的「變更專案」。
- 在「GCP 專案編號」中,貼上 Cloud 專案的專案編號。
- 點選「設定專案」。Cloud 專案和 Apps Script 專案現已連結。
建立 Apps Script 測試部署作業
現在所有程式碼都已就位,請部署 Apps Script 專案。在 Google Cloud 中設定 Chat 應用程式時,您會使用部署 ID。
在 Apps Script 中開啟事件應變應用程式的專案。
依序點選「部署」 >「測試部署作業」。
如果尚未選取「Google Workspace 外掛程式」和「網頁應用程式」,請按一下「選取類型」旁的部署類型
,然後選取「Google Workspace 外掛程式」和「網頁應用程式」。Apps Script 會提供網頁應用程式的部署作業 ID 和網址。
記下「Web app」(網頁應用程式)網址,以便稍後在啟動事件時造訪。 複製「部署作業 ID」。在 Google Cloud 控制台中設定 Chat 應用程式時,您會使用這個 ID。
按一下 [完成]。
在 Google Cloud 控制台中設定 Chat 應用程式
本節說明如何在 Google Cloud 控制台中設定 Google Chat API,並提供 Chat 應用程式的相關資訊,包括您剛從 Apps Script 專案建立的部署 ID。
在 Google Cloud 控制台中,依序點選「選單」 >「更多產品」 >「Google Workspace」 >「產品庫」 >「Google Chat API」 >「管理」 >「設定」。
在「應用程式名稱」中輸入
Incident Management with User Auth。在「Avatar URL」中輸入
https://developers.google.com/chat/images/quickstart-app-avatar.png。在「說明」中輸入
Responds to incidents。將「啟用互動功能」切換鈕設為開啟。
在「功能」下方,選取「加入聊天室和群組對話」。
在「連線設定」下方,選取「Apps Script」。
在「部署作業 ID」中,貼上您先前從 Apps Script 專案部署作業複製的 Apps Script 部署作業 ID。
註冊完全實作的 Chat 應用程式使用的快速指令:
在「指令」下方,按一下「新增指令」。
在「Command ID」(指令 ID) 中,輸入
1。在「說明」中輸入
Closes the incident being discussed in the space.在「指令類型」下方,選取「快速指令」。
在「快速指令名稱」中輸入
Close incident。選取「對話方塊」。
按一下「完成」,指令已註冊並列出。
在「瀏覽權限」下方,選取「將這個 Chat 擴充應用程式提供給『您的 Workspace 網域』中的特定使用者和群組」,然後輸入電子郵件地址。
在「記錄」下方,選取「將錯誤記錄至 Logging」。
按一下 [儲存]。系統會顯示「已儲存設定」訊息,表示應用程式已可供測試。
測試 Chat 應用程式
如要測試事件管理 Chat 應用程式,請從網頁發起事件,並確認 Chat 應用程式運作正常:
前往 Apps Script 部署作業的網頁應用程式網址。
當 Apps Script 要求存取資料的權限時,請按一下「查看權限」,使用 Google Workspace 網域中適當的 Google 帳戶登入,然後按一下「允許」。
系統會開啟事件初始化網頁。輸入測試資訊:
- 在「事件標題」中輸入
The First Incident。 - 選用:在「Incident responders」(事件回應人員) 中,輸入事件回應人員的電子郵件地址。他們必須是 Google Workspace 機構中的 Google Chat 帳戶使用者,否則無法建立聊天室。請勿輸入自己的電子郵件地址,因為系統會自動加入。
- 在「初始訊息」中,輸入
Testing the incident management Chat app.
- 在「事件標題」中輸入
按一下「建立聊天室」。畫面上會顯示
creating space訊息。聊天室建立完成後,系統會顯示
Space created!訊息。按一下「開啟聊天室」,系統會在新的分頁中開啟 Chat 聊天室。你和其他事件應變人員可以視需要傳送訊息到該空間。這款應用程式會使用 Vertex AI 摘要這些訊息,並分享回顧文件。
如要結束事件應變並開始解決程序,請在即時通訊空間中啟動快速指令
Close incident。系統會開啟事件管理對話方塊。在「關閉事件」中,輸入事件解決方式的說明,例如
Test complete。按一下「Close Incident」(關閉事件)。
事件管理應用程式會列出聊天室中的訊息、使用 Vertex AI 歸納訊息重點、將摘要貼到 Google 文件,並在聊天室中分享該文件。
清除所用資源
為避免系統向您的 Google Cloud 帳戶收取本教學課程中所用資源的相關費用,建議您刪除 Cloud 專案。
- 在 Google Cloud 控制台中,前往「管理資源」頁面。依序點選「選單」「IAM 與管理」>「管理資源」>。
- 在專案清單中選取要刪除的專案,然後按一下「刪除」圖示 。
- 在對話方塊中輸入專案 ID,然後按一下「Shut down」(關閉) 即可刪除專案。
相關主題
- 透過 Google Workspace 存取的 AI 代理程式規劃旅遊行程
- 透過 Gemini AI Chat 擴充應用程式,依據 Chat 對話回答問題
- 使用 Google Chat、Vertex AI 和 Firestore 管理專案
- 使用 ADK AI 代理和 Gemini 模型查核陳述內容
- 在 Chat 應用程式中整合 AI 基本概念
- 使用 Apps Script 建構 Google Chat 應用程式,做為 Google Workspace 外掛程式使用