Page Summary
-
This guide explains the user experience within the Google Photos app when selecting media items using the Picker API.
-
Users initiate the process by accessing the
pickerUridisplayed in your app, which opens a photo selection page within Google Photos. -
Users can search and select photos from their Google Photos library using various criteria before confirming their choices.
-
After selection, users are presented with a "Done" screen, and your app can re-display the
pickerUrito allow for further selections in a new session.
This guide helps you understand your user's experience when picking media items.
Following the standard Picker API flow,
picking begins after your app displays the pickerUri,
and while your app is polling for mediaItemsSet to return true.
To view any of these steps on your own device, check out our sample app.
Start the picking session
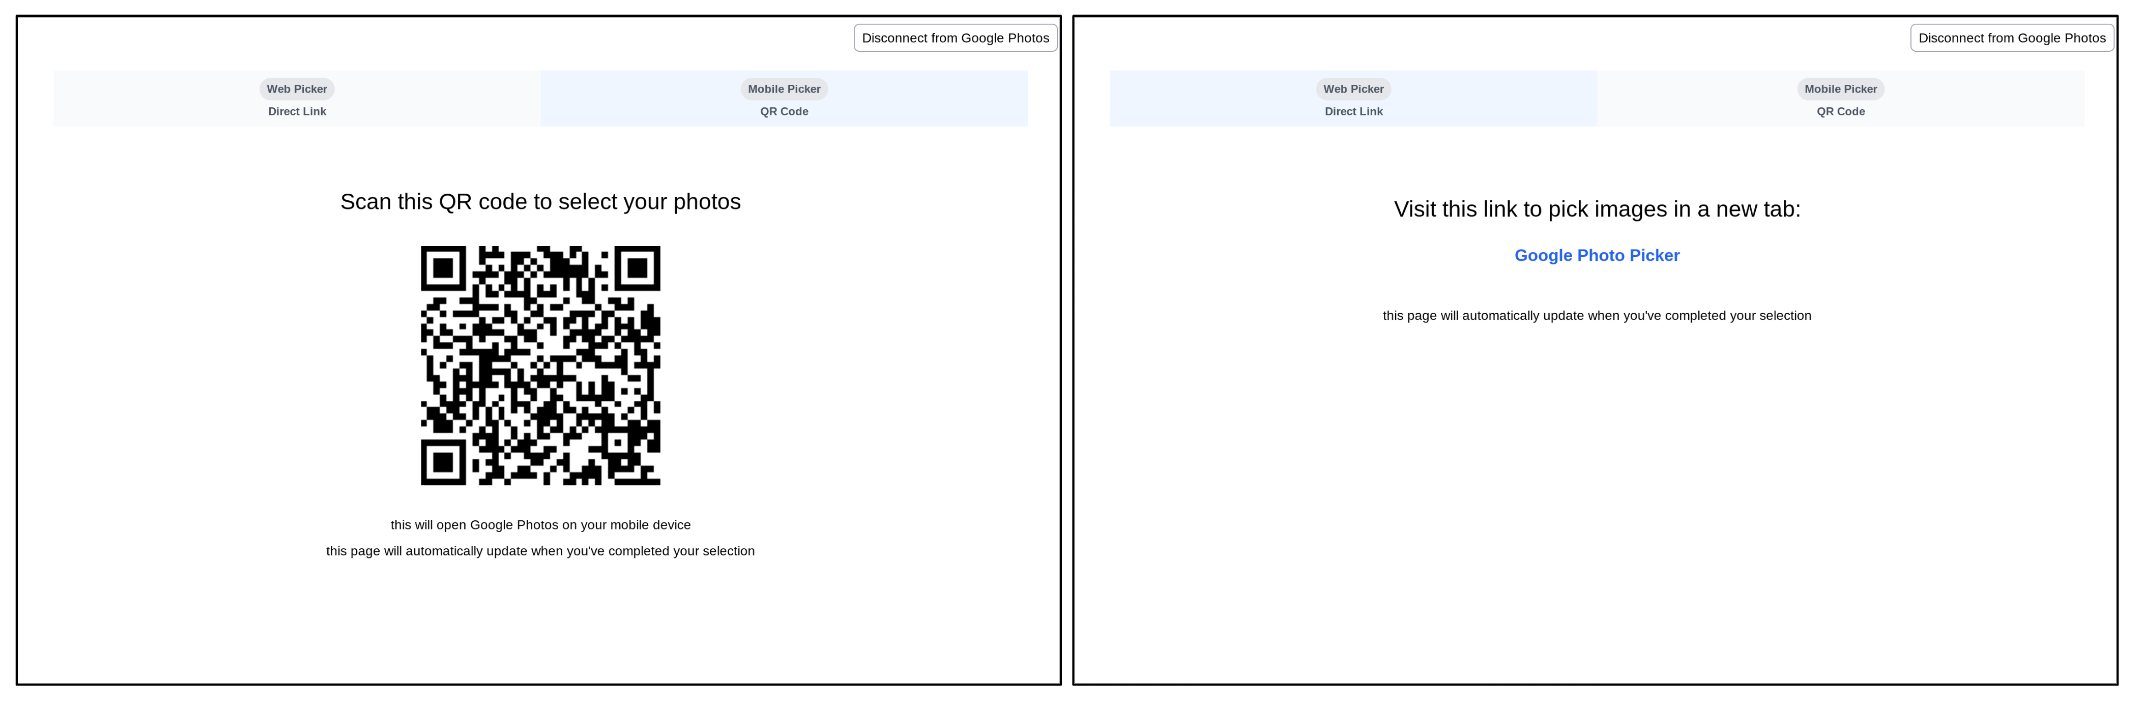
After successfully creating a session your app should display the pickerUri to
your users.
For web-based applications where clicking a link opens Google Photos in a new
browser tab or window, you can append /autoclose to the pickerUri. When
/autoclose is appended, this tab or window automatically closes after the
user finishes picking photos. This skips the Done screen and
provides a smoother experience. This behavior is only recommended for
web flows, and not for experiences where users might scan a QR code to open
Google Photos on a different device.
- Display the
pickerUrias both a QR code and a URL. - Provide helpful text alongside the
pickerUri. For example, "Scan this code to open Google Photos and select your items.". - For devices with limited input capabilities (e.g., kiosks, tablets, smart TVs), check your hardware manufacture's recommendations on text size and QR code width.
Search and select photos
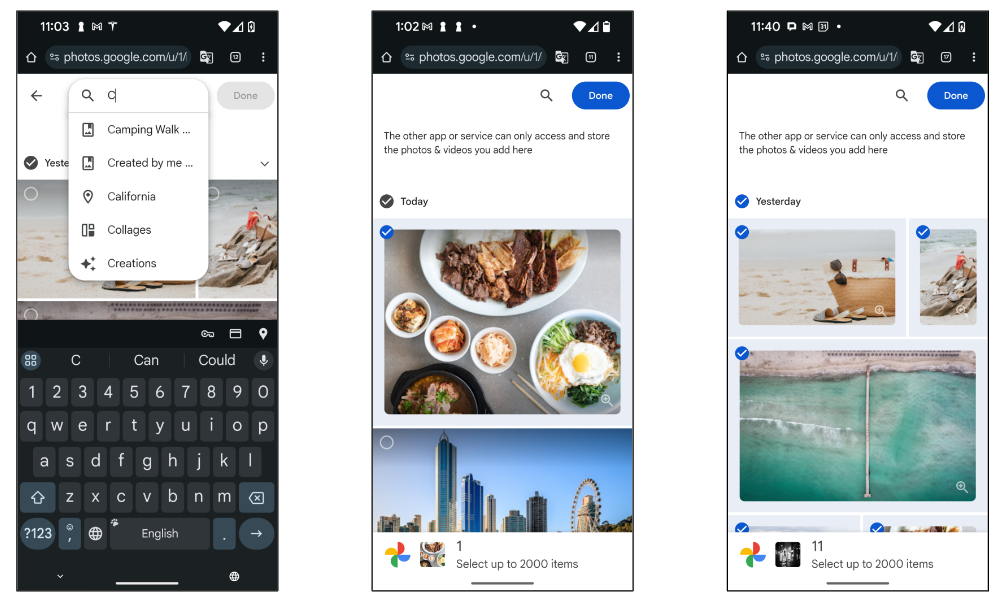
When a user accesses the pickerUri, they are taken to a photo selection page
within the Google Photos app.
This page will always display the most recent photos from your user's Google Photos library. Albums, favorites, and other common photos categories are not show directly. Users can search for photos using various criteria, such as keywords, dates, locations, and album titles.
If your app utilizes albums, dates, or other common photos categories, help your users by prompting them to search once they enter the Google Photos app.
For example, if your asking your users to share a specific album, you could include the following text on the same page your users connect to Google Photos: "Connect to Google Photos, then search for the album you want to share."
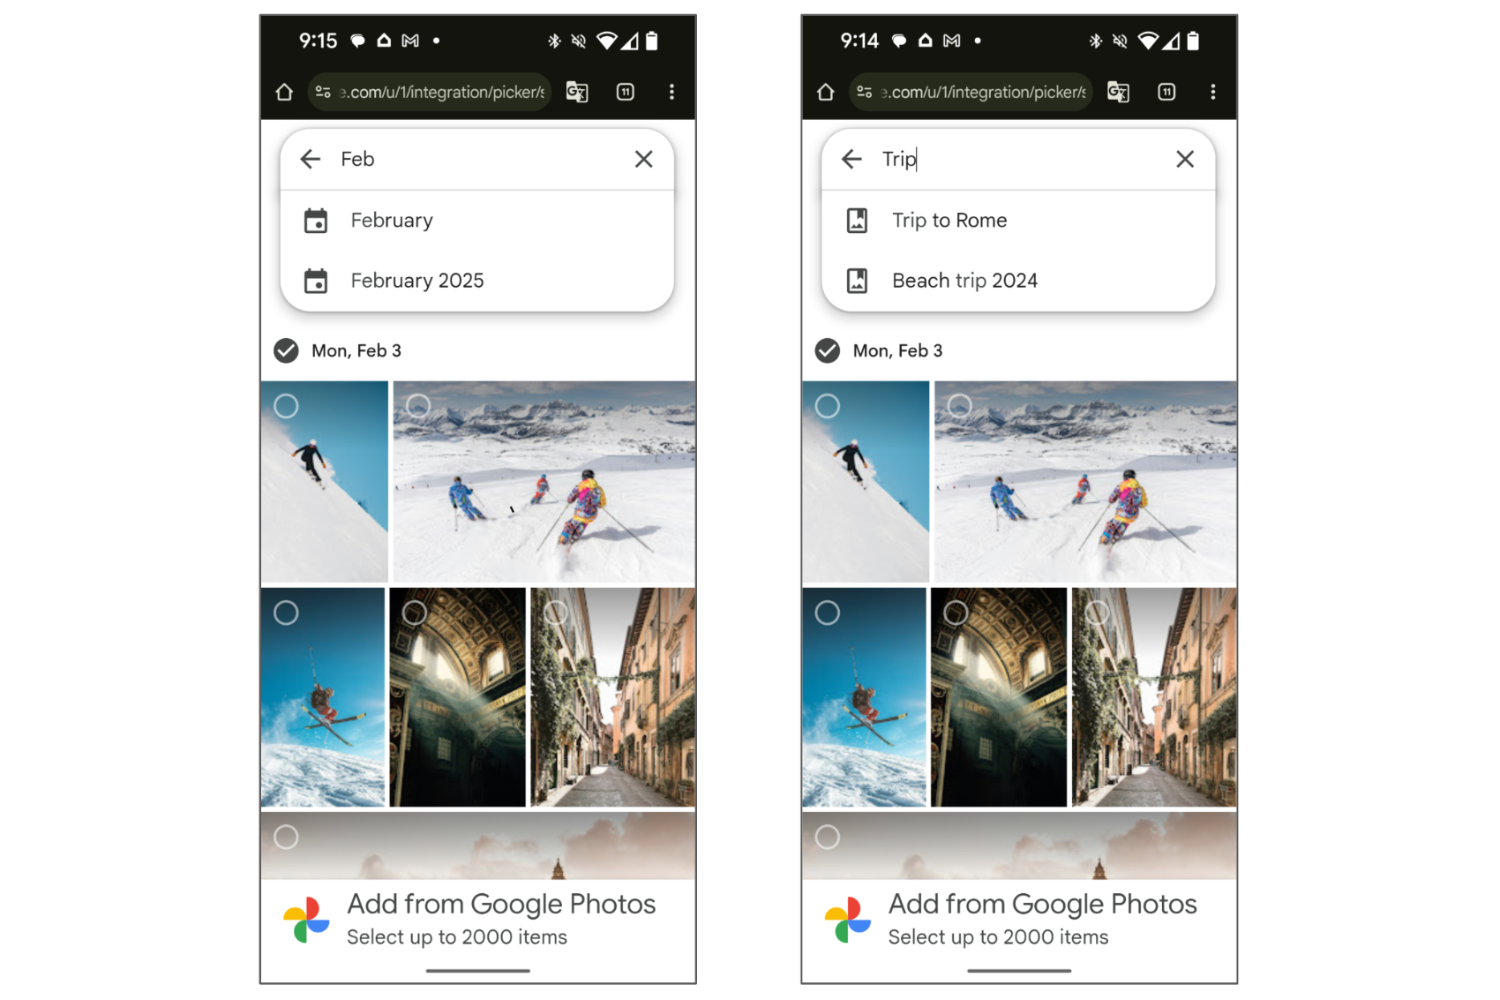
After searching, the user can select one or more items from the results.
Done screen
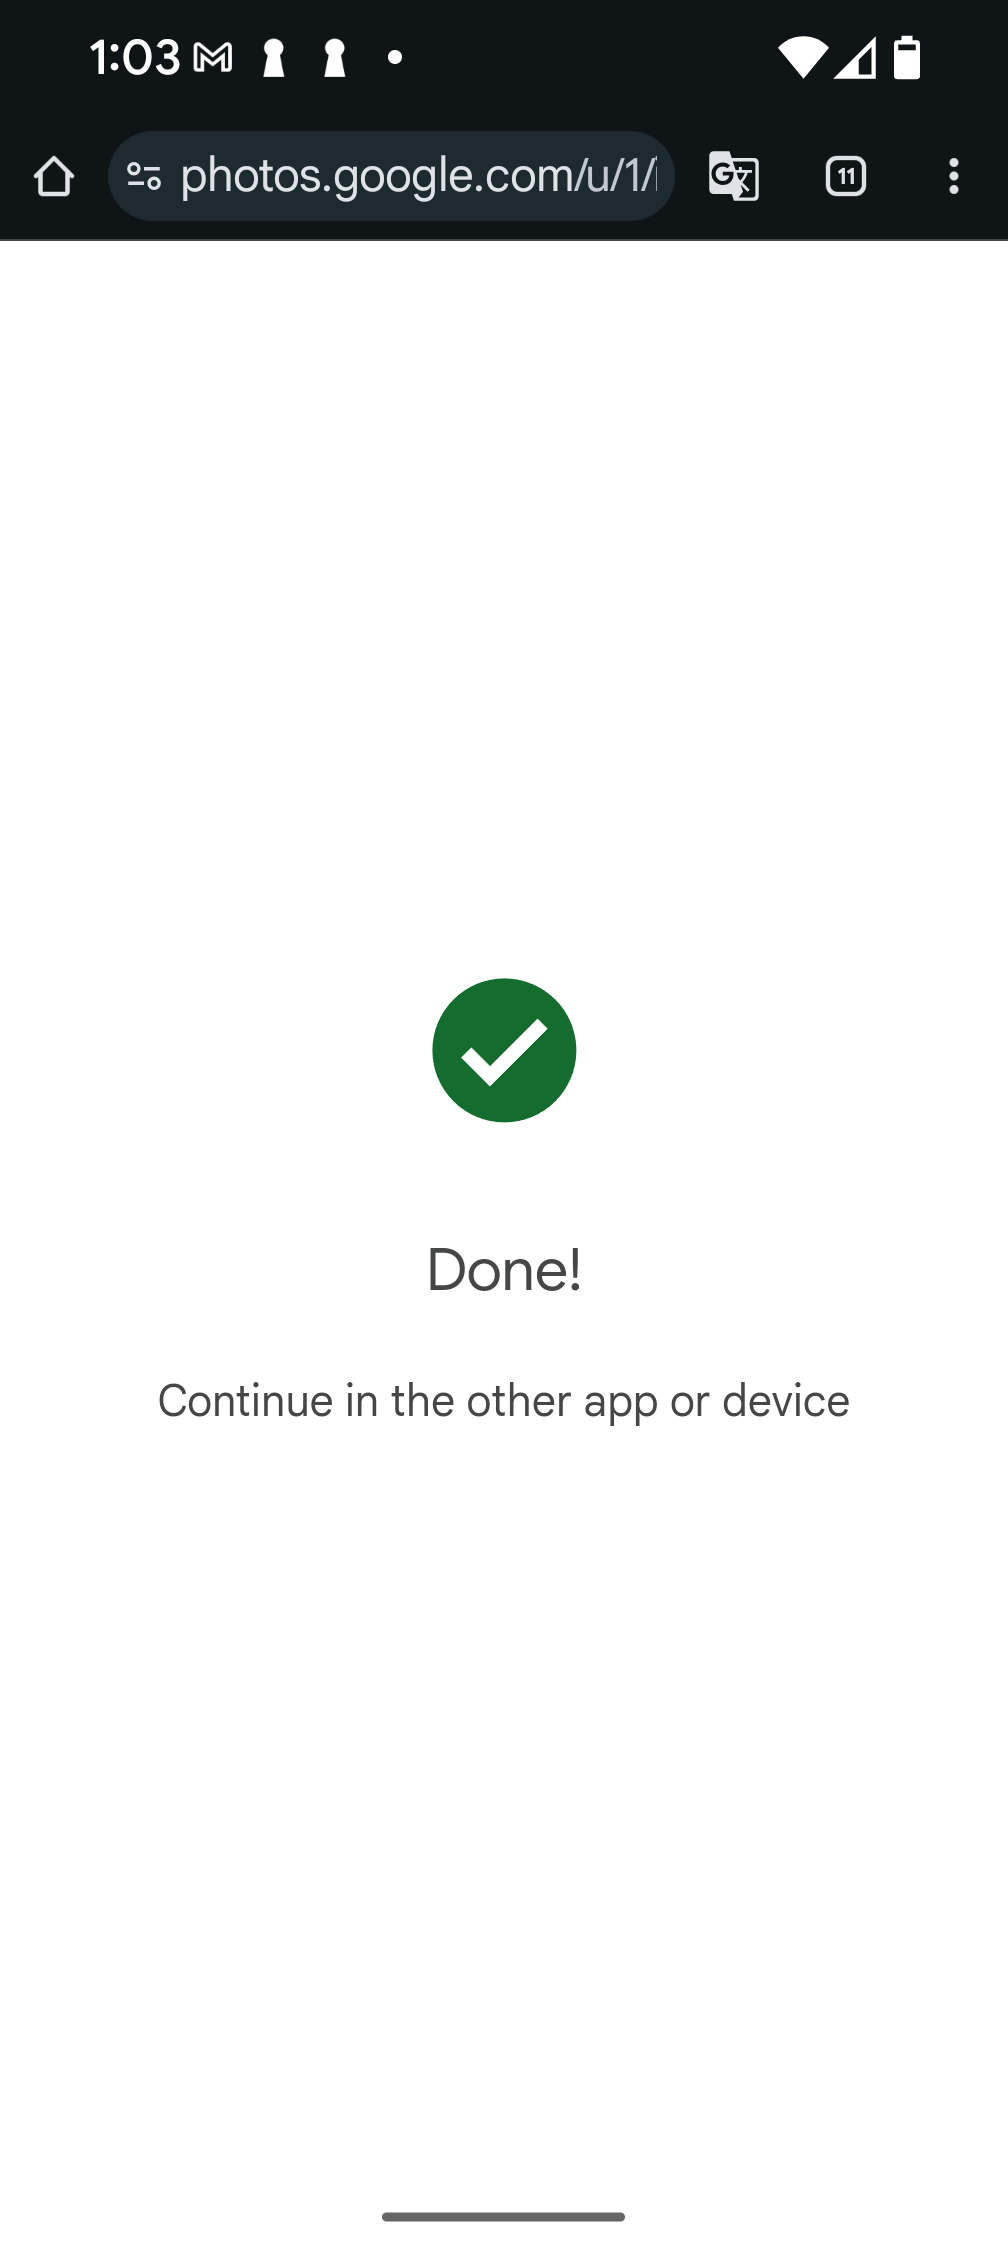
Once the user taps the "Done" button and completes picking, they will see
the "Done" screen, which ends the picking session and means the current
pickerUri will no longer work.
Note that if you have appended /autoclose to the pickerUri, this screen is
skipped, and instead the browser tab or window closes after picking is
complete.
To provide your users the option to select more photos, create a new picking
session and display the pickerUri again in your app.