Requesting Data - [Advertiser Direct Access]:
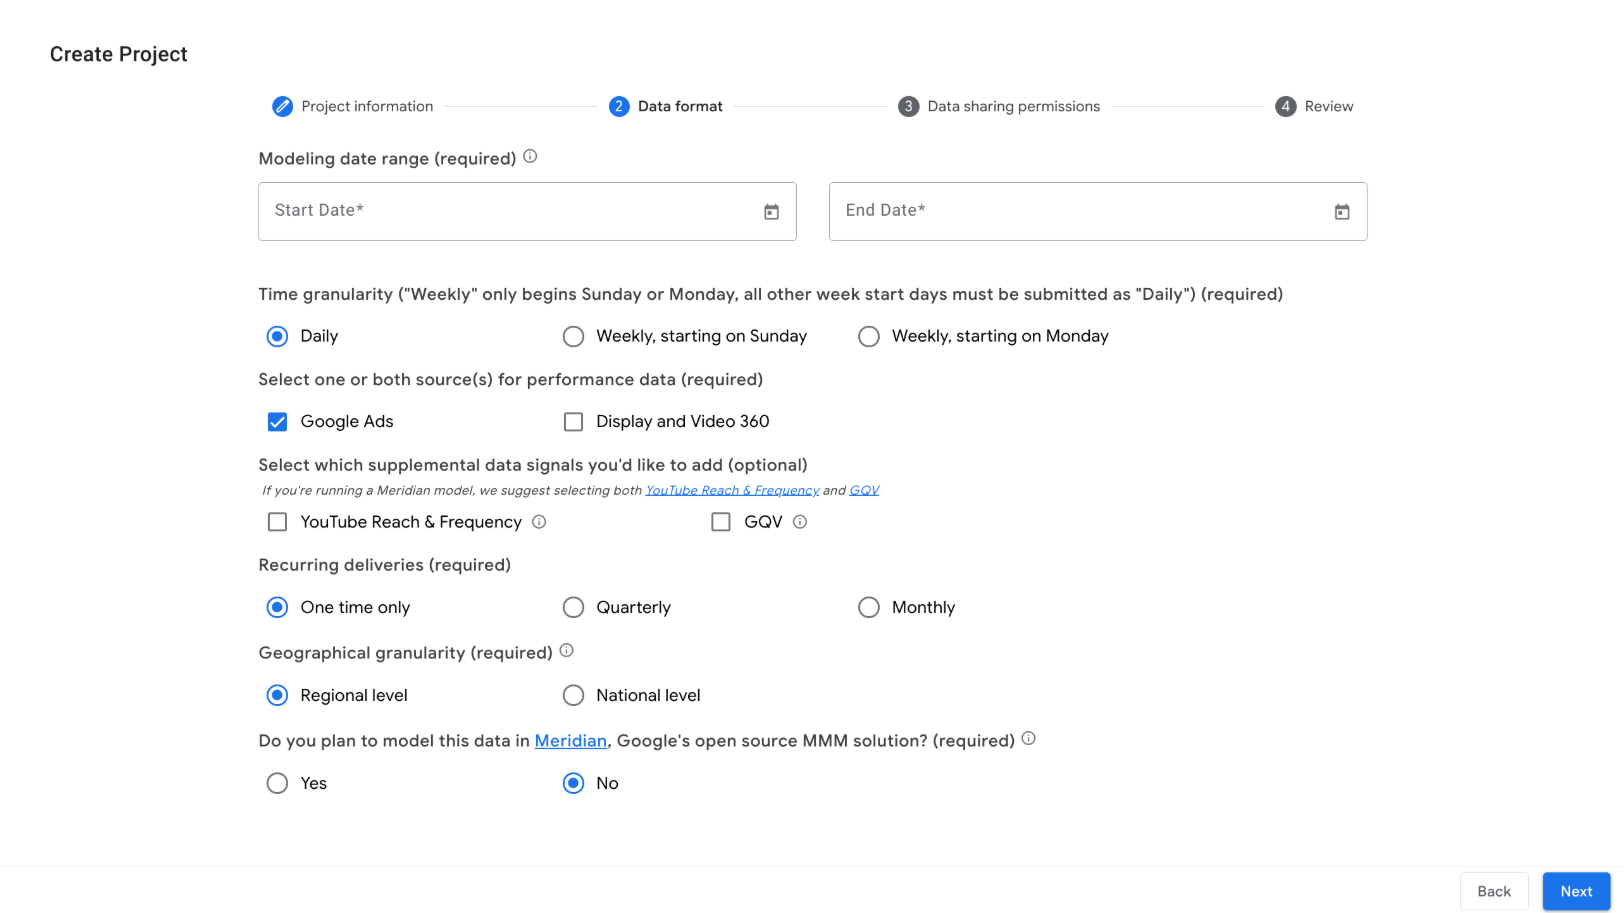
Request data from MMM DP by following the Requesting Data Overview instructions, but make sure to use the following specific inputs for GeoX for experiments in the US:
- Configure Granularity and Sources:
- Time Granularity: Select Daily.
- Data Sources: Select Google Ads as your primary source. You may also select DV360, but doing so generates a separate report.
- Configure Delivery Options:
- Supplemental Signals: Do not select supplemental signals (such as GQV or YouTube Reach & Frequency), as they are unnecessary for GeoX and delay processing time by at least a day.
- Recurring Deliveries: Set the frequency to One time only.
- Geo Granularity: To specifically receive US DMA-level data, you must select Regional for your geo granularity. Selecting Regional for the US automatically defaults to DMA, which is the system's most granular level available.
- Meridian Model Question: Select No when asked if you plan to model this data in Meridian, Google's open source MMM solution.
Data Delivery Timelines: Once ready, the data is delivered through a CSV link or you can optionally configure direct delivery to a data lake using your own Google Cloud, S3, or SFTP storage.
- See data delivery timelines here.
Data Output: You will receive a comprehensive report including the required daily campaign- and geo-level cost data.
For Google Ads data, you can validate the report by:
- GroupName: Concatenation of Campaign ID and Campaign Name. Verify that all relevant campaigns are included.
- TimeGranularity: Ensure this value is set to "DAILY".
- Geographic Granularity: You can use either of the following geo dimensions
to validate the geo output:
- MetroCriteriaId: The Criteria ID for the DMA (available for US data). Other countries use the corresponding available geographic granularity in Google Ads.
- MetroName: The display name associated with the MetroCriteriaID (e.g., "Los Angeles, CA").
- Cost: Cost converted into the selected local currency.
Once these fields are validated, your data is ready for analysis.
For DV360 data, you will instead validate the following parameters:
- CampaignName: The name of the campaign as entered in DV360.
- CampaignId: The unique campaign identifier pulled from DV360.
- ReportDate: The performance date of the advertisement. Note that there is no time granularity column in the DV360 report indicating daily data. Instead, you will need to validate using this parameter. Your data output will have daily time granularity as long as you selected Daily when creating the project.
- DmaName: The display name of the DMA where ads were delivered.
- DmaCriteriaId: The unique criteria identifier for the DMA.
- MediaCost: The ad cost in the advertiser's home currency, excluding discounts and tech fees.
Once these fields are validated, your data is ready for analysis.
Requesting Data - [Partner/3P Access]:
Same steps, but make sure to select the Advertiser name when creating the project, as outlined in the Requesting Data Overview.
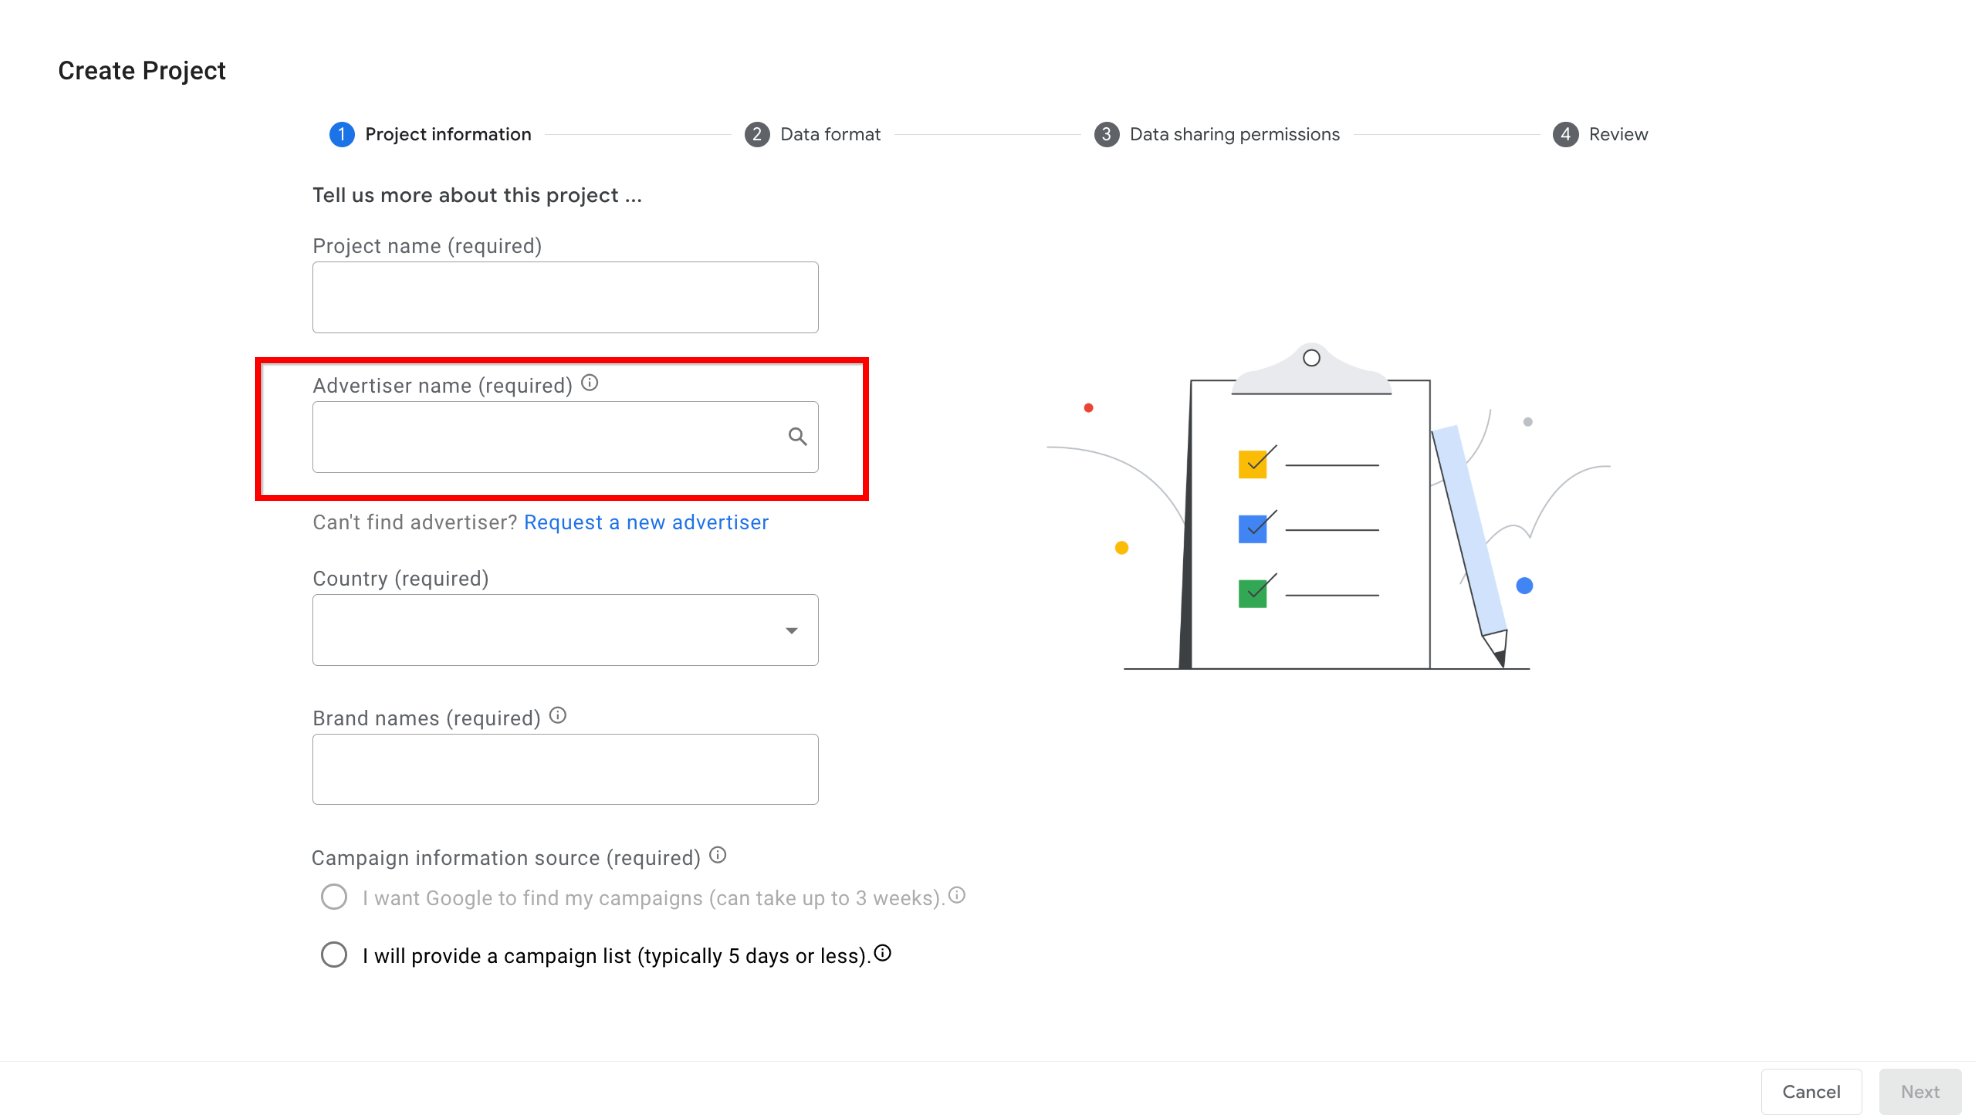
Follow the same specific inputs for GeoX outlined in Steps 1-6 of the Advertiser Direct Access section.