מבוא
Google Mashup Editor (GME) הוא אחד הכלים המועילים ביותר למפתחי מאשאפים, והוא היה צפוי כבר זמן רב. GME עוזר למפתחים ליצור ולערוך רכיבים דינמיים בדפי אינטרנט, כמו מפות, טבלאות, רשימות ורכיבים אחרים, על סמך חיבורים לנתונים חיצוניים. אחר כך אפשר לכלול את הרכיבים האלה בדפי אינטרנט ובבלוגים באמצעות iframe.במדריך הזה נסביר איך לשלב קובץ KML במפה שנוצרה באמצעות GME.
התרשמות ראשונית מ-Google Mashup Editor
- הוא פשוט מאוד, עם ממשק נקי וברור, כמו רוב מוצרי Google.
- יש בו אינדקס פרויקטים נוח עם אוסף הולך וגדל של דוגמאות קוד, וגם קוד המחבר.
- היא מאפשרת לאחסן בקלות משאבים נוספים בפרויקט (כמו קובצי תמונות).
- יש בו כלי לניפוי באגים ב-XML שקל לשימוש.
- יש בו הרבה אפליקציות לדוגמה שקל להשתמש בהן.
GME for KML Developers
לפני שהאינטרנט נכנס לחיינו, היה קשה לשתף נתונים מרחביים. עם זאת, עם התפתחות האינטרנט, אפליקציות מיפוי הפכו לדרך סטנדרטית לשיתוף קל של נתונים של מערכות מידע גיאוגרפי (GIS) עם העולם. פורמט KML הופך לסטנדרט להצגה ולהחלפה של נתונים של מערכות מידע גיאוגרפי (GIS) כי הוא קומפקטי, קל לפיתוח ונתמך על ידי אפליקציות פופולריות כמו Google Earth ו-Google Maps.
עד לאחרונה, תהליך היצירה והעריכה של דפים שמבוססים על JavaScript היה בעייתי מאוד למפתחי KML. נדרשו הרבה שלבים נוספים כדי ליצור מיקס ולנפות באגים. GME מאפשר ליצור במהירות רבה מאש-אפ מבוסס-KML מכמה רכיבים בסיסיים. תהליך היצירה לא דורש ידע מיוחד ב-HTML או ב-JavaScript. פרויקטי הדוגמה של GME מספקים מספיק מידע כדי להתחיל.
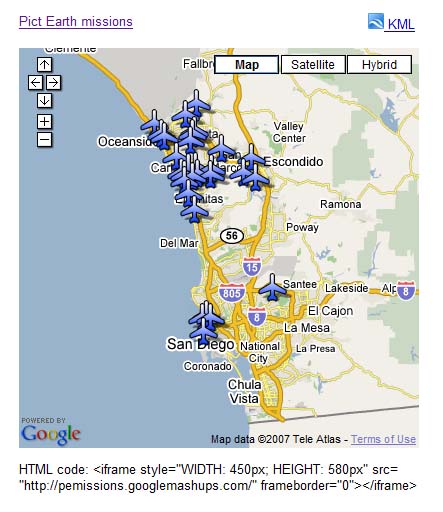
בדוגמה הבאה, אשתמש בקובץ KML שמפנה אל אוסף התמונות שצולמו במהלך טיסות של Pict Earth USA.
זו תמונה של מיזוג המפות של Pict Earth:
כדי לשלב קובץ KML בפרויקט GME באמצעות Google Maps API, צריך לבצע את השלבים הבאים:
שלב 1: בחירת קובץ ה-KML
שלב 2: יצירת פרויקט חדש ב-GME
שלב 3: יצירת פונקציה להוספת קובץ ה-KML
שלב 4: הוספת מפה
שלב 5: בדיקת המאשאפ
שלב 6: פרסום המאשאפ
שלב 7: הוספת המאשאפ לדף אינטרנט
שלב 8: הוספת המאשאפ לגלריה של GME
שלב 1: בוחרים את קובץ ה-KML
בוחרים את קובץ ה-KML שרוצים להוסיף למפה. זה יכול להיות כל דבר שיש לו תכונות שנתמכות במפות Google. הוא חייב להתארח בשרת שזמין לציבור.
שלב 2: יצירת פרויקט חדש של GME
יוצרים פרויקט חדש וריק ב-GME.
כך נראה פרויקט GME ריק:
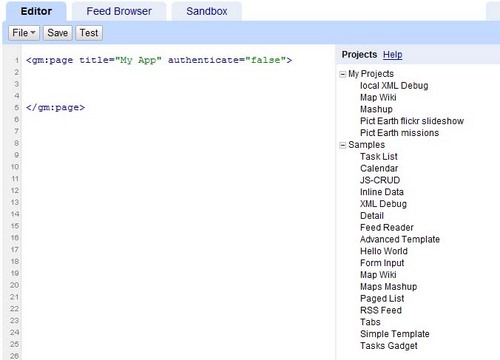
מוסיפים כותרת ושם לפונקציה.
<gm:page title="Pict Earth missions" authenticate="false" onload="kmlPE()"></gm:page>
שלב 3: יצירת פונקציה להוספת קובץ ה-KML
יוצרים פונקציית JavaScript עם הנתיב לקובץ ה-KML שרוצים להוסיף למפה.
<script>
  function kmlPE()
  {
    <!-- Get map -->
    var myMap = google.mashups.getObjectById('map').getMap();
    <!-- Get KML -->
    var geoXml = new GGeoXml("http://pictearthusa.com/kml/missions.kml");
    <!--Place KML on Map -->
    myMap.addOverlay(geoXml);
    <!--Set zoom on double click -->
    myMap.enableDoubleClickZoom();
  }
</script>
שלב 4: הוספת מפה
מוסיפים מפה ופרמטרים.
<gm:map id="map" height="400px" width="400px" lat="32.9393" lng="-117.206" zoom="9" maptypes="true"/>
שלב 5: בודקים את המאשאפ.
לוחצים על לחצן הבדיקה (F4).
זו תמונה של שילוב של Pict Earth שנבדק בארגז החול.
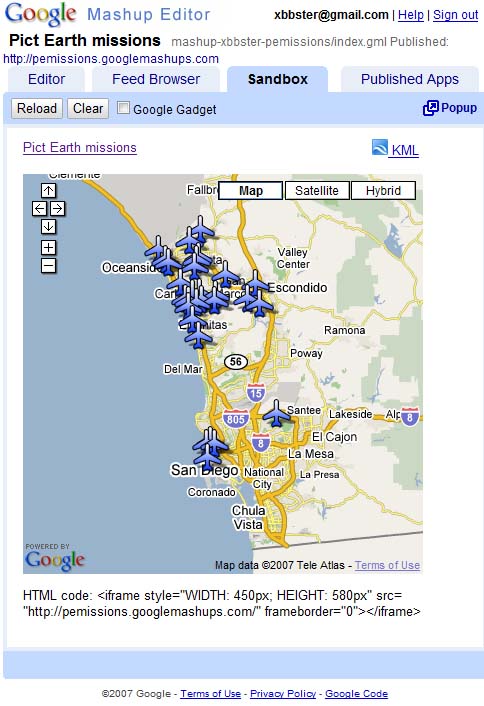
עכשיו אפשר לאמת את הטקסט של הבקשה ולראות את התוצאה הראשונה. אנחנו יכולים להוסיף כותרת וקישורים ולבדוק שוב.
שלב 6: פרסום המאשאפ
מגדירים את שם הפרויקט ומפרסמים אותו. כך תקבלו קישור קבוע למאש-אפ, שתוכלו להשתמש בו כדי לשלב אותו בדפי אינטרנט. בדוגמה שלי, זה הקישור לדף הבית של פרויקט GME. אפשר גם לראות את קוד המקור של הפרויקט.
שלב 7: הוספת המאשאפ לדף אינטרנט
מוסיפים את המאשאפ לדף אינטרנט באמצעות iframe. לדוגמה, כדי להוסיף את הפרויקט לדוגמה, מוסיפים את השורה הבאה:
<iframe style="WIDTH: 439px; HEIGHT: 491px" src="http://pemissions.googlemashups.com/" frameborder="0"></iframe>
הנה דוגמאות למאש-אפ בדף אינטרנט ובבלוג.
אפשר גם להוסיף את קוד Google Analytics לפרויקט, כדי לעקוב אחרי נתונים סטטיסטיים לגבי מי שצופה בדף. הנה סקריפט פשוט להוספה:
<script src="http://www.google-analytics.com/urchin.js" type="text/javascript"></script>
<script type="text/javascript">uacct = "youraccountnumber";urchinTracker();</script>
שלב 8: מוסיפים את התמונה לגלריה של GME
פרסום המאשאפ בגלריית המאשאפים של GME. כך משתמשים אחרים יוכלו לראות את המאש-אפ שלכם.
לקבלת מידע נוסף:
מומלץ לעיין במדריך לתחילת העבודה עם Google Mashup Editor, שבו מוסבר בפירוט איך ליצור מאשאפים. כדאי גם לעיין ברשימת התגים כדי לקבל תיאור קצר של כל תגי gm עם דוגמאות.
קוד:
זהו הקוד המלא לשימוש ב-KML של Pict Earth ב-GME:
<gm:page title="Pict Earth missions" authenticate="false" onload="kmlPE()>

<!-- Map definition -->
<gm:mapid="map" height="400px" width="400px" lat="32.9393" lng="-117.206" zoom="9" maptypes="true"/>

<script>
  function kmlPE(){

    <!-- Get map -->
    var myMap = google.mashups.getObjectById('map').getMap();

    <!-- Get KML -->
    var geoXml = new GGeoXml("http://pictearthusa.com/kml/missions.kml");

    <!-- Place KML on Map -->
    myMap.addOverlay(geoXml);

    <!-- Set zoom on double click -->
    myMap.enableDoubleClickZoom();
  }
</script>
</gm:page>
מה השלב הבא?
אחרי שמפרסמים את המאשאפ, אפשר להשתמש בקובץ ה-KML שבו כפרמטר שיכלל באפליקציה אחרת, או לטעון אותו ישירות כמפה. לדוגמה, הדף הזה:
http://param.googlemashups.com הוא שילוב של GME. אפשר להפנות ישירות לקובץ KML ב-mashup על ידי הוספת kml= כפרמטר בכתובת ה-URL, כך: http://param.googlemashups.com/?kml=http://mapgadgets.googlepages.com/cta.kmlאפשר גם ליצור גאדג'ט מהפרויקט. אחרי ששולחים אותו, עוברים לתפריט הקובץ, לוחצים על 'שליחת הגאדג'ט' ופועלים לפי ההוראות. כך תוכלו להוסיף בקלות את האפליקציה לדף הבית המותאם אישית שלכם ב-Google, לדפי אינטרנט אחרים ולשתף אותה עם אחרים.