این صفحه نحوه انجام کارهای رایج با لیست های داغ در Google Issue Tracker را نشان می دهد.
یک لیست داغ ایجاد کنید
هنگامی که یک لیست داغ ایجاد می کنید، مجوز Admin به شما داده می شود و به طور پیش فرض برای شما خصوصی است. شما باید مجوزهای موجود در فهرست داغ را تغییر دهید تا برای سایر کاربران قابل مشاهده یا تغییر باشد.
برای ایجاد لیست داغ:
روی ایجاد فهرست داغ ، که نزدیک پایین پیمایش سمت چپ است، کلیک کنید.
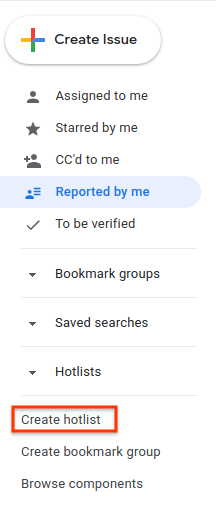
پنجره Create a new hotlist ظاهر می شود.
یک نام برای لیست داغ وارد کنید.
(اختیاری) توضیحاتی را برای لیست داغ وارد کنید.
روی ذخیره کلیک کنید.
فهرست داغ در ناوبری سمت چپ در بخش Hotlists ظاهر می شود.
همچنین میتوانید با انتخابگر فهرست داغ موجود در صفحه مشکل یا در ویرایش انبوه یا از صفحه مدیریت فهرستهای داغ ، یک فهرست داغ ایجاد کنید.
فهرست داغ را ویرایش کنید
برای ویرایش ویژگیهای فهرست، باید مجوز مدیر را داشته باشید. برای لیست های داغی که ایجاد می کنید، مجوز مدیر دارید.
برای ویرایش فهرست داغ:
در پیمایش سمت چپ، فهرست داغی را که میخواهید ویرایش کنید پیدا کنید.
نشانگر را روی فهرست داغ نگه دارید و روی دکمه "بیشتر" کلیک کنید.
تنظیمات را انتخاب کنید.
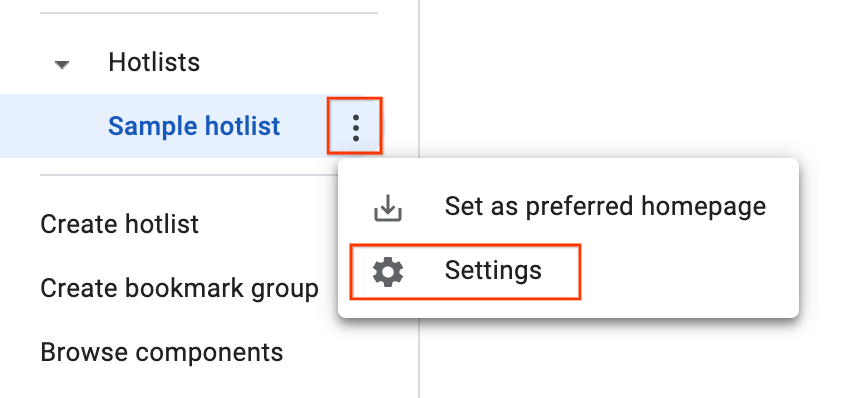
پنجره جزئیات لیست داغ ظاهر می شود.
در صفحه تنظیمات، می توانید نام فهرست داغ را تغییر دهید، توضیحات را به آن اضافه کنید یا تغییر دهید، یا تنظیمات کنترل دسترسی را تغییر دهید.
روی ذخیره کلیک کنید.
همچنین میتوانید با کلیک کردن روی نماد ویرایش (مداد) در کنار نام فهرست داغ، فهرست داغ را از صفحه مشکلات آن ویرایش کنید.
ستاره یک لیست داغ
میتوانید فهرستهای مهم را با ستارهدار کردن آنها شناسایی کنید. هنگام افزودن یا حذف فهرستهای داغ از یک مشکل، فهرستهای داغ ستارهدار نیز در انتخابگر فهرست داغ ظاهر میشوند.
برای ستارهدار کردن فهرست داغ:
در پیمایش سمت چپ، فهرست داغی را که میخواهید ستارهدار کنید، انتخاب کنید.
در بالای صفحه، روی نماد "ستاره" در کنار نام لیست داغ کلیک کنید.
مسائل را اضافه و حذف کنید
برای افزودن یا حذف مسائل، باید مجوزهای Admin یا View و اضافه کردن را در فهرست داغ داشته باشید.
برای افزودن یا حذف مسائل در فهرست داغ:
مشکلی را که میخواهید اضافه یا حذف کنید بررسی کنید یا آن را باز کنید.
روی دکمه Hotlists در نوار بالا کلیک کنید تا انتخابگر Hotlist باز شود.
برای افزودن مشکل به فهرست داغ، کادر کنار آن فهرست داغ را علامت بزنید و روی ذخیره کلیک کنید. برای حذف مشکل از فهرست داغ، کادر را پاک کنید و روی حذف کلیک کنید. در یک اقدام می توان چندین لیست داغ اضافه یا حذف کرد.
همچنین میتوانید از یک انتخابگر فهرست داغ برای افزودن یا حذف همزمان چندین موضوع به یا از یک فهرست داغ در طول یک ویرایش انبوه استفاده کنید.
مجوزهای لیست داغ را تنظیم کنید
برای تنظیم مجوز برای سایر کاربران و گروهها، باید مجوز مدیر فهرست داغ داشته باشید.
برای تنظیم مجوزها برای فهرست داغ:
در پیمایش سمت چپ، فهرست داغی را که میخواهید مجوزها را تغییر دهید، پیدا کنید.
نشانگر را روی فهرست داغ نگه دارید و روی دکمه کشویی کلیک کنید.
تنظیمات را انتخاب کنید.
پنجره جزئیات لیست داغ ظاهر می شود.
روی زبانه Access Control کلیک کنید و در صورت نیاز مجوزهایی را برای لیست داغ اعطا کنید.
روی Update کلیک کنید.
هر کاربر یا گروهی که به فهرست داغ مجوز داده است باید یک حساب Google داشته باشد. در غیر این صورت، کاربر با یک حاشیه قرمز نشان داده می شود و یک پیغام خطا کاربر(های) نامعتبر را نشان می دهد.
یک فهرست داغ به ناوبری اضافه کنید
برای افزودن آن به پیمایش سمت چپ، باید مجوز Admin ، View و افزودن یا فقط مشاهده را در فهرست داغ داشته باشید.
برای افزودن فهرست داغ:
روی نماد ذره بین در کنار Hotlists در ناوبری سمت چپ کلیک کنید.

در صورت درخواست، فهرست داغ را با کلمات کلیدی در نام یا توضیحات آن جستجو کنید. شما فقط میتوانید فهرستهای داغ را جستجو کنید که در آنها مجوز Admin ، View and Append یا فقط مشاهده دارید.
همچنین میتوانید از
owner:[NAME]برای جستجوی نام کاربری که دارای مجوز Admin است استفاده کنید.برای افزودن فهرست داغ به بخش Hotlists در ناوبری سمت چپ، روی ستاره کنار نتیجه جستجو کلیک کنید.
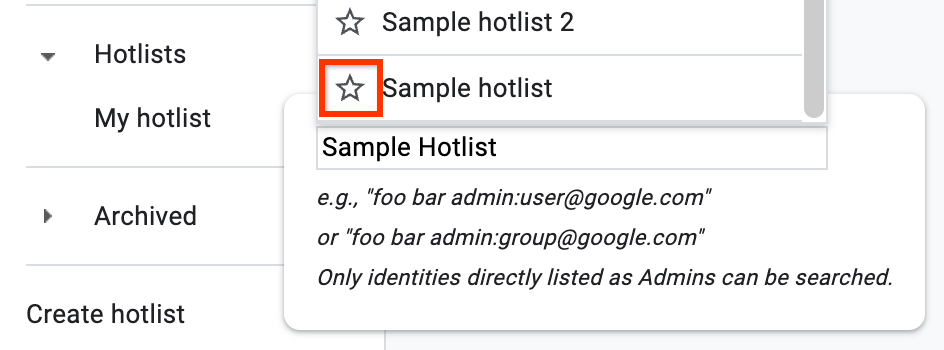
برای مشاهده لیست مشکلات موجود در فهرست داغ، روی نتیجه جستجو کلیک کنید.
همچنین میتوانید با کلیک بر روی نماد ستاره که در سمت چپ نام فهرست داغ قرار دارد، فهرست داغ را از صفحه مشکلات اضافه کنید.
حذف فهرست داغ از پیمایش
اگر صاحب فهرست داغ نیستید، میتوانید با حذف ستاره آن را از پیمایش حذف کنید. اگر شما مالک هستید، می توانید آن را با بایگانی حذف کنید.
برای حذف فهرست داغ از پیمایش.
فهرست داغی را که می خواهید حذف کنید در پیمایش سمت چپ پیدا کنید و آن را باز کنید.
در سمت چپ نام فهرست داغ، روی Un-star this hotlist کلیک کنید.
اگر شما مالک لیست داغ هستید یا اگر مجوز مدیریت را در فهرست داغ دارید:
نشانگر را روی فهرست داغ نگه دارید و روی نماد "بیشتر" کلیک کنید.
تنظیمات را انتخاب کنید.
پنجره جزئیات لیست داغ ظاهر می شود.
روی دکمه Archive در نوار بالا کلیک کنید.
روی تایید کلیک کنید. این لیست داغ را برای همه کاربرانی که به آن دسترسی داشتند بایگانی می کند.
لیست های داغ بایگانی شده دیگر در پیمایش سمت چپ ظاهر نمی شوند و دیگر به عنوان تراشه در صفحات شماره ظاهر نمی شوند.