Comienza a usar la biblioteca cliente de .NET
Organiza tus páginas con colecciones
Guarda y categoriza el contenido según tus preferencias.
Jeff Fisher, equipo de APIs de datos de Google
Agosto de 2007
Introducción
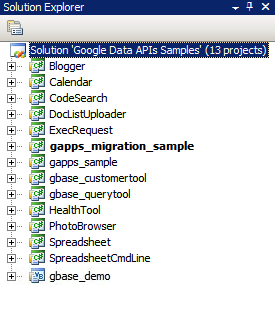
Figura 1: La solución de la API de Google Data
Para muchos desarrolladores, la parte más difícil de un proyecto nuevo es ponerlo en marcha: instalar paquetes de software nuevos, configurar un entorno de desarrollo y aprender a usar bibliotecas nuevas. En este artículo, reuní algunas instrucciones paso a paso para comenzar a usar la biblioteca cliente de .NET con Visual Studio 2005 para Windows o Mono para Linux y otros sistemas operativos Unix. Espero que esto te ahorre tiempo para comenzar y te permita trabajar rápidamente con algo de código.
Visual Studio 2008
Si aún no tienes instalado Visual Studio 2008, te recomendamos que uses Visual C# 2008 Express Edition, una versión gratuita de Visual Studio que te permitirá trabajar con la biblioteca cliente de .NET.
Configura tu entorno
- Descarga la versión MSI más reciente de la biblioteca cliente desde http://code.google.com/p/google-gdata/downloads/list.
- Ejecuta el archivo MSI descargado para instalar el paquete. De forma predeterminada, se instalará en "C:\Program Files\Google\Google Data API SDK\". En los demás ejemplos de este artículo, se supondrá que instalaste la biblioteca cliente en esta ubicación.
- Abre el archivo de solución llamado "Google Data API SDK" en la carpeta "Google Data API SDK" del menú Inicio.
Compilación y ejecución de muestras
- Verifica que la ejecución de "Compilar > Compilar solución" se complete sin errores.
- Para crear una compilación de depuración, ve a "Build > Configuration Manager" y selecciona "Debug" como la configuración de solución activa. Luego, selecciona "Build > Build Solution".
- Los archivos binarios y DLL que acabas de compilar se encuentran en "C:\Program Files\Google\Google Data API SDK\Sources\Samples\". Por ejemplo, puedes ejecutar la aplicación de ejemplo para Calendar ejecutando "C:\Program Files\Google\Google Data API SDK\Sources\Samples\calendar\bin\Debug\Calendar.exe". También hay algunos accesos directos al menú Inicio para estas muestras.
Desarrolla tu propia aplicación
Si deseas desarrollar en un proyecto fuera del archivo de solución proporcionado por el archivo MSI, debes agregar los archivos DLL de la biblioteca cliente como una ruta de referencia.
- Crea o abre un proyecto fuera de la solución del SDK de las APIs de Google.
- Selecciona "Agregar referencia" en el menú Proyecto.
- Haz clic en la pestaña Explorar.
- Navega al directorio Redist en el SDK: "C:\Program Files\Google\Google Data API SDK\Redist".
- Selecciona los archivos DLL que usará tu código. Google.GData.Extensions.dll y Google.GData.Client.dll serán necesarios para la mayoría de los proyectos, junto con el archivo DLL específico de los servicios de Google que uses en tu aplicación.
Nota: También hay un archivo de solución para las bibliotecas cliente en dispositivos móviles. De forma predeterminada, se encuentra en "C:\Program Files\Google\Google Data API SDK\Sources\Library\VS2005.mobile". Esta solución solo compilará los archivos DLL para las bibliotecas cliente.
Cómo ejecutar las pruebas de NUnit
Asegurarse de que se aprueben las pruebas de NUnit adecuadas es un paso importante si realizas cambios en las bibliotecas cliente o planeas contribuir con ellas. Si planeas usar las bibliotecas cliente sin modificaciones, por lo general, no es necesario ejecutarlas.
- Descarga la versión del archivo MSI de .NET 2.0 de NUnit desde http://www.nunit.org/index.php?p=download.
- Ejecuta el archivo MSI para instalar NUnit. La ubicación de instalación predeterminada es similar a "C:\Program Files\NUnit 2.4.8". Te recomendamos que cambies esta ruta a algo como "C:\Program Files\NUnit" para que puedas actualizar NUnit en el futuro sin tener que cambiar la ruta en tu proyecto de Visual Studio.
- Ve al directorio "C:\Program Files\Google\Google Data API SDK\Sources\Library\VS2005" y abre el archivo de solución llamado "Google Data APIs".
Verás el asistente para la conversión, ya que se trata de un archivo de proyecto de Visual Studio 2005. Haz clic en las indicaciones o simplemente en el botón “Finalizar”. Debería mostrar el registro de conversión, que se puede ignorar.
- Ahora se debe agregar NUnit como una ruta de referencia. Haz clic con el botón derecho en el proyecto "unittests" en el Explorador de soluciones a la derecha y selecciona "Propiedades". Ahora, haz clic en la pestaña "Rutas de referencia" en la ventana que se abre. Ingresa la ubicación del subdirectorio "bin" de la instalación de NUnit como una ruta de acceso de referencia y haz clic en "Agregar carpeta". Por ejemplo, si NUnit está instalado en "C:\Program Files\NUnit\", se debe ingresar "C:\Program Files\NUnit\bin". Asegúrate de guardar este cambio antes de continuar.
- Sigue los pasos que se indican en Compilación y ejecución de muestras para volver a compilar la biblioteca cliente y las pruebas de unidades.
- Copia el archivo "unittests.dll.config" de "C:\Program Files\Google\Google Data API SDK\Sources\Library\unittests\" en tu directorio de compilación de depuración "C:\Program Files\Google\Google Data API SDK\Source\Library\VS2005\unittests\bin\Debug\". Recuerda editar el archivo para incluir la información adecuada para las pruebas que ejecutes. Por ejemplo, Base requiere una clave de API y Calendar requiere un nombre de usuario y una contraseña. Se recomienda usar una cuenta de prueba sin datos reales para evitar que las pruebas unitarias borren información.
- Abre NUnit desde el menú Inicio.
- Ve a "File > Open Project" y selecciona el archivo "unittests.dll" de "C:\Program Files\Google\Google Data API SDK\Source\Library\VS2005\unittests\bin\Debug\".
- Ejecuta las pruebas de unidades que te interesen. Recuerda que ciertas pruebas requieren que se establezcan parámetros en unittests.dll.config para que funcionen. Si ejecutas las pruebas de estrés para ciertos servicios, es posible que tu cuenta de prueba se marque como generadora de spam y no puedas enviar contenido de forma programática a los servidores de Google sin encontrar desafíos de CAPTCHA.
Mono
Mono es un proyecto de código abierto que te permite ejecutar aplicaciones cliente y servidor de .NET en Linux, Solaris, Mac OS X, Windows y Unix. Ofrecemos un archivo ZIP independiente de nuestra biblioteca cliente para los desarrolladores que deseen trabajar en una de estas plataformas.
Configura tu entorno
- Descarga la versión más reciente del archivo ZIP de la biblioteca cliente desde http://code.google.com/p/google-gdata/downloads/list.
- Extrae a un directorio local (p. ej., “/scratch/gdata.NET”).
- Usa el administrador de paquetes de tu distribución para instalar Mono.
También puedes descargarlo desde http://www.mono-project.com.
- En algunas distribuciones, debes asegurarte de que el archivo nunit.framework.dll esté vinculado correctamente a la biblioteca de Mono. Si Mono se instaló en "/usr/lib/mono", asegúrate de que haya vínculos simbólicos en "/usr/lib/mono/1.0" y "/usr/lib/mono/2.0" para nunit.framework.dll (que debería instalarse en "/usr/lib/mono/gac/nunit.framework/<someversionstring>/nunit.framework.dll").
Compilación y ejecución de muestras
- Suponiendo que instalaste la biblioteca cliente en "/scratch/gdata.NET", cambia al directorio "/scratch/gdata.NET/clients/cs".
- Edita el archivo Makefile según la versión de .NET que desees usar. Para .NET 1.x, usa
CSC=mcs
y, para .NET 2.x, usa CSC=gmcs
.
- Ejecuta
make
para compilar las bibliotecas y las aplicaciones de ejemplo.
- Ejecuta
make install
si deseas instalar los archivos DLL de la biblioteca cliente en la biblioteca de Mono.
Desarrolla tu propia aplicación
Si ejecutaste un make install
después de compilar la biblioteca cliente, deberías poder incluir las bibliotecas en tu propio código pasando -r:Google.GData.Extensions.dll -r:Google.GData.Client.dll
al compilador de Mono C# junto con referencias a los archivos DLL de cualquier extensión de servicio específica que desees usar.
Cómo ejecutar las pruebas de NUnit
- Copia el archivo unittests.dll.config de "/scratch/gdata.NET/clients/cs/src/unittests" a "/scratch/gdata.NET/clients/cs/".
- Edita "/scratch/gdata.NET/clients/cs/unittests.dll.config" para incluir la información adecuada para las pruebas que ejecutas. Por ejemplo, Base requiere una clave de API y Calendar requiere un nombre de usuario y una contraseña. Te recomiendo que uses una cuenta de prueba sin datos activos para evitar que las pruebas unitarias borren información.
- Después de compilar la biblioteca, habrá un archivo unittests.dll en "/scratch/gdata.NET/clients/cs". Usa este archivo DLL con el administrador de pruebas de NUnit que prefieras (nunit-console, gnunit, etc.).
Conclusión
Ahora deberías poder compilar las bibliotecas y ejecutar el código de muestra. Sin embargo, esto es solo el comienzo. Te recomiendo que leas la documentación que se encuentra en el directorio "…/clients/cs/docs" de la biblioteca cliente.
También puedes consultar la Guía para desarrolladores de la biblioteca cliente de.NET, la página del proyecto y la guía de referencia, y el foro de la biblioteca cliente de Google Data para .NET.
Herramientas a las que se hace referencia en este artículo:
¡Mucha suerte con tu próxima aplicación .NET!
Salvo que se indique lo contrario, el contenido de esta página está sujeto a la licencia Atribución 4.0 de Creative Commons, y los ejemplos de código están sujetos a la licencia Apache 2.0. Para obtener más información, consulta las políticas del sitio de Google Developers. Java es una marca registrada de Oracle o sus afiliados.
Última actualización: 2025-07-27 (UTC)
[[["Fácil de comprender","easyToUnderstand","thumb-up"],["Resolvió mi problema","solvedMyProblem","thumb-up"],["Otro","otherUp","thumb-up"]],[["Falta la información que necesito","missingTheInformationINeed","thumb-down"],["Muy complicado o demasiados pasos","tooComplicatedTooManySteps","thumb-down"],["Desactualizado","outOfDate","thumb-down"],["Problema de traducción","translationIssue","thumb-down"],["Problema con las muestras o los códigos","samplesCodeIssue","thumb-down"],["Otro","otherDown","thumb-down"]],["Última actualización: 2025-07-27 (UTC)"],[[["\u003cp\u003eThis guide provides step-by-step instructions for setting up and using the Google Data .NET client library with either Visual Studio 2008 or Mono.\u003c/p\u003e\n"],["\u003cp\u003eDevelopers can use this library to interact with various Google services like Calendar by compiling and running provided sample applications or by developing their own applications.\u003c/p\u003e\n"],["\u003cp\u003eThe guide includes details on compiling the library, running provided unit tests for verifying functionality, and configuring the development environment for both Windows and Unix-based systems.\u003c/p\u003e\n"],["\u003cp\u003eAdditional resources such as the .NET Client Library Developer's Guide and project forums are available for further assistance.\u003c/p\u003e\n"]]],[],null,["# Getting Started with the .NET Client Library\n\n*Jeff Fisher, Google Data APIs team\nAugust 2007*\n\n- [Introduction](#introduction)\n- [Visual Studio 2008](#vs2005)\n - [Setting up your environment](#vssetup)\n - [Compiling and running samples](#vscompile)\n - [Developing your own application](#vsdevelop)\n - [Running the NUnit tests](#vsnunit)\n- [Mono](#mono)\n - [Setting up your environment](#monosetup)\n - [Compiling and running samples](#monocompile)\n - [Developing your own application](#monodevelop)\n - [Running the NUnit tests](#mononunit)\n- [Conclusion](#conclusion)\n\n### Introduction\n\n\u003cbr /\u003e\n\n**Figure 1: The Google Data API solution**\n\nFor many developers, the most difficult part of a new project is getting the ball rolling-installing new software packages, configuring a development environment, and learning new libraries. In this article, I have pulled together some step-by-step instructions for how to begin with the .NET client library using either Visual Studio 2005 for Windows or Mono for Linux and other Unix operating systems. It is my hope that this will save you some time in getting started and let you quickly start working with some code.\n\nVisual Studio 2008\n------------------\n\nIf you do not already have Visual Studio 2008 installed, you may want to consider using [Visual C# 2008 Express Edition](http://msdn.microsoft.com/en-us/library/orm-9780596521066-01-02.aspx), a free version of Visual Studio that will allow you to work with the .NET client library.\n\n### Setting up your environment\n\n1. Download the latest MSI release of the client library from [http://code.google.com/p/google-gdata/downloads/list](//code.google.com/p/google-gdata/downloads/list).\n2. Run the downloaded MSI file to install the package. It will install to \"C:\\\\Program Files\\\\Google\\\\Google Data API SDK\\\\\" by default. Further examples in this article will assume you installed the client library to this location.\n3. Open the solution file called \"Google Data API SDK\" in the \"Google Data API SDK\" folder in the Start Menu.\n\n### Compiling and running samples\n\n1. Verify that running \"Build \\\u003e Build Solution\" completes without any errors.\n2. To create a Debug build go to \"Build \\\u003e Configuration Manager\" and select \"Debug\" as the active solution configuration. Then select \"Build \\\u003e Build Solution\".\n3. The binaries and DLL files you have just compiled can be found in \"C:\\\\Program Files\\\\Google\\\\Google Data API SDK\\\\Sources\\\\Samples\\\\\" For example, you can run the sample application for Calendar by executing \"C:\\\\Program Files\\\\Google\\\\Google Data API SDK\\\\Sources\\\\Samples\\\\calendar\\\\bin\\\\Debug\\\\Calendar.exe\". There are also some Start Menu shortcuts to these samples.\n\n### Developing your own application\n\nIf you want to develop in a project outside of the solution file provided by the MSI file, you need to add the client library DLL files as a reference path.\n\n1. Create or open a project outside of the Google API SDK solution.\n2. Select \"Add Reference\" from the Project menu.\n3. Click on the Browse tab.\n4. Navigate to the Redist directory in the SDK: \"C:\\\\Program Files\\\\Google\\\\Google Data API SDK\\\\Redist\".\n5. Select the DLL files that will be used by your code. Google.GData.Extensions.dll and Google.GData.Client.dll will be needed for most projects, along with the DLL file specific to the Google service(s) you are using in your application.\n\n**Note:** There is also a solution file for client libraries on Mobile devices. It is found in \"C:\\\\Program Files\\\\Google\\\\Google Data API SDK\\\\Sources\\\\Library\\\\VS2005.mobile\" by default. This solution will only compile the DLL files for the client libraries.\n\n### Running the NUnit tests\n\nMaking sure the appropriate NUnit tests pass is an important step if you make any changes to the client libraries or plan to contribute to them. If you plan to use the client libraries without modifications then there is normally no need to run them.\n\n1. Download the .NET 2.0 MSI file release of NUnit from \u003chttp://www.nunit.org/index.php?p=download\u003e.\n2. Install NUnit by running the MSI file. The default install location is similar to \"C:\\\\Program Files\\\\NUnit 2.4.8\". You may wish to change this to something like \"C:\\\\Program Files\\\\NUnit\" so you can upgrade NUnit in the future without having to change the path in your Visual Studio project.\n3. Go to the \"C:\\\\Program Files\\\\Google\\\\Google Data API SDK\\\\Sources\\\\Library\\\\VS2005\" directory and open the solution file named \"Google Data APIs\". You will see the Conversion Wizard since this is a Visual Studio 2005 project file. Either click through the prompts or simply click on the \"Finish\" button. It should display the conversion log, which can be ignored.\n4. Now NUnit must be added as a reference path. Right click on the \"unittests\" project in the Solution Explorer on the right and select \"Properties\". Now click on the \"Reference Paths\" tab within the window that opens. Enter in the location of the \"bin\" subdirectory of the NUnit installation as a reference path and click \"Add Folder\". For example, if NUnit is installed to \"C:\\\\Program Files\\\\NUnit\\\\\", one would enter \"C:\\\\Program Files\\\\NUnit\\\\bin\". Be sure to save this change before continuing.\n5. Follow the steps listed in [Compiling and running samples](#vscompile) to rebuild the client library and the unit tests.\n6. Copy the \"unittests.dll.config\" file in \"C:\\\\Program Files\\\\Google\\\\Google Data API SDK\\\\Sources\\\\Library\\\\unittests\\\\\" to your debug build directory \"C:\\\\Program Files\\\\Google\\\\Google Data API SDK\\\\Source\\\\Library\\\\VS2005\\\\unittests\\\\bin\\\\Debug\\\\\". Remember to edit the file to include the appropriate information for the tests you are running. For example, Base requires an API key and Calendar requires a username and password. It is recommended to use a test account without any live data to avoid having information deleted by the unit tests.\n7. Open NUnit from the Start Menu.\n8. Go to \"File \\\u003e Open Project\" and select the \"unittests.dll\" file from \"C:\\\\Program Files\\\\Google\\\\Google Data API SDK\\\\Source\\\\Library\\\\VS2005\\\\unittests\\\\bin\\\\Debug\\\\\".\n9. Run the unit tests you are interested in. Remember that certain tests require parameters be set in unittests.dll.config to work. If you run the stress tests for certain services you may have your test account flagged as generating spam and be unable to programmatically submit content to Google servers without encountering CAPTCHA challenges.\n\nMono\n----\n\nMono is an open source project that allows you to run .NET client and server applications on Linux, Solaris, Mac OS X, Windows, and Unix. We offer a separate ZIP file of our client library for developers who want to work on one of these platforms.\n\n### Setting up your environment\n\n1. Download the latest ZIP file release of the client library from [http://code.google.com/p/google-gdata/downloads/list](//code.google.com/p/google-gdata/downloads/list)\n2. Extract to a local directory (e.g. \"/scratch/gdata.NET\")\n3. Use your distribution's package management to install Mono. Alternatively, you can download it from \u003chttp://www.mono-project.com\u003e.\n4. In some distributions you have to make sure that the nunit.framework.dll file is properly linked into the mono library. If mono was installed to \"/usr/lib/mono\", then ensure that there are symbolic links in \"/usr/lib/mono/1.0\" and \"/usr/lib/mono/2.0\" for nunit.framework.dll (which should be installed in \"/usr/lib/mono/gac/nunit.framework/\\\u003csomeversionstring\\\u003e/nunit.framework.dll\").\n\n### Compiling and running samples\n\n1. Assuming you installed the client library to \"/scratch/gdata.NET\", change to the \"/scratch/gdata.NET/clients/cs\" directory.\n2. Edit the Makefile depending on what version of .NET you wish to use. For .NET 1.x, use `CSC=mcs` and for .NET 2.x, use `CSC=gmcs`.\n3. Run `make` to compile the libraries and sample applications.\n4. Execute `make install` if you want to install the client library DLLs into the Mono library.\n\n### Developing your own application\n\nIf you executed a `make install` after compiling the client library, you should be able to include the libraries in your own code by passing `-r:Google.GData.Extensions.dll -r:Google.GData.Client.dll` to the Mono C# compiler along with references to the DLL files of any specific service extensions you wish to use.\n\n### Running the NUnit tests\n\n1. Copy the unittests.dll.config file from \"/scratch/gdata.NET/clients/cs/src/unittests\" to \"/scratch/gdata.NET/clients/cs/\".\n2. Edit \"/scratch/gdata.NET/clients/cs/unittests.dll.config\" to include the appropriate information for the tests you are running. For example, Base requires an API key and Calendar requires a username and password. I recommend using a test account without any live data to avoid having information deleted by the unit tests.\n3. After compiling the library there will be a unittests.dll file in \"/scratch/gdata.NET/clients/cs\". Use this DLL with your NUnit test manager of choice (nunit-console, gnunit, etc.).\n\n### Conclusion\n\nNow you should be able to compile the libraries and run the sample code. This is only the beginning, however. I encourage you to read through the documentation found in the \".../clients/cs/docs\" directory of the client library.\nYou might also want to check out the [.NET Client Library Developer's Guide](/gdata/client-cs), the [project page](http://code.google.com/p/google-gdata/) and [reference guide](http://google-gdata.googlecode.com/svn/docs/Index.html), and the [Google Data .NET client library forum](http://groups.google.com/group/gdata-dotnet-client-library).\n\nTools referenced in this article:\n\n- [Mono Project](http://www.mono-project.com/Main_Page)\n- [Visual Studio](http://msdn2.microsoft.com/en-us/vstudio/default.aspx)\n- [Visual C# 2008 Express Edition](http://msdn.microsoft.com/en-us/library/orm-9780596521066-01-02.aspx)\n- [NUnit](http://www.nunit.org/)\n\nGood luck on your next .NET application!"]]