
1. Before you begin
Geospatial Creator, powered by ARCore and Google Maps Platform, lets you create augmented-reality (AR) experiences in Adobe Aero Geospatial pre-release. It uses Google's Photorealistic 3D Tiles API to preview what the experience looks like in the real world without the need to physically visit that location. This lets creators and developers design 3D experiences with the Adobe 3D suite of apps and easily preview them in a digital twin of the world.
In this codelab, you go through the basic steps of placing 3D content with the Adobe Aero editor. You set up your environment, learn how to operate the editor, enhance your experience with triggers and behaviors, and deploy the content to Adobe Player's Play Instant App or App Clip so that you can view it in AR on your ARCore-supported Android or iOS device.
Prerequisites
- Basic knowledge of AR
- Basic knowledge of the ARCore Geospatial API
What you'll learn
- How to use Geospatial Creator in Adobe Aero.
- How to navigate the 3D map.
- How to place 3D content in the viewport.
- How to add behaviors to 3D assets.
- How to view the AR experience on your device.
What you'll need
2. Set up your environment
To use the Geospatial Creator in the Adobe Aero Geospatial pre-release, follow these steps:
3. Navigate Adobe Aero
In this step, you view the 3D representation of the area around you.
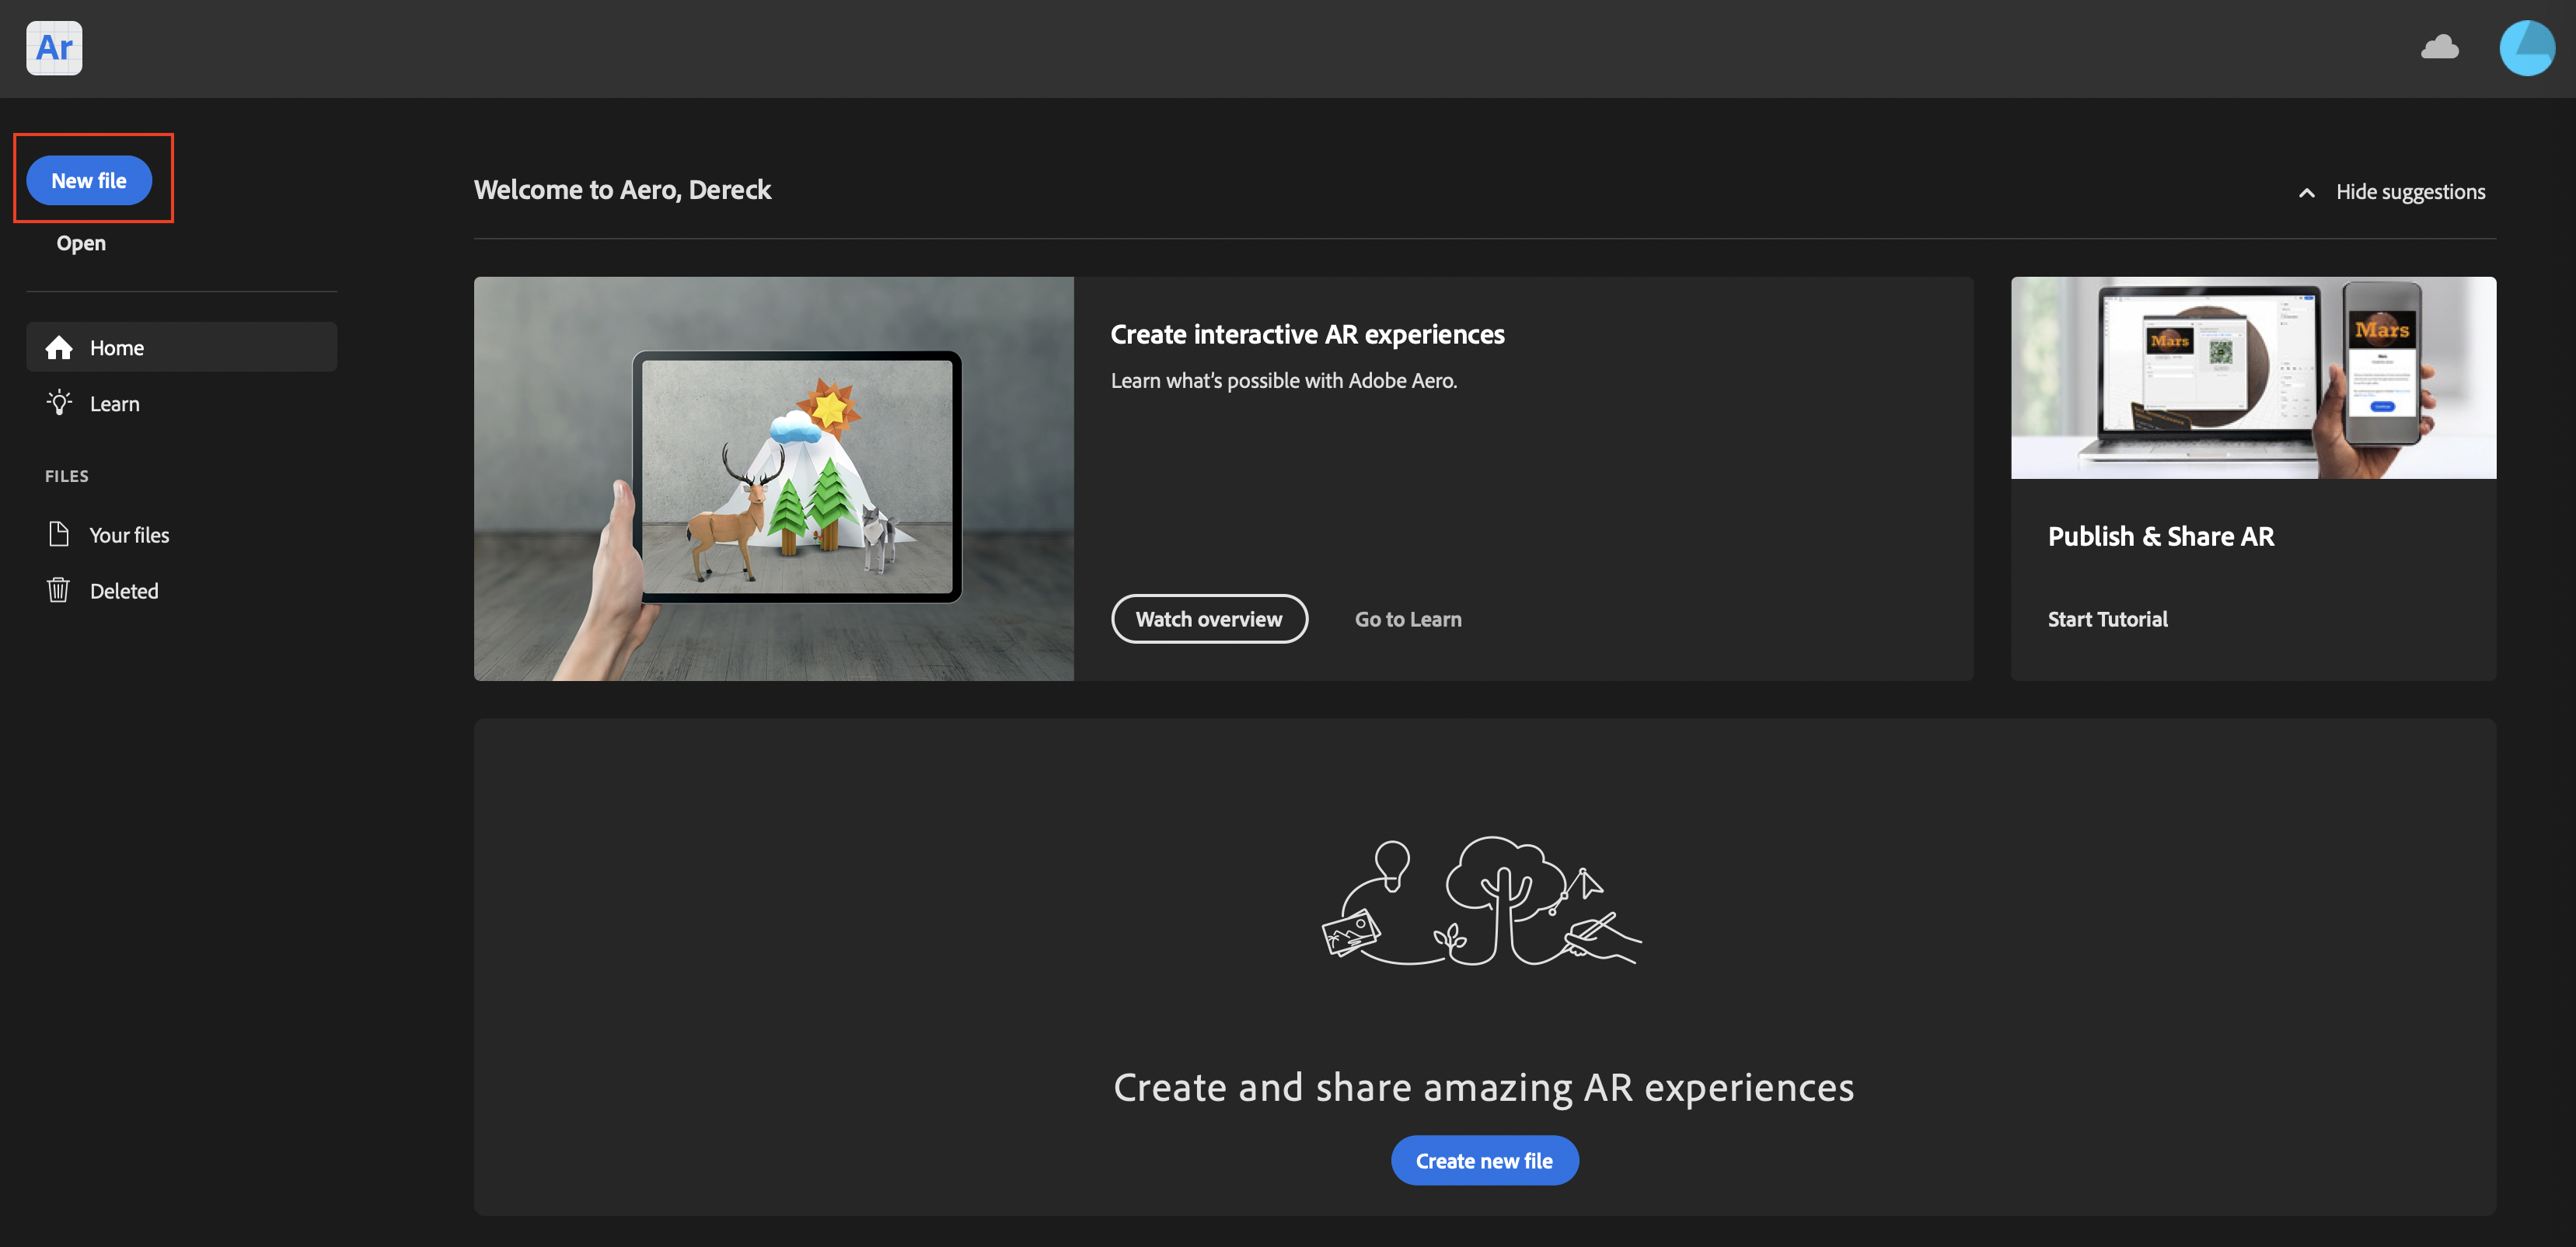
Create a project
- Open the Adobe Aero app.
- Click New file.
- Name your file. For example,
Geospatial Creator codelab. - Click OK to create the project.
Select a location
When you create a project in the Geospatial pre-release, the Select location window appears. This window lets you control which part of the world is displayed in the editor.
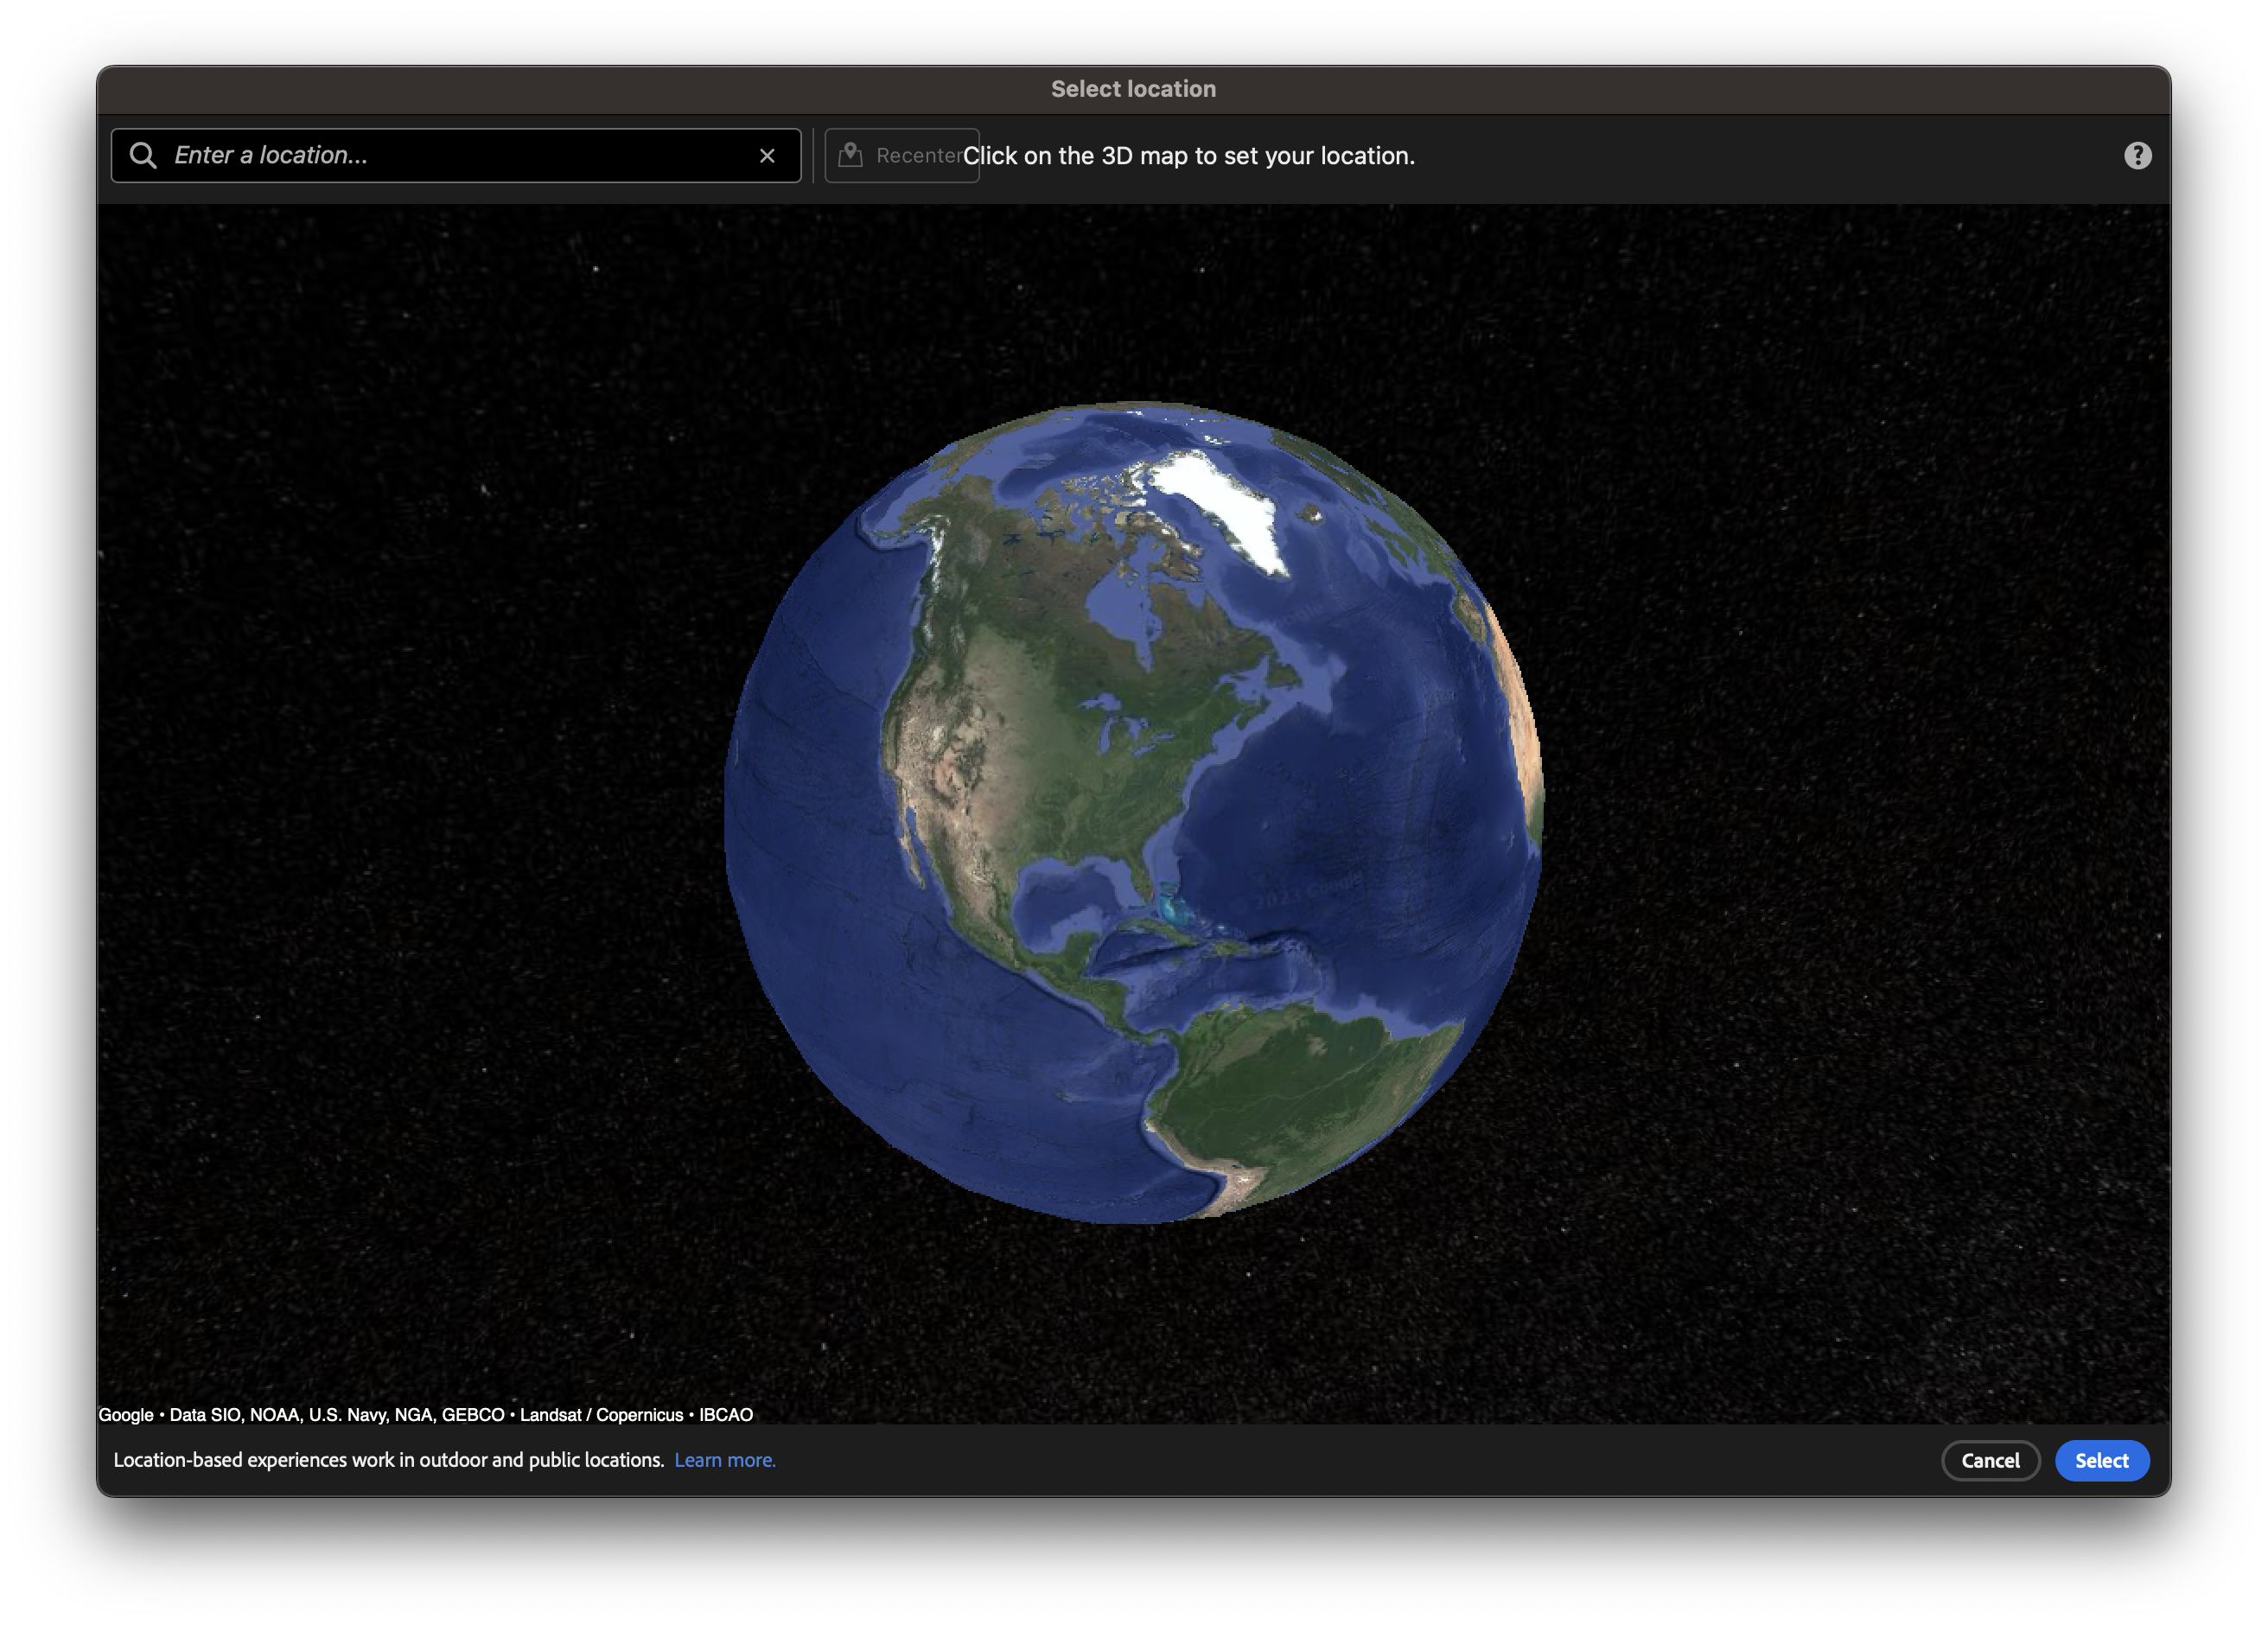
To select a location, follow these steps:
- In the text box, search for a location near you.
- Drag the world view around and use the scroll wheel to zoom.
- Click on a location on the map, and then press Select to show the location in the scene preview. In the scene preview, you see a digital representation of the selected location.
Control the viewport camera
- To rotate the camera view, click
 Orbit.
 - To drag the view horizontally and vertically, click
 Pan.
Pan. - To change the distance between the selected object and the camera, click
 Dolly.
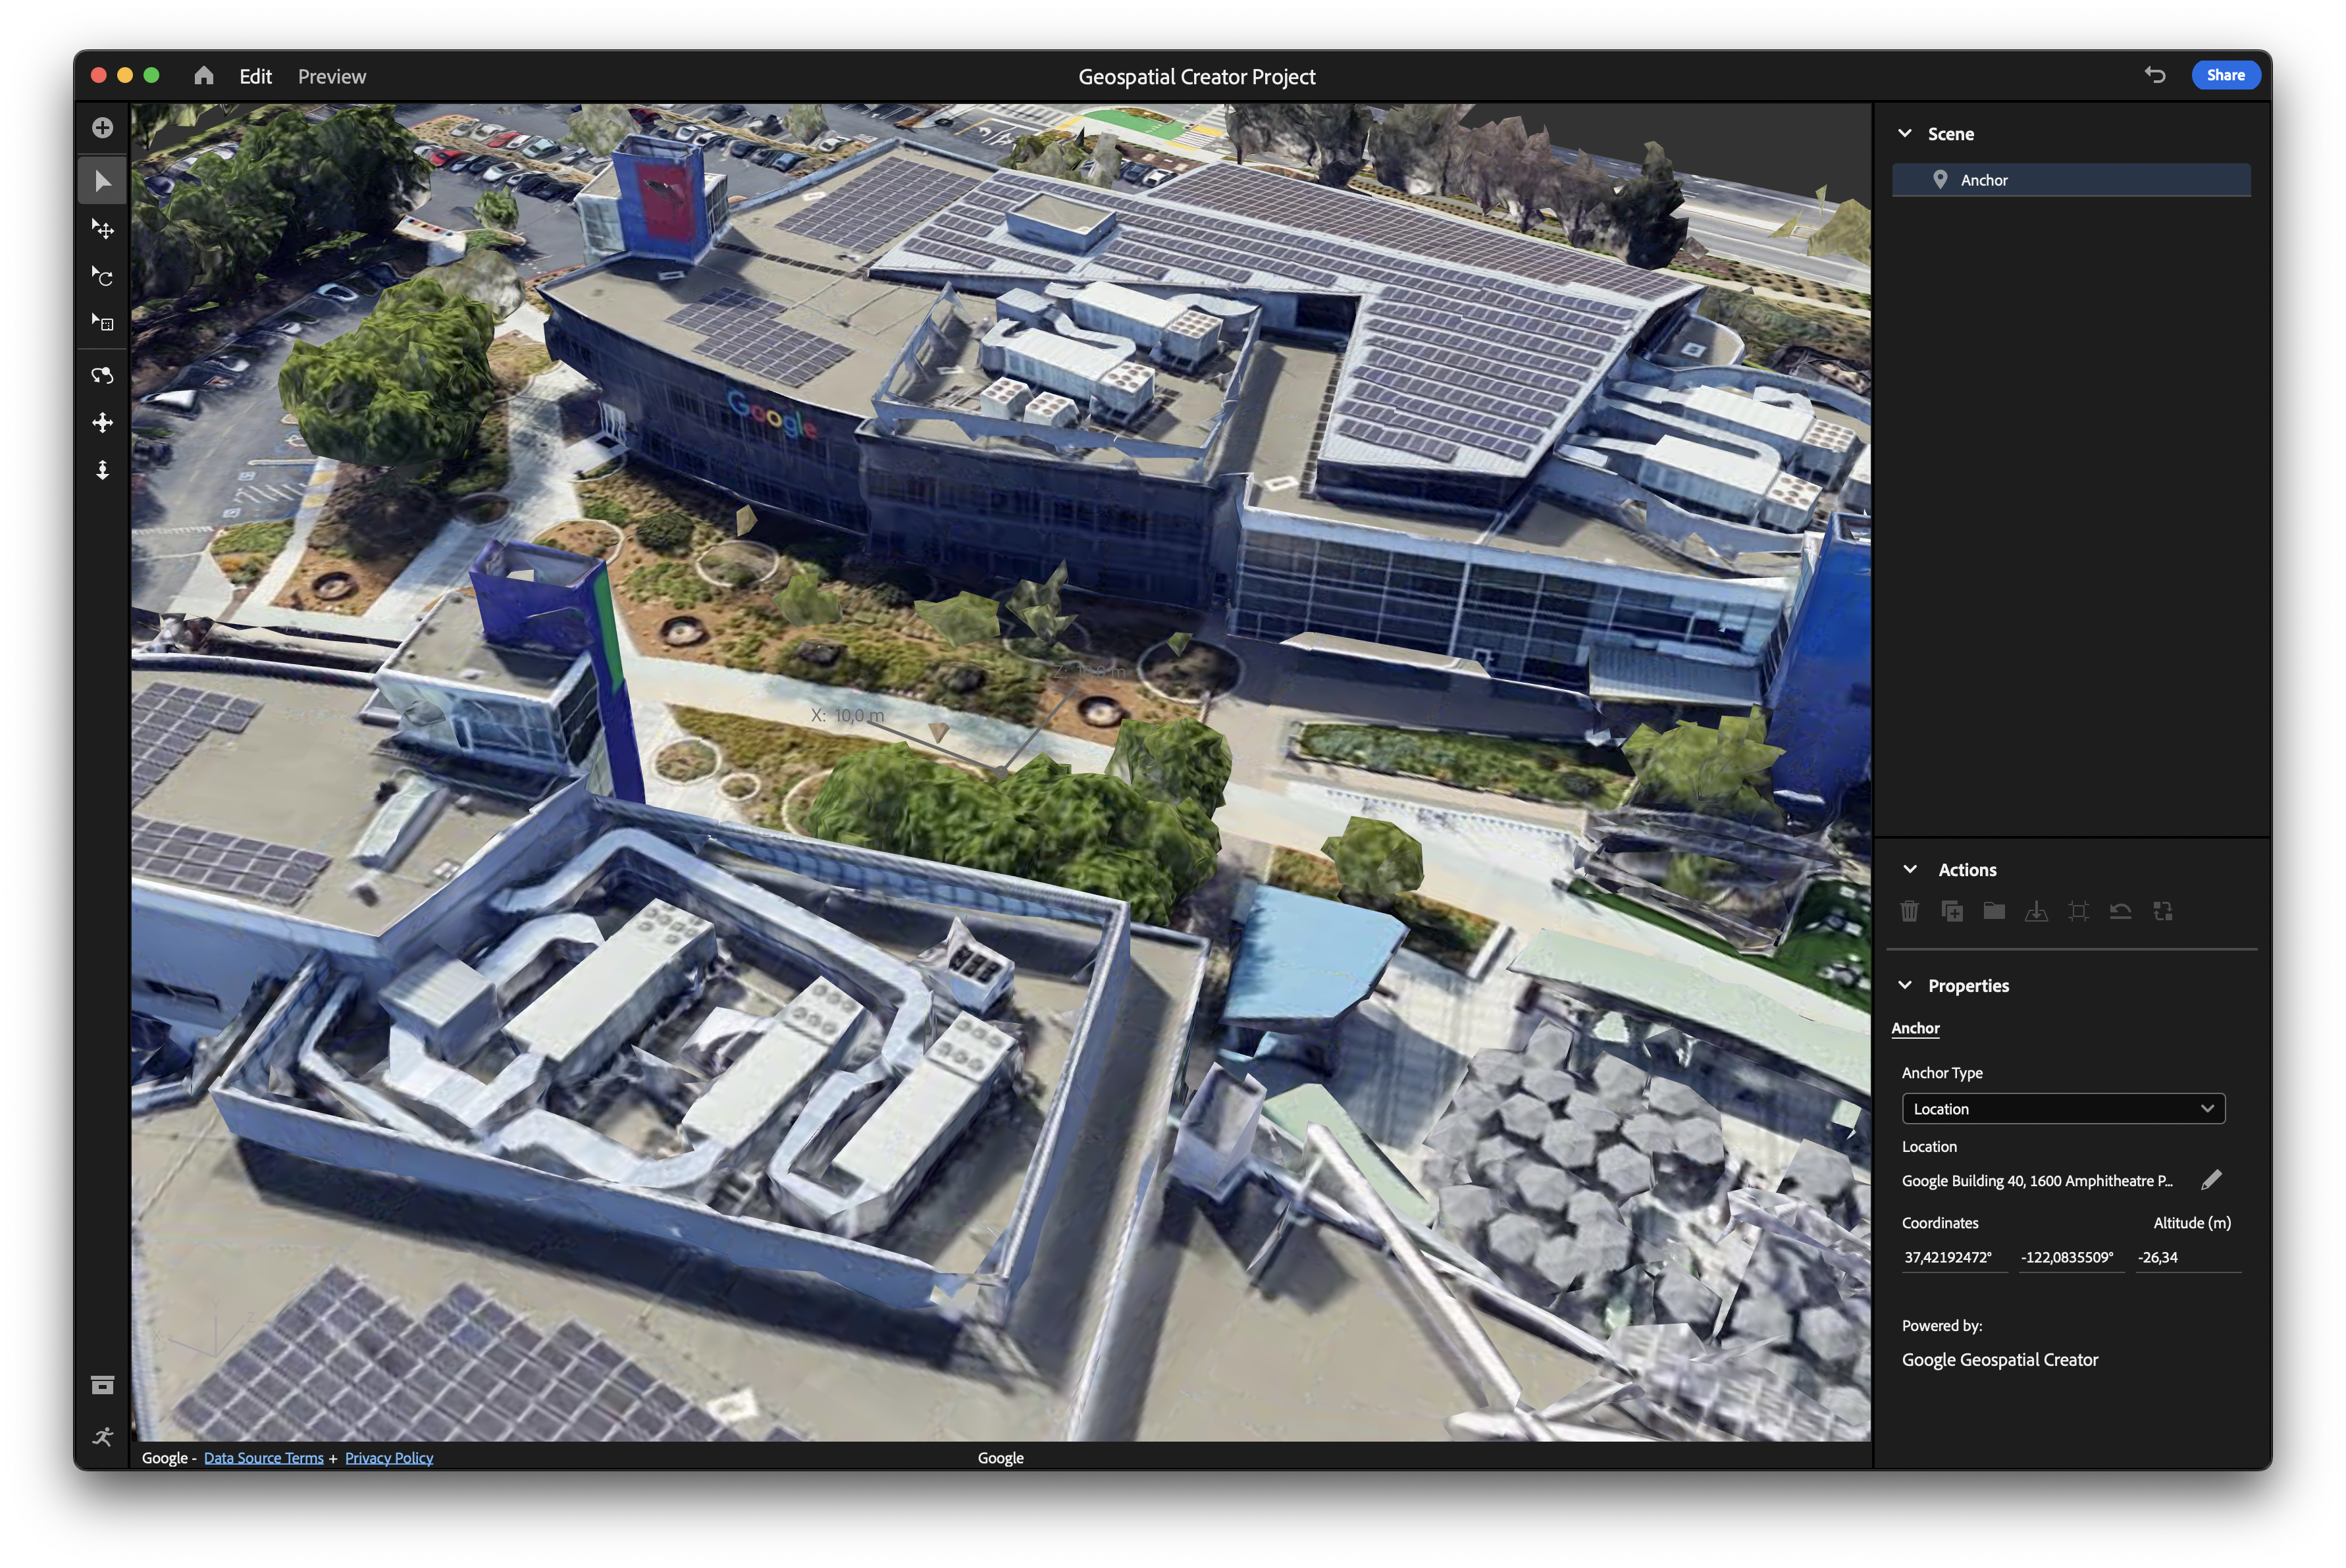
Change the selected location
If you aren't happy with the location that you selected, follow these steps:
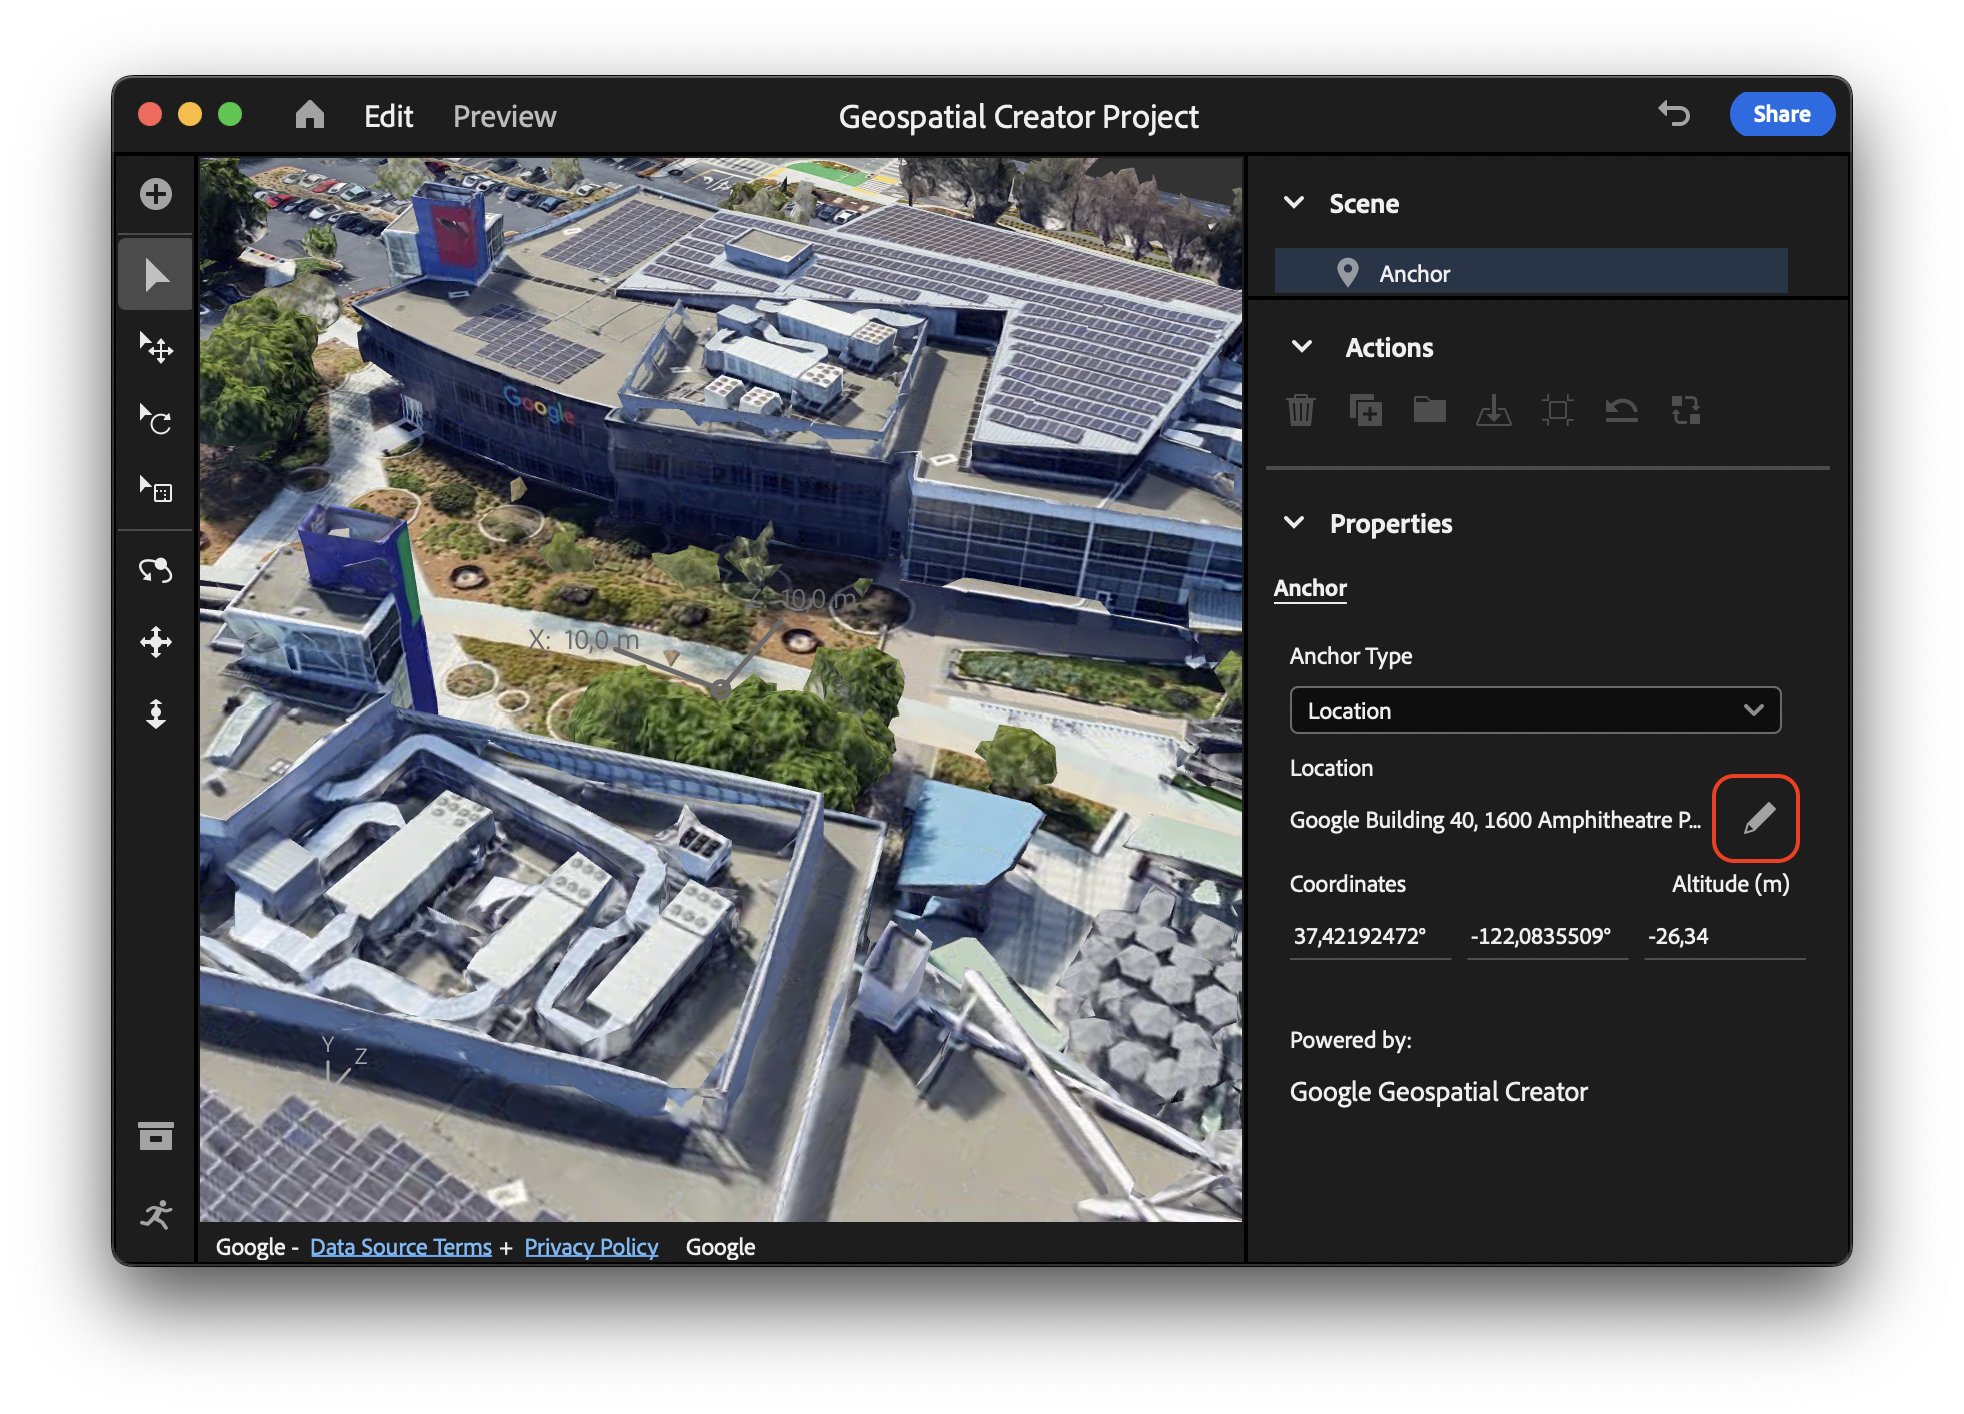
- In the Scene hierarchy panel, ensure that the anchor is selected. It's the first item in the Scene hierarchy panel.
- In the Properties panel under Location, click
 Change location to change the location.
4. Import and place a 3D asset
After you decide on a location near you, you need to import an asset that appears in your AR experience, and is anchored near the location that you selected.
Import a 3D asset
To help you with this codelab, we prepared a sample asset for you to use in your project.
To import the sample asset, follow these steps:
Resize the asset
After you add the asset, it might appear like very little has happened because the asset is too small to see!
To increase the asset's size to make it visible, follow these steps:
- In the Scene hierarchy panel, ensure that your 3D asset is selected.
- In the navigation menu, click
 Scale.
 - In the viewport, select either the red, blue, or green controls, and then drag your mouse to increase the size of the asset.
- In the Properties panel, note that the Size and Scale text boxes update to reflect the size of your asset. You can also edit these values directly. For example, you can try a size value of 300cm.
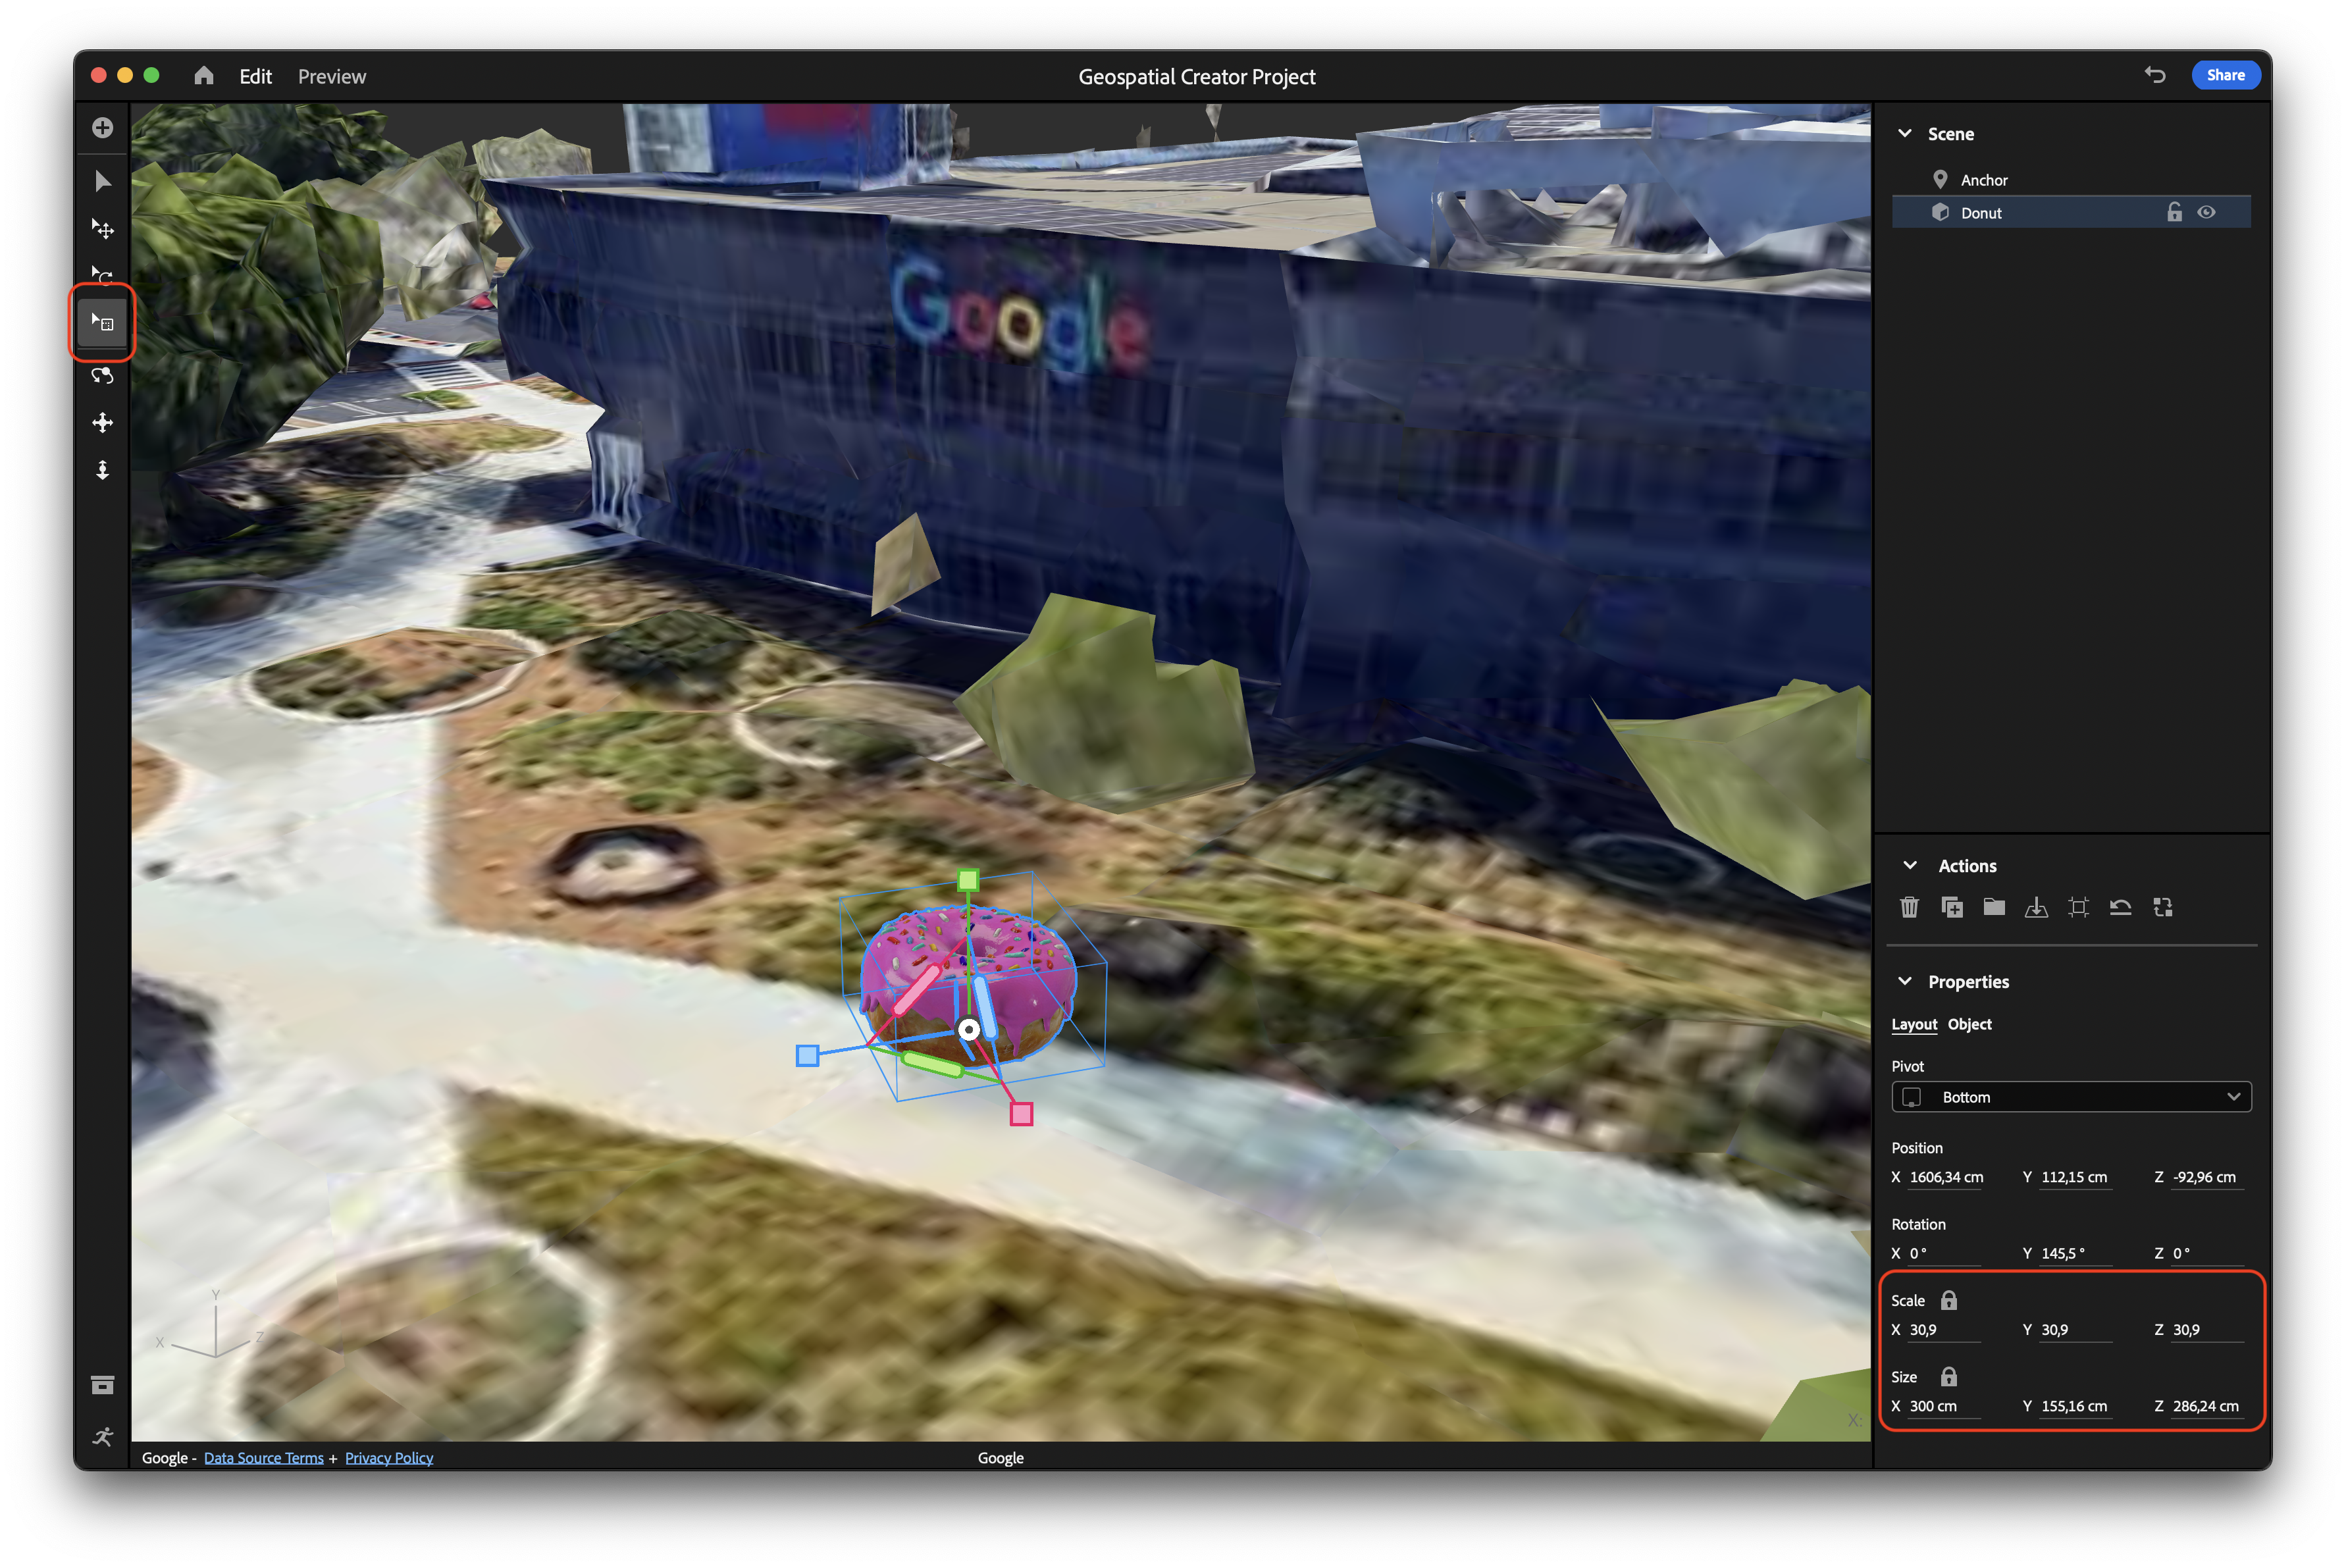
Your asset is more visible now.
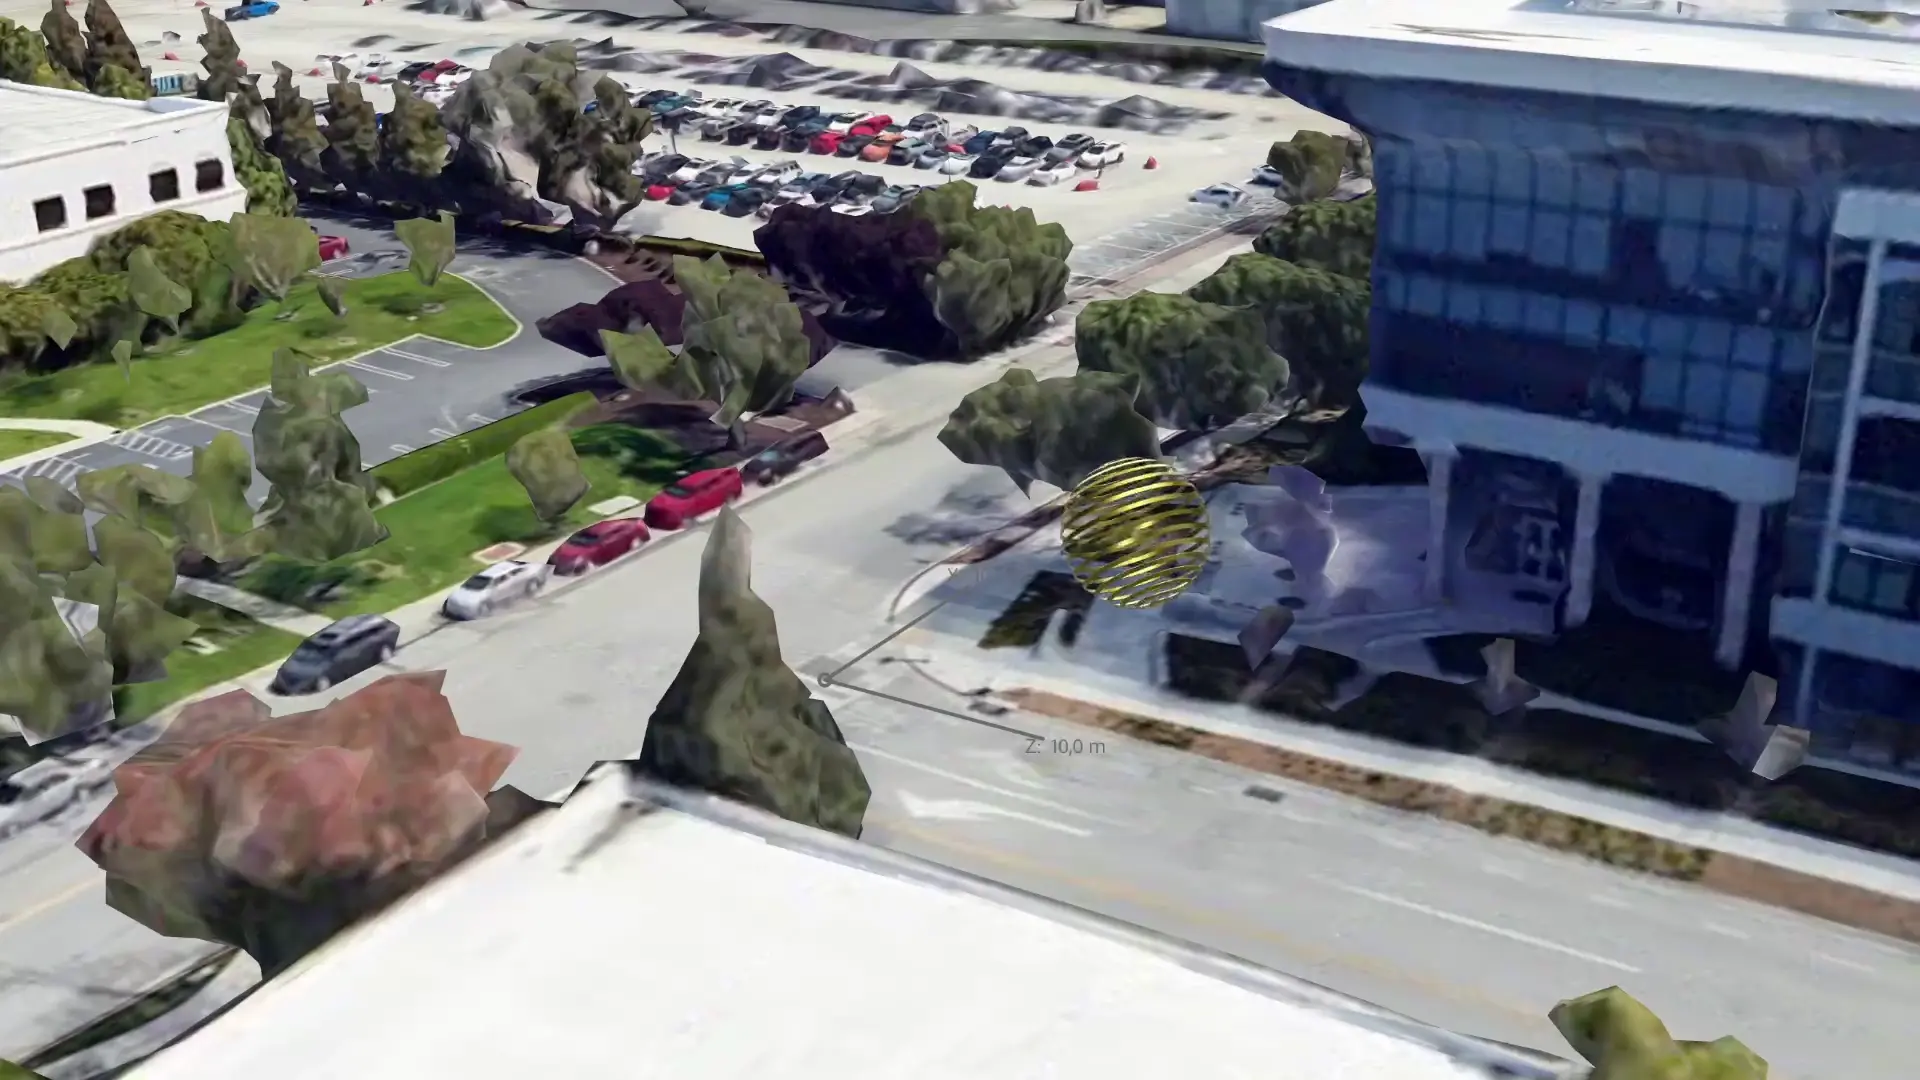
Position the asset
When you add an asset to the scene, its origin is placed at the anchor's position.
To move the anchor to a new place near the ground and position it somewhere in a location that you can find later, follow these steps:
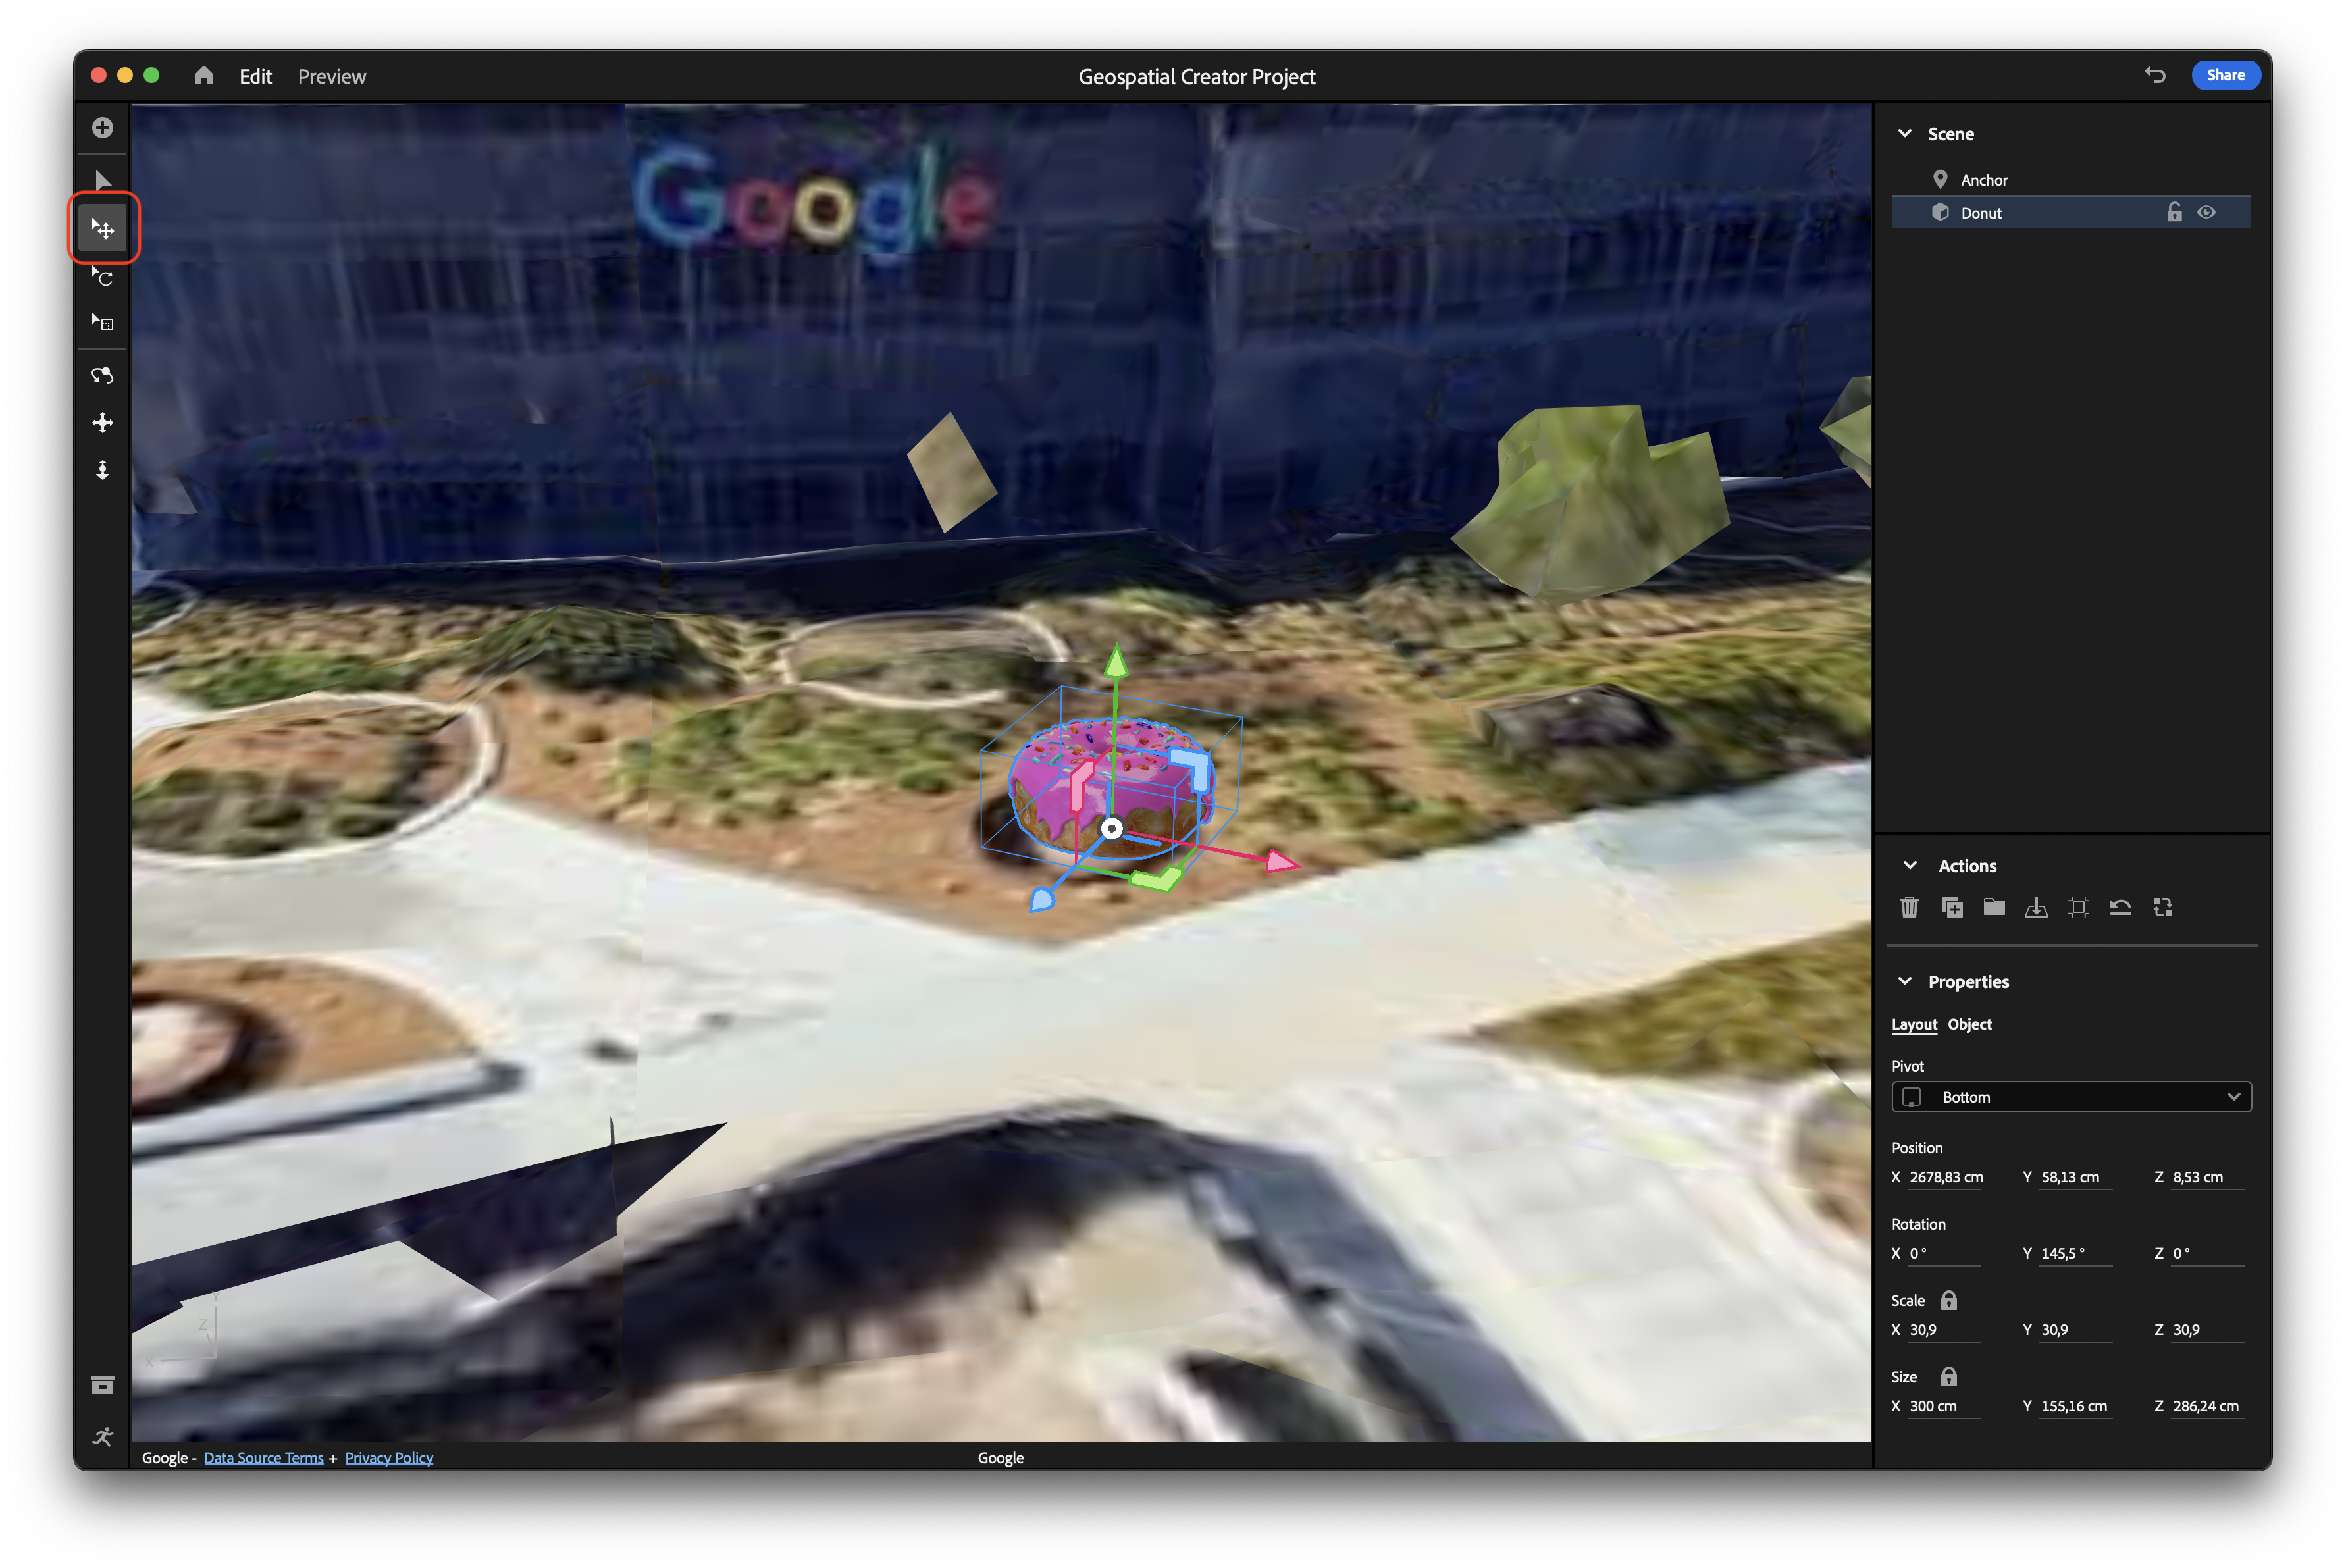
- In the navigation menu, click
 Move.
Move. - In the viewport, select either the red, blue, or green controls, and then drag your mouse to reposition the asset. Each colored control locks a certain dimension and lets you move an object along that axis.
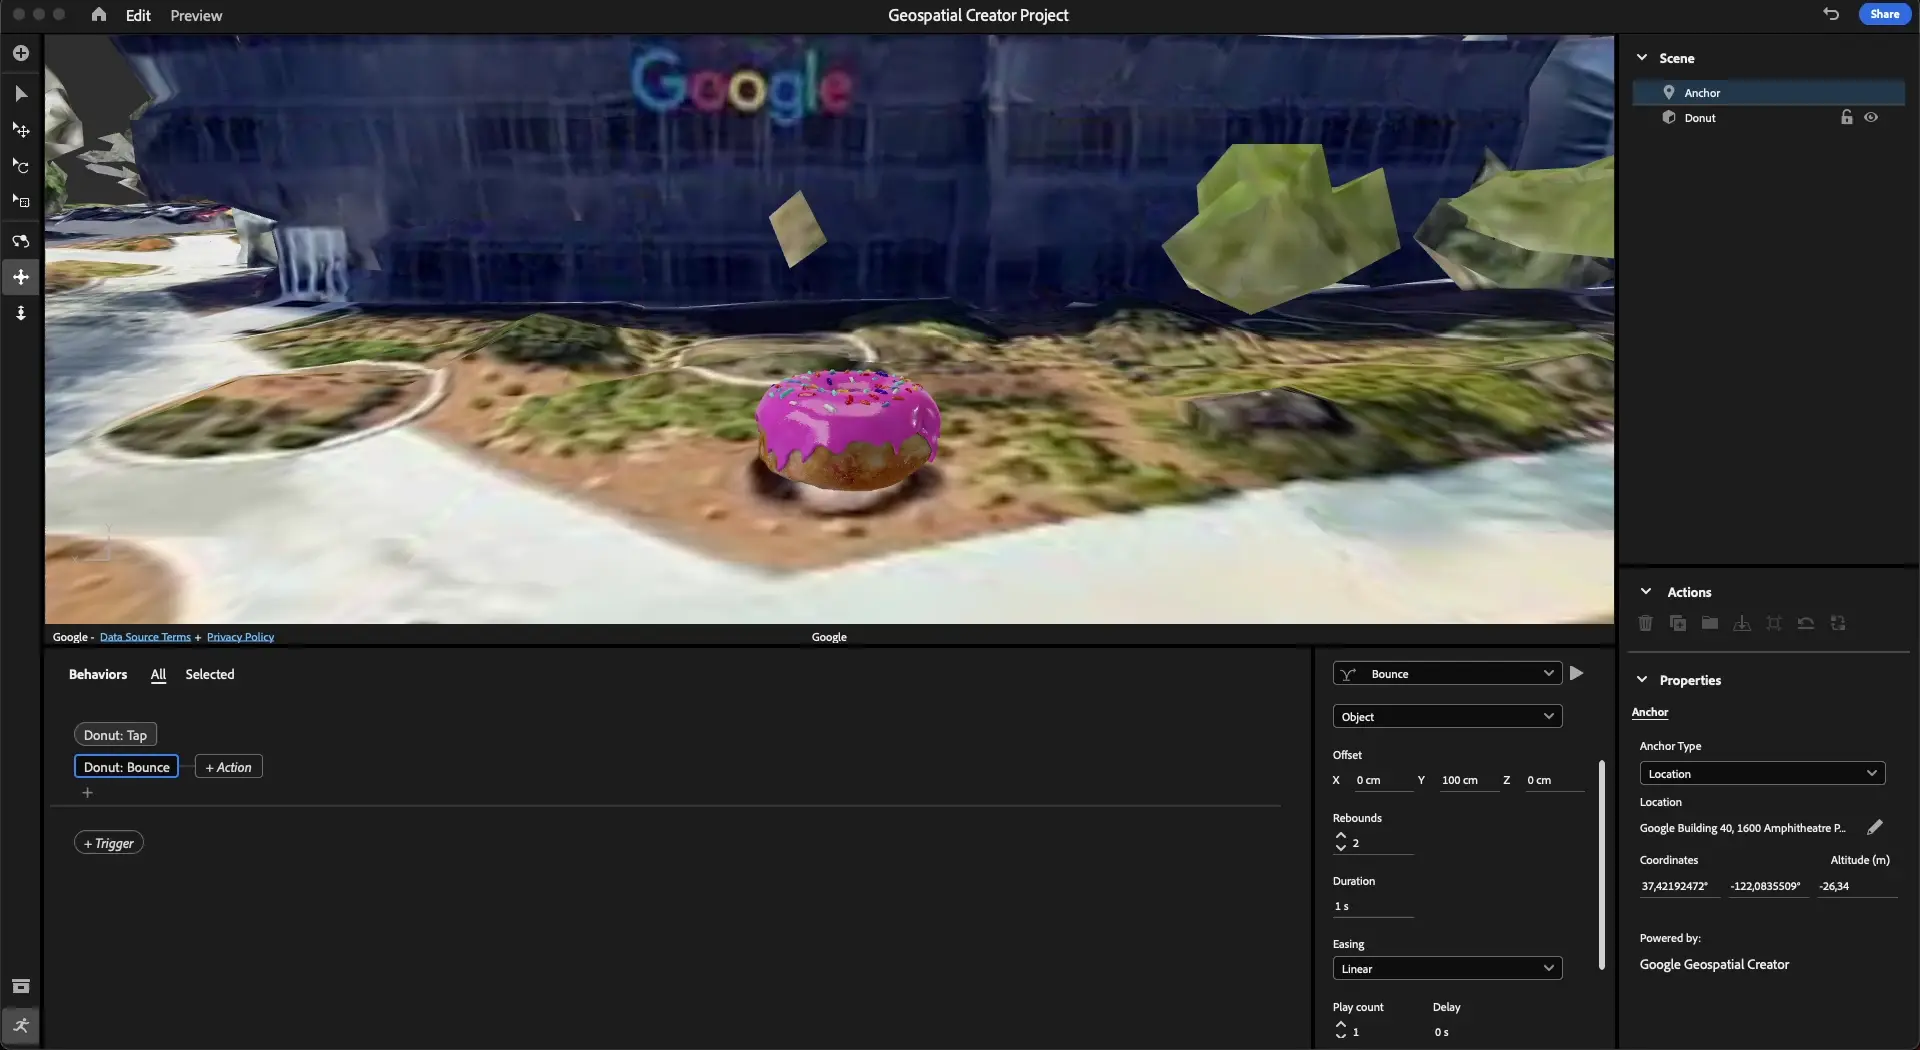
5. Add interactivity to your asset
The Adobe Aero editor lets you create behaviors and actions that trigger when certain conditions are met. This lets you transform a static 3D object into a delightful interactive AR experience.
Add a behavior to the asset
A behavior describes when certain actions should trigger. For example, you can specify actions for when a user gets nearby or starts the experience.
To add a behavior to your object, follow these steps:
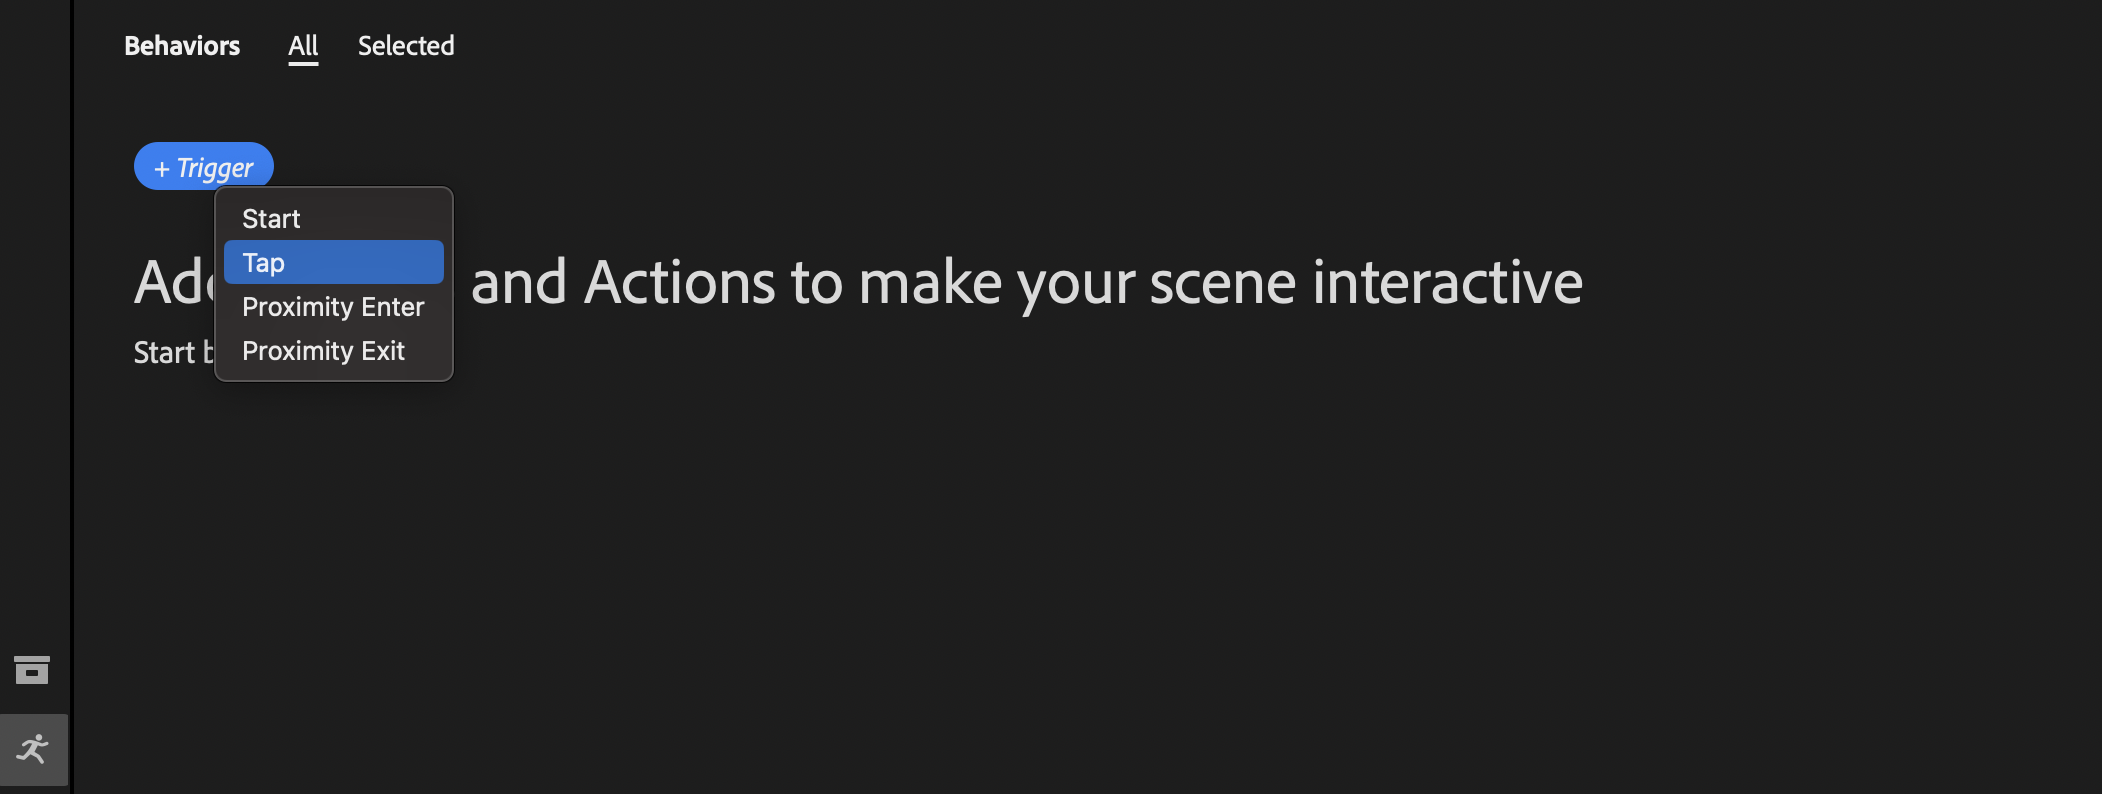
- Click
 Behavior Builder to open the Behaviors panel.
 - With the object selected, click Trigger to add a Tap trigger.
Add an action to the behavior
Actions describe what happens when a behavior is started. Actions can happen simultaneously or in parallel.
To add some interactivity to the 3D asset with actions, follow these steps:
- Click Action > Bounce.
- Modify the action properties. For example, you can add some rebounds to the bounce, which makes the object bounce after it lands.
- Click Play.
6. View the asset in AR
Finally, you look at your geospatially anchored content in AR.
Export the experience to your device
To use Adobe Aero to export your scene to your ARCore-enabled device through a QR code, follow these steps:
- Click Share to open the Share as AR window.
- In the Title text box, enter a descriptive title.
- If you accept the terms and conditions, select the checkbox.
- Click Create link to create a QR code.

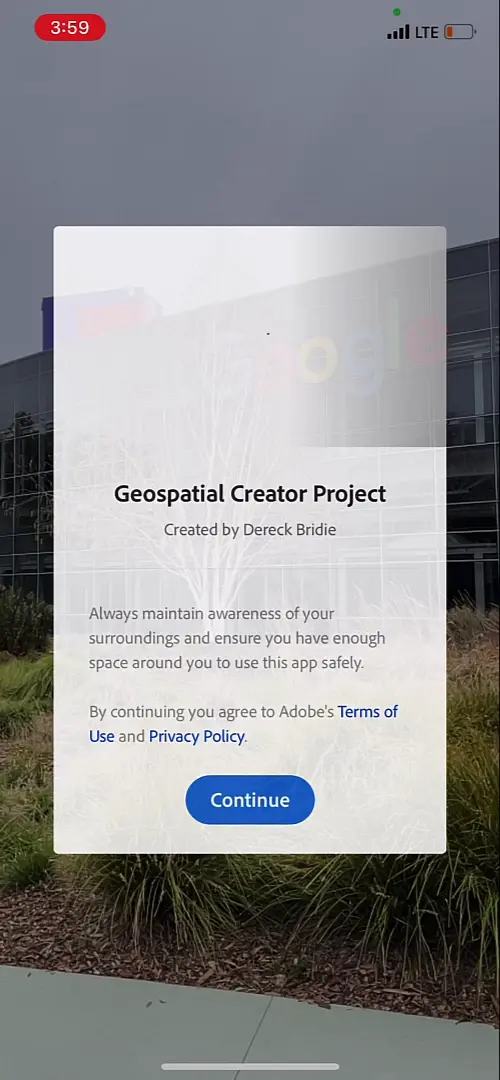
View the experience on your device
The QR code contains a link that opens the Adobe Aero Player as a Play Instant App on Android and as an App Clip on iOS. With Play Instant App and App Clip, users who want to view and interact with your experience don't need to download any separate apps. The link is enough to access the experience.
To view the AR experience on your smart device, follow these steps:
- On your ARCore-supported device, use the built-in camera app to scan the QR code and open the link.
- If necessary, accept the camera and geolocation permissions.
- Go to the location where you placed the 3D asset and then point your camera in its direction. You can use the wayfinding helper to help you find the asset.
- Tap the asset to make it bounce!
7. Conclusion
Congratulations! You learned how to use the Adobe Aero Geospatial pre-release to create a geospatial AR experience.