
این راهکار از هوش مصنوعی Vertex و Gemini برای تجزیه و تحلیل پیامهای Gmail و برچسبگذاری آنها بر اساس احساساتشان استفاده میکند.
سطح کدنویسی : متوسط
مدت زمان : ۳۰ دقیقه
نوع پروژه : افزونهی Google Workspace
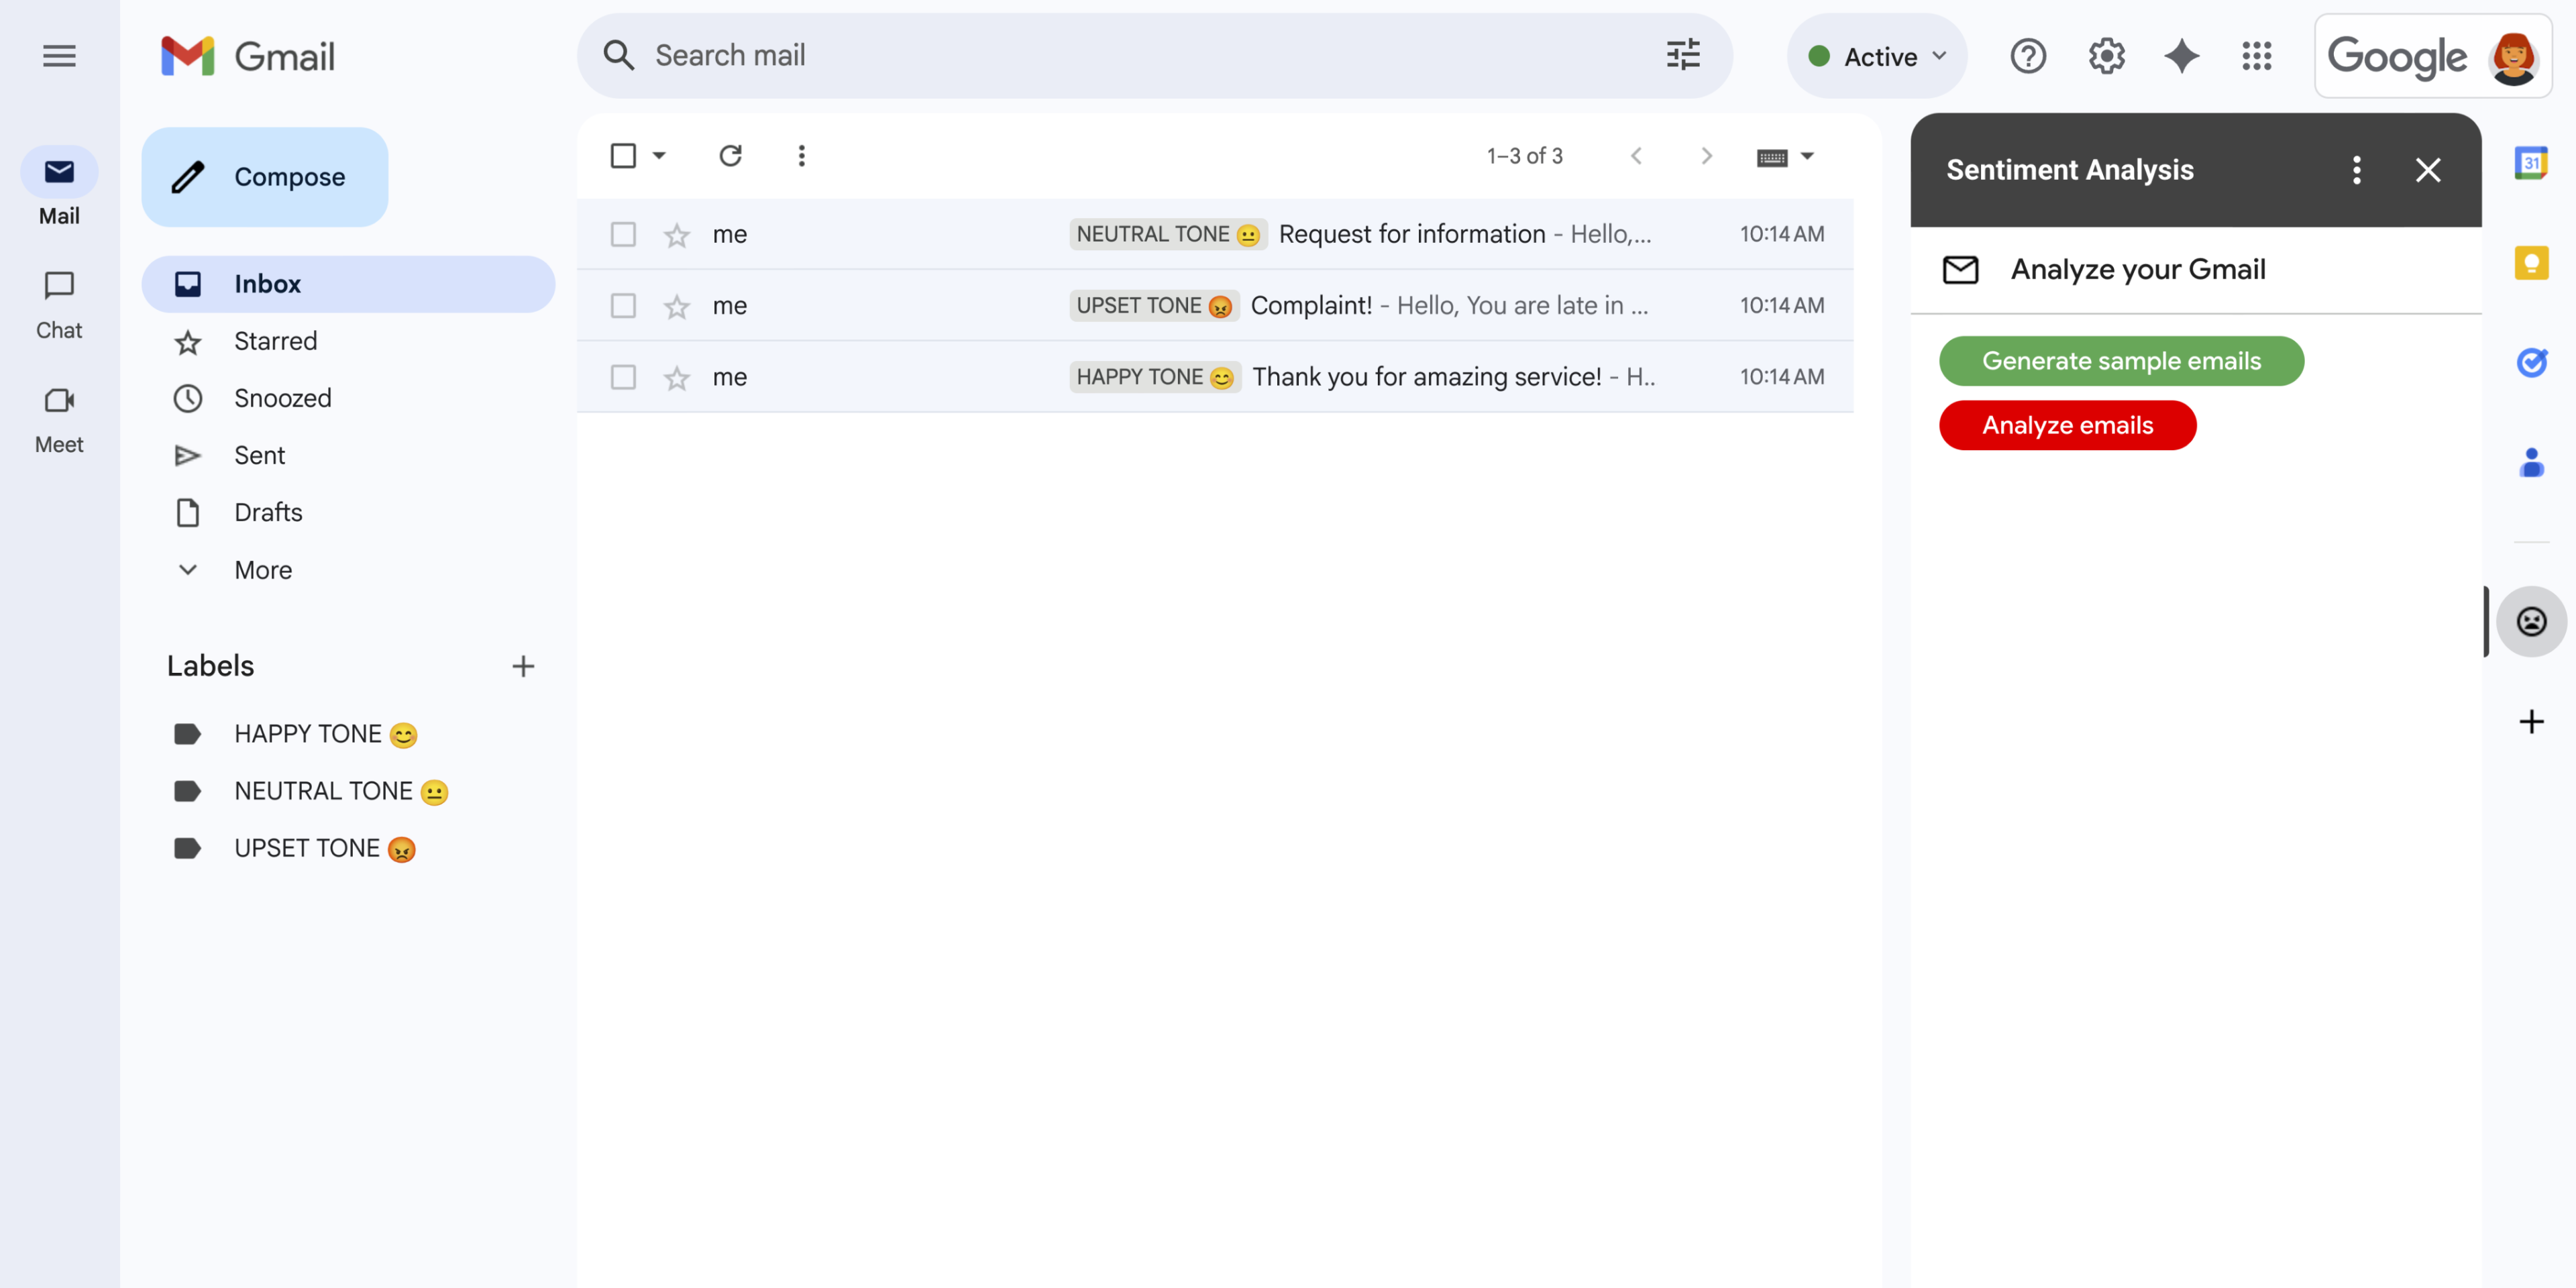
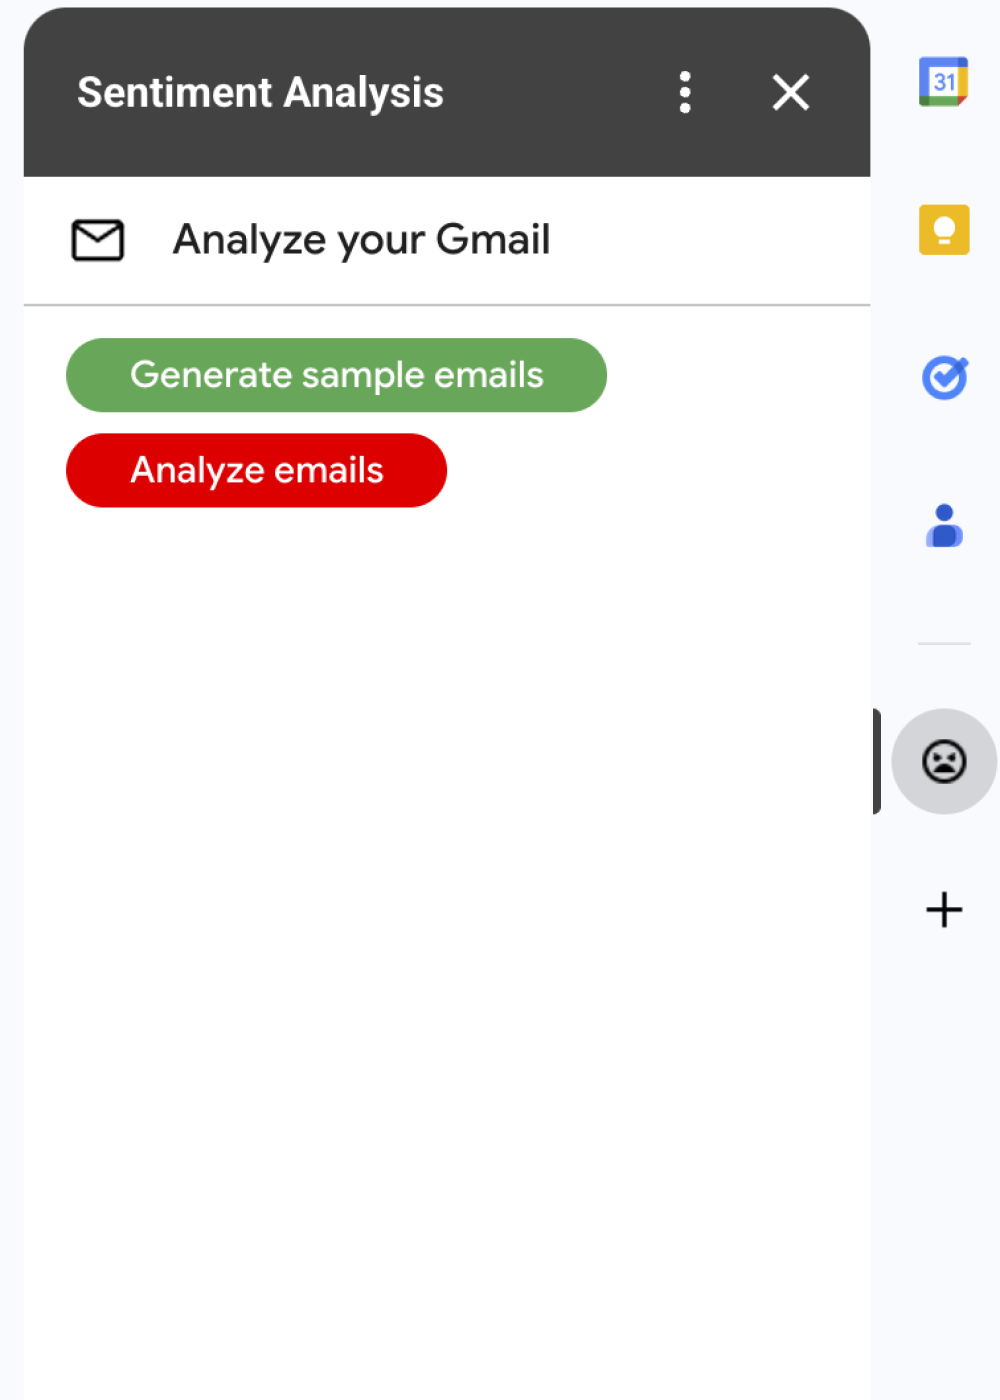
شکل ۱: افزونهی تحلیل احساسات ، یک نوار کناری در جیمیل نمایش میدهد که در آن کاربران میتوانند از Gemini بخواهند که پیامها را بر اساس احساساتشان تحلیل و برچسبگذاری کند. 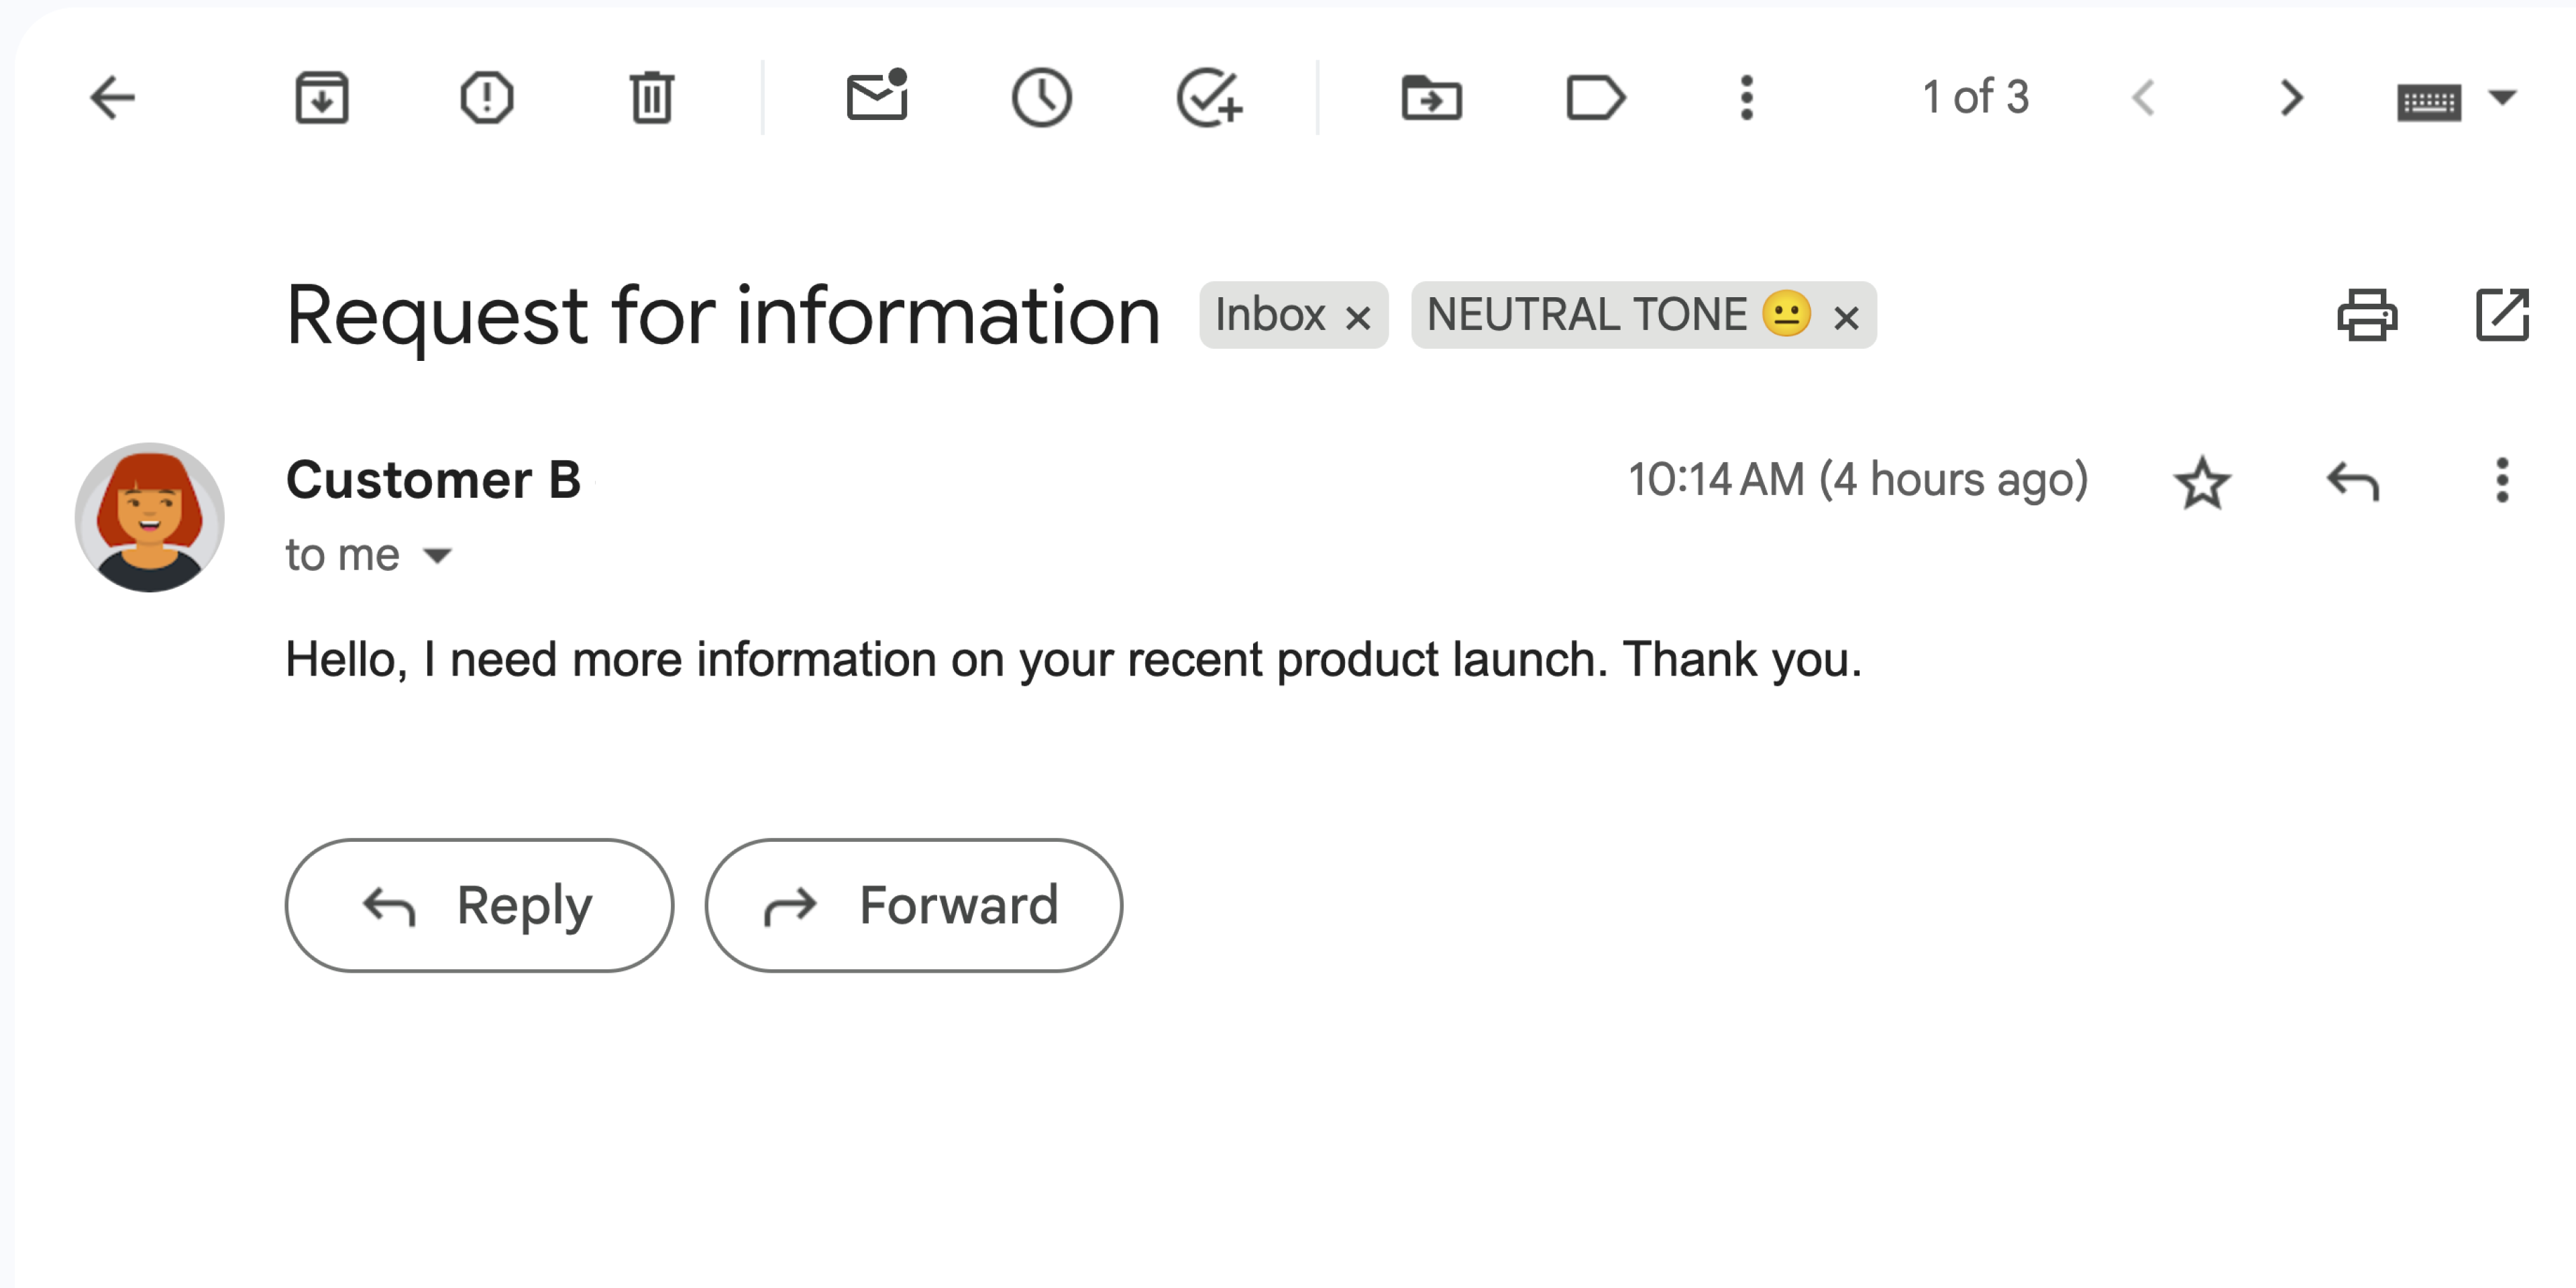
شکل ۲: این افزونه یک پیام جیمیل را با برچسب NEUTRAL TONE 😐 برچسبگذاری میکند. 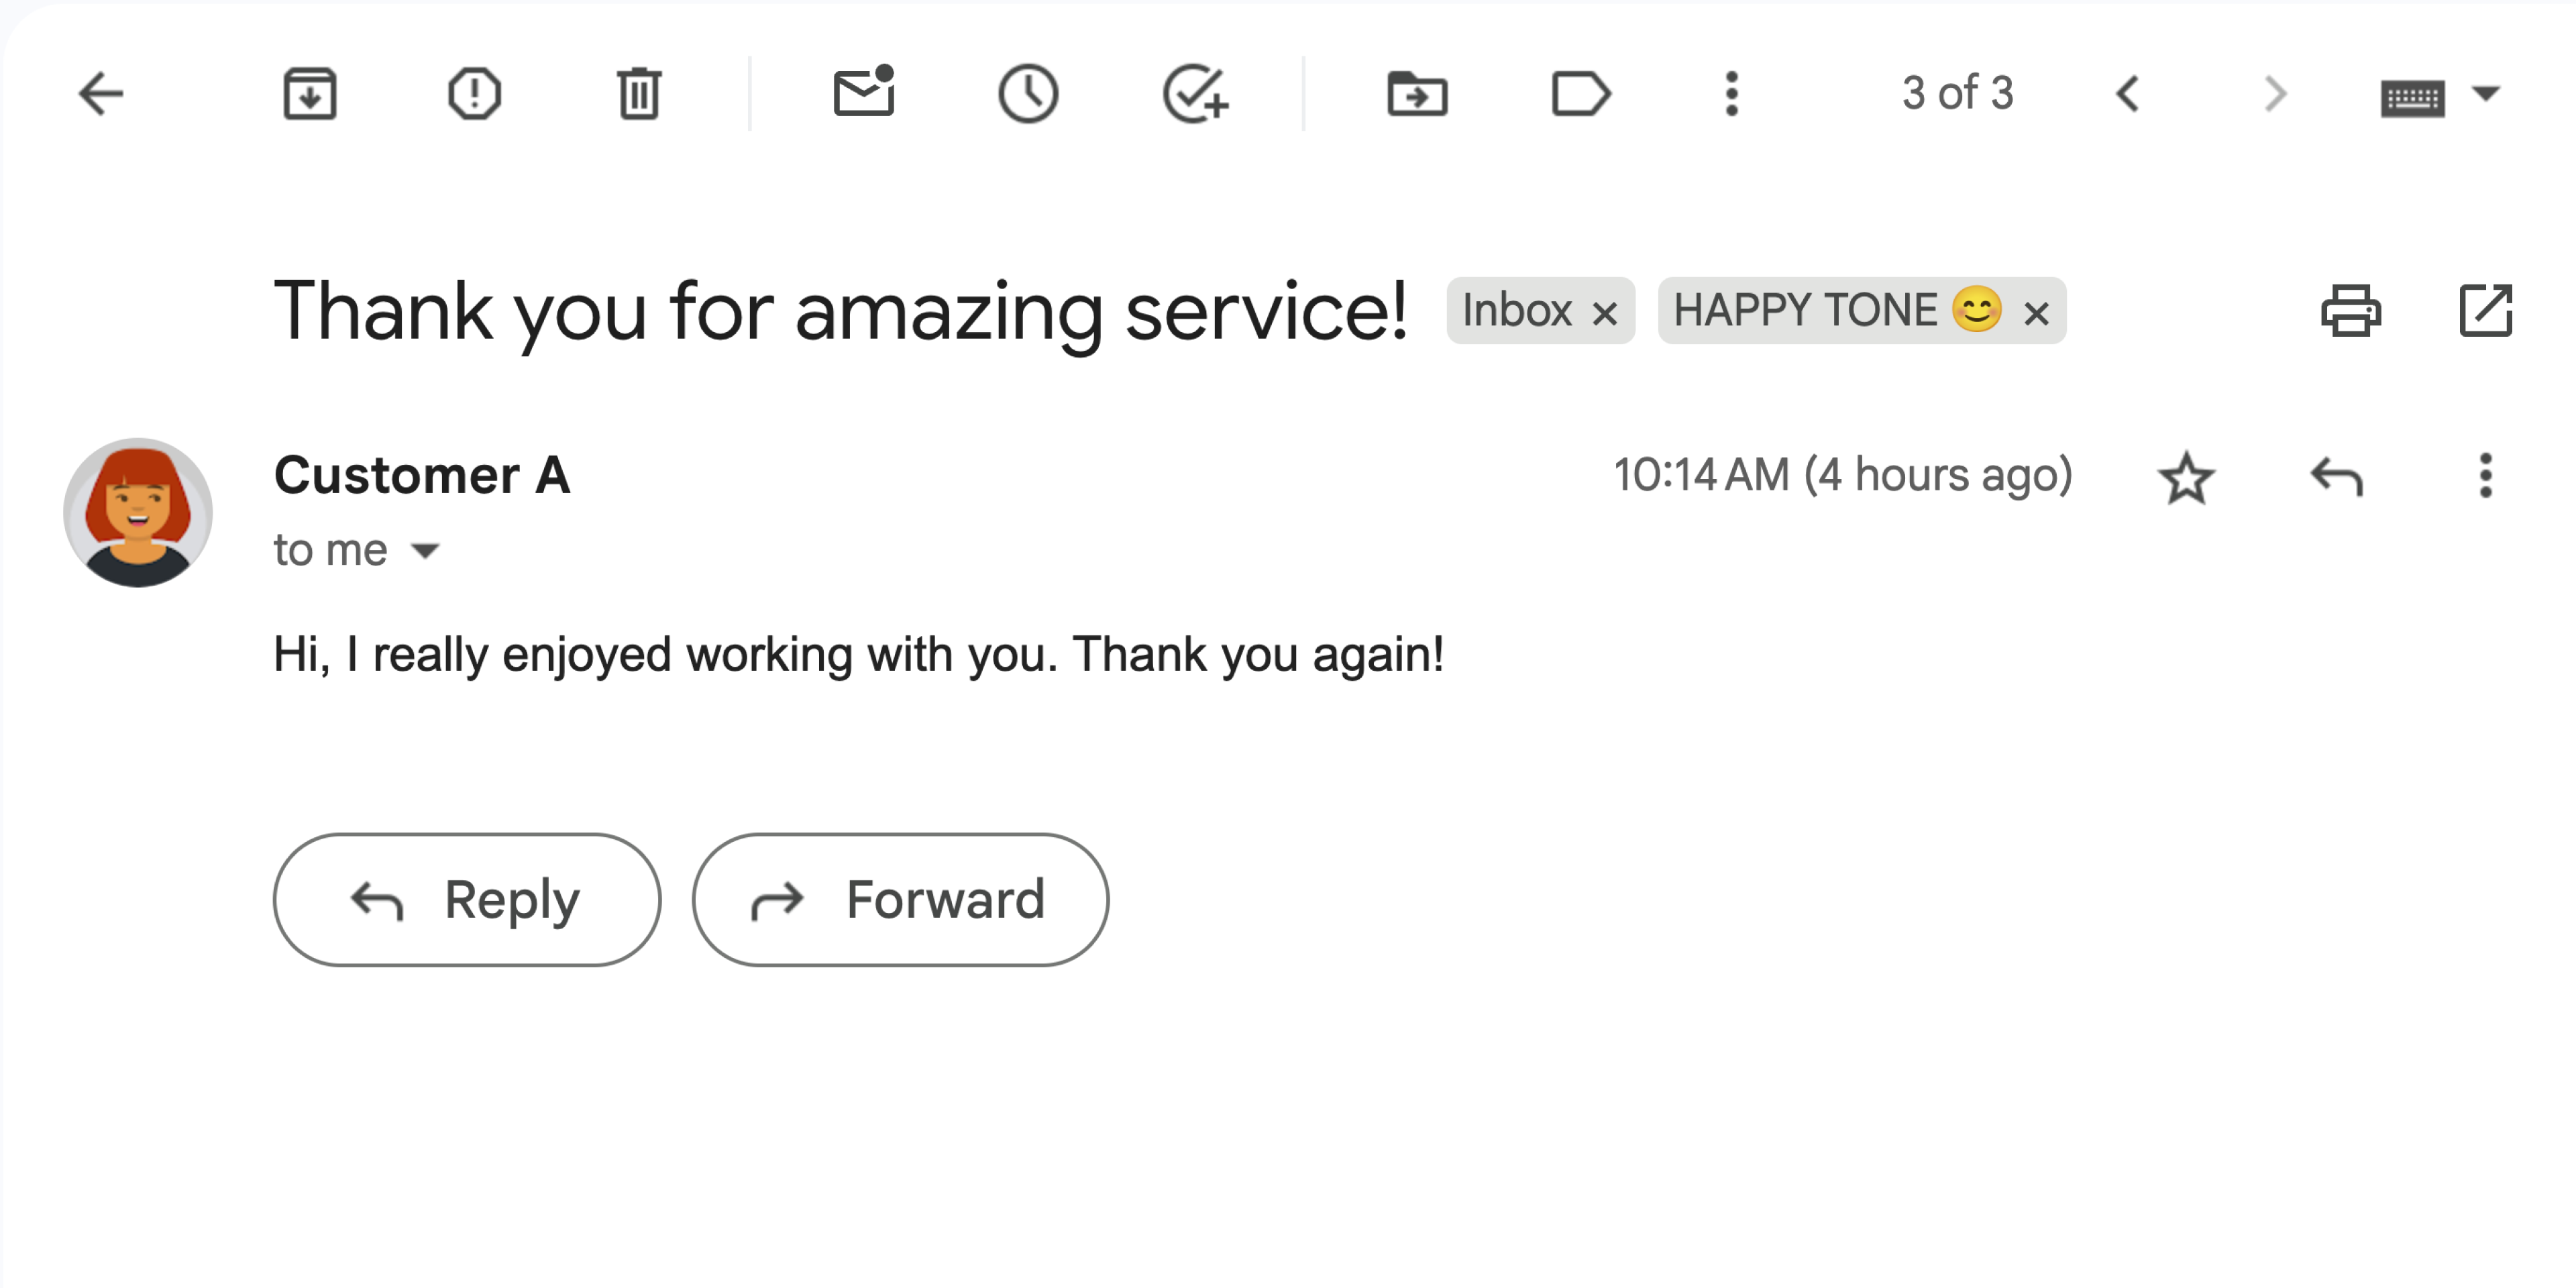
شکل ۳: این افزونه یک پیام جیمیل را با برچسب HAPPY TONE 😊 برچسبگذاری میکند. 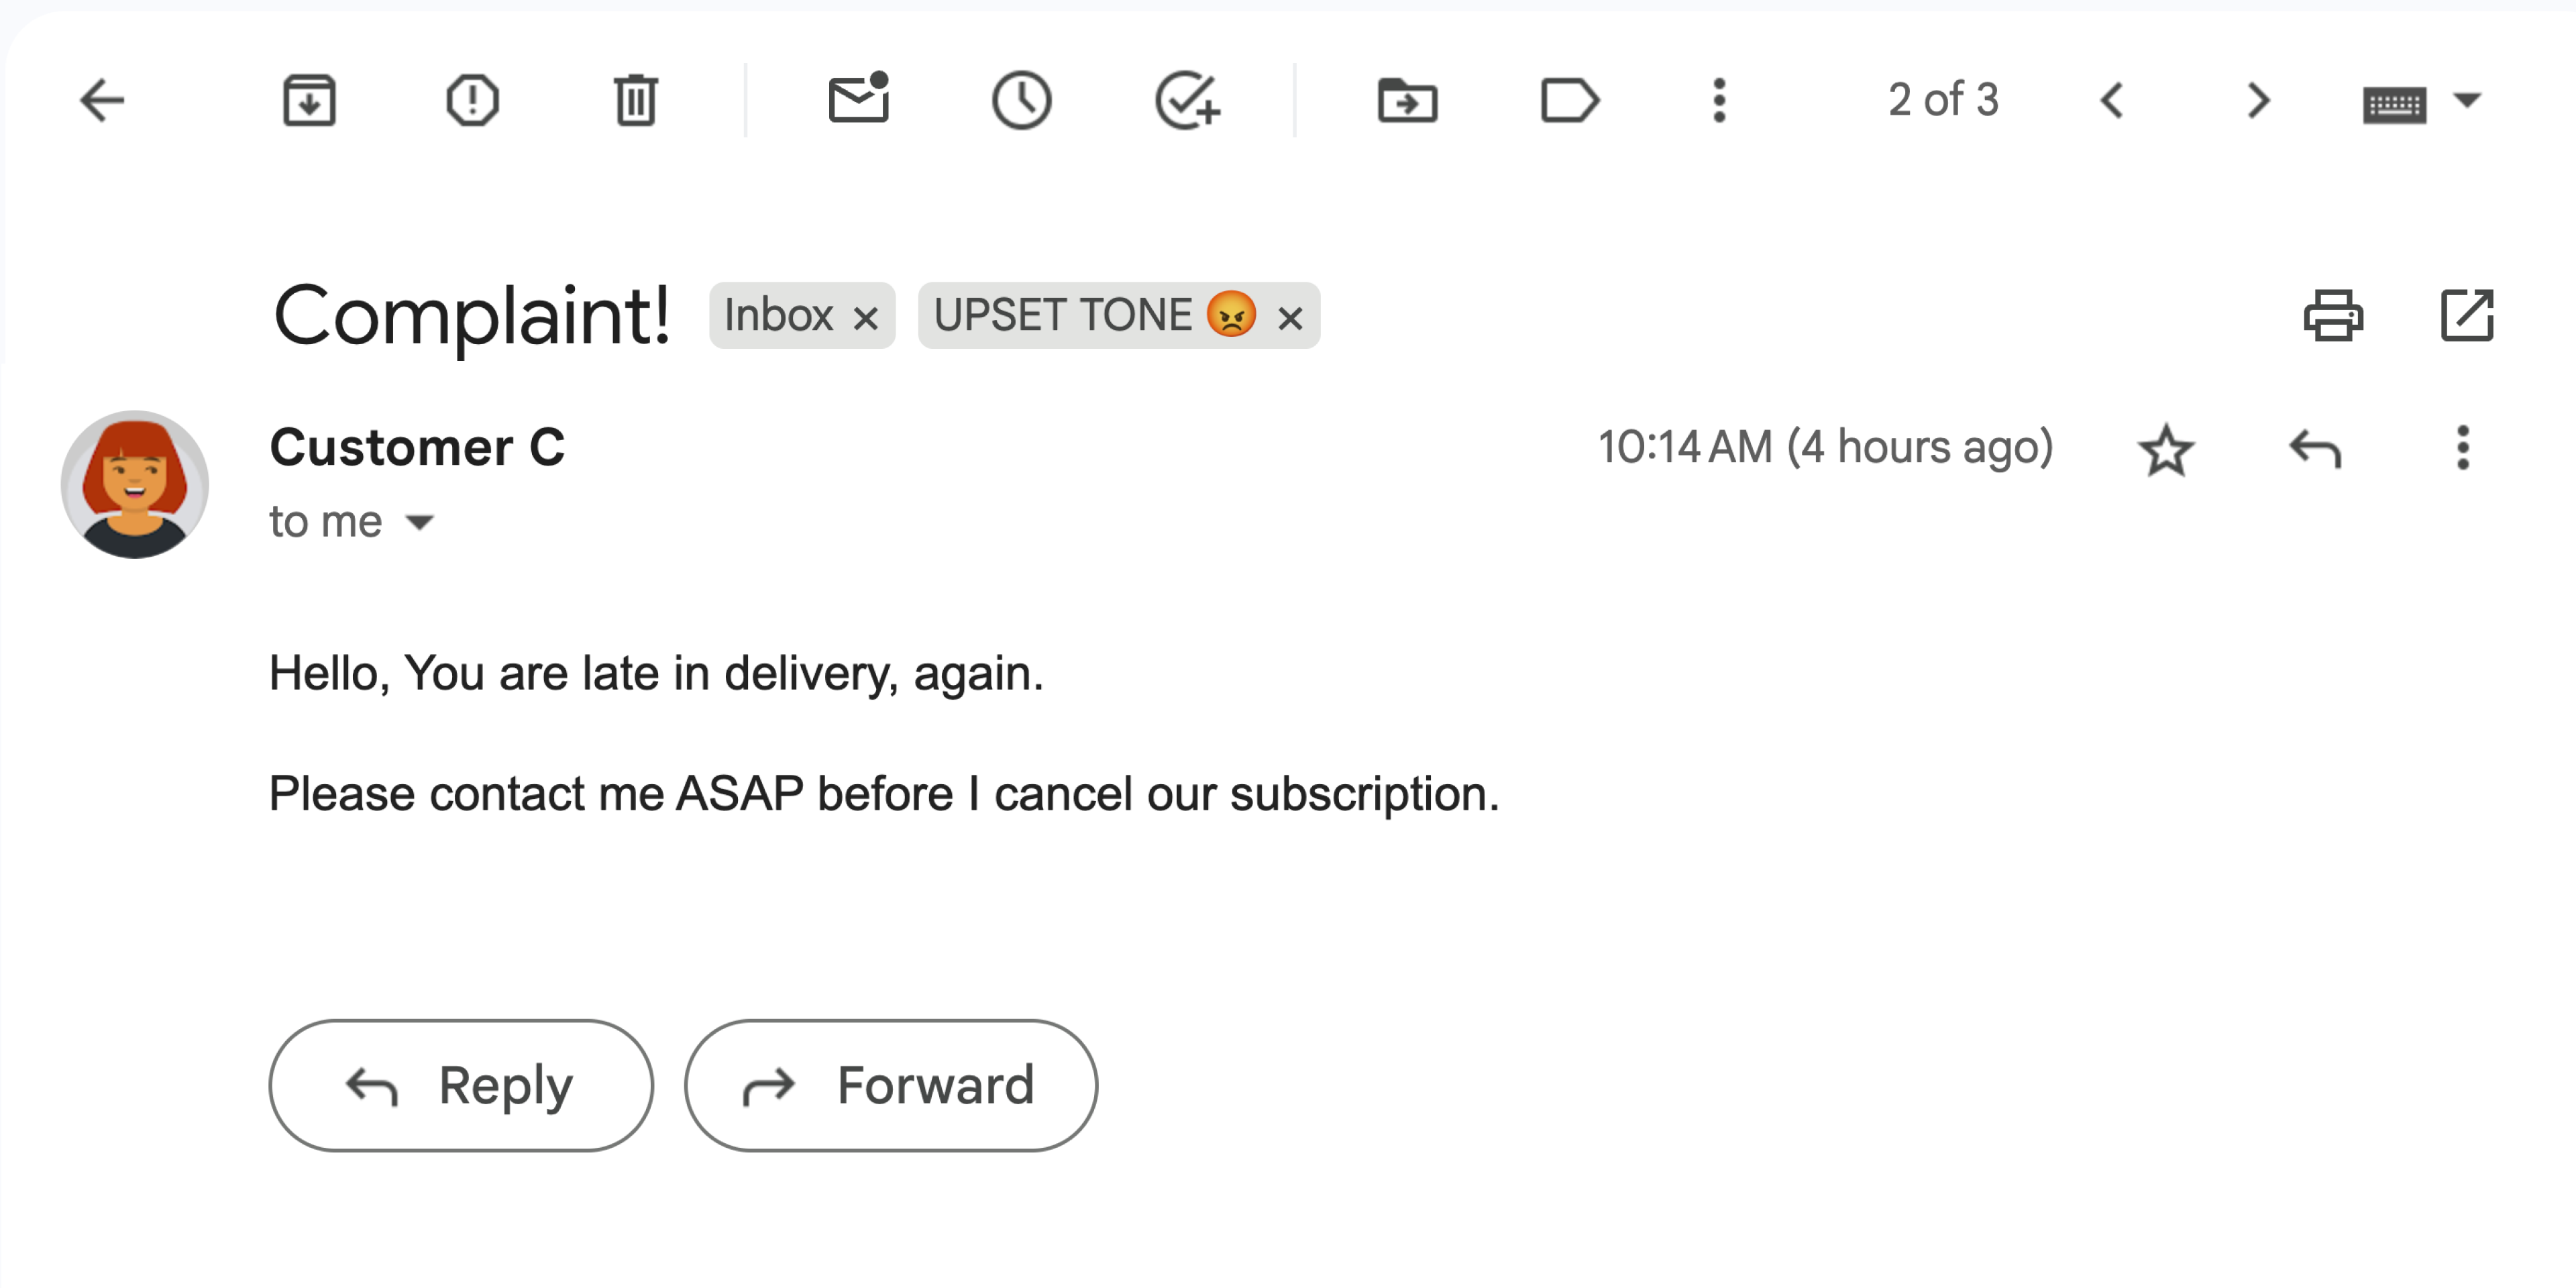
شکل ۴: این افزونه یک پیام جیمیل را با برچسب UPSET TONE 😡 برچسبگذاری میکند.
اهداف
- بفهمید که راه حل چه کاری انجام میدهد.
- بفهمید که سرویسهای گوگل در این راهکار چه کاری انجام میدهند.
- محیط را تنظیم کنید.
- پروژه اسکریپت برنامههای گوگل (Google Apps Script) را راهاندازی کنید.
- اسکریپت را اجرا کنید.
درباره این راهکار
این راهکار، یک افزونهی Google Workspace است که برچسبها را بر اساس احساسات پیامهای Gmail اعمال میکند. برای تجزیه و تحلیل محتوای پیام، این افزونه از Vertex AI برای فراخوانی مدل Gemini 2.5 Flash استفاده میکند و یکی از احساسات زیر را برمیگرداند:
- مثبت
- منفی
- خنثی
با دریافت پاسخ از Gemini، افزونه یک برچسب جیمیل مربوطه را به پیام اعمال میکند.
برای محدود کردن درخواست به API هوش مصنوعی Vertex، این افزونه فقط ۱۰ پیام اخیر در صندوق ورودی کاربر Gmail را تجزیه و تحلیل و برچسبگذاری میکند. برای کسب اطلاعات بیشتر در مورد سهمیهها و محدودیتها، به مستندات Vertex AI مراجعه کنید.
چگونه کار میکند؟
این راهکار با استفاده از اسکریپت Google Apps ساخته شده و از سرویسها و محصولات گوگل زیر استفاده میکند:
- رابط برنامهنویسی کاربردی هوش مصنوعی ورتکس - مدل Gemini 2.5 Flash را وادار میکند تا محتوای پیامهای Gmail را تجزیه و تحلیل کرده و احساسات را شناسایی کند.
سرویسهای اسکریپت برنامهها:
- سرویس Gmail - پیامهای Gmail را بازیابی و برچسبگذاری میکند. در صورت تمایل، پیامهای نمونهای را برای آزمایش افزونه ایجاد میکند.
- سرویس کارت - رابط کاربری افزونهای را ایجاد میکند که به عنوان نوار کناری در Gmail ظاهر میشود.
- سرویس URL Fetch - برای تحلیل احساسات به API هوش مصنوعی Vertex متصل میشود.
- سرویس اسکریپت - برای فراخوانی API هوش مصنوعی Vertex، با استفاده از متد
getOAuthTokenیک توکن دسترسی OAuth 2.0 برای افزونه دریافت میکند.
پیشنیازها
- یک پروژه Google Cloud با قابلیت پرداخت صورتحساب. برای اطلاع از اینکه آیا دسترسی دارید، به مجوزهای مورد نیاز برای فعال کردن پرداخت صورتحساب مراجعه کنید.
محیط خود را تنظیم کنید
این بخش نحوه پیکربندی و تنظیم محیط شما در کنسول Google Cloud و Apps Script را توضیح میدهد.
پروژه ابری خود را در کنسول گوگل کلود پیکربندی کنید
این بخش به شما نشان میدهد که چگونه Vertex AI API را فعال کنید و صفحه رضایت OAuth را در پروژه Cloud خود پیکربندی کنید.
فعال کردن API هوش مصنوعی ورتکس
در کنسول Google Cloud، پروژه Google Cloud خود را باز کنید و Vertex AI API را فعال کنید:
تأیید کنید که API را در پروژه Cloud صحیح فعال میکنید، سپس روی Next کلیک کنید.
تأیید کنید که API صحیح را فعال میکنید، سپس روی فعال کردن کلیک کنید.
صفحه رضایت OAuth را پیکربندی کنید
افزونههای Google Workspace نیاز به پیکربندی صفحه رضایت دارند. پیکربندی صفحه رضایت OAuth افزونه شما، آنچه گوگل به کاربران نمایش میدهد را تعریف میکند.
- در کنسول گوگل کلود، به Menu > برویدGoogle Auth platform > برندسازی .
- اگر قبلاً تنظیمات را انجام دادهاید Google Auth platformمیتوانید تنظیمات صفحه رضایت OAuth زیر را در Branding ، Audience و Data Access پیکربندی کنید. اگر پیامی با این مضمون مشاهده کردید Google Auth platform هنوز پیکربندی نشده است ، روی شروع کار کلیک کنید:
- در قسمت اطلاعات برنامه ، در قسمت نام برنامه ، نامی برای برنامه وارد کنید.
- در ایمیل پشتیبانی کاربر ، یک آدرس ایمیل پشتیبانی انتخاب کنید که کاربران در صورت داشتن هرگونه سوال در مورد رضایت خود بتوانند با شما تماس بگیرند.
- روی بعدی کلیک کنید.
- در قسمت مخاطبان ، داخلی (Internal) را انتخاب کنید.
- روی بعدی کلیک کنید.
- در قسمت اطلاعات تماس ، یک آدرس ایمیل وارد کنید که از طریق آن بتوانید از هرگونه تغییر در پروژه خود مطلع شوید.
- روی بعدی کلیک کنید.
- در قسمت Finish ، سیاست دادههای کاربر سرویسهای API گوگل را مرور کنید و در صورت موافقت، گزینه «من با سیاستهای دادههای کاربر سرویسهای API گوگل موافقم» را انتخاب کنید.
- روی ادامه کلیک کنید.
- روی ایجاد کلیک کنید.
- فعلاً میتوانید از اضافه کردن محدودهها صرف نظر کنید. در آینده، وقتی برنامهای برای استفاده در خارج از سازمان Google Workspace خود ایجاد میکنید، باید نوع کاربر (User type) را به خارجی (External) تغییر دهید. سپس محدودههای مجوز مورد نیاز برنامه خود را اضافه کنید. برای کسب اطلاعات بیشتر، به راهنمای کامل پیکربندی رضایت OAuth مراجعه کنید.
پروژه Apps Script خود را ایجاد و تنظیم کنید
برای ایجاد و تنظیم پروژه Apps Script خود برای افزونه، مراحل زیر را انجام دهید:
برای باز کردن پروژه «تحلیل احساسات جیمیل با Gemini و Vertex AI Apps Script» روی دکمه زیر کلیک کنید.
پروژه Apps Script را باز کنیدروی نمای کلی کلیک کنید.
در صفحه مرور کلی، روی «ایجاد کپی» کلیک کنید
 .
.شماره پروژه ابری خود را دریافت کنید:
- در کنسول گوگل کلود، به Menu > IAM & Admin > Settings بروید.
- در فیلد شماره پروژه ، مقدار را کپی کنید.
پروژه Cloud خود را با پروژه Apps Script خود متصل کنید:
- در پروژه کپیشدهی Apps Script خود، روی تنظیمات پروژه کلیک کنید.
 .
. - در زیر پروژه پلتفرم ابری گوگل (GCP) ، روی تغییر پروژه کلیک کنید.
- در قسمت شماره پروژه GCP ، شماره پروژه Cloud را وارد کنید.
- روی تنظیم پروژه کلیک کنید.
- در پروژه کپیشدهی Apps Script خود، روی تنظیمات پروژه کلیک کنید.
افزونه را تست کنید
برای امتحان کردن افزونه، یک نسخه آزمایشی نصب کنید و سپس افزونه را در Gmail باز کنید:
- یک استقرار آزمایشی Apps Script ایجاد و نصب کنید:
- در پروژهی Apps Script کپیشده، روی Editor کلیک کنید.
- فایل
Code.gsرا باز کنید و روی Run کلیک کنید. وقتی از شما خواسته شد، اسکریپت را تأیید کنید. - روی استقرار > آزمایش استقرارها کلیک کنید.
- روی نصب > انجام شد کلیک کنید.
جیمیل را باز کنید.
در نوار کناری سمت راست، افزونه Sentiment Analysis را باز کنید.
در صورت درخواست، افزونه را تأیید کنید.
اختیاری: برای ایجاد پیامهایی برای آزمایش با افزونهتان، روی «ایجاد ایمیلهای نمونه» کلیک کنید. سه پیام در صندوق ورودی شما ظاهر میشود. اگر آنها را نمیبینید، صفحه را رفرش کنید.
برای افزودن برچسبها، روی «تحلیل ایمیلها» کلیک کنید.
این افزونه ۱۰ پیام آخر موجود در صندوق ورودی شما را بررسی میکند و سپس بر اساس محتوای پیام، یکی از برچسبهای زیر را اعمال میکند:
- لحن شاد 😊
- تُن خنثی 😐
- لحن ناراحت 😡
کد را مرور کنید
کد Apps Script را برای این راه حل بررسی کنید:
مشاهده کد منبع
کد.gs
کارتها.gs
جیمیل.gs
Vertex.gs
appsscript.json
تمیز کردن
برای جلوگیری از تحمیل هزینه به حساب Google Cloud خود برای منابع استفاده شده در این آموزش، توصیه میکنیم پروژه Cloud را حذف کنید.
- در کنسول گوگل کلود، به صفحه مدیریت منابع بروید. روی منو > مدیریت و دسترسی به منابع (IAM & Admin) > مدیریت منابع (Manage Resources) کلیک کنید.
- در لیست پروژهها، پروژهای را که میخواهید حذف کنید انتخاب کنید و سپس روی «حذف کلیک کنید.
- در کادر محاورهای، شناسه پروژه را تایپ کنید و سپس برای حذف پروژه، روی خاموش کردن (Shut down) کلیک کنید.
مراحل بعدی
- گسترش جیمیل با افزونههای Google Workspace
- رابط کاربری Google Workspace را گسترش دهید
- افزونههای Google Workspace بسازید