Mantieni tutto organizzato con le raccolte
Salva e classifica i contenuti in base alle tue preferenze.
Per iniziare a utilizzare le API di Google Foto, configura il tuo progetto attivando le API di Foto di cui hai bisogno utilizzando la console API di Google e impostando un ID client OAuth 2.0.
La tua applicazione interagisce con Google Foto per conto di un utente di Google Foto. Ad esempio, quando crei album nella raccolta di Google Foto di un utente o carichi elementi multimediali nell'account Google Foto di un utente, l'utente autorizza queste richieste API utilizzando il protocollo OAuth 2.0.
L'ID client OAuth 2.0 consente agli utenti della tua applicazione di accedere, autenticarsi e quindi utilizzare le API di Foto. Le API di Foto non supportano gli account di servizio. Per utilizzare queste API, gli utenti devono aver eseguito l'accesso a un Account Google valido.
Configura la tua app
Innanzitutto, abilita l'API, poi richiedi un ID client OAuth 2.0.
Abilita l'API
Prima di poter utilizzare le API di Foto, devi attivarle nel tuo progetto.
Nella barra dei menu, seleziona un progetto o creane uno nuovo.
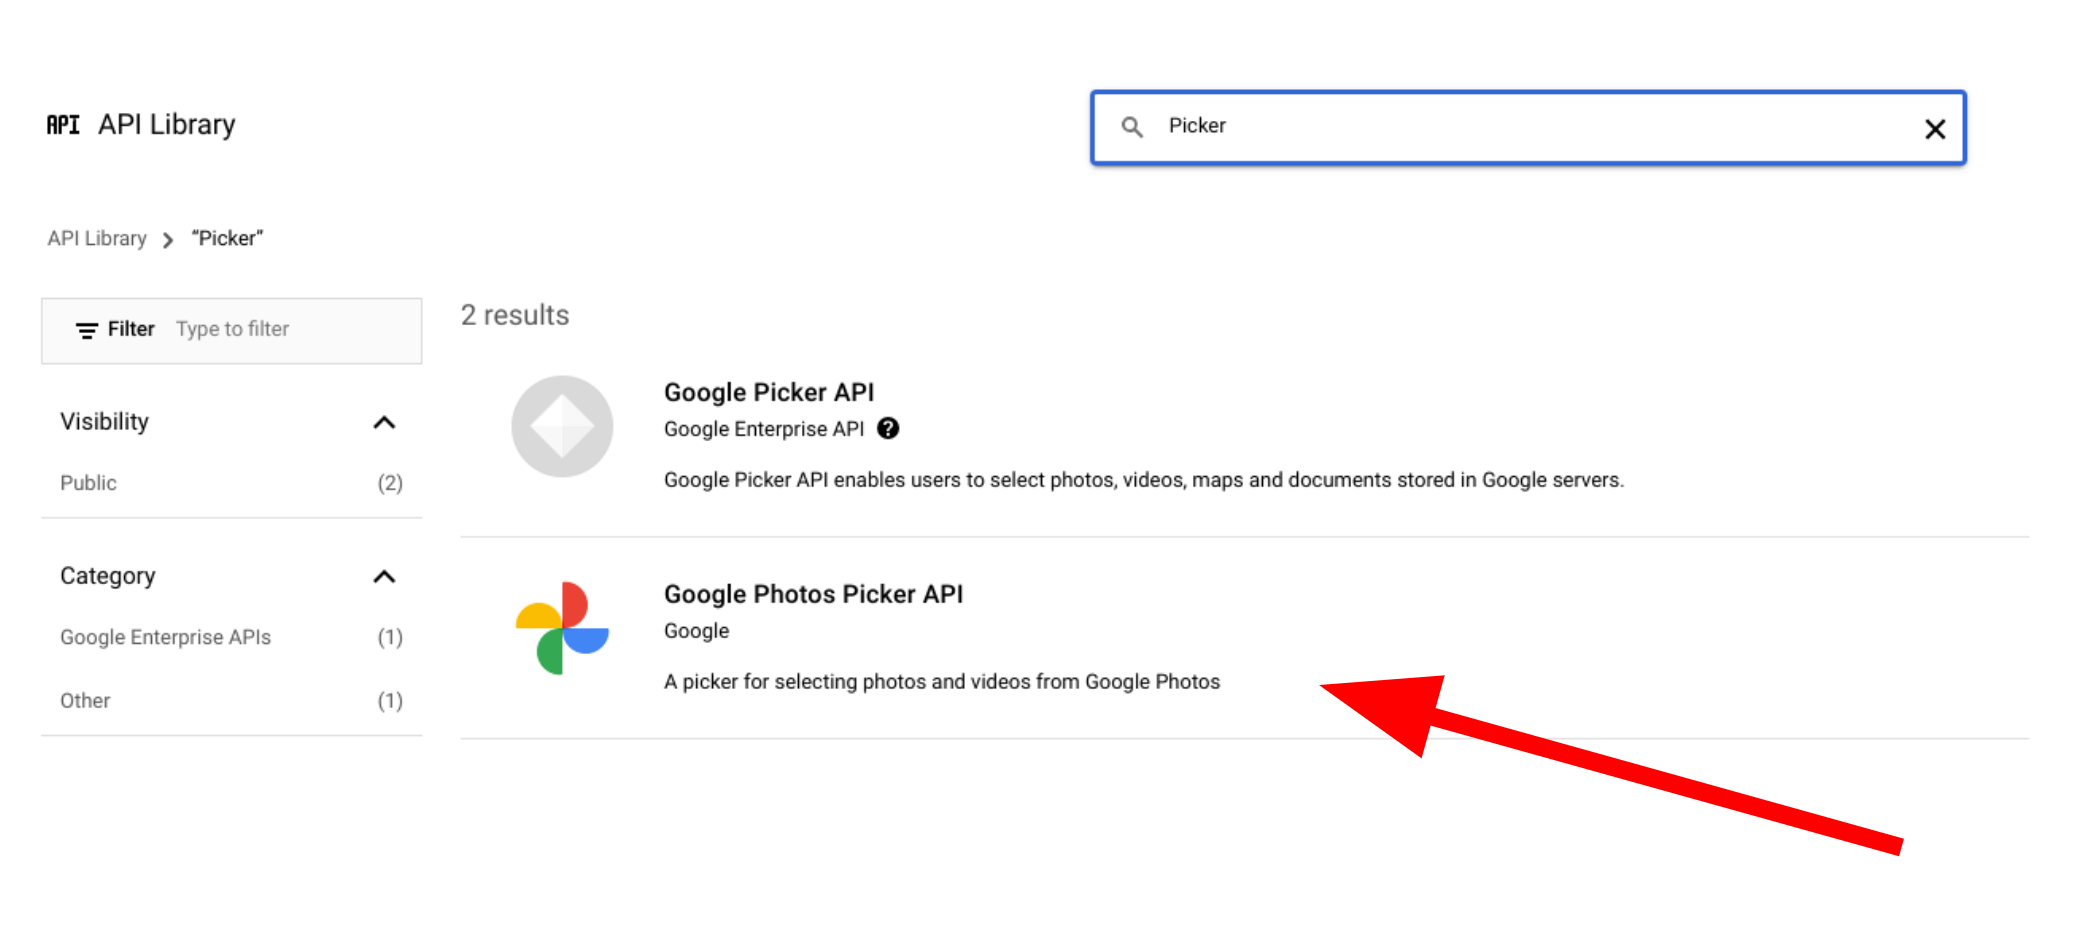
Per aprire una delle API di Google Foto, seleziona API e servizi > Libreria nel menu di navigazione.
Cerca "Foto". Seleziona una o più API di Foto e fai clic su
Abilita.
Richiedere un ID client OAuth 2.0
Segui questi passaggi per richiedere un ID client OAuth e configurarlo per la tua applicazione. Questo esempio utilizza un'applicazione in cui l'intero flusso OAuth viene gestito lato server, come quella nei nostri esempi. La procedura di configurazione può variare per altri scenari di implementazione.
Nella pagina Credenziali, fai clic su Crea credenziali > ID client OAuth.
Seleziona il tipo di applicazione. In questo esempio, il tipo di applicazione è
Applicazione web.
Registra le origini da cui la tua app è autorizzata ad accedere alle API Google come segue:
Per identificare l'ID client, inserisci un nome.
Nel campo Origini JavaScript autorizzate, inserisci l'origine per la tua app. Questo campo non ammette caratteri jolly.
Puoi inserire più origini per consentire all'app di funzionare su protocolli, domini o sottodomini diversi. Gli URL inseriti possono avviare una richiesta OAuth.
L'esempio seguente mostra un URL di sviluppo locale (i nostri esempi utilizzano localhost:8080) e un URL di produzione.
Il campo URI di reindirizzamento autorizzato è l'endpoint che riceve le risposte dal server OAuth 2.0. In genere, include l'ambiente di sviluppo e indica un percorso nell'applicazione.
Dalla finestra di dialogo del client OAuth risultante, copia quanto segue:
ID client
Client secret
La tua app può accedere alle API Google abilitate utilizzando questi valori.
Prima di poter lanciare un'applicazione pubblica che accede alle API di Foto,
la tua app deve essere esaminata da Google. Quando testi l'applicazione, sullo schermo viene visualizzato il messaggio "App non verificata" finché non viene verificata.
È possibile accedere alle risorse create tramite una delle API di Google Foto o modificarle solo utilizzando l'ID cliente originale utilizzato per crearle. Ad esempio, se crei un session nell'API Picker con un ID client specifico e in un secondo momento modifichi quell'ID client nella tua app, l'app perderà l'accesso a qualsiasi risorsa API creata con l'ID client precedente.
Pianifica attentamente e scegli il tipo di ID client corretto per l'API di Foto che stai utilizzando. Modifica l'ID cliente solo se assolutamente necessario per evitare problemi di accesso.
[[["Facile da capire","easyToUnderstand","thumb-up"],["Il problema è stato risolto","solvedMyProblem","thumb-up"],["Altra","otherUp","thumb-up"]],[["Mancano le informazioni di cui ho bisogno","missingTheInformationINeed","thumb-down"],["Troppo complicato/troppi passaggi","tooComplicatedTooManySteps","thumb-down"],["Obsoleti","outOfDate","thumb-down"],["Problema di traduzione","translationIssue","thumb-down"],["Problema relativo a esempi/codice","samplesCodeIssue","thumb-down"],["Altra","otherDown","thumb-down"]],["Ultimo aggiornamento 2025-08-29 UTC."],[[["\u003cp\u003eTo use Google Photos APIs, enable them in your Google API Console project and set up an OAuth 2.0 client ID for user authentication.\u003c/p\u003e\n"],["\u003cp\u003eGoogle Photos APIs require user sign-in with a Google Account and do not support service accounts.\u003c/p\u003e\n"],["\u003cp\u003eBefore launching publicly, your application needs to be verified by Google to remove the "Unverified app" message.\u003c/p\u003e\n"],["\u003cp\u003eResources created with a specific client ID can only be accessed or modified using the same ID; changing it may lead to access issues.\u003c/p\u003e\n"],["\u003cp\u003eYou can get started with either the Picker API or the Library API after configuring your application.\u003c/p\u003e\n"]]],["To utilize Google Photos APIs, enable them in your project via the Google API Console. Then, request an OAuth 2.0 client ID, selecting your application type and registering authorized JavaScript origins and redirect URIs. Copy the client ID and secret for your app's use. Note that user sign-in via a valid Google Account is necessary. Applications must be verified by Google before public launch, and client ID changes can cause access issues to previously created resources.\n"],null,["# Configure your app\n\nTo start using the Google Photos APIs, configure your project by enabling the Photos\nAPIs you need using the Google API Console and setting up an OAuth 2.0 client ID.\n\nYour application interacts with Google Photos on behalf of a\nGoogle Photos user. For example, when you create albums in a user's\nGoogle Photos library or upload media items to a user's\nGoogle Photos account, the user authorizes these API requests using the\n[OAuth 2.0](/identity/protocols/OAuth2) protocol.\n\nThe OAuth 2.0 client ID allows your application users to sign in, authenticate,\nand thereby use the Photos APIs. The Photos APIs don't support\nservice accounts; to use these APIs, users must be signed in to a valid Google\nAccount.\n\nConfigure your app\n------------------\n\nFirst enable the API, then request an OAuth 2.0 client ID.\n\n### Enable the API\n\nBefore you can use the Photos APIs, you must enable them in your project.\n\n1. Go to the [Google API Console](https://console.developers.google.com/apis/library).\n2. From the menu bar, select a project or create a new project.\n3. To open one of the Google Photos APIs, from the Navigation menu, select **APIs \\& Services \\\u003e Library**.\n4. Search for \"Photos\". Select one or more of the Photos APIs and click **Enable**.\n\n| **Note:** When searching Google APIs, you may also see the \"Google Picker API\", which is different from the Google Photos Picker API.\n\n### Request an OAuth 2.0 client ID\n\nFollow these steps to request an OAuth client ID and configure it for your\napplication. This example uses an application where the entire OAuth flow is\nhandled server-side, such as the one in our samples. The setup process may vary\nfor other [implementation scenarios](/identity/protocols/OAuth2).\n\n1. Go to the [Google API Console](https://console.developers.google.com/apis/library) and select your project.\n2. From the menu, select **APIs \\& Services \\\u003e Credentials**.\n3. On the **Credentials** page, click **Create Credentials \\\u003e OAuth client ID**.\n\n | **Note:** If you're setting up a new project, you may be prompted to configure your project's consent screen.\n4. Select your **Application type** . In this example, the application type is\n **Web application**.\n\n5. Register the origins from which your app is allowed to access the Google\n APIs as follows:\n\n 1. To identify the client ID, enter a name.\n 2. In the **Authorized JavaScript origins** field, enter the origin for\n your app. This field doesn't allow wildcards.\n\n You can enter multiple origins to allow your app to run on different\n protocols, domains, or subdomains. The URLs you enter are allowed to\n start an OAuth request.\n\n The following example shows a local development URL (our samples use\n `localhost:8080`) and a production URL. \n\n http://localhost:8080\n https://myproductionurl.example.com\n\n 3. The **Authorized redirect URI** field is the endpoint that receives\n responses from the OAuth 2.0 server. Typically, this includes your\n development environment and points to a path in your application.\n\n http://localhost:8080/auth/google/callback\n https://myproductionurl.example.com/auth/google/callback\n\n 4. Click **Create**.\n\n\u003c!-- --\u003e\n\n6. From the resulting OAuth client dialog, copy the following:\n\n - Client ID\n - Client secret\n\n Your app can access the enabled Google APIs using these values.\n\nBefore you can launch a public application that accesses the Photos APIs,\nyour app must be reviewed by Google. An \"Unverified app\" message appears on the\nscreen when you test your application, until it is\n[verified](https://support.google.com/cloud/answer/7454865).\n\nAfter you've configured your app you're ready to get started:\n\n- [Get started with the Picker API](/photos/picker/guides/get-started-picker)\n- [Get started with the Library API](/photos/library/guides/get-started-library)\n\nChanging your client ID\n-----------------------\n\nResources created through any of the Google Photos APIs can only be accessed or\nmodified using the original client ID used to create them. For example, if you\ncreate a `session` in the Picker API with a specific client ID and later change\nthat client ID in your app, your app will lose access to any API resources\ncreated with the previous client ID.\n\nPlan carefully and choose the correct client ID type for the Photos API you are\nusing. Only change your client ID if absolutely necessary to avoid access\nissues."]]