Sử dụng bộ sưu tập để sắp xếp ngăn nắp các trang
Lưu và phân loại nội dung dựa trên lựa chọn ưu tiên của bạn.
Để bắt đầu sử dụng API Google Photos, hãy định cấu hình dự án bằng cách bật các API Photos mà bạn cần thông qua Google API Console và thiết lập mã ứng dụng OAuth 2.0.
Ứng dụng của bạn tương tác với Google Photos thay mặt cho người dùng Google Photos. Ví dụ: khi bạn tạo album trong thư viện Google Photos của người dùng hoặc tải các mục nội dung nghe nhìn lên tài khoản Google Photos của người dùng, người dùng sẽ uỷ quyền cho các yêu cầu API này bằng giao thức OAuth 2.0.
Mã ứng dụng khách OAuth 2.0 cho phép người dùng ứng dụng đăng nhập, xác thực và nhờ đó sử dụng các API Photos. API Photos không hỗ trợ tài khoản dịch vụ; để sử dụng các API này, người dùng phải đăng nhập vào một Tài khoản Google hợp lệ.
Định cấu hình ứng dụng
Trước tiên, hãy bật API, sau đó yêu cầu mã ứng dụng khách OAuth 2.0.
Bật API
Trước khi có thể sử dụng API Photos, bạn phải bật các API đó trong dự án của mình.
Trên thanh trình đơn, hãy chọn một dự án hoặc tạo dự án mới.
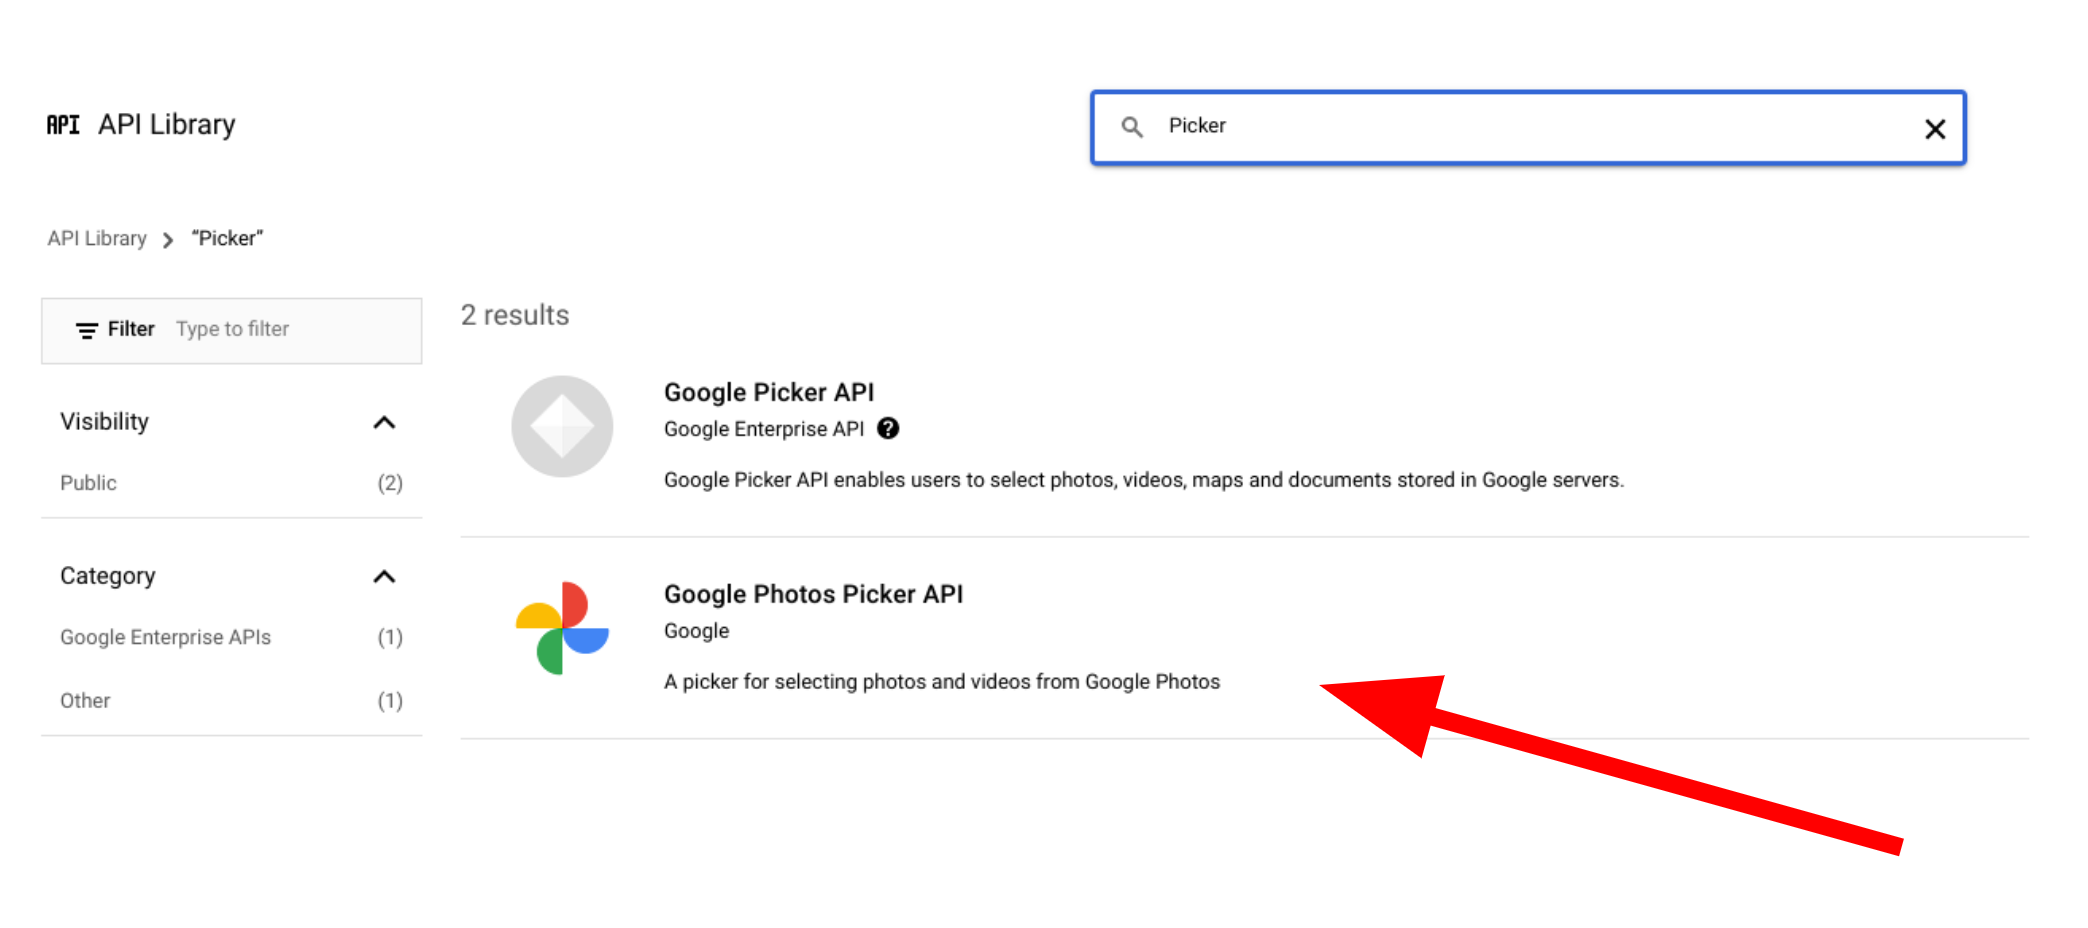
Để mở một trong các API của Google Photos, trong trình đơn Điều hướng, hãy chọn API và dịch vụ > Thư viện.
Tìm "Photos" (Ảnh). Chọn một hoặc nhiều API Photos rồi nhấp vào Bật.
Yêu cầu mã ứng dụng khách OAuth 2.0
Làm theo các bước sau để yêu cầu mã ứng dụng khách OAuth và định cấu hình mã đó cho ứng dụng của bạn. Ví dụ này sử dụng một ứng dụng trong đó toàn bộ quy trình OAuth được xử lý phía máy chủ, chẳng hạn như quy trình trong các mẫu của chúng tôi. Quá trình thiết lập có thể khác nhau đối với các trường hợp triển khai khác.
Trong trình đơn, hãy chọn API và dịch vụ > Thông tin xác thực.
Trên trang Thông tin xác thực, hãy nhấp vào Tạo thông tin xác thực > Mã ứng dụng khách OAuth.
Chọn Loại ứng dụng. Trong ví dụ này, loại ứng dụng là Ứng dụng web.
Đăng ký nguồn gốc mà ứng dụng của bạn được phép truy cập vào API của Google như sau:
Để xác định mã khách hàng, hãy nhập tên.
Trong trường Nguồn gốc JavaScript được uỷ quyền, hãy nhập nguồn gốc cho ứng dụng của bạn. Trường này không cho phép ký tự đại diện.
Bạn có thể nhập nhiều nguồn gốc để cho phép ứng dụng chạy trên nhiều giao thức, miền hoặc miền con. Các URL bạn nhập được phép bắt đầu một yêu cầu OAuth.
Ví dụ sau đây cho thấy một URL phát triển cục bộ (các mẫu của chúng tôi sử dụng localhost:8080) và một URL phát hành công khai.
Trường URI chuyển hướng được uỷ quyền là điểm cuối nhận được phản hồi từ máy chủ OAuth 2.0. Thông thường, đường dẫn này bao gồm môi trường phát triển và trỏ đến một đường dẫn trong ứng dụng.
Trong hộp thoại ứng dụng khách OAuth thu được, hãy sao chép nội dung sau:
ID khách hàng
Mật khẩu ứng dụng khách
Ứng dụng của bạn có thể truy cập vào các API của Google đã bật bằng các giá trị này.
Trước khi bạn có thể ra mắt một ứng dụng công khai truy cập vào API Photos, ứng dụng của bạn phải được Google xem xét. Thông báo "Ứng dụng chưa được xác minh" sẽ xuất hiện trên màn hình khi bạn kiểm thử ứng dụng cho đến khi ứng dụng đó được xác minh.
Sau khi định cấu hình ứng dụng, bạn có thể bắt đầu:
Bạn chỉ có thể truy cập hoặc chỉnh sửa các tài nguyên được tạo thông qua bất kỳ API Google Photos nào bằng mã ứng dụng ban đầu dùng để tạo các tài nguyên đó. Ví dụ: nếu bạn tạo một session trong API bộ chọn bằng một mã ứng dụng cụ thể và sau đó thay đổi mã ứng dụng đó trong ứng dụng, thì ứng dụng của bạn sẽ mất quyền truy cập vào mọi tài nguyên API được tạo bằng mã ứng dụng trước đó.
Hãy lập kế hoạch cẩn thận và chọn đúng loại mã ứng dụng cho API Photos mà bạn đang sử dụng. Chỉ thay đổi mã ứng dụng nếu thực sự cần thiết để tránh các vấn đề về quyền truy cập.
[[["Dễ hiểu","easyToUnderstand","thumb-up"],["Giúp tôi giải quyết được vấn đề","solvedMyProblem","thumb-up"],["Khác","otherUp","thumb-up"]],[["Thiếu thông tin tôi cần","missingTheInformationINeed","thumb-down"],["Quá phức tạp/quá nhiều bước","tooComplicatedTooManySteps","thumb-down"],["Đã lỗi thời","outOfDate","thumb-down"],["Vấn đề về bản dịch","translationIssue","thumb-down"],["Vấn đề về mẫu/mã","samplesCodeIssue","thumb-down"],["Khác","otherDown","thumb-down"]],["Cập nhật lần gần đây nhất: 2025-08-29 UTC."],[[["\u003cp\u003eTo use Google Photos APIs, enable them in your Google API Console project and set up an OAuth 2.0 client ID for user authentication.\u003c/p\u003e\n"],["\u003cp\u003eGoogle Photos APIs require user sign-in with a Google Account and do not support service accounts.\u003c/p\u003e\n"],["\u003cp\u003eBefore launching publicly, your application needs to be verified by Google to remove the "Unverified app" message.\u003c/p\u003e\n"],["\u003cp\u003eResources created with a specific client ID can only be accessed or modified using the same ID; changing it may lead to access issues.\u003c/p\u003e\n"],["\u003cp\u003eYou can get started with either the Picker API or the Library API after configuring your application.\u003c/p\u003e\n"]]],["To utilize Google Photos APIs, enable them in your project via the Google API Console. Then, request an OAuth 2.0 client ID, selecting your application type and registering authorized JavaScript origins and redirect URIs. Copy the client ID and secret for your app's use. Note that user sign-in via a valid Google Account is necessary. Applications must be verified by Google before public launch, and client ID changes can cause access issues to previously created resources.\n"],null,["# Configure your app\n\nTo start using the Google Photos APIs, configure your project by enabling the Photos\nAPIs you need using the Google API Console and setting up an OAuth 2.0 client ID.\n\nYour application interacts with Google Photos on behalf of a\nGoogle Photos user. For example, when you create albums in a user's\nGoogle Photos library or upload media items to a user's\nGoogle Photos account, the user authorizes these API requests using the\n[OAuth 2.0](/identity/protocols/OAuth2) protocol.\n\nThe OAuth 2.0 client ID allows your application users to sign in, authenticate,\nand thereby use the Photos APIs. The Photos APIs don't support\nservice accounts; to use these APIs, users must be signed in to a valid Google\nAccount.\n\nConfigure your app\n------------------\n\nFirst enable the API, then request an OAuth 2.0 client ID.\n\n### Enable the API\n\nBefore you can use the Photos APIs, you must enable them in your project.\n\n1. Go to the [Google API Console](https://console.developers.google.com/apis/library).\n2. From the menu bar, select a project or create a new project.\n3. To open one of the Google Photos APIs, from the Navigation menu, select **APIs \\& Services \\\u003e Library**.\n4. Search for \"Photos\". Select one or more of the Photos APIs and click **Enable**.\n\n| **Note:** When searching Google APIs, you may also see the \"Google Picker API\", which is different from the Google Photos Picker API.\n\n### Request an OAuth 2.0 client ID\n\nFollow these steps to request an OAuth client ID and configure it for your\napplication. This example uses an application where the entire OAuth flow is\nhandled server-side, such as the one in our samples. The setup process may vary\nfor other [implementation scenarios](/identity/protocols/OAuth2).\n\n1. Go to the [Google API Console](https://console.developers.google.com/apis/library) and select your project.\n2. From the menu, select **APIs \\& Services \\\u003e Credentials**.\n3. On the **Credentials** page, click **Create Credentials \\\u003e OAuth client ID**.\n\n | **Note:** If you're setting up a new project, you may be prompted to configure your project's consent screen.\n4. Select your **Application type** . In this example, the application type is\n **Web application**.\n\n5. Register the origins from which your app is allowed to access the Google\n APIs as follows:\n\n 1. To identify the client ID, enter a name.\n 2. In the **Authorized JavaScript origins** field, enter the origin for\n your app. This field doesn't allow wildcards.\n\n You can enter multiple origins to allow your app to run on different\n protocols, domains, or subdomains. The URLs you enter are allowed to\n start an OAuth request.\n\n The following example shows a local development URL (our samples use\n `localhost:8080`) and a production URL. \n\n http://localhost:8080\n https://myproductionurl.example.com\n\n 3. The **Authorized redirect URI** field is the endpoint that receives\n responses from the OAuth 2.0 server. Typically, this includes your\n development environment and points to a path in your application.\n\n http://localhost:8080/auth/google/callback\n https://myproductionurl.example.com/auth/google/callback\n\n 4. Click **Create**.\n\n\u003c!-- --\u003e\n\n6. From the resulting OAuth client dialog, copy the following:\n\n - Client ID\n - Client secret\n\n Your app can access the enabled Google APIs using these values.\n\nBefore you can launch a public application that accesses the Photos APIs,\nyour app must be reviewed by Google. An \"Unverified app\" message appears on the\nscreen when you test your application, until it is\n[verified](https://support.google.com/cloud/answer/7454865).\n\nAfter you've configured your app you're ready to get started:\n\n- [Get started with the Picker API](/photos/picker/guides/get-started-picker)\n- [Get started with the Library API](/photos/library/guides/get-started-library)\n\nChanging your client ID\n-----------------------\n\nResources created through any of the Google Photos APIs can only be accessed or\nmodified using the original client ID used to create them. For example, if you\ncreate a `session` in the Picker API with a specific client ID and later change\nthat client ID in your app, your app will lose access to any API resources\ncreated with the previous client ID.\n\nPlan carefully and choose the correct client ID type for the Photos API you are\nusing. Only change your client ID if absolutely necessary to avoid access\nissues."]]