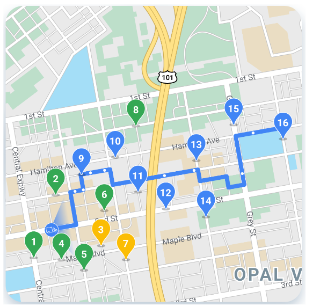
Za pomocą tego pakietu możesz skompilować i uruchomić podstawową aplikację dla klientów indywidualnych zintegrowaną z usługami backendu na żądanie i do przesyłania dostaw. Możesz utworzyć aplikację Podróże i Postępy zamówienia, która może wyświetlać aktywną podróż, odpowiadać na jej aktualizacje i obsługiwać błędy.
Ponieważ pakiet SDK klienta jest architekturą modułową, możesz używać części interfejsu API, których chcesz używać w przypadku konkretnej aplikacji, i integrować je z własnymi interfejsami API, usługami backendu udostępnionymi przez Fleet Engine i dodatkowymi interfejsami API Google Maps Platform.
Minimalne wymagania systemowe
Konfiguracja projektu
Możesz skonfigurować SDK konsumenta za pomocą CocoaPods.
Korzystanie z CocoaPods
Aby skonfigurować SDK dla klientów za pomocą CocoaPods, potrzebujesz tych elementów:
- Narzędzie CocoaPods: aby zainstalować to narzędzie, otwórz Terminal i uruchom to polecenie.
shell sudo gem install cocoapods
Więcej informacji znajdziesz w przewodniku dla początkujących na temat CocoaPods.
Utwórz plik Podfile dla pakietu SDK klienta i użyj go do zainstalowania interfejsu API i jego zależności. Najpierw utwórz w katalogu projektu plik o nazwie Podfile. Ten plik definiuje zależności projektu. Następnie edytuj plik Podfile i dodaj zależności. Oto przykład, który obejmuje zależności:
source "https://github.com/CocoaPods/Specs.git" target 'YOUR_APPLICATION_TARGET_NAME_HERE' do pod 'GoogleRidesharingConsumer' end
Zapisz plik Podfile. Otwórz terminal i przejdź do katalogu z plikiem Podfile:
cd <path-to-project>
Uruchom polecenie instalacji poda. Spowoduje to zainstalowanie interfejsów API określonych w pliku Podfile wraz z ich zależnościami.
pod install
Zamknij Xcode, a następnie kliknij (dwukrotnie) plik .xcworkspace projektu, aby uruchomić Xcode. Aby później otworzyć projekt, użyj pliku .xcworkspace.
Zainstaluj XCFramework
XCFramework to pakiet binarny, którego używasz do zainstalowania pakietu SDK klienta. Ten pakiet może być używany na wielu platformach, w tym na komputerach z chipsetem M1. Z tego przewodnika dowiesz się, jak ręcznie dodać do projektu XCFramework z pakietem SDK klienta i skonfigurować ustawienia kompilacji w Xcode.
Rozpakuj pliki źródłowe otrzymane od Google.
Uruchom Xcode i otwórz istniejący projekt lub utwórz nowy. Jeśli dopiero zaczynasz korzystać z iOS, utwórz nowy projekt i wybierz szablon aplikacji na iOS.
Jeśli jeszcze nie istnieje, utwórz grupę w ramach grupy projektów.
Przeciągnij plik
gRPCCertificates.bundle
znajdujący się w kataloguResources
archiwum ZIP zawierającego element XCFramework do katalogu najwyższego poziomu w projekcie Xcode. W razie potrzeby wybierz Kopiuj elementy.Aby zainstalować pakiet SDK dla klientów indywidualnych, przeciągnij plik
GoogleRidesharingConsumer.xcframework
do projektu, używając opcjiFrameworks, Libraries, and Embedded Content
. W razie potrzeby wybierz Kopiuj elementy.Wybierz projekt w Nawigatorze projektu i wybierz aplikację.
Otwórz kartę Etapy kompilacji i w oknie Połącz plik binarny dodaj te biblioteki i biblioteki, jeśli jeszcze ich tam nie ma:
Accelerate.framework
CoreData.framework
CoreGraphics.framework
CoreImage.framework
CoreLocation.framework
CoreTelephony.framework
CoreText.framework
GLKit.framework
ImageIO.framework
libc++.tbd
libz.tbd
Metal.framework
OpenGLES.framework
QuartzCore.framework
SystemConfiguration.framework
UIKit.framework
Zamiast projektu wybierz projekt, a potem otwórz kartę Ustawienia kompilacji. W sekcji Inne flagi łączące dodaj
‑ObjC
do debugowania i publikowania. Jeśli nie widzisz tych ustawień, zmień filtr na pasku ustawień kompilacji z Podstawowy na Wszystkie.
Wersje alfa/beta pakietu SDK
Aby skonfigurować wersję alfa lub beta pakietu SDK dla klientów indywidualnych za pomocą CocoaPods na iOS, potrzebujesz tych elementów:
Narzędzie CocoaPods: aby zainstalować to narzędzie, otwórz Terminal i uruchom to polecenie.
sudo gem install cocoapods
Więcej informacji znajdziesz w przewodniku dla początkujących na temat CocoaPods.
Twoje konto dewelopera na liście dostępu Google. Repozytorium podów w wersjach alfa i beta pakietu SDK nie jest źródłem publicznym. Aby uzyskać do nich dostęp, skontaktuj się z inżynierem ds. obsługi klienta Google. Inżynier dodaje Twoje konto dla deweloperów do listy dostępu, a następnie ustawia plik cookie na potrzeby uwierzytelniania.
Gdy Twój projekt pojawi się na liście dostępu, możesz uzyskać dostęp do poda.
Utwórz plik Podfile dla pakietu SDK dla konsumentów na iOS i użyj go do zainstalowania interfejsu API i jego zależności: utwórz w katalogu projektu plik o nazwie Podfile. Ten plik definiuje zależności projektu. Edytuj plik Podfile i dodaj do niego zależności. Oto przykład zależności:
source "https://cpdc-eap.googlesource.com/ridesharing-consumer-sdk" source "https://github.com/CocoaPods/Specs.git" target 'YOUR_APPLICATION_TARGET_NAME_HERE' do pod 'GoogleRidesharingConsumer' end
Zapisz plik Podfile. Otwórz terminal i przejdź do katalogu z plikiem Podfile:
cd <path-to-project>
Uruchom polecenie instalacji poda. Spowoduje to zainstalowanie interfejsów API określonych w pliku Podfile wraz z ich zależnościami.
pod install
Zamknij Xcode, a następnie kliknij dwukrotnie plik .xcworkspace projektu, aby uruchomić Xcode. Od teraz do otwierania tego projektu musisz używać pliku .xcworkspace.
Integracja aplikacji
Podaj token uwierzytelniania
Gdy Twoja aplikacja konsumenta poprosi o aktualizację podróży z Fleet Engine, musi zawierać prawidłowe tokeny dostępu. Aby autoryzować i uwierzytelniać te żądania, pakiet SDK dla klientów indywidualnych wywołuje Twój obiekt zgodny z protokołem GMTCAuthorization
. Obiekt jest odpowiedzialny za dostarczenie wymaganego tokena dostępu.
Deweloper aplikacji decyduje o sposobie generowania tokenów. Implementacja powinna umożliwiać wykonywanie tych czynności:
- Pobieranie tokena dostępu (prawdopodobnie w formacie JSON) z serwera HTTPS.
- Przeanalizuj token i zapisz go w pamięci podręcznej.
- Odśwież token, gdy straci ważność.
Szczegółowe informacje o tokenach oczekiwanych przez serwer Fleet Engine znajdziesz w artykule Tworzenie tokena internetowego JSON (JWT) do autoryzacji.
Identyfikator dostawcy jest taki sam jak identyfikator projektu Google Cloud. Więcej informacji znajdziesz w artykule Pierwsze kroki z Fleet Engine.
W tym przykładzie zaimplementowano dostawcę tokena dostępu:
Swift
/*
* SampleAccessTokenProvider.swift
*/
import GoogleRidesharingConsumer
private let providerURL = "INSERT_YOUR_TOKEN_PROVIDER_URL"
class SampleAccessTokenProvider: NSObject, GMTCAuthorization {
private struct AuthToken {
// The cached trip token.
let token: String
// Keep track of when the token expires for caching.
let expiration: TimeInterval
// Keep track of the trip ID the cached token is for.
let tripID: String
}
enum AccessTokenError: Error {
case missingAuthorizationContext
case missingData
}
private var authToken: AuthToken?
func fetchToken(
with authorizationContext: GMTCAuthorizationContext?,
completion: @escaping GMTCAuthTokenFetchCompletionHandler
) {
// Get the trip ID from the authorizationContext. This is set by the Consumer SDK.
guard let authorizationContext = authorizationContext else {
completion(nil, AccessTokenError.missingAuthorizationContext)
return
}
let tripID = authorizationContext.tripID
// If appropriate, use the cached token.
if let authToken = authToken,
authToken.expiration > Date.now.timeIntervalSince1970 && authToken.tripID == tripID
{
completion(authToken.token, nil)
return
}
// Otherwise, try to fetch a new token from your server.
let request = URLRequest(url: URL(string: providerURL))
let task = URLSession.shared.dataTask(with: request) { [weak self] data, _, error in
guard let strongSelf = self else { return }
guard error == nil else {
completion(nil, error)
return
}
// Replace the following key values with the appropriate keys based on your
// server's expected response.
let tripTokenKey = "TRIP_TOKEN_KEY"
let tokenExpirationKey = "TOKEN_EXPIRATION"
guard let data = data,
let fetchData = try? JSONSerialization.jsonObject(with: data) as? [String: Any],
let token = fetchData[tripTokenKey] as? String,
let expiration = fetchData[tokenExpirationKey] as? Double
else {
completion(nil, AccessTokenError.missingData)
return
}
strongSelf.authToken = AuthToken(token: token, expiration: expiration, tripID: tripID)
completion(token, nil)
}
task.resume()
}
}
Objective-C
/*
* SampleAccessTokenProvider.h
*/
#import <Foundation/Foundation.h>
#import <GoogleRidesharingConsumer/GoogleRidesharingConsumer.h>
NS_ASSUME_NONNULL_BEGIN
@interface SampleAccessTokenProvider : NSObject <GMTCAuthorization>
@end
NS_ASSUME_NONNULL_END
/*
* SampleAccessTokenProvider.m
*/
#import "SampleAccessTokenProvider.h"
#import "GoogleRidesharingConsumer/GoogleRidesharingConsumer.h"
static NSString *const PROVIDER_URL = @"INSERT_YOUR_TOKEN_PROVIDER_URL";
// SampleAccessTokenProvider.m
@implementation SampleAccessTokenProvider {
// The cached token with claims to the current trip.
NSString *_cachedTripToken;
// Keep track of the Trip ID the cached token is for.
NSString *_lastKnownTripID;
// Keep track of when tokens expire for caching.
NSTimeInterval _tokenExpiration;
}
- (void)fetchTokenWithContext:(nullable GMTCAuthorizationContext *)authorizationContext
completion:(nonnull GMTCAuthTokenFetchCompletionHandler)completion {
// Get the trip ID from the authorizationContext. This is set by the Consumer SDK.
NSString *tripID = authorizationContext.tripID;
// Clear cached trip token if trip ID has changed.
if (![_lastKnownTripID isEqual:tripID]) {
_tokenExpiration = 0.0;
_cachedTripToken = nil;
}
_lastKnownTripID = tripID;
// Clear cached tripToken if it has expired.
if ([[NSDate date] timeIntervalSince1970] > _tokenExpiration) {
_cachedTripToken = nil;
}
// If appropriate, use the cached token.
if (_cachedTripToken) {
completion(_cachedTripToken, nil);
return;
}
// Otherwise, try to fetch a new token from your server.
NSURL *requestURL = [NSURL URLWithString:PROVIDER_URL];
NSMutableURLRequest *request =
[[NSMutableURLRequest alloc] initWithURL:requestURL];
request.HTTPMethod = @"GET";
// Replace the following key values with the appropriate keys based on your
// server's expected response.
NSString *tripTokenKey = @"TRIP_TOKEN_KEY";
NSString *tokenExpirationKey = @"TOKEN_EXPIRATION";
__weak typeof(self) weakSelf = self;
void (^handler)(NSData *_Nullable data, NSURLResponse *_Nullable response,
NSError *_Nullable error) =
^(NSData *_Nullable data, NSURLResponse *_Nullable response, NSError *_Nullable error) {
typeof(self) strongSelf = weakSelf;
if (error) {
completion(nil, error);
return;
}
NSError *JSONError;
NSMutableDictionary *JSONResponse =
[NSJSONSerialization JSONObjectWithData:data options:kNilOptions error:&JSONError];
if (JSONError) {
completion(nil, JSONError);
return;
} else {
// Sample code only. No validation logic.
id expirationData = JSONResponse[tokenExpirationKey];
if ([expirationData isKindOfClass:[NSNumber class]]) {
NSTimeInterval expirationTime = ((NSNumber *)expirationData).doubleValue;
strongSelf->_tokenExpiration = [[NSDate date] timeIntervalSince1970] + expirationTime;
}
strongSelf->_cachedTripToken = JSONResponse[tripTokenKey];
completion(JSONResponse[tripTokenKey], nil);
}
};
NSURLSessionConfiguration *config = [NSURLSessionConfiguration defaultSessionConfiguration];
NSURLSession *mainQueueURLSession =
[NSURLSession sessionWithConfiguration:config delegate:nil
delegateQueue:[NSOperationQueue mainQueue]];
NSURLSessionDataTask *task = [mainQueueURLSession dataTaskWithRequest:request completionHandler:handler];
[task resume];
}
@end
Inicjowanie aplikacji
Swift
/*
* AppDelegate.swift
*/
import GoogleRidesharingConsumer
import GoogleMaps
@UIApplicationMain
class AppDelegate: UIResponder, UIApplicationDelegate {
func application(_ application: UIApplication,
didFinishLaunchingWithOptions launchOptions: [UIApplication.LaunchOptionsKey: Any]?) -> Bool {
// Register your API key for GMSServices.
GMSServices.provideAPIKey(yourMapsAPIKey)
// Set the instance of the SampleAccessTokenProvider.
GMTCServices.setAccessTokenProvider(SampleAccessTokenProvider(), providerID: yourProviderID)
// Other initialization code ...
return true
}
}
Objective-C
/*
* AppDelegate.m
*/
#import <GoogleMaps/GoogleMaps.h>
#import <GoogleRidesharingConsumer/GoogleRidesharingConsumer.h>
@implementation AppDelegate
- (BOOL)application:(UIApplication *)application
didFinishLaunchingWithOptions:(NSDictionary *)launchOptions {
//Register your API key for GMSServices.
[GMSServices provideAPIKey:yourMapsAPIKey];
//Set the instance of the AccessTokenFactory.
[GMTCServices setAccessTokenProvider:[[SampleAccessTokenProvider alloc] init]
providerID:yourProviderID];
// Other initialization code ...
return YES;
}
@end
Integracja z widokiem mapy
Inicjowanie widoku mapy
Poniższy przykład pokazuje, jak uruchomić GMTCMapView
.
Swift
/*
* MapViewController.swift
*/
class ViewController: UIViewController, GMTCMapViewDelegate {
private var rideSharingMap: GMTCMapView?
override func viewDidLoad() {
super.viewDidLoad()
self.rideSharingMap = GMTCMapView(frame: UIScreen.main.bounds)
self.rideSharingMap.delegate = self
self.rideSharingMap?.settings.myLocationButton = true
self.view.addSubview(self.rideSharingMap!)
...
}
Objective-C
/*
* MapViewController.h
*/
@interface MapViewController : UIViewController<GMTCMapViewDelegate>
...
@end
/*
* MapViewController.m
*/
@implementation MapViewController
- (void)viewDidLoad {
[super viewDidLoad];
...
self.mapView = [[GMTCMapView alloc] init];
self.mapView.settings.myLocationButton = YES;
self.mapView.delegate = self;
...
}
...
@end
Obsługa zdarzeń wyświetlenia mapy
Poniższy przykład pokazuje, jak wdrożyć przekazywanie dostępu do zdarzeń stanu klienta.
Swift
func mapViewDidInitialize(_ mapview: GMTCMapView) {
// Handle the update to the state of the map view to browsing.
}
func mapView(_ mapView: GMSMapView, didTapConsumerMarker mapMarker: GMSMarker, markerType: GMTCMapViewMarkerType) -> Bool {
// Handle the mapView marker was tapped.
}
Objective-C
/*
* MapViewController.m
*/
#pragma mark - GMTCMapViewDelegate implementation
// Handle state update of map view.
- (void)mapViewDidInitializeCustomerState:(GMTCMapView *)mapview {
// Handle the update to the state of the map view to browsing.
}
- (void)mapView:(GMSMapView *)mapView
didTapConsumerMarker:(nonnull GMSMarker *)mapMarker
markerType:(GMTCMapViewMarkerType)markerType {
// Handle the mapView marker was tapped.
}
Udostępnianie ścieżki
Rozpoczynanie nowej podróży po wczytaniu widoku
Poniższy przykład pokazuje, jak rozpocząć udostępnianie ścieżki od razu po wczytaniu widoku. Możesz zebrać wszystkie dane wejściowe użytkownika, takie jak lokalizacje dostawy i odbioru z witryny ViewController
, a następnie utwórz nowy element ViewController
, aby rozpocząć udostępnianie podróży bezpośrednio.
Swift
/*
* MapViewController.swift
*/
override func viewDidLoad() {
super.viewDidLoad()
...
self.mapView = GMTCMapView(frame: UIScreen.main.bounds)
self.mapView.delegate = self
self.view.addSubview(self.mapView)
}
func mapViewDidInitializeCustomerState(_: GMTCMapView) {
self.mapView.pickupLocation = self.selectedPickupLocation
self.mapView.dropoffLocation = self.selectedDropoffLocation
self.startConsumerMatchWithLocations(
pickupLocation: self.mapView.pickupLocation!,
dropoffLocation: self.mapView.dropoffLocation!
) { [weak self] (tripName, error) in
guard let strongSelf = self else { return }
if error != nil {
// print error message.
return
}
let tripService = GMTCServices.shared().tripService
// Create a tripModel instance for listening the update of the trip
// specified by this trip name.
let tripModel = tripService.tripModel(forTripName: tripName)
// Create a journeySharingSession instance based on the tripModel
let journeySharingSession = GMTCJourneySharingSession(tripModel: tripModel)
// Add the journeySharingSession instance on the mapView for UI updating.
strongSelf.mapView.show(journeySharingSession)
// Register for the trip update events.
tripModel.register(strongSelf)
strongSelf.currentTripModel = tripModel
strongSelf.currentJourneySharingSession = journeySharingSession
strongSelf.hideLoadingView()
}
self.showLoadingView()
}
Objective-C
/*
* MapViewController.m
*/
- (void)viewDidLoad {
[super viewDidLoad];
...
self.mapView = [[GMTCMapView alloc] init];
self.mapView.delegate = self;
[self.view addSubview:self.mapView];
}
// Handle the callback when the GMTCMapView did initialized.
- (void)mapViewDidInitializeCustomerState:(GMTCMapView *)mapview {
self.mapView.pickupLocation = self.selectedPickupLocation;
self.mapView.dropoffLocation = self.selectedDropoffLocation;
__weak __typeof(self) weakSelf = self;
[self startTripBookingWithPickupLocation:self.selectedPickupLocation
dropoffLocation:self.selectedDropoffLocation
completion:^(NSString *tripName, NSError *error) {
__typeof(self) strongSelf = weakSelf;
GMTCTripService *tripService = [GMTCServices sharedServices].tripService;
// Create a tripModel instance for listening to updates to the trip specified by this trip name.
GMTCTripModel *tripModel = [tripService tripModelForTripName:tripName];
// Create a journeySharingSession instance based on the tripModel.
GMTCJourneySharingSession *journeySharingSession =
[[GMTCJourneySharingSession alloc] initWithTripModel:tripModel];
// Add the journeySharingSession instance on the mapView for updating the UI.
[strongSelf.mapView showMapViewSession:journeySharingSession];
// Register for trip update events.
[tripModel registerSubscriber:self];
strongSelf.currentTripModel = tripModel;
strongSelf.currentJourneySharingSession = journeySharingSession;
[strongSelf hideLoadingView];
}];
[self showLoadingView];
}
Anuluj aktywną podróż
Przykład poniżej pokazuje, jak zresetować bieżącą aktywną podróż.
Swift
/*
* MapViewController.swift
*/
func cancelCurrentActiveTrip() {
// Stop the tripModel
self.currentTripModel.unregisterSubscriber(self)
// Remove the journey sharing session from the mapView's UI stack.
self.mapView.hide(journeySharingSession)
}
Objective-C
/*
* MapViewController.m
*/
- (void)cancelCurrentActiveTrip {
// Stop the tripModel
[self.currentTripModel unregisterSubscriber:self];
// Remove the journey sharing session from the mapView's UI stack.
[self.mapView hideMapViewSession:journeySharingSession];
}
Słuchaj aktualności na temat podróży
Poniższy przykład pokazuje, jak zarejestrować wywołanie zwrotne tripModel
.
Swift
/*
* MapViewController.swift
*/
override func viewDidLoad() {
super.viewDidLoad()
// Register for trip update events.
self.currentTripModel.register(self)
}
Objective-C
/*
* MapViewController.m
*/
- (void)viewDidLoad {
[super viewDidLoad];
// Register for trip update events.
[self.currentTripModel registerSubscriber:self];
...
}
Poniższy przykład pokazuje, jak anulować rejestrację wywołania zwrotnego tripModel
.
Swift
/*
* MapViewController.swift
*/
deinit {
self.currentTripModel.unregisterSubscriber(self)
}
Objective-C
/*
* MapViewController.m
*/
- (void)dealloc {
[self.currentTripModel unregisterSubscriber:self];
...
}
Poniższy przykład pokazuje, jak wdrożyć protokół GMTCTripModelSubscriber
do obsługi wywołań zwrotnych po zaktualizowaniu stanu podróży.
Swift
/*
* MapViewController.swift
*/
func tripModel(_: GMTCTripModel, didUpdate trip: GMTSTrip?, updatedPropertyFields: GMTSTripPropertyFields) {
// Update the UI with the new `trip` data.
self.updateUI(with: trip)
}
func tripModel(_: GMTCTripModel, didUpdate tripStatus: GMTSTripStatus) {
// Handle trip status did change.
}
func tripModel(_: GMTCTripModel, didUpdateActiveRouteRemainingDistance activeRouteRemainingDistance: Int32) {
// Handle remaining distance of active route did update.
}
func tripModel(_: GMTCTripModel, didUpdateActiveRoute activeRoute: [GMTSLatLng]?) {
// Handle trip active route did update.
}
func tripModel(_: GMTCTripModel, didUpdate vehicleLocation: GMTSVehicleLocation?) {
// Handle vehicle location did update.
}
func tripModel(_: GMTCTripModel, didUpdatePickupLocation pickupLocation: GMTSTerminalLocation?) {
// Handle pickup location did update.
}
func tripModel(_: GMTCTripModel, didUpdateDropoffLocation dropoffLocation: GMTSTerminalLocation?) {
// Handle drop off location did update.
}
func tripModel(_: GMTCTripModel, didUpdatePickupETA pickupETA: TimeInterval) {
// Handle the pickup ETA did update.
}
func tripModel(_: GMTCTripModel, didUpdateDropoffETA dropoffETA: TimeInterval) {
// Handle the drop off ETA did update.
}
func tripModel(_: GMTCTripModel, didUpdateRemaining remainingWaypoints: [GMTSTripWaypoint]?) {
// Handle updates to the pickup, dropoff or intermediate destinations of the trip.
}
func tripModel(_: GMTCTripModel, didFailUpdateTripWithError error: Error?) {
// Handle the error.
}
func tripModel(_: GMTCTripModel, didUpdateIntermediateDestinations intermediateDestinations: [GMTSTerminalLocation]?) {
// Handle the intermediate destinations being updated.
}
func tripModel(_: GMTCTripModel, didUpdateActiveRouteTraffic activeRouteTraffic: GMTSTrafficData?) {
// Handle trip active route traffic being updated.
}
Objective-C
/*
* MapViewController.m
*/
#pragma mark - GMTCTripModelSubscriber implementation
- (void)tripModel:(GMTCTripModel *)tripModel
didUpdateTrip:(nullable GMTSTrip *)trip
updatedPropertyFields:(enum GMTSTripPropertyFields)updatedPropertyFields {
// Update the UI with the new `trip` data.
[self updateUIWithTrip:trip];
...
}
- (void)tripModel:(GMTCTripModel *)tripModel didUpdateTripStatus:(enum GMTSTripStatus)tripStatus {
// Handle trip status did change.
}
- (void)tripModel:(GMTCTripModel *)tripModel
didUpdateActiveRouteRemainingDistance:(int32_t)activeRouteRemainingDistance {
// Handle remaining distance of active route did update.
}
- (void)tripModel:(GMTCTripModel *)tripModel
didUpdateActiveRoute:(nullable NSArray<GMTSLatLng *> *)activeRoute {
// Handle trip active route did update.
}
- (void)tripModel:(GMTCTripModel *)tripModel
didUpdateVehicleLocation:(nullable GMTSVehicleLocation *)vehicleLocation {
// Handle vehicle location did update.
}
- (void)tripModel:(GMTCTripModel *)tripModel
didUpdatePickupLocation:(nullable GMTSTerminalLocation *)pickupLocation {
// Handle pickup location did update.
}
- (void)tripModel:(GMTCTripModel *)tripModel
didUpdateDropoffLocation:(nullable GMTSTerminalLocation *)dropoffLocation {
// Handle drop off location did update.
}
- (void)tripModel:(GMTCTripModel *)tripModel didUpdatePickupETA:(NSTimeInterval)pickupETA {
// Handle the pickup ETA did update.
}
- (void)tripModel:(GMTCTripModel *)tripModel
didUpdateRemainingWaypoints:(nullable NSArray<GMTSTripWaypoint *> *)remainingWaypoints {
// Handle updates to the pickup, dropoff or intermediate destinations of the trip.
}
- (void)tripModel:(GMTCTripModel *)tripModel didUpdateDropoffETA:(NSTimeInterval)dropoffETA {
// Handle the drop off ETA did update.
}
- (void)tripModel:(GMTCTripModel *)tripModel didFailUpdateTripWithError:(nullable NSError *)error {
// Handle the error.
}
- (void)tripModel:(GMTCTripModel *)tripModel
didUpdateIntermediateDestinations:
(nullable NSArray<GMTSTerminalLocation *> *)intermediateDestinations {
// Handle the intermediate destinations being updated.
}
- (void)tripModel:(GMTCTripModel *)tripModel
didUpdateActiveRouteTraffic:(nullable GMTSTrafficData *)activeRouteTraffic {
// Handle trip active route traffic being updated.
}
Obsługa błędów
Jeśli podczas subskrybowania podróży TriModel wystąpi błąd, możesz wywołać wywołanie tryModel, stosując metodę przekazywania tripModel(_:didFailUpdateTripWithError:)
. Fleet Engine wygenerował komunikat o błędzie zgodny ze standardem Google Cloud Error. Szczegółową definicję oraz wszystkie kody błędów znajdziesz w dokumentacji błędów Google Cloud.
W przypadku monitorowania podróży wymaga to podania ważnego tokena uwierzytelniania. Wartość 401 UNAUTHENTICATED
zostanie zwrócona, jeśli nie będzie prawidłowych danych uwierzytelniających, np. token wygaśnie. 403 PERMISSION_DENIED
zostanie wywołana, jeśli element wywołujący nie ma uprawnień do wywoływania określonego interfejsu API (na przykład użytkownik z rolą konsumenta próbuje wywołać metodę updateTrip) lub żądanie nie ma prawidłowego identyfikatora token_id/trip_id w tokenie JWT.
Więcej informacji znajdziesz w artykule Obsługa błędów konsumenckich dotyczących pakietu SDK.
Dostosowywanie interfejsu użytkownika
Pobieranie/ustawianie opcji interfejsu niestandardowych linii łamanych
Poniższy przykład pokazuje, jak ustawić niestandardowe opcje interfejsu użytkownika dla linii łamanych.
Swift
/** MapViewController.swift */
func updatePolylineUIOptions() {
// The polyline type that you would like to set custom UI options for.
let customizablePolylineType = GMTCPolylineType.activeRoute
let polylineStyleOptions = GMTCMutablePolylineStyleOptions()
polylineStyleOptions.strokeWidth = 8.0
polylineStyleOptions.strokeColor = .blue
polylineStyleOptions.isVisible = true
polylineStyleOptions.zIndex = 1000
polylineStyleOptions.isGeodesic = true
let coordinator = self.mapView.consumerMapStyleCoordinator
coordinator.setPolylineStyleOptions(polylineStyleOptions, polylineType:customizablePolylineType)
}
Objective-C
/** MapViewController.m */
- (void)updatePolylineUIOptions {
// The polyline type that you would like to set custom UI options for.
GMTCPolylineType customizablePolylineType = GMTCPolylineTypeActiveRoute;
GMTCMutablePolylineStyleOptions *polylineStyleOptions =
[[GMTCMutablePolylineStyleOptions alloc] init];
polylineStyleOptions.strokeWidth = 8.0;
polylineStyleOptions.strokeColor = [UIColor blueColor];
polylineStyleOptions.isVisible = YES;
polylineStyleOptions.zIndex = 1000;
polylineStyleOptions.isGeodesic = YES;
[[_mapView consumerMapStyleCoordinator] setPolylineStyleOptions:polylineStyleOptions
polylineType:customizablePolylineType];
}
Pobierz/ustal opcje interfejsu niestandardowego znacznika
Poniższy przykład pokazuje, jak ustawić niestandardowe opcje interfejsu znaczników.
Swift
/** MapViewController.swift */
func updateMarkerUIOptions() {
let customizableMarkerType = GMTCCustomizableMarkerType.tripVehicle
let markerStyleOptions = GMTCMutableMarkerStyleOptions()
markerStyleOptions.groundAnchor = groundAnchor
markerStyleOptions.isVisible = true
markerStyleOptions.icon = icon
markerStyleOptions.zIndex = 100
markerStyleOptions.isFlat = false
let coordinator = self.mapView.consumerMapStyleCoordinator
coordinator.setMarkerStyleOptions(markerStyleOptions, markerType: customizableMarkerType)
}
Objective-C
/** MapViewController.m */
- (void)updateMarkerUIOptions {
// The marker type that you would like to set custom UI options for.
GMTCCustomizableMarkerType customizableMarkerType = GMTCCustomizableMarkerTypeTripVehicle;
GMTCMutableMarkerStyleOptions *markerStyleOptions =
[[GMTCMutableMarkerStyleOptions alloc] init];
markerStyleOptions.groundAnchor = groundAnchor;
markerStyleOptions.isVisible = YES;
markerStyleOptions.icon = icon;
markerStyleOptions.zIndex = 100;
markerStyleOptions.isFlat = NO;
[[_mapView consumerMapStyleCoordinator] setMarkerStyleOptions:markerStyleOptions markerType:customizableMarkerType];
}
Dostosowywanie powiększenia aparatu
Przycisk Moja lokalizacja w pakiecie Maps SDK na iOS umożliwia wyśrodkowanie aparatu na lokalizacji urządzenia.
Jeśli jest aktywna sesja udostępniania podróży, możesz wyśrodkować aparat, aby skupić się na podróży, a nie tylko na lokalizacji urządzenia.
SDK klienta ma funkcję automatycznej kamery, która jest domyślnie włączona. Kamera powiększy obraz, aby skupić się na trasie udostępniania i następnej trasie.
Jeśli chcesz mieć większą kontrolę nad działaniem kamery, możesz wyłączyć lub włączyć funkcję aparatu automatycznego za pomocą właściwości isAllowCameraAutoUpdate
.
Więcej informacji o dostosowywaniu aparatu znajdziesz w artykule Pakiet SDK Map na iOS – przenoszenie kamery.