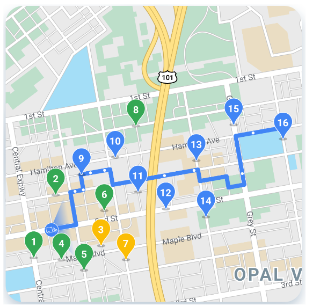
Anda dapat menggunakan SDK Konsumen untuk membuat dan menjalankan aplikasi konsumen dasar yang terintegrasi dengan layanan backend Solusi Perjalanan dan Pengiriman On-demand. Anda dapat membuat aplikasi Progres Perjalanan dan Pesanan yang dapat menampilkan perjalanan aktif, merespons info terbaru perjalanan, dan menangani error perjalanan.
Karena SDK Konsumen memiliki arsitektur modular, Anda dapat menggunakan bagian-bagian API yang ingin digunakan untuk aplikasi tertentu dan mengintegrasikannya dengan API Anda sendiri, layanan backend yang disediakan oleh Fleet Engine, dan API tambahan Google Maps Platform.
Persyaratan sistem minimum
Konfigurasi Project
Anda dapat mengonfigurasi SDK Konsumen menggunakan CocoaPods.
Menggunakan CocoaPods
Untuk mengonfigurasi Consumer SDK menggunakan CocoaPods, Anda memerlukan item berikut:
- Alat CocoaPods: Untuk menginstal alat ini, buka Terminal dan jalankan perintah berikut.
shell sudo gem install cocoapods
Lihat panduan Memulai CocoaPods untuk mengetahui detail selengkapnya.
Buat Podfile untuk Consumer SDK dan gunakan untuk menginstal API serta dependensinya. Pertama, buat file bernama Podfile di direktori project Anda. File ini mendefinisikan dependensi project Anda. Kemudian edit Podfile dan tambahkan dependensi Anda. Berikut adalah contoh yang menyertakan dependensi:
source "https://github.com/CocoaPods/Specs.git" target 'YOUR_APPLICATION_TARGET_NAME_HERE' do pod 'GoogleRidesharingConsumer' end
Simpan Podfile. Buka terminal, lalu buka direktori yang berisi Podfile:
cd <path-to-project>
Jalankan perintah pod install. Tindakan ini akan menginstal API yang ditentukan di Podfile, beserta dependensi yang mungkin dimilikinya.
pod install
Tutup Xcode, lalu buka (klik dua kali) file .xcworkspace project Anda untuk meluncurkan Xcode. Untuk membuka project pada lain waktu, gunakan file .xcworkspace.
Menginstal XCFramework
XCFramework adalah paket biner yang Anda gunakan untuk menginstal Consumer SDK. Anda dapat menggunakan paket ini di berbagai platform, termasuk mesin yang menggunakan chipset M1. Panduan ini menunjukkan cara menambahkan XCFramework yang berisi Consumer SDK secara manual ke project Anda, dan mengonfigurasi setelan build di Xcode.
Ekstrak file sumber yang Anda terima dari Google.
Mulai Xcode dan buka project yang sudah ada, atau buat project baru. Jika Anda baru menggunakan iOS, buat project baru dan pilih template Aplikasi iOS.
Buat grup Framework di grup project Anda jika belum ada.
Tarik file
gRPCCertificates.bundle
yang disertakan dalam direktoriResources
zip yang berisi XCFramework ke direktori level atas project Xcode Anda. Saat diminta, pilih Salin item jika diperlukan.Untuk menginstal Consumer SDK, tarik file
GoogleRidesharingConsumer.xcframework
ke project Anda di bagianFrameworks, Libraries, and Embedded Content
. Saat diminta, pilih Salin item jika diperlukan.Klik kanan
GoogleRidesharingConsumer.xcframework
di project Anda, lalu pilihShow In Finder
.Tarik
GoogleRidesharingConsumer.bundle
dari folderios-arm64_x86_64-simulator/GoogleRidesharingConsumer.framework/Resources
ke direktori level teratas project Xcode Anda. Saat diminta, pastikanCopy items if needed
tidak dipilih.Pilih project dari Project Navigator, dan pilih target aplikasi Anda.
Buka tab Build Phases, dan di Link Binary with Libraries, tambahkan framework dan library berikut jika belum ada:
Accelerate.framework
CoreData.framework
CoreGraphics.framework
CoreImage.framework
CoreLocation.framework
CoreTelephony.framework
CoreText.framework
GLKit.framework
ImageIO.framework
libc++.tbd
libz.tbd
Metal.framework
OpenGLES.framework
QuartzCore.framework
SystemConfiguration.framework
UIKit.framework
Pilih project Anda, bukan target tertentu, dan buka tab Build Settings. Di bagian Other Linker Flags, tambahkan
‑ObjC
untuk debug dan rilis. Jika setelan ini tidak terlihat, ubah filter di panel Setelan Build dari Dasar ke Semua.
Versi SDK Alfa/Beta
Untuk mengonfigurasi Consumer SDK versi Alfa atau Beta menggunakan CocoaPods untuk iOS, Anda memerlukan item berikut:
Alat CocoaPods: Untuk menginstal alat ini, buka Terminal dan jalankan perintah berikut.
sudo gem install cocoapods
Baca panduan Memulai CocoaPods untuk mengetahui detail selengkapnya.
Akun pengembangan Anda di daftar akses Google. Repositori pod SDK versi Alfa dan Beta bukanlah sumber publik. Untuk mengakses versi tersebut, hubungi Customer Engineer Google. Engineer akan menambahkan akun pengembangan Anda ke daftar akses, lalu menetapkan cookie untuk autentikasi.
Setelah project ada dalam daftar akses, Anda dapat mengakses pod.
Buat Podfile untuk Consumer SDK for iOS dan gunakan untuk menginstal API beserta dependensinya: Buat file bernama Podfile di direktori project Anda. File ini mendefinisikan dependensi project Anda. Edit Podfile dan tambahkan dependensi Anda. Berikut adalah contoh yang menyertakan dependensi:
source "https://cpdc-eap.googlesource.com/ridesharing-consumer-sdk" source "https://github.com/CocoaPods/Specs.git" target 'YOUR_APPLICATION_TARGET_NAME_HERE' do pod 'GoogleRidesharingConsumer' end
Simpan Podfile. Buka terminal, lalu buka direktori yang berisi Podfile:
cd <path-to-project>
Jalankan perintah pod install. Tindakan ini akan menginstal API yang ditentukan di Podfile, beserta dependensi yang mungkin dimilikinya.
pod install
Tutup Xcode, lalu buka (klik dua kali) file .xcworkspace project Anda untuk meluncurkan Xcode. Untuk selanjutnya, gunakan file .xcworkspace untuk membuka project.
Integrasi aplikasi
Berikan token autentikasi
Saat aplikasi Konsumen Anda meminta update perjalanan dari Fleet Engine,
permintaan tersebut harus menyertakan token akses yang valid. Untuk mengizinkan dan
mengautentikasi permintaan ini, Consumer SDK akan memanggil objek Anda sesuai dengan
protokol
GMTCAuthorization
. Objek bertanggung jawab menyediakan token akses yang diperlukan.
Sebagai developer aplikasi, Anda memilih cara token dibuat. Penerapan Anda harus memberikan kemampuan untuk melakukan hal berikut:
- Ambil token akses, mungkin dalam format JSON, dari server HTTPS.
- Mengurai dan meng-cache token.
- Muat ulang token jika masa berlakunya habis.
Untuk detail tentang token yang diharapkan oleh server Fleet Engine, lihat Membuat Token Web JSON (JWT) untuk otorisasi.
ID penyedia sama dengan ID Project Google Cloud. Untuk informasi selengkapnya, lihat Memulai Fleet Engine.
Contoh berikut mengimplementasikan penyedia token akses:
Swift
/*
* SampleAccessTokenProvider.swift
*/
import GoogleRidesharingConsumer
private let providerURL = "INSERT_YOUR_TOKEN_PROVIDER_URL"
class SampleAccessTokenProvider: NSObject, GMTCAuthorization {
private struct AuthToken {
// The cached trip token.
let token: String
// Keep track of when the token expires for caching.
let expiration: TimeInterval
// Keep track of the trip ID the cached token is for.
let tripID: String
}
enum AccessTokenError: Error {
case missingAuthorizationContext
case missingData
}
private var authToken: AuthToken?
func fetchToken(
with authorizationContext: GMTCAuthorizationContext?,
completion: @escaping GMTCAuthTokenFetchCompletionHandler
) {
// Get the trip ID from the authorizationContext. This is set by the Consumer SDK.
guard let authorizationContext = authorizationContext else {
completion(nil, AccessTokenError.missingAuthorizationContext)
return
}
let tripID = authorizationContext.tripID
// If appropriate, use the cached token.
if let authToken = authToken,
authToken.expiration > Date.now.timeIntervalSince1970 && authToken.tripID == tripID
{
completion(authToken.token, nil)
return
}
// Otherwise, try to fetch a new token from your server.
let request = URLRequest(url: URL(string: providerURL))
let task = URLSession.shared.dataTask(with: request) { [weak self] data, _, error in
guard let strongSelf = self else { return }
guard error == nil else {
completion(nil, error)
return
}
// Replace the following key values with the appropriate keys based on your
// server's expected response.
let tripTokenKey = "TRIP_TOKEN_KEY"
let tokenExpirationKey = "TOKEN_EXPIRATION"
guard let data = data,
let fetchData = try? JSONSerialization.jsonObject(with: data) as? [String: Any],
let token = fetchData[tripTokenKey] as? String,
let expiration = fetchData[tokenExpirationKey] as? Double
else {
completion(nil, AccessTokenError.missingData)
return
}
strongSelf.authToken = AuthToken(token: token, expiration: expiration, tripID: tripID)
completion(token, nil)
}
task.resume()
}
}
Objective-C
/*
* SampleAccessTokenProvider.h
*/
#import <Foundation/Foundation.h>
#import <GoogleRidesharingConsumer/GoogleRidesharingConsumer.h>
NS_ASSUME_NONNULL_BEGIN
@interface SampleAccessTokenProvider : NSObject <GMTCAuthorization>
@end
NS_ASSUME_NONNULL_END
/*
* SampleAccessTokenProvider.m
*/
#import "SampleAccessTokenProvider.h"
#import "GoogleRidesharingConsumer/GoogleRidesharingConsumer.h"
static NSString *const PROVIDER_URL = @"INSERT_YOUR_TOKEN_PROVIDER_URL";
// SampleAccessTokenProvider.m
@implementation SampleAccessTokenProvider {
// The cached token with claims to the current trip.
NSString *_cachedTripToken;
// Keep track of the Trip ID the cached token is for.
NSString *_lastKnownTripID;
// Keep track of when tokens expire for caching.
NSTimeInterval _tokenExpiration;
}
- (void)fetchTokenWithContext:(nullable GMTCAuthorizationContext *)authorizationContext
completion:(nonnull GMTCAuthTokenFetchCompletionHandler)completion {
// Get the trip ID from the authorizationContext. This is set by the Consumer SDK.
NSString *tripID = authorizationContext.tripID;
// Clear cached trip token if trip ID has changed.
if (![_lastKnownTripID isEqual:tripID]) {
_tokenExpiration = 0.0;
_cachedTripToken = nil;
}
_lastKnownTripID = tripID;
// Clear cached tripToken if it has expired.
if ([[NSDate date] timeIntervalSince1970] > _tokenExpiration) {
_cachedTripToken = nil;
}
// If appropriate, use the cached token.
if (_cachedTripToken) {
completion(_cachedTripToken, nil);
return;
}
// Otherwise, try to fetch a new token from your server.
NSURL *requestURL = [NSURL URLWithString:PROVIDER_URL];
NSMutableURLRequest *request =
[[NSMutableURLRequest alloc] initWithURL:requestURL];
request.HTTPMethod = @"GET";
// Replace the following key values with the appropriate keys based on your
// server's expected response.
NSString *tripTokenKey = @"TRIP_TOKEN_KEY";
NSString *tokenExpirationKey = @"TOKEN_EXPIRATION";
__weak typeof(self) weakSelf = self;
void (^handler)(NSData *_Nullable data, NSURLResponse *_Nullable response,
NSError *_Nullable error) =
^(NSData *_Nullable data, NSURLResponse *_Nullable response, NSError *_Nullable error) {
typeof(self) strongSelf = weakSelf;
if (error) {
completion(nil, error);
return;
}
NSError *JSONError;
NSMutableDictionary *JSONResponse =
[NSJSONSerialization JSONObjectWithData:data options:kNilOptions error:&JSONError];
if (JSONError) {
completion(nil, JSONError);
return;
} else {
// Sample code only. No validation logic.
id expirationData = JSONResponse[tokenExpirationKey];
if ([expirationData isKindOfClass:[NSNumber class]]) {
NSTimeInterval expirationTime = ((NSNumber *)expirationData).doubleValue;
strongSelf->_tokenExpiration = [[NSDate date] timeIntervalSince1970] + expirationTime;
}
strongSelf->_cachedTripToken = JSONResponse[tripTokenKey];
completion(JSONResponse[tripTokenKey], nil);
}
};
NSURLSessionConfiguration *config = [NSURLSessionConfiguration defaultSessionConfiguration];
NSURLSession *mainQueueURLSession =
[NSURLSession sessionWithConfiguration:config delegate:nil
delegateQueue:[NSOperationQueue mainQueue]];
NSURLSessionDataTask *task = [mainQueueURLSession dataTaskWithRequest:request completionHandler:handler];
[task resume];
}
@end
Inisialisasi aplikasi
Swift
/*
* AppDelegate.swift
*/
import GoogleRidesharingConsumer
import GoogleMaps
@UIApplicationMain
class AppDelegate: UIResponder, UIApplicationDelegate {
func application(_ application: UIApplication,
didFinishLaunchingWithOptions launchOptions: [UIApplication.LaunchOptionsKey: Any]?) -> Bool {
// Register your API key for GMSServices.
GMSServices.provideAPIKey(yourMapsAPIKey)
// Set the instance of the SampleAccessTokenProvider.
GMTCServices.setAccessTokenProvider(SampleAccessTokenProvider(), providerID: yourProviderID)
// Other initialization code ...
return true
}
}
Objective-C
/*
* AppDelegate.m
*/
#import <GoogleMaps/GoogleMaps.h>
#import <GoogleRidesharingConsumer/GoogleRidesharingConsumer.h>
@implementation AppDelegate
- (BOOL)application:(UIApplication *)application
didFinishLaunchingWithOptions:(NSDictionary *)launchOptions {
//Register your API key for GMSServices.
[GMSServices provideAPIKey:yourMapsAPIKey];
//Set the instance of the AccessTokenFactory.
[GMTCServices setAccessTokenProvider:[[SampleAccessTokenProvider alloc] init]
providerID:yourProviderID];
// Other initialization code ...
return YES;
}
@end
Integrasi tampilan peta
Melakukan inisialisasi tampilan peta
Contoh berikut menunjukkan cara melakukan inisialisasi GMTCMapView
.
Swift
/*
* MapViewController.swift
*/
class ViewController: UIViewController, GMTCMapViewDelegate {
private var rideSharingMap: GMTCMapView?
override func viewDidLoad() {
super.viewDidLoad()
self.rideSharingMap = GMTCMapView(frame: UIScreen.main.bounds)
self.rideSharingMap.delegate = self
self.rideSharingMap?.settings.myLocationButton = true
self.view.addSubview(self.rideSharingMap!)
...
}
Objective-C
/*
* MapViewController.h
*/
@interface MapViewController : UIViewController<GMTCMapViewDelegate>
...
@end
/*
* MapViewController.m
*/
@implementation MapViewController
- (void)viewDidLoad {
[super viewDidLoad];
...
self.mapView = [[GMTCMapView alloc] initWithFrame:CGRectZero];
self.mapView.settings.myLocationButton = YES;
self.mapView.delegate = self;
...
}
...
@end
Menangani peristiwa tampilan peta
Contoh berikut menunjukkan cara menerapkan delegasi untuk menangani peristiwa status pelanggan.
Swift
func mapViewDidInitialize(_ mapview: GMTCMapView) {
// Handle the update to the state of the map view to browsing.
}
func mapView(_ mapView: GMSMapView, didTapConsumerMarker mapMarker: GMSMarker, markerType: GMTCMapViewMarkerType) -> Bool {
// Handle the mapView marker was tapped.
}
Objective-C
/*
* MapViewController.m
*/
#pragma mark - GMTCMapViewDelegate implementation
// Handle state update of map view.
- (void)mapViewDidInitializeCustomerState:(GMTCMapView *)mapview {
// Handle the update to the state of the map view to browsing.
}
- (void)mapView:(GMSMapView *)mapView
didTapConsumerMarker:(nonnull GMSMarker *)mapMarker
markerType:(GMTCMapViewMarkerType)markerType {
// Handle the mapView marker was tapped.
}
Berbagi perjalanan
Mulai perjalanan baru saat tampilan dimuat
Contoh berikut menunjukkan cara memulai berbagi perjalanan segera setelah
tampilan dimuat. Anda dapat mengumpulkan semua input pengguna seperti lokasi pengantaran dan penjemputan
dari ViewController
, lalu membuat ViewController
baru untuk memulai
perjalanan berbagi secara langsung.
Swift
/*
* MapViewController.swift
*/
override func viewDidLoad() {
super.viewDidLoad()
...
self.mapView = GMTCMapView(frame: UIScreen.main.bounds)
self.mapView.delegate = self
self.view.addSubview(self.mapView)
}
func mapViewDidInitializeCustomerState(_: GMTCMapView) {
self.mapView.pickupLocation = self.selectedPickupLocation
self.mapView.dropoffLocation = self.selectedDropoffLocation
self.startConsumerMatchWithLocations(
pickupLocation: self.mapView.pickupLocation!,
dropoffLocation: self.mapView.dropoffLocation!
) { [weak self] (tripName, error) in
guard let strongSelf = self else { return }
if error != nil {
// print error message.
return
}
let tripService = GMTCServices.shared().tripService
// Create a tripModel instance for listening the update of the trip
// specified by this trip name.
let tripModel = tripService.tripModel(forTripName: tripName)
// Create a journeySharingSession instance based on the tripModel
let journeySharingSession = GMTCJourneySharingSession(tripModel: tripModel)
// Add the journeySharingSession instance on the mapView for UI updating.
strongSelf.mapView.show(journeySharingSession)
// Register for the trip update events.
tripModel.register(strongSelf)
strongSelf.currentTripModel = tripModel
strongSelf.currentJourneySharingSession = journeySharingSession
strongSelf.hideLoadingView()
}
self.showLoadingView()
}
Objective-C
/*
* MapViewController.m
*/
- (void)viewDidLoad {
[super viewDidLoad];
...
self.mapView = [[GMTCMapView alloc] initWithFrame:CGRectZero];
self.mapView.delegate = self;
[self.view addSubview:self.mapView];
}
// Handle the callback when the GMTCMapView did initialized.
- (void)mapViewDidInitializeCustomerState:(GMTCMapView *)mapview {
self.mapView.pickupLocation = self.selectedPickupLocation;
self.mapView.dropoffLocation = self.selectedDropoffLocation;
__weak __typeof(self) weakSelf = self;
[self startTripBookingWithPickupLocation:self.selectedPickupLocation
dropoffLocation:self.selectedDropoffLocation
completion:^(NSString *tripName, NSError *error) {
__typeof(self) strongSelf = weakSelf;
GMTCTripService *tripService = [GMTCServices sharedServices].tripService;
// Create a tripModel instance for listening to updates to the trip specified by this trip name.
GMTCTripModel *tripModel = [tripService tripModelForTripName:tripName];
// Create a journeySharingSession instance based on the tripModel.
GMTCJourneySharingSession *journeySharingSession =
[[GMTCJourneySharingSession alloc] initWithTripModel:tripModel];
// Add the journeySharingSession instance on the mapView for updating the UI.
[strongSelf.mapView showMapViewSession:journeySharingSession];
// Register for trip update events.
[tripModel registerSubscriber:self];
strongSelf.currentTripModel = tripModel;
strongSelf.currentJourneySharingSession = journeySharingSession;
[strongSelf hideLoadingView];
}];
[self showLoadingView];
}
Membatalkan perjalanan aktif
Contoh berikut menunjukkan cara mereset perjalanan yang saat ini aktif.
Swift
/*
* MapViewController.swift
*/
func cancelCurrentActiveTrip() {
// Stop the tripModel
self.currentTripModel.unregisterSubscriber(self)
// Remove the journey sharing session from the mapView's UI stack.
self.mapView.hide(journeySharingSession)
}
Objective-C
/*
* MapViewController.m
*/
- (void)cancelCurrentActiveTrip {
// Stop the tripModel
[self.currentTripModel unregisterSubscriber:self];
// Remove the journey sharing session from the mapView's UI stack.
[self.mapView hideMapViewSession:journeySharingSession];
}
Memproses update perjalanan
Contoh berikut menunjukkan cara mendaftarkan callback tripModel
.
Swift
/*
* MapViewController.swift
*/
override func viewDidLoad() {
super.viewDidLoad()
// Register for trip update events.
self.currentTripModel.register(self)
}
Objective-C
/*
* MapViewController.m
*/
- (void)viewDidLoad {
[super viewDidLoad];
// Register for trip update events.
[self.currentTripModel registerSubscriber:self];
...
}
Contoh berikut menunjukkan cara membatalkan pendaftaran callback tripModel
.
Swift
/*
* MapViewController.swift
*/
deinit {
self.currentTripModel.unregisterSubscriber(self)
}
Objective-C
/*
* MapViewController.m
*/
- (void)dealloc {
[self.currentTripModel unregisterSubscriber:self];
...
}
Contoh berikut menunjukkan cara menerapkan protokol GMTCTripModelSubscriber
untuk menangani callback saat status perjalanan diperbarui.
Swift
/*
* MapViewController.swift
*/
func tripModel(_: GMTCTripModel, didUpdate trip: GMTSTrip?, updatedPropertyFields: GMTSTripPropertyFields) {
// Update the UI with the new `trip` data.
self.updateUI(with: trip)
}
func tripModel(_: GMTCTripModel, didUpdate tripStatus: GMTSTripStatus) {
// Handle trip status did change.
}
func tripModel(_: GMTCTripModel, didUpdateActiveRouteRemainingDistance activeRouteRemainingDistance: Int32) {
// Handle remaining distance of active route did update.
}
func tripModel(_: GMTCTripModel, didUpdateActiveRoute activeRoute: [GMTSLatLng]?) {
// Handle trip active route did update.
}
func tripModel(_: GMTCTripModel, didUpdate vehicleLocation: GMTSVehicleLocation?) {
// Handle vehicle location did update.
}
func tripModel(_: GMTCTripModel, didUpdatePickupLocation pickupLocation: GMTSTerminalLocation?) {
// Handle pickup location did update.
}
func tripModel(_: GMTCTripModel, didUpdateDropoffLocation dropoffLocation: GMTSTerminalLocation?) {
// Handle drop off location did update.
}
func tripModel(_: GMTCTripModel, didUpdatePickupETA pickupETA: TimeInterval) {
// Handle the pickup ETA did update.
}
func tripModel(_: GMTCTripModel, didUpdateDropoffETA dropoffETA: TimeInterval) {
// Handle the drop off ETA did update.
}
func tripModel(_: GMTCTripModel, didUpdateRemaining remainingWaypoints: [GMTSTripWaypoint]?) {
// Handle updates to the pickup, dropoff or intermediate destinations of the trip.
}
func tripModel(_: GMTCTripModel, didFailUpdateTripWithError error: Error?) {
// Handle the error.
}
func tripModel(_: GMTCTripModel, didUpdateIntermediateDestinations intermediateDestinations: [GMTSTerminalLocation]?) {
// Handle the intermediate destinations being updated.
}
func tripModel(_: GMTCTripModel, didUpdateActiveRouteTraffic activeRouteTraffic: GMTSTrafficData?) {
// Handle trip active route traffic being updated.
}
Objective-C
/*
* MapViewController.m
*/
#pragma mark - GMTCTripModelSubscriber implementation
- (void)tripModel:(GMTCTripModel *)tripModel
didUpdateTrip:(nullable GMTSTrip *)trip
updatedPropertyFields:(enum GMTSTripPropertyFields)updatedPropertyFields {
// Update the UI with the new `trip` data.
[self updateUIWithTrip:trip];
...
}
- (void)tripModel:(GMTCTripModel *)tripModel didUpdateTripStatus:(enum GMTSTripStatus)tripStatus {
// Handle trip status did change.
}
- (void)tripModel:(GMTCTripModel *)tripModel
didUpdateActiveRouteRemainingDistance:(int32_t)activeRouteRemainingDistance {
// Handle remaining distance of active route did update.
}
- (void)tripModel:(GMTCTripModel *)tripModel
didUpdateActiveRoute:(nullable NSArray<GMTSLatLng *> *)activeRoute {
// Handle trip active route did update.
}
- (void)tripModel:(GMTCTripModel *)tripModel
didUpdateVehicleLocation:(nullable GMTSVehicleLocation *)vehicleLocation {
// Handle vehicle location did update.
}
- (void)tripModel:(GMTCTripModel *)tripModel
didUpdatePickupLocation:(nullable GMTSTerminalLocation *)pickupLocation {
// Handle pickup location did update.
}
- (void)tripModel:(GMTCTripModel *)tripModel
didUpdateDropoffLocation:(nullable GMTSTerminalLocation *)dropoffLocation {
// Handle drop off location did update.
}
- (void)tripModel:(GMTCTripModel *)tripModel didUpdatePickupETA:(NSTimeInterval)pickupETA {
// Handle the pickup ETA did update.
}
- (void)tripModel:(GMTCTripModel *)tripModel
didUpdateRemainingWaypoints:(nullable NSArray<GMTSTripWaypoint *> *)remainingWaypoints {
// Handle updates to the pickup, dropoff or intermediate destinations of the trip.
}
- (void)tripModel:(GMTCTripModel *)tripModel didUpdateDropoffETA:(NSTimeInterval)dropoffETA {
// Handle the drop off ETA did update.
}
- (void)tripModel:(GMTCTripModel *)tripModel didFailUpdateTripWithError:(nullable NSError *)error {
// Handle the error.
}
- (void)tripModel:(GMTCTripModel *)tripModel
didUpdateIntermediateDestinations:
(nullable NSArray<GMTSTerminalLocation *> *)intermediateDestinations {
// Handle the intermediate destinations being updated.
}
- (void)tripModel:(GMTCTripModel *)tripModel
didUpdateActiveRouteTraffic:(nullable GMTSTrafficData *)activeRouteTraffic {
// Handle trip active route traffic being updated.
}
Penanganan error
Jika Anda berlangganan tripModel dan terjadi error, Anda bisa mendapatkan callback tripModel dengan menerapkan metode delegasi tripModel(_:didFailUpdateTripWithError:)
. Fleet Engine membuat pesan error yang mengikuti standar Google Cloud Error. Untuk mengetahui definisi pesan error detail dan semua kode error, lihat dokumentasi Error Google Cloud.
Khususnya, untuk pemantauan perjalanan, diperlukan penyediaan token autentikasi yang valid. 401 UNAUTHENTICATED
akan ditampilkan jika tidak ada kredensial autentikasi yang valid, misalnya token sudah tidak berlaku.403 PERMISSION_DENIED
akan dimunculkan jika pemanggil tidak memiliki izin untuk memanggil API tertentu (misalnya, pengguna dengan peran konsumen mencoba memanggil updateTrip), atau permintaan tidak memiliki kendaraan_id/trip_id yang valid dalam token JWT.
Untuk mengetahui informasi selengkapnya, lihat Penanganan Error SDK Konsumen.
Penyesuaian UI
Mendapatkan/Menetapkan opsi UI polyline kustom
Contoh berikut menunjukkan cara menetapkan opsi UI kustom untuk polyline.
Swift
/** MapViewController.swift */
func updatePolylineUIOptions() {
// The polyline type that you would like to set custom UI options for.
let customizablePolylineType = GMTCPolylineType.activeRoute
let polylineStyleOptions = GMTCMutablePolylineStyleOptions()
polylineStyleOptions.strokeWidth = 8.0
polylineStyleOptions.strokeColor = .blue
polylineStyleOptions.isVisible = true
polylineStyleOptions.zIndex = 1000
polylineStyleOptions.isGeodesic = true
let coordinator = self.mapView.consumerMapStyleCoordinator
coordinator.setPolylineStyleOptions(polylineStyleOptions, polylineType:customizablePolylineType)
}
Objective-C
/** MapViewController.m */
- (void)updatePolylineUIOptions {
// The polyline type that you would like to set custom UI options for.
GMTCPolylineType customizablePolylineType = GMTCPolylineTypeActiveRoute;
GMTCMutablePolylineStyleOptions *polylineStyleOptions =
[[GMTCMutablePolylineStyleOptions alloc] init];
polylineStyleOptions.strokeWidth = 8.0;
polylineStyleOptions.strokeColor = [UIColor blueColor];
polylineStyleOptions.isVisible = YES;
polylineStyleOptions.zIndex = 1000;
polylineStyleOptions.isGeodesic = YES;
[[_mapView consumerMapStyleCoordinator] setPolylineStyleOptions:polylineStyleOptions
polylineType:customizablePolylineType];
}
Mendapatkan/Menetapkan opsi UI penanda kustom
Contoh berikut menunjukkan cara menetapkan opsi UI kustom untuk penanda.
Swift
/** MapViewController.swift */
func updateMarkerUIOptions() {
let customizableMarkerType = GMTCCustomizableMarkerType.tripVehicle
let markerStyleOptions = GMTCMutableMarkerStyleOptions()
markerStyleOptions.groundAnchor = groundAnchor
markerStyleOptions.isVisible = true
markerStyleOptions.icon = icon
markerStyleOptions.zIndex = 100
markerStyleOptions.isFlat = false
let coordinator = self.mapView.consumerMapStyleCoordinator
coordinator.setMarkerStyleOptions(markerStyleOptions, markerType: customizableMarkerType)
}
Objective-C
/** MapViewController.m */
- (void)updateMarkerUIOptions {
// The marker type that you would like to set custom UI options for.
GMTCCustomizableMarkerType customizableMarkerType = GMTCCustomizableMarkerTypeTripVehicle;
GMTCMutableMarkerStyleOptions *markerStyleOptions =
[[GMTCMutableMarkerStyleOptions alloc] init];
markerStyleOptions.groundAnchor = groundAnchor;
markerStyleOptions.isVisible = YES;
markerStyleOptions.icon = icon;
markerStyleOptions.zIndex = 100;
markerStyleOptions.isFlat = NO;
[[_mapView consumerMapStyleCoordinator] setMarkerStyleOptions:markerStyleOptions markerType:customizableMarkerType];
}
Menyesuaikan zoom kamera
Tombol Lokasiku di Maps SDK for iOS memusatkan kamera di lokasi perangkat.
Jika ada sesi Berbagi Perjalanan yang aktif, Anda dapat memusatkan kamera untuk fokus pada perjalanan, bukan hanya pada lokasi perangkat.
SDK Konsumen menyediakan fitur kamera otomatis yang diaktifkan secara default. Kamera akan memperbesar fokus pada rute berbagi perjalanan dan titik jalan perjalanan berikutnya.
Jika memerlukan kontrol lebih terhadap perilaku kamera, Anda dapat menonaktifkan atau mengaktifkan
fitur kamera otomatis menggunakan properti isAllowCameraAutoUpdate
.
Untuk penyesuaian kamera lainnya, lihat Maps SDK for iOS Memindahkan kamera.