หากต้องการผสานรวม Google Sign-In เข้ากับแอป Android ให้กำหนดค่า Google Sign-In และใส่ปุ่มลงในเลย์เอาต์ของแอปเพื่อเริ่มขั้นตอนการลงชื่อเข้าใช้
ก่อนเริ่มต้น
กําหนดค่าโปรเจ็กต์คอนโซล Google API และตั้งค่าโปรเจ็กต์ Android Studio
กำหนดค่า Google Sign-In และออบเจ็กต์ GoogleSignInClient
ในเมธอด
onCreateของกิจกรรมการลงชื่อเข้าใช้ ให้กําหนดค่า Google Sign-In เพื่อขอข้อมูลผู้ใช้ที่จําเป็นสําหรับแอปของคุณ เช่น หากต้องการกําหนดค่า Google Sign-In เพื่อขอรหัสและข้อมูลโปรไฟล์พื้นฐานของผู้ใช้ ให้สร้างออบเจ็กต์GoogleSignInOptionsที่มีพารามิเตอร์DEFAULT_SIGN_INหากต้องการขออีเมลของผู้ใช้ด้วย ให้สร้างออบเจ็กต์GoogleSignInOptionsด้วยตัวเลือกrequestEmail// Configure sign-in to request the user's ID, email address, and basic // profile. ID and basic profile are included in DEFAULT_SIGN_IN. GoogleSignInOptions gso = new GoogleSignInOptions.Builder(GoogleSignInOptions.DEFAULT_SIGN_IN) .requestEmail() .build();หากต้องการขอขอบเขตเพิ่มเติมเพื่อเข้าถึง Google API ให้ระบุขอบเขตเหล่านั้นด้วย
requestScopesในการลงชื่อเข้าใช้ ให้ขอเฉพาะขอบเขตที่จําเป็นสําหรับให้แอปทํางานได้ขั้นต่ำเท่านั้น เพื่อให้ผู้ใช้ได้รับประสบการณ์การใช้งานที่ดีที่สุด ขอขอบเขตเพิ่มเติมก็ต่อเมื่อจําเป็นเท่านั้น เพื่อให้ผู้ใช้เห็นหน้าจอขอความยินยอมในบริบทของการดำเนินการที่ผู้ใช้ทํา โปรดดูการขอขอบเขตเพิ่มเติมจากนั้นสร้างออบเจ็กต์
GoogleSignInClientด้วยตัวเลือกที่คุณระบุในเมธอดonCreateของกิจกรรมการลงชื่อเข้าใช้// Build a GoogleSignInClient with the options specified by gso. mGoogleSignInClient = GoogleSignIn.getClient(this, gso);
ตรวจสอบผู้ใช้ที่ลงชื่อเข้าใช้อยู่
ในเมธอด onStart ของกิจกรรม ให้ตรวจสอบว่าผู้ใช้ลงชื่อเข้าใช้แอปด้วย Google ไว้แล้วหรือยัง
// Check for existing Google Sign In account, if the user is already signed in
// the GoogleSignInAccount will be non-null.
GoogleSignInAccount account = GoogleSignIn.getLastSignedInAccount(this);
updateUI(account);
หาก GoogleSignIn.getLastSignedInAccount แสดงผลออบเจ็กต์ GoogleSignInAccount (แทนที่จะเป็น null) แสดงว่าผู้ใช้ลงชื่อเข้าใช้แอปด้วย Google อยู่แล้ว
อัปเดต UI ให้สอดคล้องกัน เช่น ซ่อนปุ่มลงชื่อเข้าใช้ เปิดกิจกรรมหลัก หรือดำเนินการใดๆ ที่เหมาะสมกับแอปของคุณ
หาก GoogleSignIn.getLastSignedInAccount แสดงผลเป็น null แสดงว่าผู้ใช้ยังไม่ได้ลงชื่อเข้าใช้แอปด้วย Google อัปเดต UI เพื่อแสดงปุ่มลงชื่อเข้าใช้ Google
เพิ่มปุ่มลงชื่อเข้าใช้ด้วย Google ลงในแอป
 เพิ่ม
เพิ่ม SignInButtonในเลย์เอาต์ของแอปพลิเคชัน<com.google.android.gms.common.SignInButton android:id="@+id/sign_in_button" android:layout_width="wrap_content" android:layout_height="wrap_content" />ไม่บังคับ: หากใช้กราฟิกปุ่มลงชื่อเข้าใช้เริ่มต้นแทนการให้ชิ้นงานปุ่มลงชื่อเข้าใช้ของคุณเอง คุณจะปรับขนาดปุ่มได้ด้วยเมธอด
setSize// Set the dimensions of the sign-in button. SignInButton signInButton = findViewById(R.id.sign_in_button); signInButton.setSize(SignInButton.SIZE_STANDARD);
ในกิจกรรม Android (เช่น ในเมธอด
onCreate) ให้ลงทะเบียนOnClickListenerของปุ่มเพื่อลงชื่อเข้าใช้ผู้ใช้เมื่อมีการคลิก ดังนี้findViewById(R.id.sign_in_button).setOnClickListener(this);
เริ่มขั้นตอนการลงชื่อเข้าใช้
 ในเมธอด
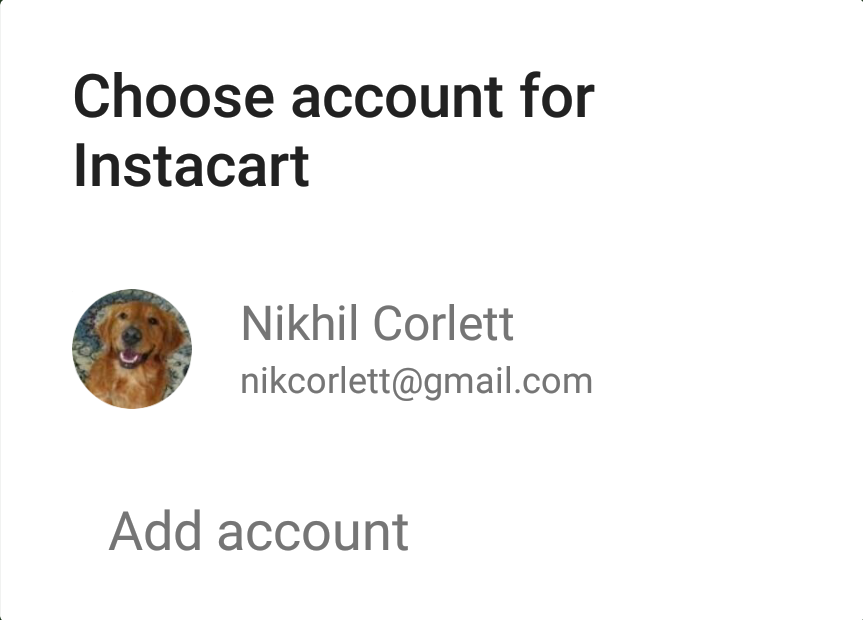
 onClickของกิจกรรม ให้จัดการการแตะปุ่มลงชื่อเข้าใช้ด้วยการสร้าง Intent การลงชื่อเข้าใช้ด้วยเมธอดgetSignInIntentและเริ่ม Intent ด้วยstartActivityForResult@Override public void onClick(View v) { switch (v.getId()) { case R.id.sign_in_button: signIn(); break; // ... } }private void signIn() { Intent signInIntent = mGoogleSignInClient.getSignInIntent(); startActivityForResult(signInIntent, RC_SIGN_IN); }การเริ่ม Intent จะแจ้งให้ผู้ใช้เลือกบัญชี Google เพื่อลงชื่อเข้าใช้ หากคุณขอขอบเขตนอกเหนือจาก
profile,emailและopenidระบบจะแจ้งให้ผู้ใช้ให้สิทธิ์เข้าถึงทรัพยากรที่ขอด้วยหลังจากผู้ใช้ลงชื่อเข้าใช้แล้ว คุณจะรับออบเจ็กต์
GoogleSignInAccountของผู้ใช้ได้ในเมธอดonActivityResultของกิจกรรม@Override public void onActivityResult(int requestCode, int resultCode, Intent data) { super.onActivityResult(requestCode, resultCode, data); // Result returned from launching the Intent from GoogleSignInClient.getSignInIntent(...); if (requestCode == RC_SIGN_IN) { // The Task returned from this call is always completed, no need to attach // a listener. Task<GoogleSignInAccount> task = GoogleSignIn.getSignedInAccountFromIntent(data); handleSignInResult(task); } }ออบเจ็กต์
GoogleSignInAccountมีข้อมูลเกี่ยวกับผู้ใช้ที่ลงชื่อเข้าใช้ เช่น ชื่อผู้ใช้private void handleSignInResult(Task<GoogleSignInAccount> completedTask) { try { GoogleSignInAccount account = completedTask.getResult(ApiException.class); // Signed in successfully, show authenticated UI. updateUI(account); } catch (ApiException e) { // The ApiException status code indicates the detailed failure reason. // Please refer to the GoogleSignInStatusCodes class reference for more information. Log.w(TAG, "signInResult:failed code=" + e.getStatusCode()); updateUI(null); } }นอกจากนี้ คุณยังดูอีเมลของผู้ใช้ได้ด้วย
getEmail, รหัส Google ของผู้ใช้ (สําหรับฝั่งไคลเอ็นต์) ด้วยgetIdและโทเค็นระบุตัวตนของผู้ใช้ด้วยgetIdTokenหากต้องการส่งผู้ใช้ที่ลงชื่อเข้าใช้อยู่ในขณะนี้ไปยังเซิร์ฟเวอร์แบ็กเอนด์ ให้ส่งโทเค็นระบุตัวตนไปยังเซิร์ฟเวอร์แบ็กเอนด์ และตรวจสอบโทเค็นในเซิร์ฟเวอร์