
1. 开始前须知
借助 Web Authentication API(也称为 WebAuthn),您可以创建并使用限定了来源的公钥凭据验证用户身份。
该 API 支持使用 BLE、NFC 和 USB 漫游 U2F 或 FIDO2 身份验证器(也称为安全密钥)以及平台身份验证器,让用户能够使用指纹或屏幕锁定进行身份验证。
在此 Codelab 中,您将构建一个使用指纹传感器实现简单的身份重新验证功能的网站。身份重新验证功能可以保护帐号数据,因为它要求已登录网站的用户在尝试进入网站的重要部分时或在经过一段时间后再次访问网站时重新验证身份。
前提条件
- 基本了解 WebAuthn 的工作原理
- 具备基本的 JavaScript 编程技能
操作内容
- 构建一个使用指纹传感器实现简单的身份重新验证功能的网站。
所需硬件及软件
- 下列任一设备:
- 一部 Android 设备(最好带有生物识别传感器)
- 一部搭载 iOS 14 或更高版本且具备触控 ID 或面容 ID 功能的 iPhone 或 iPad
- 一部搭载 macOS Big Sur 或更高版本且具备触控 ID 功能的 MacBook Pro 或 Air
- 设置了 Windows Hello 的 Windows 10 19H1 或更高版本
- 下列任一浏览器:
- Google Chrome 67 或更高版本
- Microsoft Edge 85 或更高版本
- Safari 14 或更高版本
2. 进行设置
在此 Codelab 中,您将使用一项名为 glitch 的服务。在该服务中,您可以使用 JavaScript 修改客户端和服务器端代码,并立即部署修改后的代码。
前往 https://glitch.com/edit/#!/webauthn-codelab-start。
了解其工作原理
按以下步骤操作,查看网站的初始状态:
- 依次点击“显示”图标
 >“在新窗口中”图标
  查看已发布的网站。
 - 输入您选择的用户名,然后点击 Next。
- 输入密码并点击 Sign-in。
密码将被忽略,但您仍会顺利通过身份验证。此时,您已转到首页。
- 点击 Try reauth,然后重复执行第 2 步、第 3 步和第 4 步。
- 点击 Sign out。
请注意,每次尝试登录时,您都必须输入密码。这模拟的是用户需要重新验证身份才能访问网站的重要部分的情形。
混编代码
- 前往 WebAuthn / FIDO2 API Codelab。
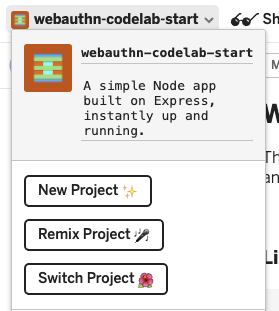
- 依次点击项目名称 >“重新合成项目”图标
 创建项目分支,并通过新网址继续构建您自己的版本。
3. 使用指纹注册凭据
您需要注册由 UVPA(设备内置的身份验证器,用于验证用户身份)生成的凭据。我们通常将该身份验证器视为指纹传感器,具体取决于用户设备。
您要将该功能添加到 /home 页面:
创建 registerCredential() 函数
创建一个 registerCredential() 函数,以用于注册新凭据。
public/client.js
export const registerCredential = async () => {

};
从服务器端点获取质询和其他选项
在要求用户注册新凭据前,先要求服务器返回要传入 WebAuthn 的参数(包括质询)。幸运的是,您已拥有一个能用此类参数做出响应的服务器端点。
将以下代码添加到 registerCredential():
public/client.js
const opts = {
  attestation: 'none',
  authenticatorSelection: {
    authenticatorAttachment: 'platform',
    userVerification: 'required',
    requireResidentKey: false
  }
};

const options = await _fetch('/auth/registerRequest', opts);
服务器和客户端之间的协议不包含在 WebAuthn 规范中。不过,此 Codelab 旨在与 WebAuthn 规范保持一致,而您传递到服务器的 JSON 对象与 PublicKeyCredentialCreationOptions 非常相似,因此对您而言非常直观。下表包含您可以传递到服务器的重要参数,并说明了它们的功能:
参数 | 说明 | ||
| 认证传输偏好设置 - | ||
|
| ||
|
| 过滤可用的身份验证器。如果您要将身份验证器连接到设备,请使用“ | |
| 确定身份验证器本地用户验证是“ | ||
| 如果创建的凭据应该可供用于未来的帐号选择器用户体验,请使用 | ||
如需详细了解这些选项,请参阅 5.4 凭据创建选项(字典 PublicKeyCredentialCreationOptions)。
以下是您会从服务器收到的选项示例。
{
  "rp": {
    "name": "WebAuthn Codelab",
    "id": "webauthn-codelab.glitch.me"
  },
  "user": {
    "displayName": "User Name",
    "id": "...",
    "name": "test"
  },
  "challenge": "...",
  "pubKeyCredParams": [
    {
      "type": "public-key",
      "alg": -7
    }, {
      "type": "public-key",
      "alg": -257
    }
  ],
  "timeout": 1800000,
  "attestation": "none",
  "excludeCredentials": [
    {
      "id": "...",
      "type": "public-key",
      "transports": [
        "internal"
      ]
    }
  ],
  "authenticatorSelection": {
    "authenticatorAttachment": "platform",
    "userVerification": "required"
  }
}
创建凭据
- 由于这些选项会按编码方式传递以便顺利通过 HTTP 协议,因此,请将某些参数重新转换为二进制文件,具体而言,包括
user.id、challenge以及excludeCredentials数组中包含的id实例:
public/client.js
options.user.id = base64url.decode(options.user.id);
options.challenge = base64url.decode(options.challenge);

if (options.excludeCredentials) {
  for (let cred of options.excludeCredentials) {
    cred.id = base64url.decode(cred.id);
  }
}
- 调用
navigator.credentials.create()方法以创建新凭据。
调用后,浏览器会与身份验证器交互,并尝试通过 UVPA 验证用户身份。
public/client.js
const cred = await navigator.credentials.create({
  publicKey: options,
});
在用户验证身份后,您应该会收到一个凭据对象,您可以将该对象发送到服务器并注册身份验证器。
将凭据注册到服务器端点
以下是您应该已收到的凭据对象示例。
{
  "id": "...",
  "rawId": "...",
  "type": "public-key",
  "response": {
    "clientDataJSON": "...",
    "attestationObject": "..."
  }
}
- 就像您收到用于注册凭据的选项对象时一样,请对凭据的二进制文件参数进行编码,以将其作为字符串传递到服务器:
public/client.js
const credential = {};
credential.id = cred.id;
credential.rawId = base64url.encode(cred.rawId);
credential.type = cred.type;

if (cred.response) {
  const clientDataJSON =
    base64url.encode(cred.response.clientDataJSON);
  const attestationObject =
    base64url.encode(cred.response.attestationObject);
  credential.response = {
    clientDataJSON,
    attestationObject,
  };
}
- 在本地存储凭据 ID,以便在用户返回时使用该 ID 进行身份验证:
public/client.js
localStorage.setItem(`credId`, credential.id);
- 将对象发送到服务器,如果返回
HTTP code 200,则可视为新凭据已注册成功。
public/client.js
return await _fetch('/auth/registerResponse' , credential);
现在,您已拥有完整的 registerCredential() 函数!
本部分的最终代码
public/client.js
...
export const registerCredential = async () => {
  const opts = {
    attestation: 'none',
    authenticatorSelection: {
      authenticatorAttachment: 'platform',
      userVerification: 'required',
      requireResidentKey: false
    }
  };

  const options = await _fetch('/auth/registerRequest', opts);

  options.user.id = base64url.decode(options.user.id);
  options.challenge = base64url.decode(options.challenge);

  if (options.excludeCredentials) {
    for (let cred of options.excludeCredentials) {
      cred.id = base64url.decode(cred.id);
    }
  }

  const cred = await navigator.credentials.create({
    publicKey: options
  });

  const credential = {};
  credential.id =     cred.id;
  credential.rawId =  base64url.encode(cred.rawId);
  credential.type =   cred.type;

  if (cred.response) {
    const clientDataJSON =
      base64url.encode(cred.response.clientDataJSON);
    const attestationObject =
      base64url.encode(cred.response.attestationObject);
    credential.response = {
      clientDataJSON,
      attestationObject
    };
  }

  localStorage.setItem(`credId`, credential.id);

  return await _fetch('/auth/registerResponse' , credential);
};
...
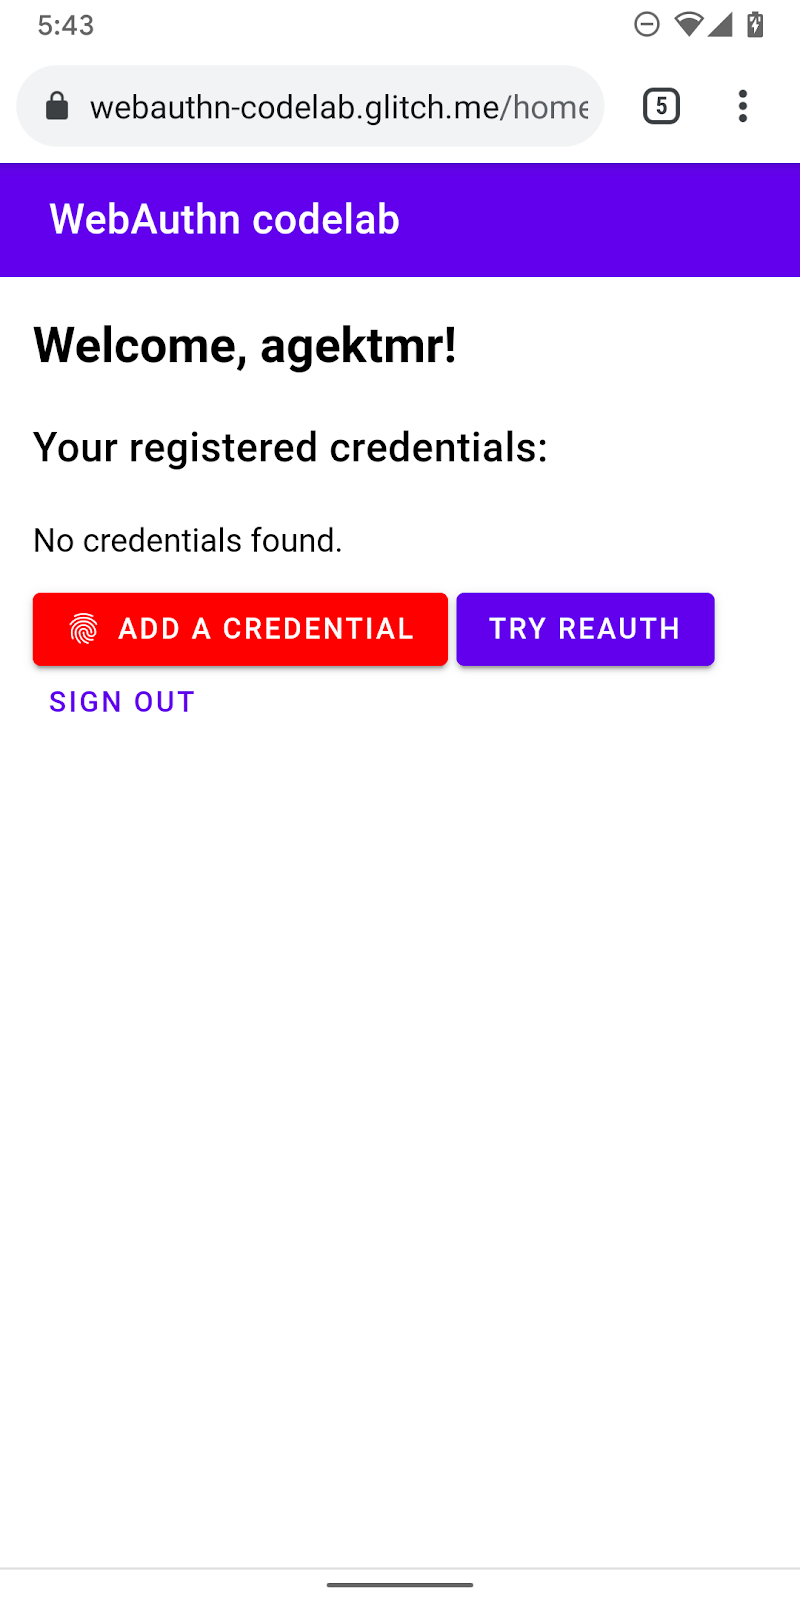
4. 构建界面以注册、获取和移除凭据
最好创建一个由已注册的凭据构成的列表以及用于移除这些凭据的按钮。
构建界面占位符
添加用于列出凭据的界面以及用于注册新凭据的按钮。您可从警告消息中或用于注册新凭据的按钮中(具体取决于相应功能是否可用)移除 hidden 类。ul#list 是占位符,用于添加已注册凭据的列表。
views/home.html
<p id="uvpa_unavailable" class="hidden">
  This device does not support User Verifying Platform Authenticator. You can't register a credential.
</p>
<h3 class="mdc-typography mdc-typography--headline6">
  Your registered credentials:
</h3>
<section>
  <div id="list"></div>
</section>
<mwc-button id="register" class="hidden" icon="fingerprint" raised>Add a credential</mwc-button>
功能检测和 UVPA 可用性
如需检查 UVPA 可用性,请按以下步骤操作:
- 查看
window.PublicKeyCredential以检查 WebAuthn 是否可用。 - 调用
PublicKeyCredential.isUserVerifyingPlatformAuthenticatorAvailable()以检查 UVPA 是否可用。如果都可用,您可以显示用于注册新凭据的按钮。如果其中任一项不可用,您可以显示警告消息。
views/home.html
const register = document.querySelector('#register');

if (window.PublicKeyCredential) {
  PublicKeyCredential.isUserVerifyingPlatformAuthenticatorAvailable()
  .then(uvpaa => {
    if (uvpaa) {
      register.classList.remove('hidden');
    } else {
      document
        .querySelector('#uvpa_unavailable')
        .classList.remove('hidden');
    }
  });
} else {
  document
    .querySelector('#uvpa_unavailable')
    .classList.remove('hidden');
}
获取并显示凭据列表
- 创建
getCredentials()函数,以便获取已注册的凭据并将其显示在列表中。幸运的是,服务器/auth/getKeys上已有一个能够派上用场的端点,您可以通过该端点提取已登录用户的已注册凭据。
返回的 JSON 包含凭据信息,例如 id 和 publicKey。您可以构建 HTML 以将其显示给用户。
views/home.html
const getCredentials = async () => {
  const res = await _fetch('/auth/getKeys');
  const list = document.querySelector('#list');
  const creds = html`${res.credentials.length > 0 ? res.credentials.map(cred => html`
    <div class="mdc-card credential">
      <span class="mdc-typography mdc-typography--body2">${cred.credId}</span>
      <pre class="public-key">${cred.publicKey}</pre>
      <div class="mdc-card__actions">
        <mwc-button id="${cred.credId}" @click="${removeCredential}" raised>Remove</mwc-button>
      </div>
    </div>`) : html`
    <p>No credentials found.</p>
    `}`;
  render(creds, list);
};
- 调用
getCredentials(),以便在用户进入/home页面后立即显示可用凭据。
views/home.html
getCredentials();
移除凭据
在凭据列表中,您添加了一个用于移除每个凭据的按钮。您可以将请求与 credId 查询参数一起发送到 /auth/removeKey 以移除凭据。
public/client.js
export const unregisterCredential = async (credId) => {
  localStorage.removeItem('credId');
  return _fetch(`/auth/removeKey?credId=${encodeURIComponent(credId)}`);
};
- 将
unregisterCredential附加到现有的import语句。
views/home.html
import { _fetch, unregisterCredential } from '/client.js';
- 添加要在用户点击 Remove 时调用的函数。
views/home.html
const removeCredential = async e => {
  try {
    await unregisterCredential(e.target.id);
    getCredentials();
  } catch (e) {
    alert(e);
  }
};
注册凭据
当用户点击 Add a credential 时,您可以调用 registerCredential() 以注册新凭据。
- 将
registerCredential附加到现有的import语句。
views/home.html
import { _fetch, registerCredential, unregisterCredential } from '/client.js';
- 使用
navigator.credentials.create()的选项调用registerCredential()。
注册后,请务必调用 getCredentials() 以更新凭据列表。
views/home.html
register.addEventListener('click', e => {
  registerCredential().then(user => {
    getCredentials();
  }).catch(e => alert(e));
});
现在,您应该能够注册新凭据并显示该凭据的相关信息。您可以在已发布的网站上试一试。
本部分的最终代码
views/home.html
...
      <p id="uvpa_unavailable" class="hidden">
        This device does not support User Verifying Platform Authenticator. You can't register a credential.
      </p>
      <h3 class="mdc-typography mdc-typography--headline6">
        Your registered credentials:
      </h3>
      <section>
        <div id="list"></div>
        <mwc-fab id="register" class="hidden" icon="add"></mwc-fab>
      </section>
      <mwc-button raised><a href="/reauth">Try reauth</a></mwc-button>
      <mwc-button><a href="/auth/signout">Sign out</a></mwc-button>
    </main>
    <script type="module">
      import { _fetch, registerCredential, unregisterCredential } from '/client.js';
      import { html, render } from 'https://unpkg.com/lit-html@1.0.0/lit-html.js?module';

      const register = document.querySelector('#register');

      if (window.PublicKeyCredential) {
        PublicKeyCredential.isUserVerifyingPlatformAuthenticatorAvailable()
        .then(uvpaa => {
          if (uvpaa) {
            register.classList.remove('hidden');
          } else {
            document
              .querySelector('#uvpa_unavailable')
              .classList.remove('hidden');
          }
        });
      } else {
        document
          .querySelector('#uvpa_unavailable')
          .classList.remove('hidden');
      }

      const getCredentials = async () => {
        const res = await _fetch('/auth/getKeys');
        const list = document.querySelector('#list');
        const creds = html`${res.credentials.length > 0 ? res.credentials.map(cred => html`
          <div class="mdc-card credential">
            <span class="mdc-typography mdc-typography--body2">${cred.credId}</span>
            <pre class="public-key">${cred.publicKey}</pre>
            <div class="mdc-card__actions">
              <mwc-button id="${cred.credId}" @click="${removeCredential}" raised>Remove</mwc-button>
            </div>
          </div>`) : html`
          <p>No credentials found.</p>
          `}`;
        render(creds, list);
      };

      getCredentials();

      const removeCredential = async e => {
        try {
          await unregisterCredential(e.target.id);
          getCredentials();
        } catch (e) {
          alert(e);
        }
      };

      register.addEventListener('click', e => {
        registerCredential({
          attestation: 'none',
          authenticatorSelection: {
            authenticatorAttachment: 'platform',
            userVerification: 'required',
            requireResidentKey: false
          }
        })
        .then(user => {
          getCredentials();
        })
        .catch(e => alert(e));
      });
    </script>
...
public/client.js
...
export const unregisterCredential = async (credId) => {
  localStorage.removeItem('credId');
  return _fetch(`/auth/removeKey?credId=${encodeURIComponent(credId)}`);
};
...
5. 使用指纹验证用户身份
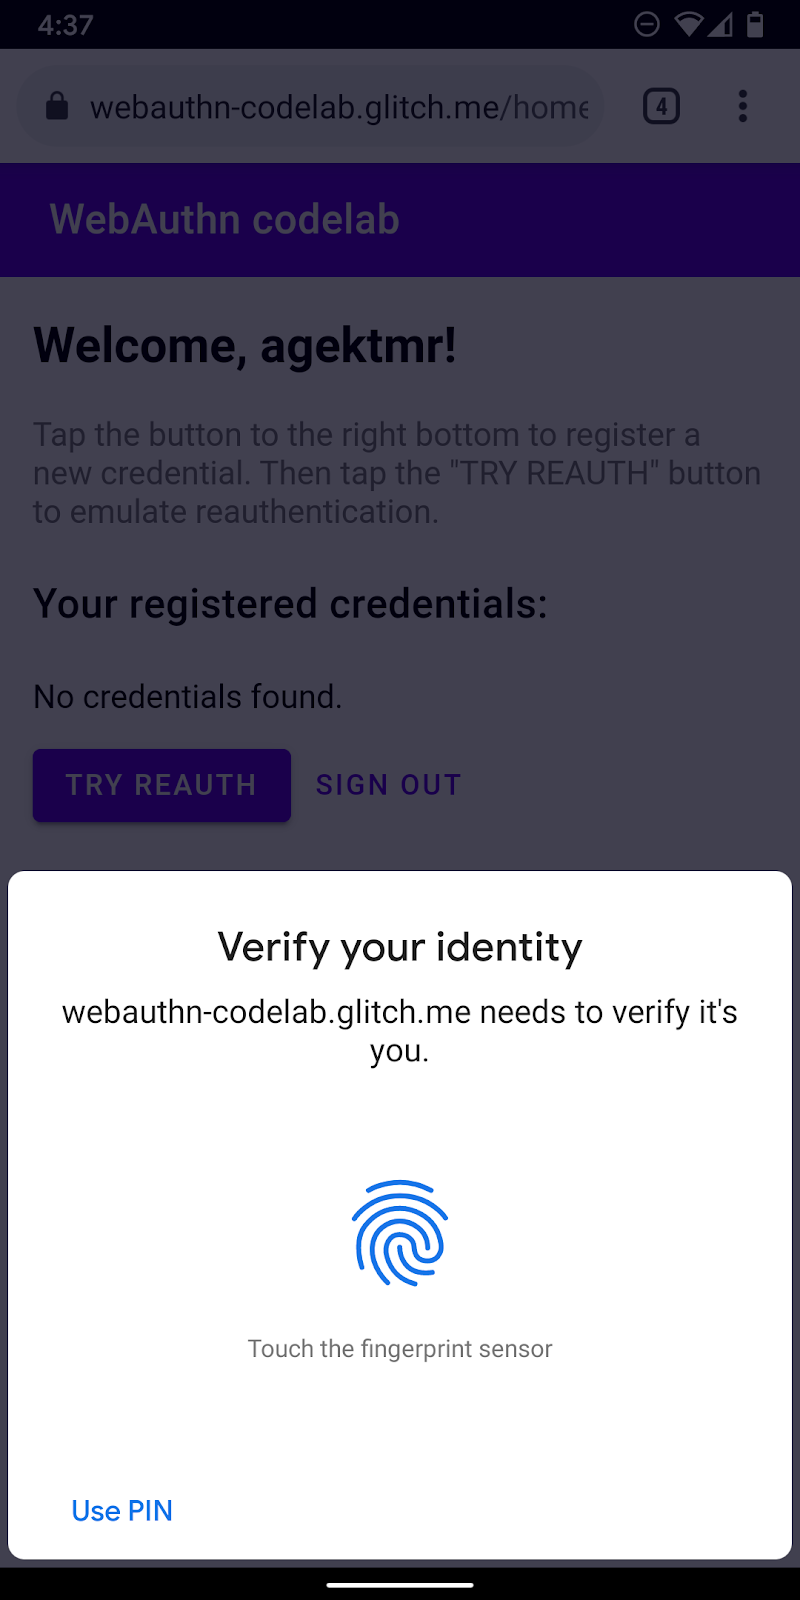
现在,您已注册凭据,并已准备好将该凭据作为用户身份验证方式。接下来,您要向该网站添加身份重新验证功能。其用户体验如下:
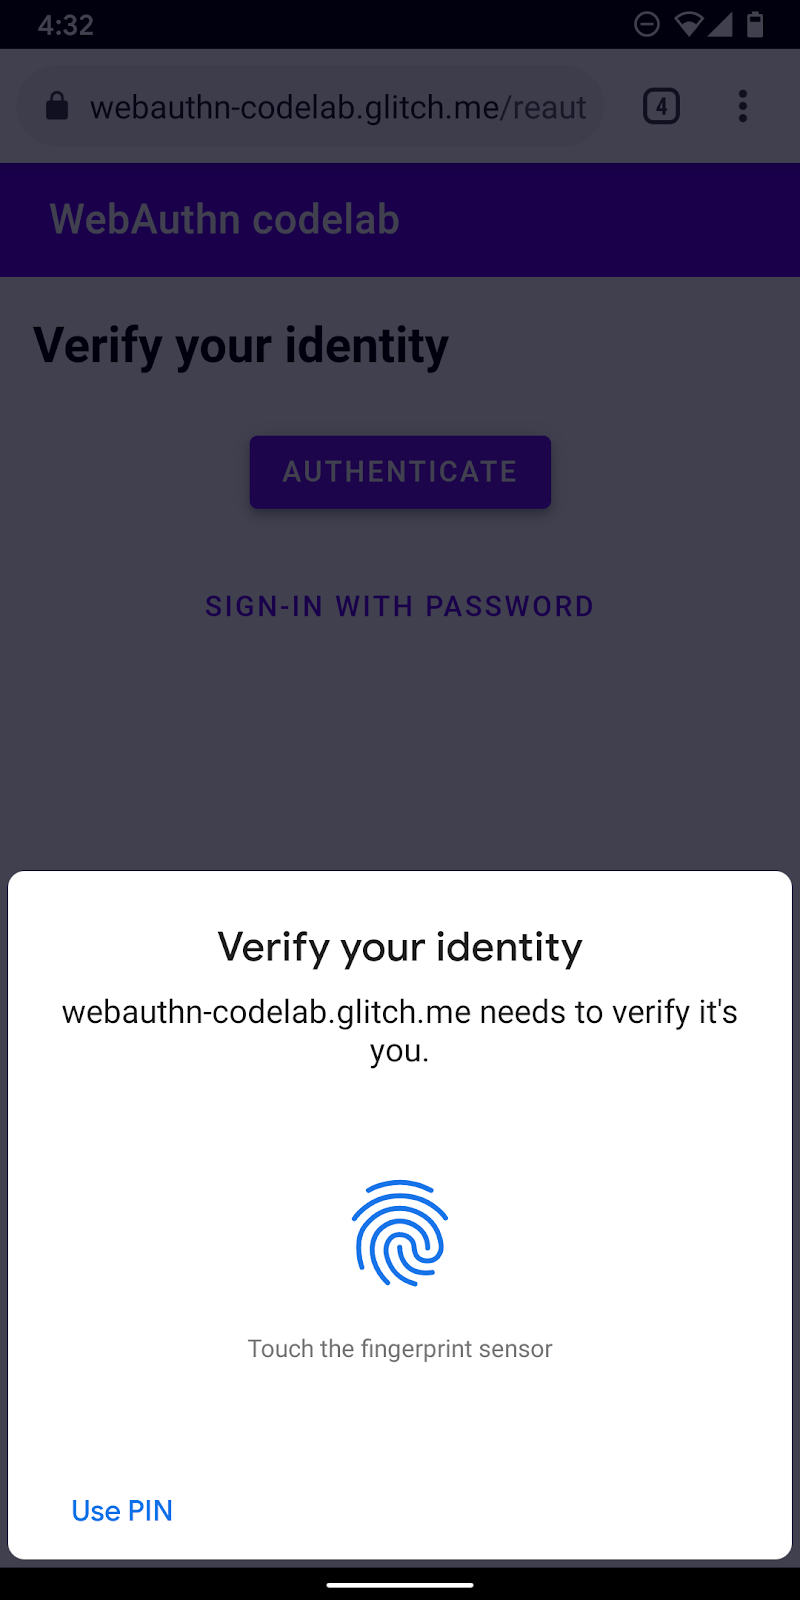
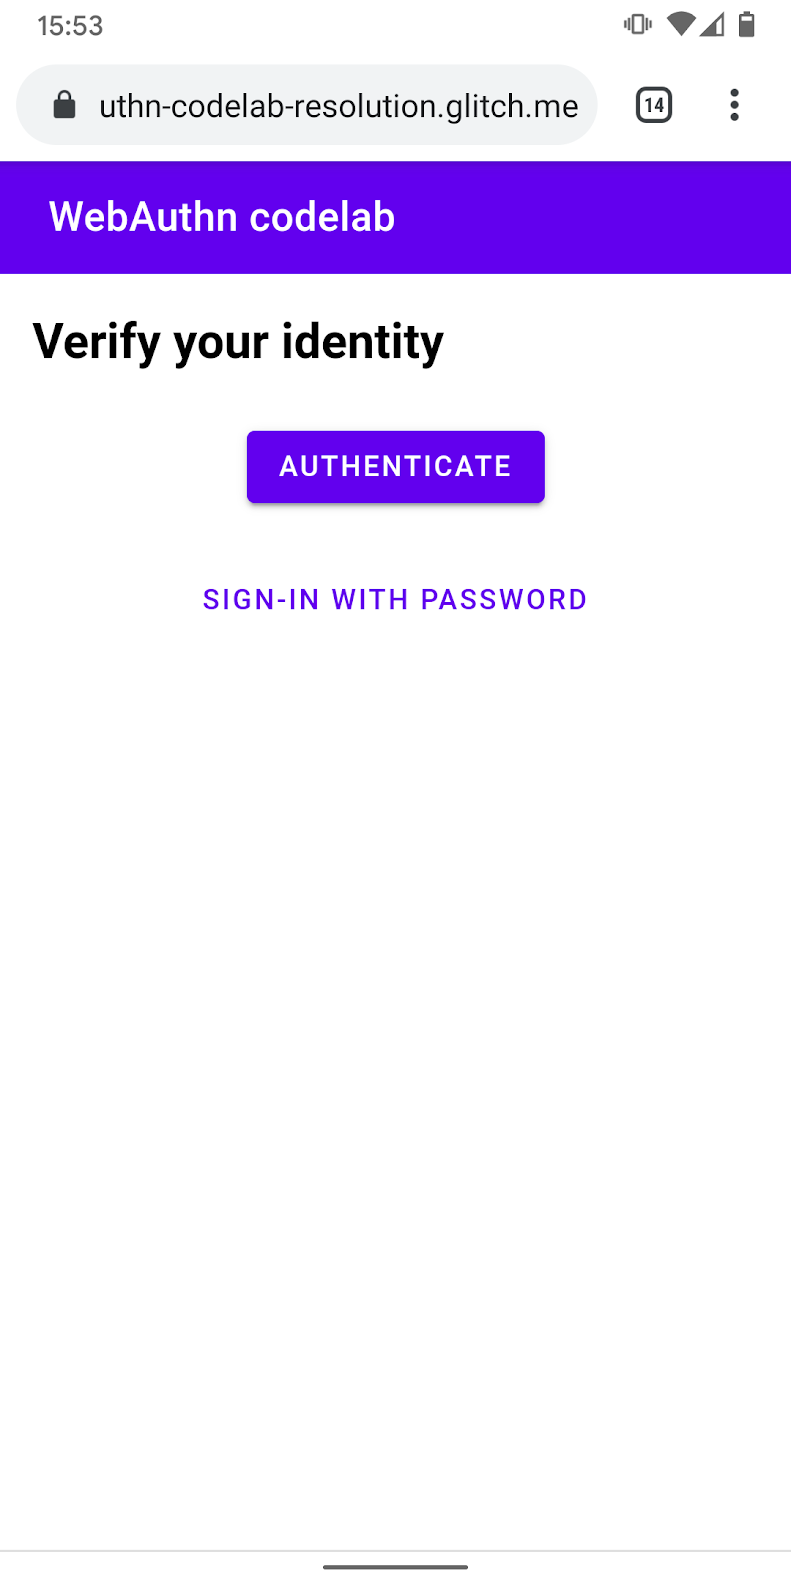
在用户进入 /reauth 页面后,如果可以进行生物识别身份验证,他们就会看到 Authenticate 按钮。在用户点按 Authenticate 后,指纹身份验证 (UVPA) 过程就会开始,接着成功完成身份验证,然后进入 /home 页面。如果无法进行生物识别身份验证,或生物识别身份验证失败,界面将回退到使用现有的密码表单。
创建 authenticate() 函数
创建名为 authenticate() 的函数,以用于使用指纹验证用户身份。请在此处添加 JavaScript 代码:
public/client.js
export const authenticate = async () => {

};
从服务器端点获取质询和其他选项
- 在进行身份验证前,检查用户是否有存储的凭据 ID,如果有,则将其设为查询参数。
如果您提供凭据 ID 以及其他选项,服务器可以提供相关的 allowCredentials,从而确保用户验证的可靠性。
public/client.js
const opts = {};

let url = '/auth/signinRequest';
const credId = localStorage.getItem(`credId`);
if (credId) {
  url += `?credId=${encodeURIComponent(credId)}`;
}
- 在要求用户进行身份验证前,先要求服务器发回质询和其他参数。使用
opts作为参数调用_fetch(),以向服务器发送 POST 请求。
public/client.js
const options = await _fetch(url, opts);
以下是您应该会收到的选项示例(与 PublicKeyCredentialRequestOptions 一致)。
{
  "challenge": "...",
  "timeout": 1800000,
  "rpId": "webauthn-codelab.glitch.me",
  "userVerification": "required",
  "allowCredentials": [
    {
      "id": "...",
      "type": "public-key",
      "transports": [
        "internal"
      ]
    }
  ]
}
其中最重要的选项是 allowCredentials。当您从服务器收到选项时,allowCredentials 要么是数组中的单个对象,要么是空数组,具体取决于能否在服务器端的查询参数中找到具有相应 ID 的凭据。
- 当
allowCredentials是空数组时,使用null解析 promise,以便让界面回退到要求用户输入密码。
if (options.allowCredentials.length === 0) {
  console.info('No registered credentials found.');
  return Promise.resolve(null);
}
在本地验证用户身份并获取凭据
- 由于这些选项会按编码方式传递以便顺利通过 HTTP 协议,因此,请将某些参数重新转换为二进制文件,具体而言,包括
challenge以及allowCredentials数组中包含的id实例:
public/client.js
options.challenge = base64url.decode(options.challenge);

for (let cred of options.allowCredentials) {
  cred.id = base64url.decode(cred.id);
}
- 调用
navigator.credentials.get()方法,以使用 UVPA 验证用户身份。
public/client.js
const cred = await navigator.credentials.get({
  publicKey: options
});
在用户验证身份后,您应该会收到一个凭据对象,您可以将该对象发送到服务器并验证用户身份。
验证凭据
以下是您应该已收到的 PublicKeyCredential 对象示例(response 为 AuthenticatorAssertionResponse):
{
  "id": "...",
  "type": "public-key",
  "rawId": "...",
  "response": {
    "clientDataJSON": "...",
    "authenticatorData": "...",
    "signature": "...",
    "userHandle": ""
  }
}
- 对凭据的二进制文件参数进行编码,以将其作为字符串传递到服务器:
public/client.js
const credential = {};
credential.id = cred.id;
credential.type = cred.type;
credential.rawId = base64url.encode(cred.rawId);

if (cred.response) {
  const clientDataJSON =
    base64url.encode(cred.response.clientDataJSON);
  const authenticatorData =
    base64url.encode(cred.response.authenticatorData);
  const signature =
    base64url.encode(cred.response.signature);
  const userHandle =
    base64url.encode(cred.response.userHandle);
  credential.response = {
    clientDataJSON,
    authenticatorData,
    signature,
    userHandle,
  };
}
- 将对象发送到服务器,如果返回
HTTP code 200,则可视为用户已成功登录:
public/client.js
return await _fetch(`/auth/signinResponse`, credential);
现在,您已拥有完整的 authentication() 函数!
本部分的最终代码
public/client.js
...
export const authenticate = async () => {
  const opts = {};

  let url = '/auth/signinRequest';
  const credId = localStorage.getItem(`credId`);
  if (credId) {
    url += `?credId=${encodeURIComponent(credId)}`;
  }

  const options = await _fetch(url, opts);

  if (options.allowCredentials.length === 0) {
    console.info('No registered credentials found.');
    return Promise.resolve(null);
  }

  options.challenge = base64url.decode(options.challenge);

  for (let cred of options.allowCredentials) {
    cred.id = base64url.decode(cred.id);
  }

  const cred = await navigator.credentials.get({
    publicKey: options
  });

  const credential = {};
  credential.id = cred.id;
  credential.type = cred.type;
  credential.rawId = base64url.encode(cred.rawId);

  if (cred.response) {
    const clientDataJSON =
      base64url.encode(cred.response.clientDataJSON);
    const authenticatorData =
      base64url.encode(cred.response.authenticatorData);
    const signature =
      base64url.encode(cred.response.signature);
    const userHandle =
      base64url.encode(cred.response.userHandle);
    credential.response = {
      clientDataJSON,
      authenticatorData,
      signature,
      userHandle,
    };
  }

  return await _fetch(`/auth/signinResponse`, credential);
};
...
6. 启用身份重新验证体验
构建界面
当用户返回到您的网站时,您要让用户能够尽可能简单安全地重新验证身份。生物识别身份验证功能的用武之地就在于此。不过,在以下情况下,生物识别身份验证功能可能会失效:
- UVPA 不可用。
- 用户尚未在其设备上注册任何凭据。
- 存储空间经过清理,设备已忘记凭据 ID。
- 用户因某种原因(例如手指潮湿或佩戴口罩)而无法验证身份。
因此,请务必提供其他登录选项作为后备选项。在此 Codelab 中,您将使用基于表单的密码解决方案。
- 添加界面,以显示一个身份验证按钮,用于调用生物识别身份验证功能以及密码表单。
使用 hidden 类以根据用户状态有选择地显示/隐藏其中一个选项。
views/reauth.html
<div id="uvpa_available" class="hidden">
  <h2>
    Verify your identity
  </h2>
  <div>
    <mwc-button id="reauth" raised>Authenticate</mwc-button>
  </div>
  <div>
    <mwc-button id="cancel">Sign-in with password</mwc-button>
  </div>
</div>
- 将
class="hidden"附加到表单:
views/reauth.html
<form id="form" method="POST" action="/auth/password" class="hidden">
功能检测和 UVPA 可用性
如果满足以下条件之一,用户必须使用密码登录:
- WebAuthn 不可用。
- UVPA 不可用。
- 检测不到该 UVPA 的凭据 ID。
有选择地显示或隐藏身份验证按钮:
views/reauth.html
if (window.PublicKeyCredential) {
  PublicKeyCredential.isUserVerifyingPlatformAuthenticatorAvailable()
  .then(uvpaa => {
    if (uvpaa && localStorage.getItem(`credId`)) {
      document
        .querySelector('#uvpa_available')
        .classList.remove('hidden');
    } else {
      form.classList.remove('hidden');
    }
  });
} else {
  form.classList.remove('hidden');
}
回退到密码表单
此外,还应让用户能够选择使用密码登录。
在用户点击 Sign in with password 后,显示密码表单并隐藏身份验证按钮:
views/reauth.html
const cancel = document.querySelector('#cancel');
cancel.addEventListener('click', e => {
  form.classList.remove('hidden');
  document
    .querySelector('#uvpa_available')
    .classList.add('hidden');
});
调用生物识别身份验证功能
最后,启用生物识别身份验证功能。
- 将
authenticate附加到现有的import语句:
views/reauth.html
import { _fetch, authenticate } from '/client.js';
- 在用户点按 Authenticate 后调用
authenticate()以开始进行生物识别身份验证。
确保如果生物识别身份验证失败,系统会回退到密码表单。
views/reauth.html
const button = document.querySelector('#reauth');
button.addEventListener('click', e => {
  authenticate().then(user => {
    if (user) {
      location.href = '/home';
    } else {
      throw 'User not found.';
    }
  }).catch(e => {
    console.error(e.message || e);
    alert('Authentication failed. Use password to sign-in.');
    form.classList.remove('hidden');
    document.querySelector('#uvpa_available').classList.add('hidden');
  });
});
本部分的最终代码
views/reauth.html
...
<main class="content">
<div id="uvpa_available" class="hidden">
<h2>
Verify your identity
</h2>
<div>
<mwc-button id="reauth" raised>Authenticate</mwc-button>
</div>
<div>
<mwc-button id="cancel">Sign-in with password</mwc-button>
</div>
</div>
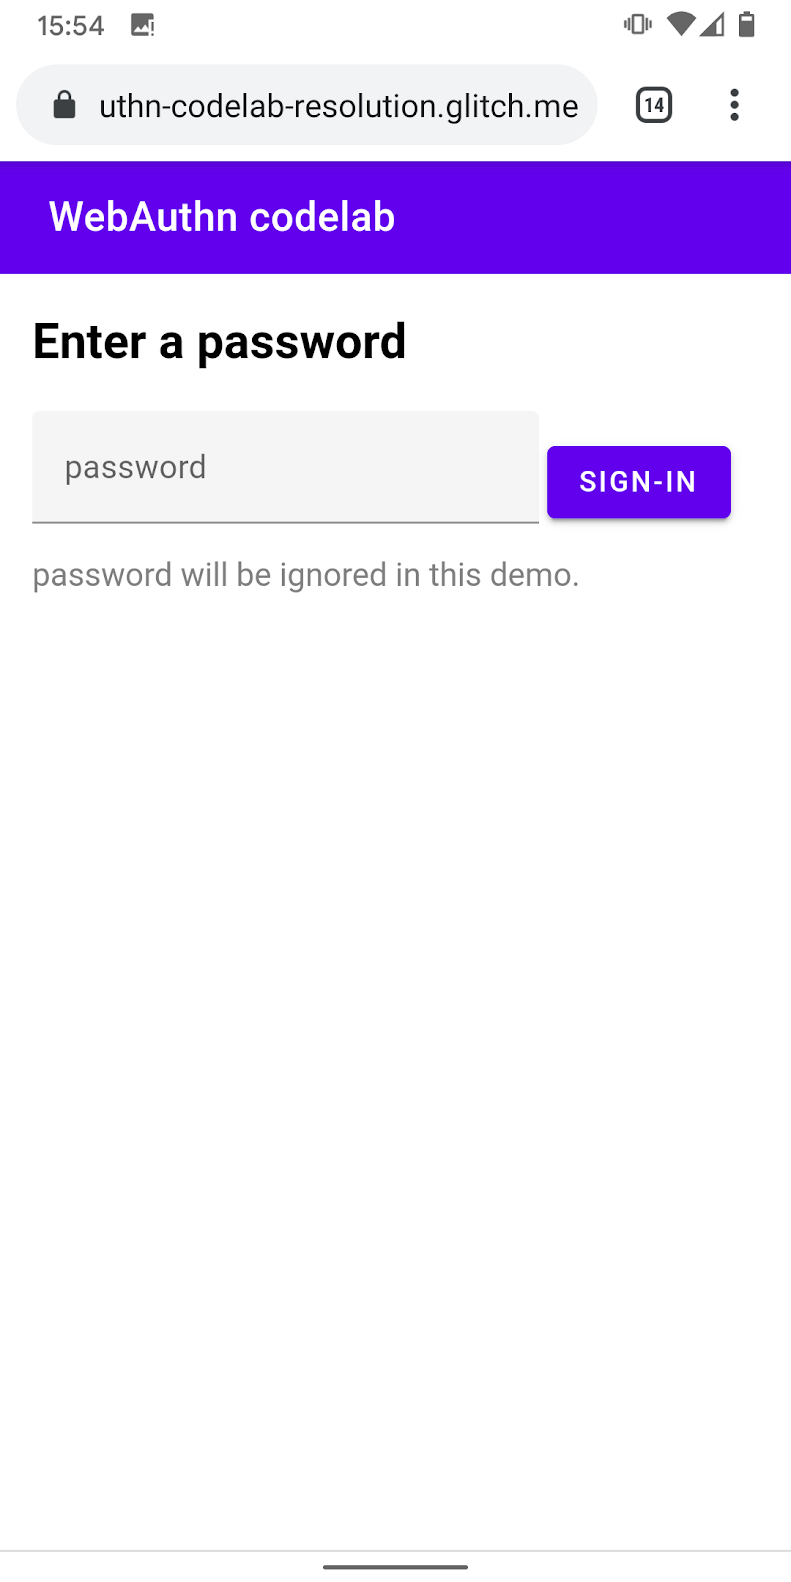
<form id="form" method="POST" action="/auth/password" class="hidden">
<h2>
Enter a password
</h2>
<input type="hidden" name="username" value="{{username}}" />
<div class="mdc-text-field mdc-text-field--filled">
<span class="mdc-text-field__ripple"></span>
<label class="mdc-floating-label" id="password-label">password</label>
<input type="password" class="mdc-text-field__input" aria-labelledby="password-label" name="password" />
<span class="mdc-line-ripple"></span>
</div>
<input type="submit" class="mdc-button mdc-button--raised" value="Sign-In" />
<p class="instructions">password will be ignored in this demo.</p>
</form>
</main>
<script src="https://unpkg.com/material-components-web@7.0.0/dist/material-components-web.min.js"></script>
<script type="module">
new mdc.textField.MDCTextField(document.querySelector('.mdc-text-field'));
import { _fetch, authenticate } from '/client.js';
const form = document.querySelector('#form');
form.addEventListener('submit', e => {
e.preventDefault();
const form = new FormData(e.target);
const cred = {};
form.forEach((v, k) => cred[k] = v);
_fetch(e.target.action, cred)
.then(user => {
location.href = '/home';
})
.catch(e => alert(e));
});
if (window.PublicKeyCredential) {
PublicKeyCredential.isUserVerifyingPlatformAuthenticatorAvailable()
.then(uvpaa => {
if (uvpaa && localStorage.getItem(`credId`)) {
document
.querySelector('#uvpa_available')
.classList.remove('hidden');
} else {
form.classList.remove('hidden');
}
});
} else {
form.classList.remove('hidden');
}
const cancel = document.querySelector('#cancel');
cancel.addEventListener('click', e => {
form.classList.remove('hidden');
document
.querySelector('#uvpa_available')
.classList.add('hidden');
});
const button = document.querySelector('#reauth');
button.addEventListener('click', e => {
authenticate().then(user => {
if (user) {
location.href = '/home';
} else {
throw 'User not found.';
}
}).catch(e => {
console.error(e.message || e);
alert('Authentication failed. Use password to sign-in.');
form.classList.remove('hidden');
document.querySelector('#uvpa_available').classList.add('hidden');
});
});
</script>
...
7. 恭喜!
您已完成此 Codelab!
了解详情
- Web Authentication:用于访问公钥凭据级别 1 的 API
- WebAuthn API 简介
- FIDO WebAuthn 研讨会
- WebAuthn 指南:DUOSEC
- 您的首个 Android FIDO2 API
特别感谢 FIDO 联盟的 Yuriy Ackermann 提供的帮助。