
1. 事前準備
Web Authentication API (也稱為 WebAuthn) 可讓您建立和使用來源範圍的公開金鑰憑證來驗證使用者。
這個 API 支援使用 BLE、NFC 和 USB 漫遊
在這個程式碼研究室中,您建構了一個使用簡單的指紋重新驗證的網站,而該網站使用了指紋感應器。重新驗證會保護帳戶資料,原因是要求登入網站的使用者在進入網站重要部分或經過一定時間後,再次嘗試驗證。
必要條件
- 瞭解 WebAuthn 的運作方式
- JavaScript 的基本程式設計技巧
執行步驟
- 透過簡易的重新驗證功能 (使用指紋感應器) 建立網站
軟硬體需求
- 下列其中一種裝置:
- Android 裝置 (建議使用生物特徵辨識感應器)
- 搭載 Touch ID 或 Face ID 的 iPhone 或 iPad (搭載 iOS 14 以上版本)
- 在 macOS Big Sur 或更高版本的 MacBook Pro 或 Air,採用 Touch ID 功能
- 安裝 Windows Hello 的 Windows 10 19H1 或更高版本
- 使用下列其中一種瀏覽器:
- Google Chrome 67 以上版本
- Microsoft Edge 85 以上版本
- Safari 14 以上版本
2. 做好準備
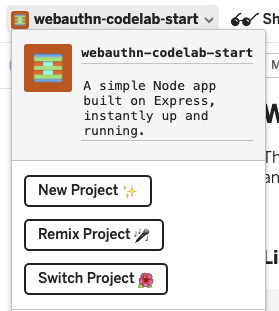
在這個程式碼研究室中,您使用稱為 glitch 的服務。您可以在此編輯 JavaScript 的用戶端和伺服器端程式碼,並立即進行部署。
前往 https://glitch.com/edit/#!/webauthn-codelab-start。
瞭解運作方式
請按照下列步驟查看網站的初始狀態:
- 按一下
 [顯示] > [在新視窗中開啟],即可查看實際網站。
 - 輸入您選擇的使用者名稱,然後按一下 [繼續]。
- 輸入密碼,然後按一下 [登入]。
這個密碼會遭到忽略,但你仍然已通過驗證。您到達首頁。
- 按一下 [嘗試重新驗證],然後重複第二個步驟、第三個步驟和第四步驟。
- 按一下 [登出]。
請注意,每次您登入時,都必須輸入密碼。模擬使用者需要重新驗證,才能存取網站的重要部分。
重混代碼
- 前往 WebAuthn / FIDO2 API 程式碼研究室。
- 按一下專案名稱 (「Remix Project」(Remix 專案)
 ) 以執行專案分支,並改用新網址繼續使用自己的版本。
3. 使用指紋註冊憑證
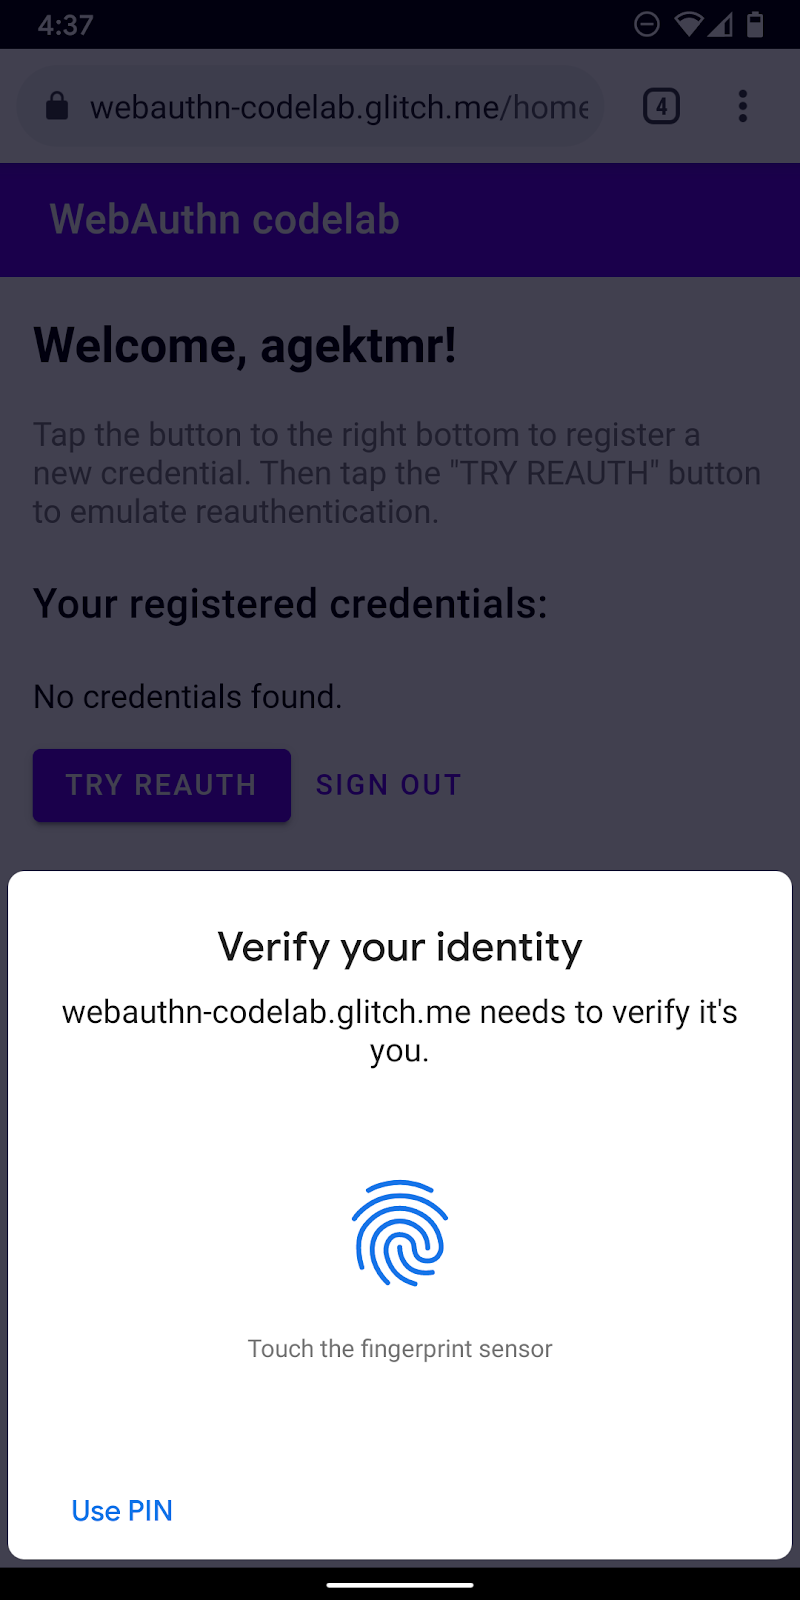
您必須註冊由裝置內建的 UVPA 產生的憑證,用於驗證裝置的身分,並驗證使用者身分。通常視指紋感應器而定,實際情況須視使用者的裝置而定。
您將這項功能新增至「/home」頁面:
建立 registerCredential() 函式
建立 registerCredential() 函式,用於註冊新憑證。
public/client.js
export const registerCredential = async () => {

};
從伺服器端點取得挑戰與其他選項
要求使用者註冊新憑證之前,請先要求伺服器傳回可在 WebAuthn 中傳送的參數,包括驗證方式。別擔心,您已經有伺服器端點回應了這類參數,
請將下列程式碼新增到 registerCredential()。
public/client.js
const opts = {
  attestation: 'none',
  authenticatorSelection: {
    authenticatorAttachment: 'platform',
    userVerification: 'required',
    requireResidentKey: false
  }
};

const options = await _fetch('/auth/registerRequest', opts);
伺服器和用戶端之間的通訊協定不屬於 WebAuthn 規格的一部分。不過,此程式碼研究室的設計,是符合 WebAuthn 規格,且您傳送到伺服器的 JSON 物件與 PublicKeyCredentialCreationOptions 非常相似,因此相當直覺易懂。下表列出可傳送至伺服器的重要參數,並說明參數的用途:
參數 | 說明 | ||
| 認證傳輸偏好設定: | ||
|
| ||
|
| 篩選可用的驗證器。如果你想為裝置附加驗證器,請使用「 | |
| 決定驗證器本機使用者驗證是否為「 | ||
| 如果日後建立的帳戶 UX 應提供憑證,請使用 | ||
如要進一步瞭解這些選項,請參閱 5.4. 建立憑證的選項 (字典 PublicKeyCredentialCreationOptions)。
以下是您從伺服器收到的範例選項。
{
  "rp": {
    "name": "WebAuthn Codelab",
    "id": "webauthn-codelab.glitch.me"
  },
  "user": {
    "displayName": "User Name",
    "id": "...",
    "name": "test"
  },
  "challenge": "...",
  "pubKeyCredParams": [
    {
      "type": "public-key",
      "alg": -7
    }, {
      "type": "public-key",
      "alg": -257
    }
  ],
  "timeout": 1800000,
  "attestation": "none",
  "excludeCredentials": [
    {
      "id": "...",
      "type": "public-key",
      "transports": [
        "internal"
      ]
    }
  ],
  "authenticatorSelection": {
    "authenticatorAttachment": "platform",
    "userVerification": "required"
  }
}
建立憑證
- 由於這些選項是透過 HTTP 通訊協定提供編碼,因此請將部分參數轉換回二進位,尤其是
user.id、challenge和excludeCredentials陣列中的id例項:
public/client.js
options.user.id = base64url.decode(options.user.id);
options.challenge = base64url.decode(options.challenge);

if (options.excludeCredentials) {
  for (let cred of options.excludeCredentials) {
    cred.id = base64url.decode(cred.id);
  }
}
- 呼叫
navigator.credentials.create()方法來建立新的憑證。
透過這項呼叫,瀏覽器會與驗證器互動,並嘗試透過 UVPA 驗證使用者身分。
public/client.js
const cred = await navigator.credentials.create({
  publicKey: options,
});
使用者驗證身分後,您應該會收到一個可傳送給伺服器的憑證,並註冊驗證工具。
向伺服器端點註冊憑證
這是您應該收到的憑證物件範例。
{
  "id": "...",
  "rawId": "...",
  "type": "public-key",
  "response": {
    "clientDataJSON": "...",
    "attestationObject": "..."
  }
}
- 就像收到註冊憑證的選項物件時,請將憑證的二進位參數編碼成字串,以便以字串的形式傳送到伺服器:
public/client.js
const credential = {};
credential.id = cred.id;
credential.rawId = base64url.encode(cred.rawId);
credential.type = cred.type;

if (cred.response) {
  const clientDataJSON =
    base64url.encode(cred.response.clientDataJSON);
  const attestationObject =
    base64url.encode(cred.response.attestationObject);
  credential.response = {
    clientDataJSON,
    attestationObject,
  };
}
- 將憑證 ID 儲存在本機,以便在使用者返回時使用此 ID 進行驗證:
public/client.js
localStorage.setItem(`credId`, credential.id);
- 將物件傳送至伺服器,如果傳回
HTTP code 200,請將新憑證視為已成功註冊。
public/client.js
return await _fetch('/auth/registerResponse' , credential);
現在已具備完整的 registerCredential() 函式!
這個部分的最終程式碼
public/client.js
...
export const registerCredential = async () => {
  const opts = {
    attestation: 'none',
    authenticatorSelection: {
      authenticatorAttachment: 'platform',
      userVerification: 'required',
      requireResidentKey: false
    }
  };

  const options = await _fetch('/auth/registerRequest', opts);

  options.user.id = base64url.decode(options.user.id);
  options.challenge = base64url.decode(options.challenge);

  if (options.excludeCredentials) {
    for (let cred of options.excludeCredentials) {
      cred.id = base64url.decode(cred.id);
    }
  }

  const cred = await navigator.credentials.create({
    publicKey: options
  });

  const credential = {};
  credential.id =     cred.id;
  credential.rawId =  base64url.encode(cred.rawId);
  credential.type =   cred.type;

  if (cred.response) {
    const clientDataJSON =
      base64url.encode(cred.response.clientDataJSON);
    const attestationObject =
      base64url.encode(cred.response.attestationObject);
    credential.response = {
      clientDataJSON,
      attestationObject
    };
  }

  localStorage.setItem(`credId`, credential.id);

  return await _fetch('/auth/registerResponse' , credential);
};
...
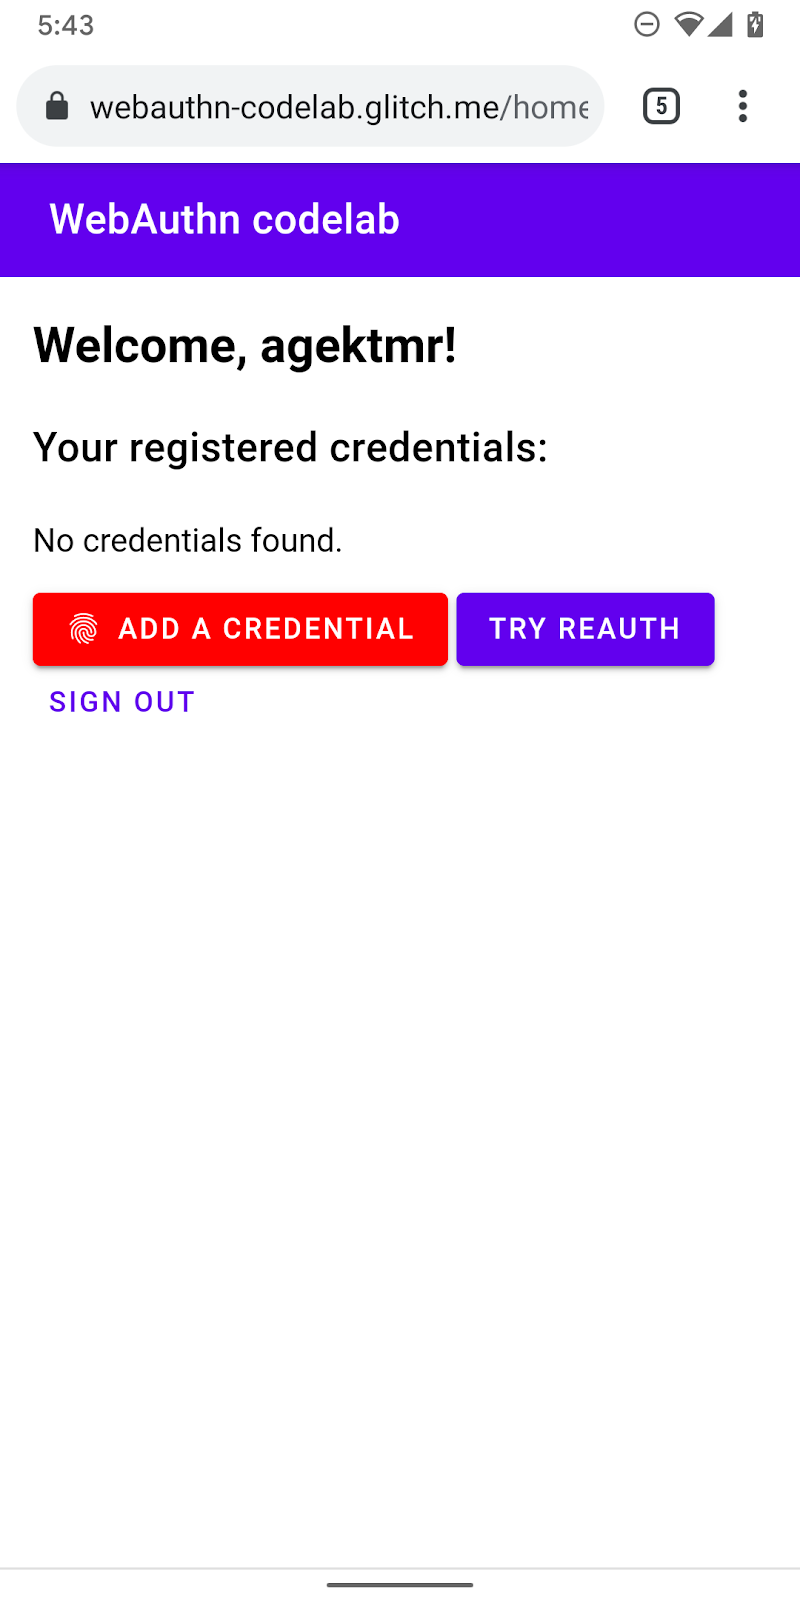
4. 建構 UI 來註冊、取得及移除憑證
建議您使用已註冊的憑證清單和可移除的按鈕。
版本 UI 預留位置
新增使用者介面來列出憑證,以及註冊新憑證的按鈕。視使用者是否可用的功能而定,您可以從警告訊息或註冊新憑證的按鈕中移除 hidden 類別。ul#list 是用來新增已註冊憑證清單的預留位置。
views/home.html
<p id="uvpa_unavailable" class="hidden">
  This device does not support User Verifying Platform Authenticator. You can't register a credential.
</p>
<h3 class="mdc-typography mdc-typography--headline6">
  Your registered credentials:
</h3>
<section>
  <div id="list"></div>
</section>
<mwc-button id="register" class="hidden" icon="fingerprint" raised>Add a credential</mwc-button>
功能偵測和 UVPA 可用性
如要檢查 UVPA 可用性,請按照下列步驟操作:
- 請檢查
window.PublicKeyCredential,確認 WebAuthn 是否可用。 - 致電
PublicKeyCredential.isUserVerifyingPlatformAuthenticatorAvailable(),確認 UVPA 是否可用。如果有新憑證可用,您就會看到註冊新憑證的按鈕。如果上述兩者皆不可用,系統就會顯示警告訊息。
views/home.html
const register = document.querySelector('#register');

if (window.PublicKeyCredential) {
  PublicKeyCredential.isUserVerifyingPlatformAuthenticatorAvailable()
  .then(uvpaa => {
    if (uvpaa) {
      register.classList.remove('hidden');
    } else {
      document
        .querySelector('#uvpa_unavailable')
        .classList.remove('hidden');
    }
  });
} else {
  document
    .querySelector('#uvpa_unavailable')
    .classList.remove('hidden');
}
取得並顯示憑證清單
- 建立
getCredentials()函式,以便取得已註冊的憑證,並顯示在清單中。幸好,您在/auth/getKeys伺服器上已有便利的端點,方便您擷取已登入使用者的註冊憑證。
傳回的 JSON 內含憑證資訊,例如 id 和 publicKey。您可以建立 HTML 並向使用者顯示。
views/home.html
const getCredentials = async () => {
  const res = await _fetch('/auth/getKeys');
  const list = document.querySelector('#list');
  const creds = html`${res.credentials.length > 0 ? res.credentials.map(cred => html`
    <div class="mdc-card credential">
      <span class="mdc-typography mdc-typography--body2">${cred.credId}</span>
      <pre class="public-key">${cred.publicKey}</pre>
      <div class="mdc-card__actions">
        <mwc-button id="${cred.credId}" @click="${removeCredential}" raised>Remove</mwc-button>
      </div>
    </div>`) : html`
    <p>No credentials found.</p>
    `}`;
  render(creds, list);
};
- 在使用者進入
/home頁面時,叫用getCredentials()以顯示可用的憑證。
views/home.html
getCredentials();
移除憑證
在憑證清單中,您新增了可移除每個憑證的按鈕。您可以向 /auth/removeKey 傳送要求和 credId 查詢參數,以便移除這些參數。
public/client.js
export const unregisterCredential = async (credId) => {
  localStorage.removeItem('credId');
  return _fetch(`/auth/removeKey?credId=${encodeURIComponent(credId)}`);
};
- 將
unregisterCredential附加至現有的import陳述式。
views/home.html
import { _fetch, unregisterCredential } from '/client.js';
- 新增函式,以便在使用者點擊 [移除] 時呼叫該函式。
views/home.html
const removeCredential = async e => {
  try {
    await unregisterCredential(e.target.id);
    getCredentials();
  } catch (e) {
    alert(e);
  }
};
註冊憑證
您可以點選 [新增憑證],呼叫 registerCredential() 來註冊新憑證。
- 將
registerCredential附加至現有的import陳述式。
views/home.html
import { _fetch, registerCredential, unregisterCredential } from '/client.js';
- 叫用
registerCredential()內含navigator.credentials.create()選項。
註冊後,別忘了呼叫 getCredentials() 來更新憑證清單。
views/home.html
register.addEventListener('click', e => {
  registerCredential().then(user => {
    getCredentials();
  }).catch(e => alert(e));
});
現在,您應該就能註冊新的憑證,並顯示憑證的相關資訊。您可以在實際的網站上試用這項功能。
這個部分的最終程式碼
views/home.html
...
      <p id="uvpa_unavailable" class="hidden">
        This device does not support User Verifying Platform Authenticator. You can't register a credential.
      </p>
      <h3 class="mdc-typography mdc-typography--headline6">
        Your registered credentials:
      </h3>
      <section>
        <div id="list"></div>
        <mwc-fab id="register" class="hidden" icon="add"></mwc-fab>
      </section>
      <mwc-button raised><a href="/reauth">Try reauth</a></mwc-button>
      <mwc-button><a href="/auth/signout">Sign out</a></mwc-button>
    </main>
    <script type="module">
      import { _fetch, registerCredential, unregisterCredential } from '/client.js';
      import { html, render } from 'https://unpkg.com/lit-html@1.0.0/lit-html.js?module';

      const register = document.querySelector('#register');

      if (window.PublicKeyCredential) {
        PublicKeyCredential.isUserVerifyingPlatformAuthenticatorAvailable()
        .then(uvpaa => {
          if (uvpaa) {
            register.classList.remove('hidden');
          } else {
            document
              .querySelector('#uvpa_unavailable')
              .classList.remove('hidden');
          }
        });
      } else {
        document
          .querySelector('#uvpa_unavailable')
          .classList.remove('hidden');
      }

      const getCredentials = async () => {
        const res = await _fetch('/auth/getKeys');
        const list = document.querySelector('#list');
        const creds = html`${res.credentials.length > 0 ? res.credentials.map(cred => html`
          <div class="mdc-card credential">
            <span class="mdc-typography mdc-typography--body2">${cred.credId}</span>
            <pre class="public-key">${cred.publicKey}</pre>
            <div class="mdc-card__actions">
              <mwc-button id="${cred.credId}" @click="${removeCredential}" raised>Remove</mwc-button>
            </div>
          </div>`) : html`
          <p>No credentials found.</p>
          `}`;
        render(creds, list);
      };

      getCredentials();

      const removeCredential = async e => {
        try {
          await unregisterCredential(e.target.id);
          getCredentials();
        } catch (e) {
          alert(e);
        }
      };

      register.addEventListener('click', e => {
        registerCredential({
          attestation: 'none',
          authenticatorSelection: {
            authenticatorAttachment: 'platform',
            userVerification: 'required',
            requireResidentKey: false
          }
        })
        .then(user => {
          getCredentials();
        })
        .catch(e => alert(e));
      });
    </script>
...
public/client.js
...
export const unregisterCredential = async (credId) => {
  localStorage.removeItem('credId');
  return _fetch(`/auth/removeKey?credId=${encodeURIComponent(credId)}`);
};
...
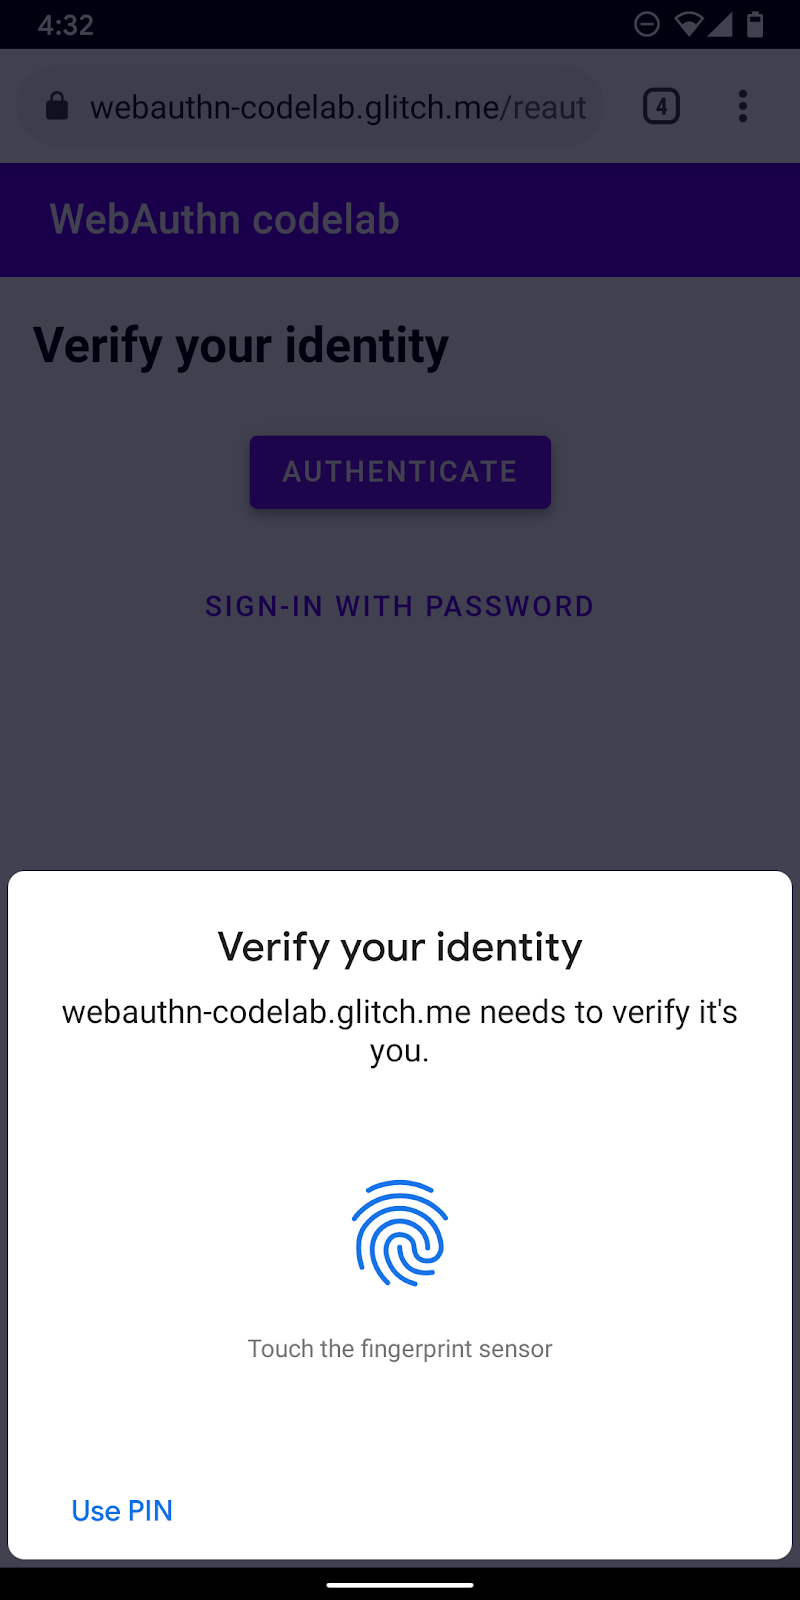
5. 透過指紋驗證使用者
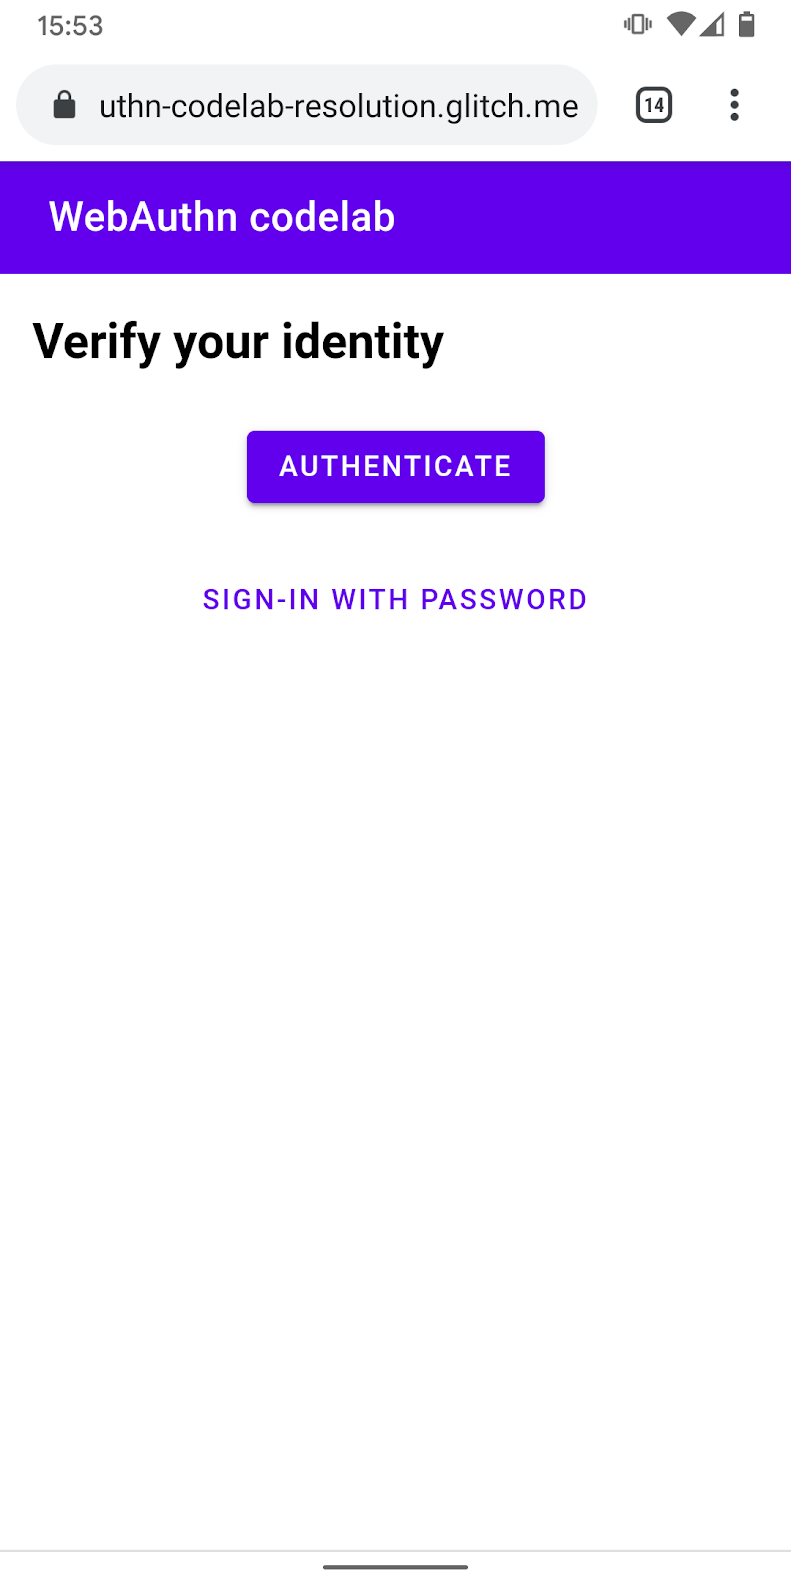
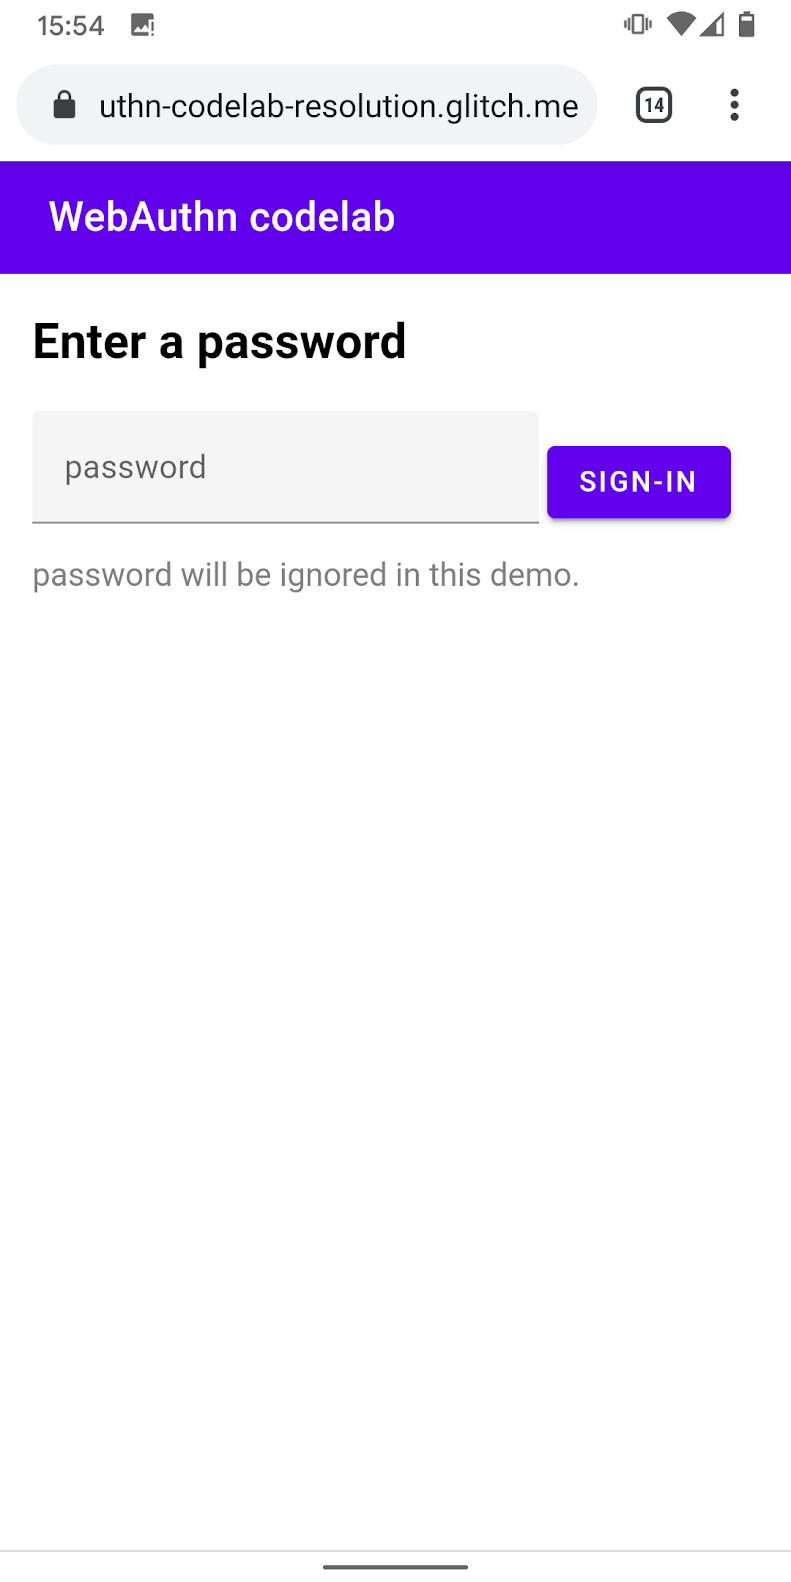
您已經註冊一個憑證,並準備用來驗證使用者的方式。現在,您可以在網站中新增重新驗證功能。以下是使用者體驗:
當使用者進入 /reauth 頁面時,如果可以進行生物特徵辨識驗證,系統就會顯示 [驗證] 按鈕。指紋驗證 (UVPA) 是指透過輕觸 [驗證] 的方式進行驗證、成功完成驗證,然後回到 /home 頁面。如果無法取得生物特徵辨識驗證,或是驗證失敗,導致生物特徵辨識驗證失敗,使用者介面就會改用現有的密碼表單。
建立 authenticate() 函式
建立名為 authenticate() 的函式,使用指紋驗證使用者身分。在這裡新增 JavaScript 程式碼:
public/client.js
export const authenticate = async () => {

};
從伺服器端點取得挑戰與其他選項
- 驗證之前,請檢查使用者是否有已儲存的憑證 ID,如果有,就會將該 ID 設為查詢參數。
當您提供憑證 ID 以及其他選項時,伺服器可提供相關的 allowCredentials,進而讓使用者驗證可靠。
public/client.js
const opts = {};

let url = '/auth/signinRequest';
const credId = localStorage.getItem(`credId`);
if (credId) {
  url += `?credId=${encodeURIComponent(credId)}`;
}
- 要求使用者驗證之前,請先要求伺服器傳回驗證結果和其他參數。呼叫
_fetch()和opts做為引數,以便將 POST 要求傳送至伺服器。
public/client.js
const options = await _fetch(url, opts);
以下是您應該收到的範例選項 (與 PublicKeyCredentialRequestOptions 保持一致)。
{
  "challenge": "...",
  "timeout": 1800000,
  "rpId": "webauthn-codelab.glitch.me",
  "userVerification": "required",
  "allowCredentials": [
    {
      "id": "...",
      "type": "public-key",
      "transports": [
        "internal"
      ]
    }
  ]
}
這裡最重要的選項是 allowCredentials。當您從伺服器接收選項時,allowCredentials 應是陣列中的單一物件或是空白的陣列 (視在伺服器端是否找到查詢參數中的憑證憑證)。
- 當
allowCredentials是空的陣列時,你可以透過null解決這項承諾,讓 UI 恢復要求提供密碼。
if (options.allowCredentials.length === 0) {
  console.info('No registered credentials found.');
  return Promise.resolve(null);
}
在本機驗證使用者並取得憑證
- 由於這些選項是透過 HTTP 通訊協定提供,因此會將部分參數轉換回二進位,尤其是
challenge和allowCredentials陣列中的id例項:
public/client.js
options.challenge = base64url.decode(options.challenge);

for (let cred of options.allowCredentials) {
  cred.id = base64url.decode(cred.id);
}
- 呼叫
navigator.credentials.get()方法,透過 UVPA 驗證使用者身分。
public/client.js
const cred = await navigator.credentials.get({
  publicKey: options
});
使用者驗證身分後,您應該會收到一個憑證物件,以便您傳送給伺服器並驗證使用者。
驗證憑證
這裡應該會顯示 PublicKeyCredential 物件範例 (response 是 AuthenticatorAssertionResponse):
{
  "id": "...",
  "type": "public-key",
  "rawId": "...",
  "response": {
    "clientDataJSON": "...",
    "authenticatorData": "...",
    "signature": "...",
    "userHandle": ""
  }
}
- 將憑證的二進位參數編碼,以便以字串的形式傳送至伺服器:
public/client.js
const credential = {};
credential.id = cred.id;
credential.type = cred.type;
credential.rawId = base64url.encode(cred.rawId);

if (cred.response) {
  const clientDataJSON =
    base64url.encode(cred.response.clientDataJSON);
  const authenticatorData =
    base64url.encode(cred.response.authenticatorData);
  const signature =
    base64url.encode(cred.response.signature);
  const userHandle =
    base64url.encode(cred.response.userHandle);
  credential.response = {
    clientDataJSON,
    authenticatorData,
    signature,
    userHandle,
  };
}
- 將物件傳送至伺服器,如果物件傳回
HTTP code 200,請將其視為成功登入的使用者:
public/client.js
return await _fetch(`/auth/signinResponse`, credential);
現在已具備完整的 authentication() 函式!
這個部分的最終程式碼
public/client.js
...
export const authenticate = async () => {
  const opts = {};

  let url = '/auth/signinRequest';
  const credId = localStorage.getItem(`credId`);
  if (credId) {
    url += `?credId=${encodeURIComponent(credId)}`;
  }

  const options = await _fetch(url, opts);

  if (options.allowCredentials.length === 0) {
    console.info('No registered credentials found.');
    return Promise.resolve(null);
  }

  options.challenge = base64url.decode(options.challenge);

  for (let cred of options.allowCredentials) {
    cred.id = base64url.decode(cred.id);
  }

  const cred = await navigator.credentials.get({
    publicKey: options
  });

  const credential = {};
  credential.id = cred.id;
  credential.type = cred.type;
  credential.rawId = base64url.encode(cred.rawId);

  if (cred.response) {
    const clientDataJSON =
      base64url.encode(cred.response.clientDataJSON);
    const authenticatorData =
      base64url.encode(cred.response.authenticatorData);
    const signature =
      base64url.encode(cred.response.signature);
    const userHandle =
      base64url.encode(cred.response.userHandle);
    credential.response = {
      clientDataJSON,
      authenticatorData,
      signature,
      userHandle,
    };
  }

  return await _fetch(`/auth/signinResponse`, credential);
};
...
6. 啟用重新驗證體驗
版本 UI
當使用者返回時,您會希望使用者以輕鬆又安全的方式重新驗證。生物特徵辨識驗證就在這裡。但在某些情況下,生物特徵驗證功能可能無法正常運作:
- 無法使用 UVPA。
- 使用者尚未在裝置上註冊任何憑證。
- 系統會清除儲存空間,且裝置不再記住憑證 ID。
- 使用者因故而無法驗證身分,例如手指移動時,或是裝置戴著口罩。
因此,請務必提供其他登入選項,做為備用登入機制。在本程式碼研究室中,您可以使用表單密碼解決方案。
- 新增 UI 以顯示驗證按鈕,除了密碼表單之外,還會叫用生物特徵辨識驗證。
使用 hidden 類別,即可根據使用者的狀態,選擇顯示或隱藏其中一個類別。
views/reauth.html
<div id="uvpa_available" class="hidden">
  <h2>
    Verify your identity
  </h2>
  <div>
    <mwc-button id="reauth" raised>Authenticate</mwc-button>
  </div>
  <div>
    <mwc-button id="cancel">Sign-in with password</mwc-button>
  </div>
</div>
- 將「
class="hidden"」附加到表單:
views/reauth.html
<form id="form" method="POST" action="/auth/password" class="hidden">
功能偵測和 UVPA 可用性
如果符合下列任一條件,使用者就必須使用密碼登入:
- WebAuthn 無法使用。
- 無法使用 UVPA。
- 找不到這個 UVPA 的憑證 ID。
選擇顯示驗證按鈕或隱藏按鈕:
views/reauth.html
if (window.PublicKeyCredential) {
  PublicKeyCredential.isUserVerifyingPlatformAuthenticatorAvailable()
  .then(uvpaa => {
    if (uvpaa && localStorage.getItem(`credId`)) {
      document
        .querySelector('#uvpa_available')
        .classList.remove('hidden');
    } else {
      form.classList.remove('hidden');
    }
  });
} else {
  form.classList.remove('hidden');
}
備用密碼表單
使用者也應該可以選擇使用密碼登入。
在使用者點選 [使用密碼登入] 時,顯示密碼表單並隱藏驗證按鈕:
views/reauth.html
const cancel = document.querySelector('#cancel');
cancel.addEventListener('click', e => {
  form.classList.remove('hidden');
  document
    .querySelector('#uvpa_available')
    .classList.add('hidden');
});
叫用生物特徵辨識驗證
最後,啟用生物特徵辨識驗證功能。
- 將
authenticate附加至現有的import陳述式:
views/reauth.html
import { _fetch, authenticate } from '/client.js';
- 在使用者輕觸 [驗證] 啟動生物特徵辨識驗證時,叫用
authenticate()。
確認生物特徵辨識驗證失敗後回到密碼表單。
views/reauth.html
const button = document.querySelector('#reauth');
button.addEventListener('click', e => {
  authenticate().then(user => {
    if (user) {
      location.href = '/home';
    } else {
      throw 'User not found.';
    }
  }).catch(e => {
    console.error(e.message || e);
    alert('Authentication failed. Use password to sign-in.');
    form.classList.remove('hidden');
    document.querySelector('#uvpa_available').classList.add('hidden');
  });
});
這個部分的最終程式碼
views/reauth.html
...
    <main class="content">
      <div id="uvpa_available" class="hidden">
        <h2>
          Verify your identity
        </h2>
        <div>
          <mwc-button id="reauth" raised>Authenticate</mwc-button>
        </div>
        <div>
          <mwc-button id="cancel">Sign-in with password</mwc-button>
        </div>
      </div>
      <form id="form" method="POST" action="/auth/password" class="hidden">
        <h2>
          Enter a password
        </h2>
        <input type="hidden" name="username" value="{{username}}" />
        <div class="mdc-text-field mdc-text-field--filled">
          <span class="mdc-text-field__ripple"></span>
          <label class="mdc-floating-label" id="password-label">password</label>
          <input type="password" class="mdc-text-field__input" aria-labelledby="password-label" name="password" />
          <span class="mdc-line-ripple"></span>
        </div>
        <input type="submit" class="mdc-button mdc-button--raised" value="Sign-In" />
        <p class="instructions">password will be ignored in this demo.</p>
      </form>
    </main>
    <script src="https://unpkg.com/material-components-web@7.0.0/dist/material-components-web.min.js"></script>
    <script type="module">
      new mdc.textField.MDCTextField(document.querySelector('.mdc-text-field'));
      import { _fetch, authenticate } from '/client.js';
      const form = document.querySelector('#form');
      form.addEventListener('submit', e => {
        e.preventDefault();
        const form = new FormData(e.target);
        const cred = {};
        form.forEach((v, k) => cred[k] = v);
        _fetch(e.target.action, cred)
        .then(user => {
          location.href = '/home';
        })
        .catch(e => alert(e));
      });

      if (window.PublicKeyCredential) {
        PublicKeyCredential.isUserVerifyingPlatformAuthenticatorAvailable()
        .then(uvpaa => {
          if (uvpaa && localStorage.getItem(`credId`)) {
            document
              .querySelector('#uvpa_available')
              .classList.remove('hidden');
          } else {
            form.classList.remove('hidden');
          }
        });
      } else {
        form.classList.remove('hidden');
      }

      const cancel = document.querySelector('#cancel');
      cancel.addEventListener('click', e => {
        form.classList.remove('hidden');
        document
          .querySelector('#uvpa_available')
          .classList.add('hidden');
      });

      const button = document.querySelector('#reauth');
      button.addEventListener('click', e => {
        authenticate().then(user => {
          if (user) {
            location.href = '/home';
          } else {
            throw 'User not found.';
          }
        }).catch(e => {
          console.error(e.message || e);
          alert('Authentication failed. Use password to sign-in.');
          form.classList.remove('hidden');
          document.querySelector('#uvpa_available').classList.add('hidden');
        });
      });
    </script>
...
7. 恭喜!
您已經完成這個程式碼研究室!
瞭解詳情
- 網路驗證:存取公用金鑰憑證層級 1 的 API
- WebAuthn API 簡介
- FIDO WebAuthn 研討會
- WebAuthn 指南:DUOSEC
- 您的第一個 Android FIDO2 API
感謝 FIDO Alliance 的 Yuriy Ackermann 的協助。