
1. ก่อนเริ่มต้น
ฟีเจอร์ที่พบบ่อยที่สุดอย่างหนึ่งของเว็บไซต์คือการแสดงแผนที่ Google ที่ไฮไลต์สถานที่ตั้งอย่างน้อย 1 แห่งสำหรับธุรกิจ สถานประกอบการ หรือหน่วยงานอื่นๆ ที่มีที่ตั้งจริง วิธีติดตั้งใช้งานแผนที่เหล่านี้อาจแตกต่างกันอย่างมากโดยขึ้นอยู่กับข้อกำหนด เช่น จำนวนสถานที่ตั้งและความถี่ในการเปลี่ยนแปลง
ในโค้ดแล็บนี้ คุณจะได้ดู Use Case ที่ง่ายที่สุด นั่นคือสถานที่จำนวนเล็กน้อยที่แทบจะไม่เปลี่ยนแปลง เช่น เครื่องมือระบุตำแหน่งร้านค้าสำหรับธุรกิจที่มีร้านค้าหลายสาขา ในกรณีนี้ คุณสามารถใช้วิธีการที่มีเทคโนโลยีค่อนข้างต่ำโดยไม่ต้องมีการเขียนโปรแกรมฝั่งเซิร์ฟเวอร์ แต่ไม่ได้หมายความว่าคุณจะสร้างสรรค์ไม่ได้ โดยคุณสามารถทำได้ด้วยการใช้ประโยชน์จากรูปแบบข้อมูล GeoJSON เพื่อจัดเก็บและแสดงข้อมูลที่กำหนดเองเกี่ยวกับร้านค้าแต่ละแห่งบนแผนที่ รวมถึงปรับแต่งเครื่องหมายและสไตล์โดยรวมของแผนที่เอง
สุดท้ายนี้ คุณยังใช้ Cloud Shell เพื่อพัฒนาและโฮสต์เครื่องมือระบุตำแหน่งร้านค้าได้อีกด้วย แม้ว่าการใช้เครื่องมือนี้จะไม่ใช่ข้อกำหนดที่เข้มงวด แต่การใช้เครื่องมือนี้จะช่วยให้คุณพัฒนาเครื่องมือระบุตำแหน่งร้านค้าจากอุปกรณ์ใดก็ได้ที่เรียกใช้เว็บเบราว์เซอร์ และทำให้เครื่องมือนี้พร้อมใช้งานออนไลน์ต่อสาธารณะ
ข้อกำหนดเบื้องต้น
- ความรู้พื้นฐานเกี่ยวกับ HTML และ JavaScript
สิ่งที่คุณต้องทำ
- แสดงแผนที่ที่มีชุดตำแหน่งร้านค้าและข้อมูลที่จัดเก็บในรูปแบบ GeoJSON
- ปรับแต่งเครื่องหมายและแผนที่
- แสดงข้อมูลเพิ่มเติมเกี่ยวกับร้านค้าเมื่อมีการคลิกเครื่องหมายของร้านค้า
- เพิ่มแถบค้นหาการเติมข้อความอัตโนมัติของสถานที่ลงในหน้าเว็บ
- ระบุตำแหน่งร้านค้าที่ใกล้กับจุดเริ่มต้นที่ผู้ใช้ระบุมากที่สุด
2. ตั้งค่า
ในขั้นตอนที่ 3 ของส่วนต่อไปนี้ ให้เปิดใช้ API 3 รายการต่อไปนี้สำหรับ Codelab นี้
- Maps JavaScript API
- Places API
- Distance Matrix API
เริ่มต้นใช้งาน Google Maps Platform
หากคุณยังไม่เคยใช้ Google Maps Platform มาก่อน ให้ทำตามคู่มือการเริ่มต้นใช้งาน Google Maps Platform หรือดูเพลย์ลิสต์การเริ่มต้นใช้งาน Google Maps Platform เพื่อทำตามขั้นตอนต่อไปนี้
- สร้างบัญชีสำหรับการเรียกเก็บเงิน
- สร้างโปรเจ็กต์
- เปิดใช้ Google Maps Platform API และ SDK (แสดงอยู่ในส่วนก่อนหน้า)
- สร้างคีย์ API
เปิดใช้งาน Cloud Shell
ในโค้ดแล็บนี้ คุณจะได้ใช้ Cloud Shell ซึ่งเป็นสภาพแวดล้อมบรรทัดคำสั่งที่ทำงานใน Google Cloud และให้สิทธิ์เข้าถึงผลิตภัณฑ์และทรัพยากรที่ทำงานใน Google Cloud เพื่อให้คุณโฮสต์และเรียกใช้โปรเจ็กต์จากเว็บเบราว์เซอร์ได้อย่างสมบูรณ์
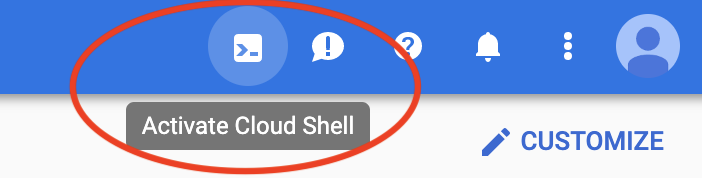
หากต้องการเปิดใช้งาน Cloud Shell จาก Cloud Console ให้คลิกเปิดใช้งาน Cloud Shell  (ระบบจะจัดสรรและเชื่อมต่อกับสภาพแวดล้อมภายในเวลาไม่กี่นาที)
ซึ่งจะเปิดเชลล์ใหม่ในส่วนล่างของเบราว์เซอร์หลังจากที่อาจแสดงโฆษณาคั่นระหว่างหน้าเบื้องต้น
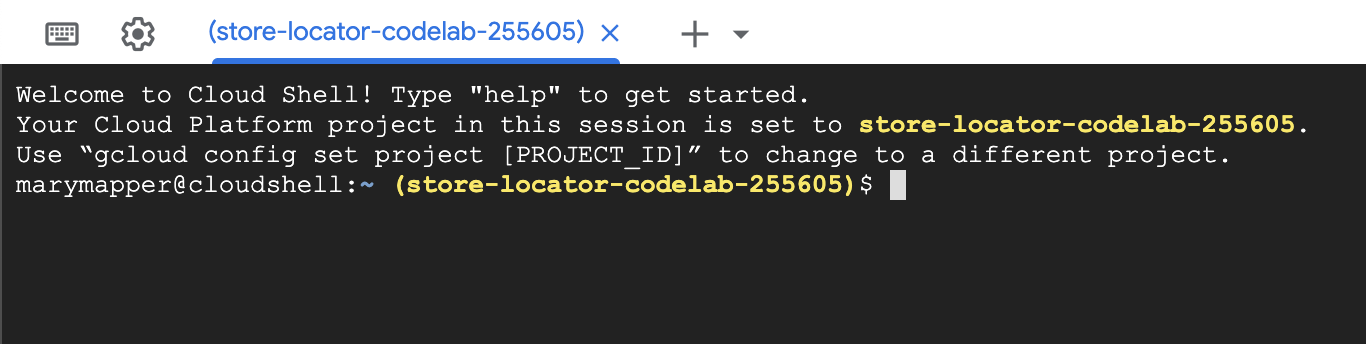
เมื่อเชื่อมต่อกับ Cloud Shell แล้ว คุณควรเห็นว่าคุณได้รับการตรวจสอบสิทธิ์แล้ว และระบบได้ตั้งค่าโปรเจ็กต์เป็นรหัสโปรเจ็กต์ที่คุณเลือกไว้ในระหว่างการตั้งค่าแล้ว
$ gcloud auth list
Credentialed Accounts:
ACTIVE  ACCOUNT
  *     <myaccount>@<mydomain>.com
$ gcloud config list project
[core]
project = <YOUR_PROJECT_ID>
หากไม่ได้ตั้งค่าโปรเจ็กต์เนื่องด้วยเหตุผลบางประการ ให้เรียกใช้คำสั่งต่อไปนี้
$ gcloud config set project <YOUR_PROJECT_ID>
3. "Hello, World!" พร้อมแผนที่
เริ่มพัฒนาด้วยแผนที่
ใน Cloud Shell คุณจะเริ่มต้นด้วยการสร้างหน้า HTML ที่จะเป็นพื้นฐานสำหรับ Codelab ที่เหลือ
- ในแถบเครื่องมือของ Cloud Shell ให้คลิกเปิดตัวแก้ไข
 เพื่อเปิดตัวแก้ไขโค้ดในแท็บใหม่
ตัวแก้ไขโค้ดบนเว็บนี้ช่วยให้คุณแก้ไขไฟล์ใน Cloud Shell ได้อย่างง่ายดาย

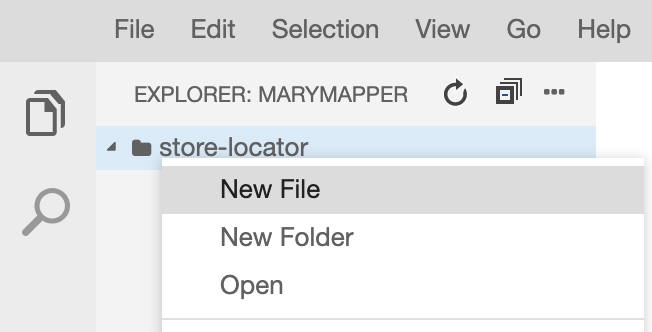
- สร้างไดเรกทอรี
store-locatorใหม่สำหรับแอปในโปรแกรมแก้ไขโค้ดโดยคลิกไฟล์ > โฟลเดอร์ใหม่
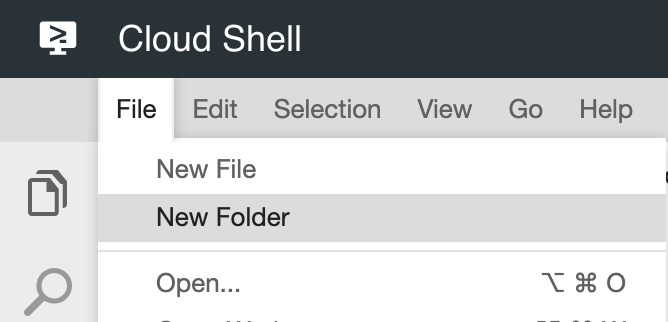
- ตั้งชื่อโฟลเดอร์ใหม่ว่า
store-locator
จากนั้นสร้างหน้าเว็บที่มีแผนที่
- สร้างไฟล์ในไดเรกทอรี
store-locatorชื่อindex.html
- ใส่เนื้อหาต่อไปนี้ในไฟล์
index.html
index.html
<html>

<head>
    <title>Store Locator</title>
    <style>
        #map {
            height: 100%;
        }

        html,
        body {
            height: 100%;
            margin: 0;
            padding: 0;
        }
    </style>
</head>

<body>
    <!-- The div to hold the map -->
    <div id="map"></div>

    <script src="app.js"></script>
    <script async defer src="https://maps.googleapis.com/maps/api/js?key=YOUR_API_KEY&libraries=places&callback=initMap&solution_channel=GMP_codelabs_simplestorelocator_v1_a">
    </script>
</body>

</html>
นี่คือหน้า HTML ที่แสดงแผนที่ ซึ่งมี CSS บางส่วนเพื่อให้แน่ใจว่าแผนที่จะใช้พื้นที่ทั้งหน้าในเชิงภาพ แท็ก <div> สำหรับเก็บแผนที่ และแท็ก <script> 2 แท็ก แท็กสคริปต์แรกจะโหลดไฟล์ JavaScript ที่ชื่อ app.js ซึ่งมีโค้ด JavaScript ทั้งหมด แท็กสคริปต์ที่ 2 จะโหลดคีย์ API รวมถึงการใช้ Places Library สำหรับฟังก์ชันการทำงานของคำแนะนำอัตโนมัติที่คุณจะเพิ่มในภายหลัง และระบุชื่อของฟังก์ชัน JavaScript ที่ทำงานเมื่อโหลด Maps JavaScript API แล้ว ซึ่งก็คือ initMap
- แทนที่ข้อความ
YOUR_API_KEYในข้อมูลโค้ดด้วยคีย์ API ที่คุณสร้างไว้ก่อนหน้านี้ใน Codelab นี้ - สุดท้าย ให้สร้างไฟล์อีกไฟล์หนึ่งชื่อ
app.jsโดยใช้โค้ดต่อไปนี้
app.js
function initMap() {
   // Create the map.
    const map = new google.maps.Map(document.getElementById('map'), {
        zoom: 7,
        center: { lat: 52.632469, lng: -1.689423 },
    });

}
ซึ่งเป็นโค้ดขั้นต่ำที่จำเป็นสำหรับการสร้างแผนที่ คุณส่งการอ้างอิงไปยังแท็ก <div> เพื่อเก็บแผนที่ และระบุศูนย์กลางและระดับการซูม
หากต้องการทดสอบแอปนี้ คุณสามารถเรียกใช้เซิร์ฟเวอร์ HTTP ของ Python แบบง่ายใน Cloud Shell ได้
- ไปที่ Cloud Shell แล้วพิมพ์คำสั่งต่อไปนี้
$ cd store-locator
$ python3 -m http.server 8080
คุณจะเห็นเอาต์พุตของบันทึกบางบรรทัดที่แสดงว่าคุณกำลังเรียกใช้เซิร์ฟเวอร์ HTTP อย่างง่ายใน Cloud Shell โดยมีเว็บแอปที่รับฟังในพอร์ต 8080 ของ localhost
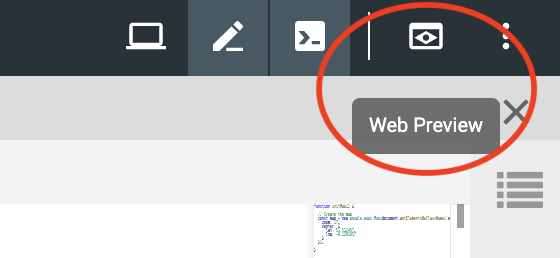
- เปิดแท็บเว็บเบราว์เซอร์ในแอปนี้โดยคลิกตัวอย่างเว็บ
 ในแถบเครื่องมือของ Cloud Console แล้วเลือกแสดงตัวอย่างบนพอร์ต 8080

การคลิกรายการเมนูนี้จะเปิดแท็บใหม่ในเว็บเบราว์เซอร์พร้อมเนื้อหาของ HTML ที่แสดงจากเซิร์ฟเวอร์ HTTP ของ Python แบบง่าย หากทุกอย่างเรียบร้อยดี คุณควรเห็นแผนที่ที่ลอนดอน ประเทศอังกฤษเป็นศูนย์กลาง
หากต้องการหยุดเซิร์ฟเวอร์ HTTP แบบง่าย ให้กด Control+C ใน Cloud Shell
4. ป้อนข้อมูล GeoJSON ลงในแผนที่
ตอนนี้มาดูข้อมูลของร้านค้ากัน GeoJSON เป็นรูปแบบข้อมูลที่แสดงฟีเจอร์ทางภูมิศาสตร์อย่างง่าย เช่น จุด เส้น หรือรูปหลายเหลี่ยมบนแผนที่ ฟีเจอร์ยังอาจมีข้อมูลที่กำหนดเองด้วย ด้วยเหตุนี้ GeoJSON จึงเป็นตัวเลือกที่ยอดเยี่ยมในการแสดงร้านค้า ซึ่งโดยพื้นฐานแล้วคือจุดบนแผนที่ที่มีข้อมูลเพิ่มเติมเล็กน้อย เช่น ชื่อร้านค้า เวลาทำการ และหมายเลขโทรศัพท์ ที่สำคัญที่สุดคือ GeoJSON ได้รับการรองรับอย่างเต็มที่ใน Google Maps ซึ่งหมายความว่าคุณสามารถส่งเอกสาร GeoJSON ไปยังแผนที่ Google แล้วระบบจะแสดงเอกสารดังกล่าวบนแผนที่อย่างเหมาะสม
- สร้างไฟล์ใหม่ชื่อ
stores.jsonแล้ววางโค้ดต่อไปนี้
stores.json
{
    "type": "FeatureCollection",
    "features": [{
            "geometry": {
                "type": "Point",
                "coordinates": [-0.1428115,
                    51.5125168
                ]
            },
            "type": "Feature",
            "properties": {
                "category": "patisserie",
                "hours": "10am - 6pm",
                "description": "Modern twists on classic pastries. We're part of a larger chain of patisseries and cafes.",
                "name": "Josie's Patisserie Mayfair",
                "phone": "+44 20 1234 5678",
                "storeid": "01"
            }
        },
        {
            "geometry": {
                "type": "Point",
                "coordinates": [-2.579623,
                    51.452251
                ]
            },
            "type": "Feature",
            "properties": {
                "category": "patisserie",
                "hours": "10am - 6pm",
                "description": "Come and try our award-winning cakes and pastries. We're part of a larger chain of patisseries and cafes.",
                "name": "Josie's Patisserie Bristol",
                "phone": "+44 117 121 2121",
                "storeid": "02"
            }
        },
        {
            "geometry": {
                "type": "Point",
                "coordinates": [
                    1.273459,
                    52.638072
                ]
            },
            "type": "Feature",
            "properties": {
                "category": "patisserie",
                "hours": "10am - 6pm",
                "description": "Whatever the occasion, whether it's a birthday or a wedding, Josie's Patisserie has the perfect treat for you. We're part of a larger chain of patisseries and cafes.",
                "name": "Josie's Patisserie Norwich",
                "phone": "+44 1603 123456",
                "storeid": "03"
            }
        },
        {
            "geometry": {
                "type": "Point",
                "coordinates": [-1.9912838,
                    50.8000418
                ]
            },
            "type": "Feature",
            "properties": {
                "category": "patisserie",
                "hours": "10am - 6pm",
                "description": "A gourmet patisserie that will delight your senses. We're part of a larger chain of patisseries and cafes.",
                "name": "Josie's Patisserie Wimborne",
                "phone": "+44 1202 343434",
                "storeid": "04"
            }
        },
        {
            "geometry": {
                "type": "Point",
                "coordinates": [-2.985933,
                    53.408899
                ]
            },
            "type": "Feature",
            "properties": {
                "category": "patisserie",
                "hours": "10am - 6pm",
                "description": "Spoil yourself or someone special with our classic pastries. We're part of a larger chain of patisseries and cafes.",
                "name": "Josie's Patisserie Liverpool",
                "phone": "+44 151 444 4444",
                "storeid": "05"
            }
        },
        {
            "geometry": {
                "type": "Point",
                "coordinates": [-1.689423,
                    52.632469
                ]
            },
            "type": "Feature",
            "properties": {
                "category": "patisserie",
                "hours": "10am - 6pm",
                "description": "Come and feast your eyes and tastebuds on our delicious pastries and cakes. We're part of a larger chain of patisseries and cafes.",
                "name": "Josie's Patisserie Tamworth",
                "phone": "+44 5555 55555",
                "storeid": "06"
            }
        },
        {
            "geometry": {
                "type": "Point",
                "coordinates": [-3.155305,
                    51.479756
                ]
            },
            "type": "Feature",
            "properties": {
                "category": "patisserie",
                "hours": "10am - 6pm",
                "description": "Josie's Patisserie is family-owned, and our delectable pastries, cakes, and great coffee are renowed. We're part of a larger chain of patisseries and cafes.",
                "name": "Josie's Patisserie Cardiff",
                "phone": "+44 29 6666 6666",
                "storeid": "07"
            }
        },
        {
            "geometry": {
                "type": "Point",
                "coordinates": [-0.725019,
                    52.668891
                ]
            },
            "type": "Feature",
            "properties": {
                "category": "cafe",
                "hours": "8am - 9:30pm",
                "description": "Oakham's favorite spot for fresh coffee and delicious cakes. We're part of a larger chain of patisseries and cafes.",
                "name": "Josie's Cafe Oakham",
                "phone": "+44 7777 777777",
                "storeid": "08"
            }
        },
        {
            "geometry": {
                "type": "Point",
                "coordinates": [-2.477653,
                    53.735405
                ]
            },
            "type": "Feature",
            "properties": {
                "category": "cafe",
                "hours": "8am - 9:30pm",
                "description": "Enjoy freshly brewed coffe, and home baked cakes in our homely cafe. We're part of a larger chain of patisseries and cafes.",
                "name": "Josie's Cafe Blackburn",
                "phone": "+44 8888 88888",
                "storeid": "09"
            }
        },
        {
            "geometry": {
                "type": "Point",
                "coordinates": [-0.211363,
                    51.108966
                ]
            },
            "type": "Feature",
            "properties": {
                "category": "cafe",
                "hours": "8am - 9:30pm",
                "description": "A delicious array of pastries with many flavours, and fresh coffee in an snug cafe. We're part of a larger chain of patisseries and cafes.",
                "name": "Josie's Cafe Crawley",
                "phone": "+44 1010 101010",
                "storeid": "10"
            }
        },
        {
            "geometry": {
                "type": "Point",
                "coordinates": [-0.123559,
                    50.832679
                ]
            },
            "type": "Feature",
            "properties": {
                "category": "cafe",
                "hours": "8am - 9:30pm",
                "description": "Grab a freshly brewed coffee, a decadent cake and relax in our idyllic cafe. We're part of a larger chain of patisseries and cafes.",
                "name": "Josie's Cafe Brighton",
                "phone": "+44 1313 131313",
                "storeid": "11"
            }
        },
        {
            "geometry": {
                "type": "Point",
                "coordinates": [-3.319575,
                    52.517827
                ]
            },
            "type": "Feature",
            "properties": {
                "category": "cafe",
                "hours": "8am - 9:30pm",
                "description": "Come in and unwind at this idyllic cafe with fresh coffee and home made cakes. We're part of a larger chain of patisseries and cafes.",
                "name": "Josie's Cafe Newtown",
                "phone": "+44 1414 141414",
                "storeid": "12"
            }
        },
        {
            "geometry": {
                "type": "Point",
                "coordinates": [
                    1.158167,
                    52.071634
                ]
            },
            "type": "Feature",
            "properties": {
                "category": "cafe",
                "hours": "8am - 9:30pm",
                "description": "Fresh coffee and delicious cakes in an snug cafe. We're part of a larger chain of patisseries and cafes.",
                "name": "Josie's Cafe Ipswich",
                "phone": "+44 1717 17171",
                "storeid": "13"
            }
        }
    ]
}
แม้ว่าจะมีข้อมูลจำนวนมาก แต่เมื่อพิจารณาแล้ว คุณจะเห็นว่าโครงสร้างนั้นเป็นโครงสร้างเดียวกันที่ทำซ้ำสำหรับแต่ละร้านค้า ร้านค้าแต่ละแห่งจะแสดงเป็น GeoJSON Point พร้อมกับพิกัดและข้อมูลเพิ่มเติมที่อยู่ในคีย์ properties ที่น่าสนใจคือ GeoJSON อนุญาตให้รวมคีย์ที่มีชื่อโดยพลการไว้ในคีย์ properties ในโค้ดแล็บนี้ คีย์เหล่านั้นคือ category, hours, description, name และ phone
- ตอนนี้ให้แก้ไข
app.jsเพื่อให้โหลด GeoJSON ในstores.jsลงในแผนที่
app.js
function initMap() {
  // Create the map.
  const map = new google.maps.Map(document.getElementById('map'), {
    zoom: 7,
    center: {lat: 52.632469, lng: -1.689423},
  });

  // Load the stores GeoJSON onto the map.
  map.data.loadGeoJson('stores.json', {idPropertyName: 'storeid'});

  const apiKey = 'YOUR_API_KEY';
  const infoWindow = new google.maps.InfoWindow();

  // Show the information for a store when its marker is clicked.
  map.data.addListener('click', (event) => {
    const category = event.feature.getProperty('category');
    const name = event.feature.getProperty('name');
    const description = event.feature.getProperty('description');
    const hours = event.feature.getProperty('hours');
    const phone = event.feature.getProperty('phone');
    const position = event.feature.getGeometry().get();
    const content = `
      <h2>${name}</h2><p>${description}</p>
      <p><b>Open:</b> ${hours}<br/><b>Phone:</b> ${phone}</p>
    `;

    infoWindow.setContent(content);
    infoWindow.setPosition(position);
    infoWindow.setOptions({pixelOffset: new google.maps.Size(0, -30)});
    infoWindow.open(map);
  });
}
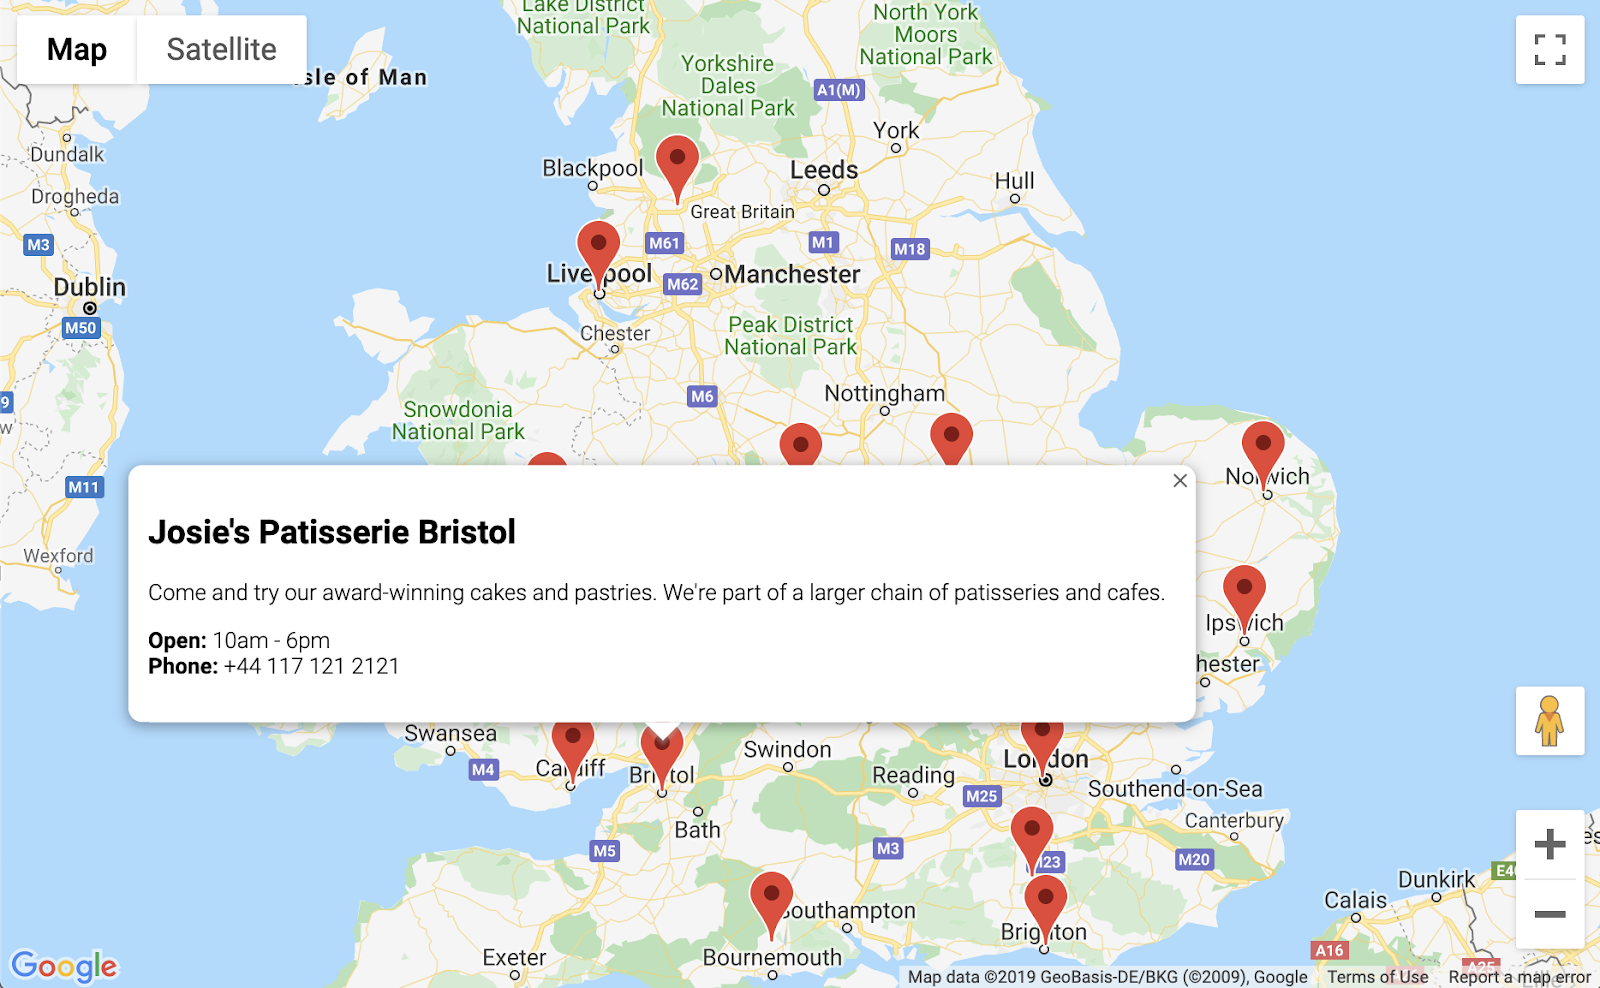
ในตัวอย่างโค้ด คุณโหลด GeoJSON ลงในแผนที่โดยเรียกใช้ loadGeoJson และส่งชื่อของไฟล์ JSON นอกจากนี้ คุณยังกำหนดฟังก์ชันให้ทำงานทุกครั้งที่มีการคลิกเครื่องหมาย จากนั้นฟังก์ชันจะเข้าถึงข้อมูลเพิ่มเติมของร้านค้าที่มีการคลิกเครื่องหมาย และใช้ข้อมูลในหน้าต่างข้อมูลที่แสดง หากต้องการทดสอบแอปนี้ คุณสามารถเรียกใช้เซิร์ฟเวอร์ HTTP ของ Python แบบง่ายโดยใช้คำสั่งเดียวกับก่อนหน้า
- กลับไปที่ Cloud Shell แล้วพิมพ์คำสั่งต่อไปนี้
$ python3 -m http.server 8080
- คลิกตัวอย่างเว็บ > แสดงตัวอย่างบนพอร์ต 8080 อีกครั้ง แล้วคุณจะเห็นแผนที่ที่มีเครื่องหมายเต็มไปหมด ซึ่งคุณคลิกเพื่อดูรายละเอียดเกี่ยวกับร้านค้าแต่ละแห่งได้ เช่น ตัวอย่างต่อไปนี้ ความคืบหน้า
5. ปรับแต่งแผนที่
ใกล้เสร็จแล้ว คุณมีแผนที่ที่มีเครื่องหมายร้านค้าทั้งหมดและข้อมูลเพิ่มเติมจะแสดงเมื่อคลิก แต่ก็ดูเหมือนแผนที่อื่นๆ ของ Google น่าเบื่อจัง เพิ่มลูกเล่นด้วยรูปแบบแผนที่ เครื่องหมาย โลโก้ และภาพ Street View ที่กำหนดเอง
นี่คือapp.jsเวอร์ชันใหม่ที่มีการเพิ่มการจัดรูปแบบที่กำหนดเอง
app.js
const mapStyle = [{
  'featureType': 'administrative',
  'elementType': 'all',
  'stylers': [{
    'visibility': 'on',
  },
  {
    'lightness': 33,
  },
  ],
},
{
  'featureType': 'landscape',
  'elementType': 'all',
  'stylers': [{
    'color': '#f2e5d4',
  }],
},
{
  'featureType': 'poi.park',
  'elementType': 'geometry',
  'stylers': [{
    'color': '#c5dac6',
  }],
},
{
  'featureType': 'poi.park',
  'elementType': 'labels',
  'stylers': [{
    'visibility': 'on',
  },
  {
    'lightness': 20,
  },
  ],
},
{
  'featureType': 'road',
  'elementType': 'all',
  'stylers': [{
    'lightness': 20,
  }],
},
{
  'featureType': 'road.highway',
  'elementType': 'geometry',
  'stylers': [{
    'color': '#c5c6c6',
  }],
},
{
  'featureType': 'road.arterial',
  'elementType': 'geometry',
  'stylers': [{
    'color': '#e4d7c6',
  }],
},
{
  'featureType': 'road.local',
  'elementType': 'geometry',
  'stylers': [{
    'color': '#fbfaf7',
  }],
},
{
  'featureType': 'water',
  'elementType': 'all',
  'stylers': [{
    'visibility': 'on',
  },
  {
    'color': '#acbcc9',
  },
  ],
},
];

function initMap() {
  // Create the map.
  const map = new google.maps.Map(document.getElementById('map'), {
    zoom: 7,
    center: {lat: 52.632469, lng: -1.689423},
    styles: mapStyle,
  });

  // Load the stores GeoJSON onto the map.
  map.data.loadGeoJson('stores.json', {idPropertyName: 'storeid'});

  // Define the custom marker icons, using the store's "category".
  map.data.setStyle((feature) => {
    return {
      icon: {
        url: `img/icon_${feature.getProperty('category')}.png`,
        scaledSize: new google.maps.Size(64, 64),
      },
    };
  });

  const apiKey = 'YOUR_API_KEY';
  const infoWindow = new google.maps.InfoWindow();

  // Show the information for a store when its marker is clicked.
  map.data.addListener('click', (event) => {
    const category = event.feature.getProperty('category');
    const name = event.feature.getProperty('name');
    const description = event.feature.getProperty('description');
    const hours = event.feature.getProperty('hours');
    const phone = event.feature.getProperty('phone');
    const position = event.feature.getGeometry().get();
    const content = `
      <img style="float:left; width:200px; margin-top:30px" src="img/logo_${category}.png">
      <div style="margin-left:220px; margin-bottom:20px;">
        <h2>${name}</h2><p>${description}</p>
        <p><b>Open:</b> ${hours}<br/><b>Phone:</b> ${phone}</p>
        <p><img src="https://maps.googleapis.com/maps/api/streetview?size=350x120&location=${position.lat()},${position.lng()}&key=${apiKey}&solution_channel=GMP_codelabs_simplestorelocator_v1_a"></p>
      </div>
      `;

    infoWindow.setContent(content);
    infoWindow.setPosition(position);
    infoWindow.setOptions({pixelOffset: new google.maps.Size(0, -30)});
    infoWindow.open(map);
  });

}
สิ่งที่คุณเพิ่มมีดังนี้
- ตัวแปร
mapStyleมีข้อมูลทั้งหมดสำหรับการจัดรูปแบบแผนที่ (นอกจากนี้ คุณยังสร้างสไตล์ของคุณเองได้ด้วย หากต้องการ) - เมื่อใช้
map.data.setStyleคุณได้ใช้เครื่องหมายที่กำหนดเอง ซึ่งแต่ละเครื่องหมายจะแตกต่างกันสำหรับแต่ละcategoryจาก GeoJSON - คุณแก้ไขตัวแปร
contentเพื่อรวมโลโก้ (ใช้categoryจาก GeoJSON อีกครั้ง) และรูปภาพ Street View สำหรับตำแหน่งของร้านค้า
คุณต้องทำตาม 2-3 ขั้นตอนก่อนที่จะติดตั้งใช้งาน
- ตั้งค่าที่ถูกต้องสำหรับตัวแปร
apiKeyโดยแทนที่สตริง'YOUR_API_KEY'ในapp.jsด้วยคีย์ API ของคุณเองจากก่อนหน้านี้ (คีย์เดียวกับที่คุณวางในindex.htmlโดยปล่อยให้เครื่องหมายคำพูดเหมือนเดิม) - เรียกใช้คำสั่งต่อไปนี้ใน Cloud Shell เพื่อดาวน์โหลดกราฟิกเครื่องหมายและโลโก้ ตรวจสอบว่าคุณอยู่ในไดเรกทอรี
store-locatorใช้Control+Cเพื่อหยุดเซิร์ฟเวอร์ HTTP แบบง่ายหากกำลังทำงานอยู่
$ mkdir -p img; cd img
$ wget https://github.com/googlecodelabs/google-maps-simple-store-locator/raw/master/src/img/icon_cafe.png
$ wget https://github.com/googlecodelabs/google-maps-simple-store-locator/raw/master/src/img/icon_patisserie.png
$ wget https://github.com/googlecodelabs/google-maps-simple-store-locator/raw/master/src/img/logo_cafe.png
$ wget https://github.com/googlecodelabs/google-maps-simple-store-locator/raw/master/src/img/logo_patisserie.png
- ดูตัวอย่างเครื่องมือระบุตำแหน่งร้านค้าที่เสร็จสมบูรณ์แล้วโดยเรียกใช้คำสั่งต่อไปนี้
$ python3 -m http.server 8080
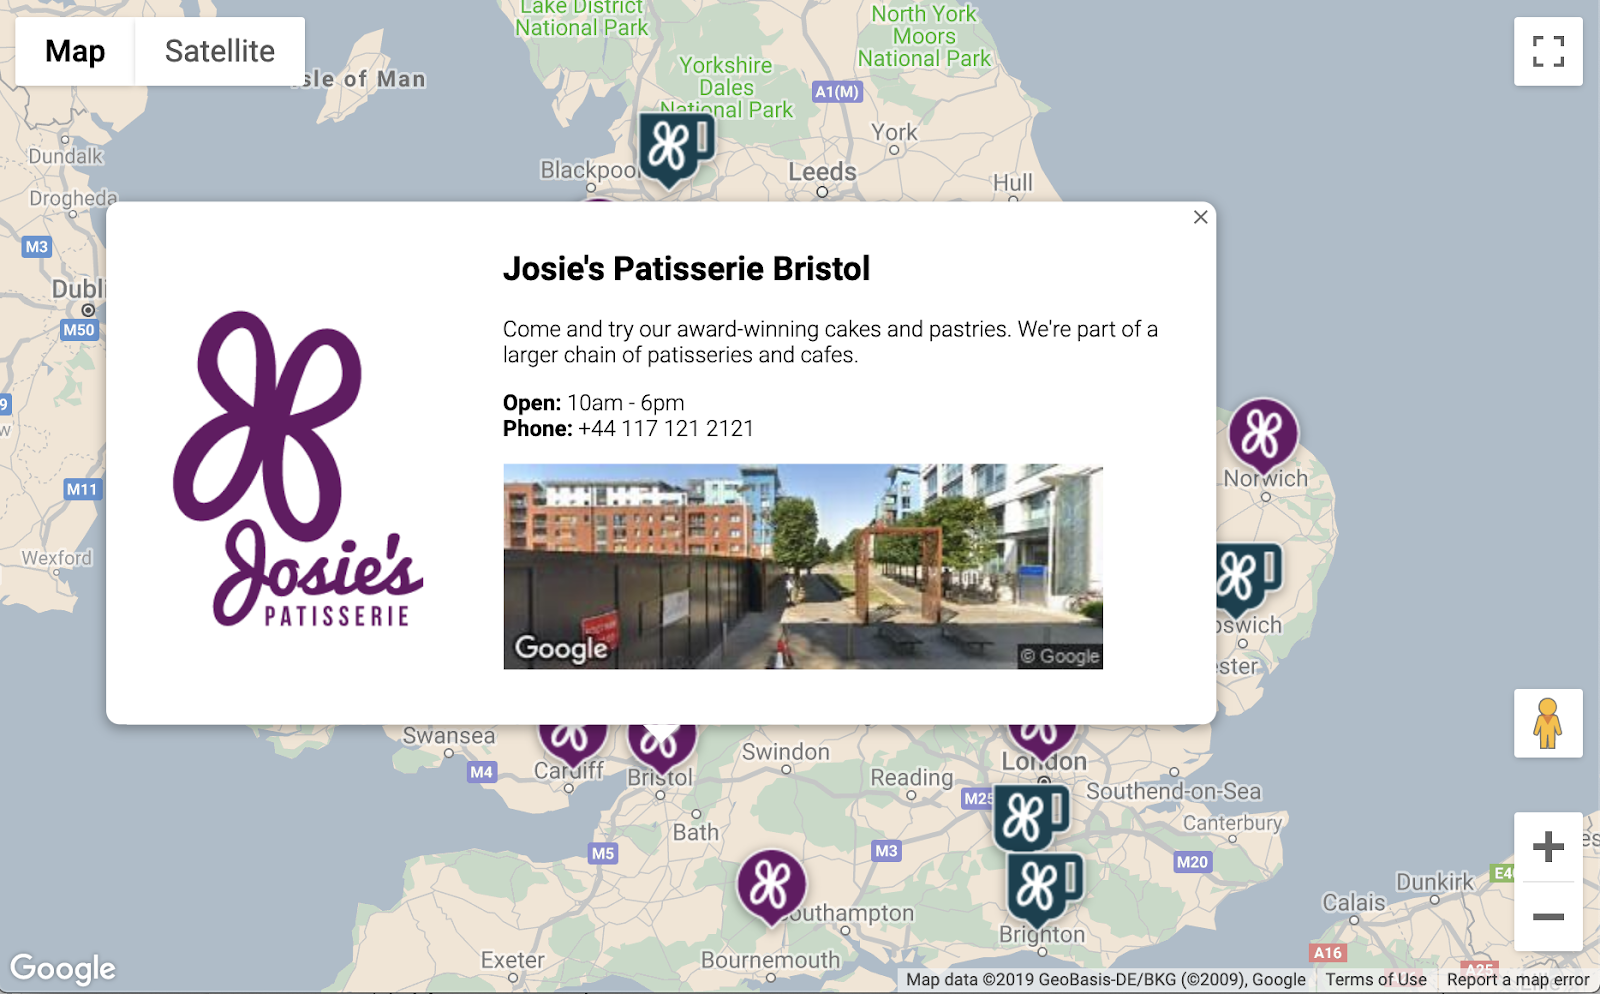
เมื่อโหลดตัวอย่างซ้ำ คุณควรเห็นแผนที่ที่มีการจัดรูปแบบที่กำหนดเอง รูปภาพเครื่องหมายที่กำหนดเอง การจัดรูปแบบหน้าต่างข้อมูลที่ดีขึ้น และรูปภาพ Street View สำหรับแต่ละสถานที่ตั้ง ดังนี้
6. รับข้อมูลจากผู้ใช้
โดยปกติแล้ว ผู้ใช้เครื่องมือระบุตำแหน่งร้านค้าต้องการทราบว่าร้านค้าใดอยู่ใกล้ตนมากที่สุด หรือที่อยู่ที่ผู้ใช้วางแผนจะเริ่มต้นการเดินทาง เพิ่มแถบค้นหาการเติมข้อความอัตโนมัติของสถานที่เพื่อให้ผู้ใช้ป้อนที่อยู่เริ่มต้นได้อย่างง่ายดาย การเติมข้อความอัตโนมัติของสถานที่ให้ฟังก์ชันการพิมพ์ล่วงหน้าคล้ายกับวิธีที่การเติมข้อความอัตโนมัติทำงานในแถบค้นหาอื่นๆ ของ Google แต่การคาดคะเนทั้งหมดเป็นสถานที่ใน Google Maps Platform
- กลับไปแก้ไข
index.htmlเพื่อเพิ่มการจัดรูปแบบสำหรับแถบค้นหาเติมข้อความอัตโนมัติและแผงด้านข้างของผลการค้นหาที่เกี่ยวข้อง อย่าลืมแทนที่คีย์ API หากคุณวางโค้ดเก่าทับ
index.html
<html>

<head>
  <title>Store Locator</title>
  <style>
    #map {
      height: 100%;
    }

    html,
    body {
      height: 100%;
      margin: 0;
      padding: 0;
    }

    /* Styling for Autocomplete search bar */
    #pac-card {
      background-color: #fff;
      border-radius: 2px 0 0 2px;
      box-shadow: 0 2px 6px rgba(0, 0, 0, 0.3);
      box-sizing: border-box;
      font-family: Roboto;
      margin: 10px 10px 0 0;
      -moz-box-sizing: border-box;
      outline: none;
    }

    #pac-container {
      padding-top: 12px;
      padding-bottom: 12px;
      margin-right: 12px;
    }

    #pac-input {
      background-color: #fff;
      font-family: Roboto;
      font-size: 15px;
      font-weight: 300;
      margin-left: 12px;
      padding: 0 11px 0 13px;
      text-overflow: ellipsis;
      width: 400px;
    }

    #pac-input:focus {
      border-color: #4d90fe;
    }

    #title {
      color: #fff;
      background-color: #acbcc9;
      font-size: 18px;
      font-weight: 400;
      padding: 6px 12px;
    }

    .hidden {
      display: none;
    }

    /* Styling for an info pane that slides out from the left.
     * Hidden by default. */
    #panel {
      height: 100%;
      width: null;
      background-color: white;
      position: fixed;
      z-index: 1;
      overflow-x: hidden;
      transition: all .2s ease-out;
    }

    .open {
      width: 250px;
    }

    .place {
      font-family: 'open sans', arial, sans-serif;
      font-size: 1.2em;
      font-weight: 500;
      margin-block-end: 0px;
      padding-left: 18px;
      padding-right: 18px;
    }

    .distanceText {
      color: silver;
      font-family: 'open sans', arial, sans-serif;
      font-size: 1em;
      font-weight: 400;
      margin-block-start: 0.25em;
      padding-left: 18px;
      padding-right: 18px;
    }
  </style>
</head>

<body>
  <!-- The div to hold the map -->
  <div id="map"></div>

  <script src="app.js"></script>
  <script async defer src="https://maps.googleapis.com/maps/api/js?key=YOUR_API_KEY&libraries=places&callback=initMap&solution_channel=GMP_codelabs_simplestorelocator_v1_a">
  </script>
</body>

</html>
ทั้งแถบค้นหาการเติมข้อความอัตโนมัติและแผงแบบสไลด์จะซ่อนไว้ในตอนแรกจนกว่าจะจำเป็นต้องใช้
- ตอนนี้ให้เพิ่มวิดเจ็ตการเติมข้อความอัตโนมัติลงในแผนที่ที่ส่วนท้ายของฟังก์ชัน
initMapในapp.jsก่อนหน้าวงเล็บปีกกาปิด
app.js
  // Build and add the search bar
  const card = document.createElement('div');
  const titleBar = document.createElement('div');
  const title = document.createElement('div');
  const container = document.createElement('div');
  const input = document.createElement('input');
  const options = {
    types: ['address'],
    componentRestrictions: {country: 'gb'},
  };

  card.setAttribute('id', 'pac-card');
  title.setAttribute('id', 'title');
  title.textContent = 'Find the nearest store';
  titleBar.appendChild(title);
  container.setAttribute('id', 'pac-container');
  input.setAttribute('id', 'pac-input');
  input.setAttribute('type', 'text');
  input.setAttribute('placeholder', 'Enter an address');
  container.appendChild(input);
  card.appendChild(titleBar);
  card.appendChild(container);
  map.controls[google.maps.ControlPosition.TOP_RIGHT].push(card);

  // Make the search bar into a Places Autocomplete search bar and select
  // which detail fields should be returned about the place that
  // the user selects from the suggestions.
  const autocomplete = new google.maps.places.Autocomplete(input, options);

  autocomplete.setFields(
      ['address_components', 'geometry', 'name']);
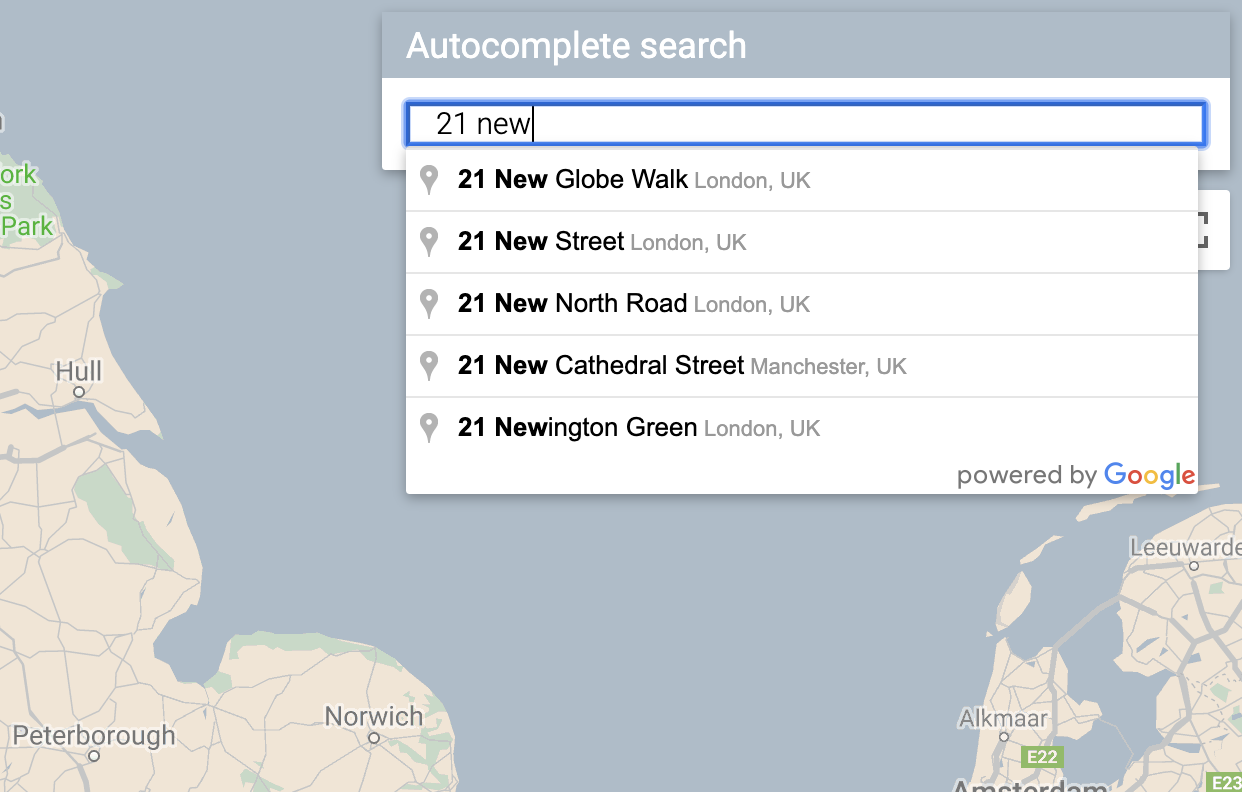
โค้ดจะจำกัดคำแนะนำในการเติมข้อความอัตโนมัติให้แสดงเฉพาะที่อยู่ (เนื่องจากการเติมข้อความอัตโนมัติของสถานที่สามารถจับคู่ชื่อสถานประกอบการและสถานที่ตั้งที่เป็นเขตการปกครองได้) และจำกัดที่อยู่ที่แสดงให้แสดงเฉพาะที่อยู่ในสหราชอาณาจักร การเพิ่มข้อกำหนดที่ไม่บังคับเหล่านี้จะช่วยลดจำนวนอักขระที่ผู้ใช้ต้องป้อนเพื่อจำกัดการคาดคะเนให้แสดงที่อยู่ที่ผู้ใช้กำลังมองหา จากนั้นจะย้ายการเติมข้อความอัตโนมัติ div ที่คุณสร้างไว้ไปยังมุมขวาบนของแผนที่ และระบุช่องที่ควรแสดงเกี่ยวกับสถานที่แต่ละแห่งในการตอบกลับ
- รีสตาร์ทเซิร์ฟเวอร์และรีเฟรชตัวอย่างโดยเรียกใช้คำสั่งต่อไปนี้
$ python3 -m http.server 8080
ตอนนี้คุณควรเห็นวิดเจ็ตการเติมข้อความอัตโนมัติที่มุมขวาบนของแผนที่ ซึ่งจะแสดงที่อยู่ของสหราชอาณาจักรที่ตรงกับสิ่งที่คุณพิมพ์
ตอนนี้คุณต้องจัดการเมื่อผู้ใช้เลือกการคาดคะเนจากวิดเจ็ตการเติมข้อความอัตโนมัติ และใช้ตำแหน่งนั้นเป็นพื้นฐานในการคำนวณระยะทางไปยังร้านค้า
- เพิ่มโค้ดต่อไปนี้ที่ส่วนท้ายของ
initMapในapp.jsหลังจากโค้ดที่คุณเพิ่งวาง
app.js
 // Set the origin point when the user selects an address
  const originMarker = new google.maps.Marker({map: map});
  originMarker.setVisible(false);
  let originLocation = map.getCenter();

  autocomplete.addListener('place_changed', async () => {
    originMarker.setVisible(false);
    originLocation = map.getCenter();
    const place = autocomplete.getPlace();

    if (!place.geometry) {
      // User entered the name of a Place that was not suggested and
      // pressed the Enter key, or the Place Details request failed.
      window.alert('No address available for input: \'' + place.name + '\'');
      return;
    }

    // Recenter the map to the selected address
    originLocation = place.geometry.location;
    map.setCenter(originLocation);
    map.setZoom(9);
    console.log(place);

    originMarker.setPosition(originLocation);
    originMarker.setVisible(true);

    // Use the selected address as the origin to calculate distances
    // to each of the store locations
    const rankedStores = await calculateDistances(map.data, originLocation);
    showStoresList(map.data, rankedStores);

    return;
  });
โค้ดจะเพิ่ม Listener เพื่อให้เมื่อผู้ใช้คลิกคำแนะนำรายการใดรายการหนึ่ง แผนที่จะจัดกึ่งกลางใหม่ที่ที่อยู่ที่เลือกและตั้งค่าต้นทางเป็นพื้นฐานสำหรับการคำนวณระยะทาง คุณจะใช้การคำนวณระยะทางในขั้นตอนถัดไป
7. แสดงร้านค้าที่ใกล้ที่สุด
Directions API ทำงานคล้ายกับการขอเส้นทางในแอป Google Maps ซึ่งก็คือการป้อนต้นทางและปลายทางเดียวเพื่อรับเส้นทางระหว่าง 2 จุด Distance Matrix API จะนำแนวคิดนี้ไปใช้ต่อเพื่อระบุการจับคู่ที่เหมาะสมที่สุดระหว่างต้นทางที่เป็นไปได้หลายแห่งกับปลายทางที่เป็นไปได้หลายแห่งโดยอิงตามเวลาในการเดินทางและระยะทาง ในกรณีนี้ เพื่อช่วยให้ผู้ใช้ค้นหาร้านค้าที่ใกล้กับที่อยู่ที่เลือกมากที่สุด คุณจะต้องระบุต้นทาง 1 แห่งและอาร์เรย์ของตำแหน่งร้านค้าเป็นปลายทาง
- เพิ่มฟังก์ชันใหม่ใน
app.jsชื่อcalculateDistances
app.js
async function calculateDistances(data, origin) {
  const stores = [];
  const destinations = [];

  // Build parallel arrays for the store IDs and destinations
  data.forEach((store) => {
    const storeNum = store.getProperty('storeid');
    const storeLoc = store.getGeometry().get();

    stores.push(storeNum);
    destinations.push(storeLoc);
  });

  // Retrieve the distances of each store from the origin
  // The returned list will be in the same order as the destinations list
  const service = new google.maps.DistanceMatrixService();
  const getDistanceMatrix =
    (service, parameters) => new Promise((resolve, reject) => {
      service.getDistanceMatrix(parameters, (response, status) => {
        if (status != google.maps.DistanceMatrixStatus.OK) {
          reject(response);
        } else {
          const distances = [];
          const results = response.rows[0].elements;
          for (let j = 0; j < results.length; j++) {
            const element = results[j];
            const distanceText = element.distance.text;
            const distanceVal = element.distance.value;
            const distanceObject = {
              storeid: stores[j],
              distanceText: distanceText,
              distanceVal: distanceVal,
            };
            distances.push(distanceObject);
          }

          resolve(distances);
        }
      });
    });

  const distancesList = await getDistanceMatrix(service, {
    origins: [origin],
    destinations: destinations,
    travelMode: 'DRIVING',
    unitSystem: google.maps.UnitSystem.METRIC,
  });

  distancesList.sort((first, second) => {
    return first.distanceVal - second.distanceVal;
  });

  return distancesList;
}
ฟังก์ชันจะเรียกใช้ Distance Matrix API โดยใช้ต้นทางที่ส่งไปยังฟังก์ชันเป็นต้นทางเดียว และใช้สถานที่ตั้งของร้านค้าเป็นอาร์เรย์ของปลายทาง จากนั้นจะสร้างอาร์เรย์ของออบเจ็กต์ที่จัดเก็บรหัสของร้านค้า ระยะทางที่แสดงเป็นสตริงที่มนุษย์อ่านได้ ระยะทางเป็นเมตรในรูปแบบค่าตัวเลข และจัดเรียงอาร์เรย์
ผู้ใช้คาดหวังว่าจะเห็นรายชื่อร้านค้าที่เรียงตามลำดับจากใกล้ที่สุดไปไกลที่สุด ป้อนข้อมูลในรายการแผงด้านข้างสำหรับร้านค้าแต่ละแห่งโดยใช้รายการที่ได้จากฟังก์ชัน calculateDistances เพื่อแจ้งลำดับการแสดงร้านค้า
- เพิ่มฟังก์ชันใหม่ใน
app.jsชื่อshowStoresList
app.js
function showStoresList(data, stores) {
  if (stores.length == 0) {
    console.log('empty stores');
    return;
  }

  let panel = document.createElement('div');
  // If the panel already exists, use it. Else, create it and add to the page.
  if (document.getElementById('panel')) {
    panel = document.getElementById('panel');
    // If panel is already open, close it
    if (panel.classList.contains('open')) {
      panel.classList.remove('open');
    }
  } else {
    panel.setAttribute('id', 'panel');
    const body = document.body;
    body.insertBefore(panel, body.childNodes[0]);
  }


  // Clear the previous details
  while (panel.lastChild) {
    panel.removeChild(panel.lastChild);
  }

  stores.forEach((store) => {
    // Add store details with text formatting
    const name = document.createElement('p');
    name.classList.add('place');
    const currentStore = data.getFeatureById(store.storeid);
    name.textContent = currentStore.getProperty('name');
    panel.appendChild(name);
    const distanceText = document.createElement('p');
    distanceText.classList.add('distanceText');
    distanceText.textContent = store.distanceText;
    panel.appendChild(distanceText);
  });

  // Open the panel
  panel.classList.add('open');

  return;
}
- รีสตาร์ทเซิร์ฟเวอร์และรีเฟรชตัวอย่างโดยเรียกใช้คำสั่งต่อไปนี้
$ python3 -m http.server 8080
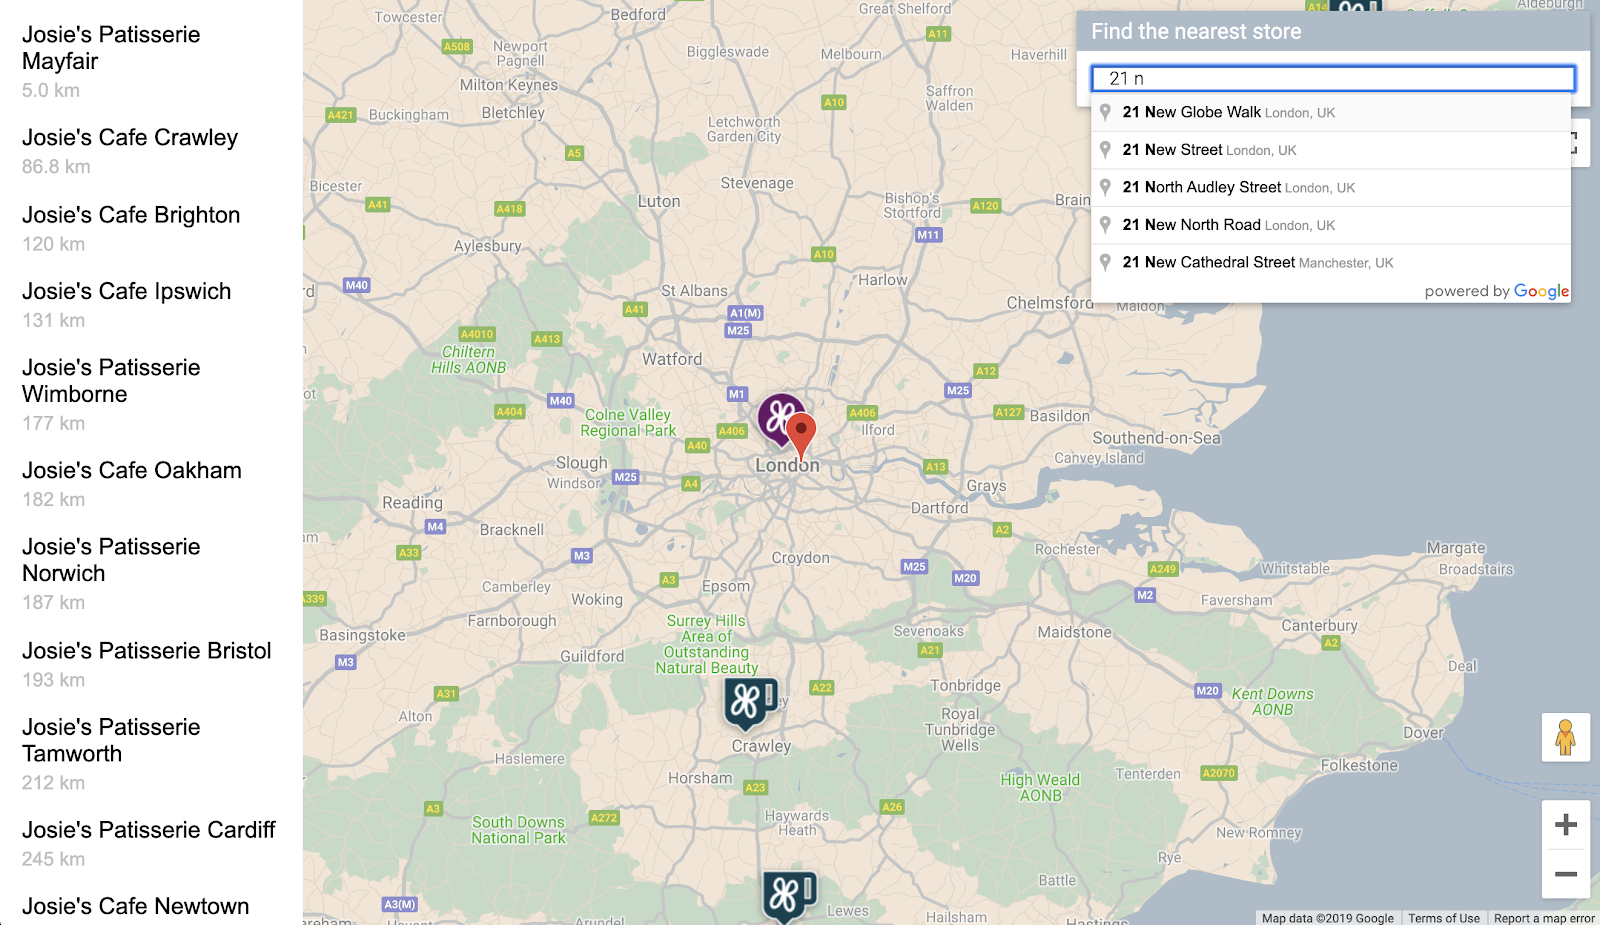
- สุดท้าย ให้ป้อนที่อยู่ในสหราชอาณาจักรลงในแถบค้นหาที่เติมข้อความอัตโนมัติ แล้วคลิกคำแนะนำรายการใดรายการหนึ่ง
แผนที่ควรมีที่อยู่นั้นเป็นจุดศูนย์กลาง และแถบด้านข้างควรปรากฏขึ้นเพื่อแสดงรายการสถานที่ตั้งของร้านค้าตามลำดับระยะทางจากที่อยู่ที่เลือก ตัวอย่างหนึ่งแสดงดังนี้
8. ไม่บังคับ: โฮสต์หน้าเว็บ
จนถึงตอนนี้ คุณจะดูแผนที่ได้ก็ต่อเมื่อเรียกใช้เซิร์ฟเวอร์ HTTP ของ Python อยู่ หากต้องการดูแผนที่นอกเหนือจากเซสชัน Cloud Shell ที่ใช้งานอยู่ หรือแชร์ URL ของแผนที่กับผู้อื่น ให้ลองใช้ Cloud Storage เพื่อโฮสต์หน้าเว็บ Cloud Storage คือบริการเว็บสำหรับจัดเก็บไฟล์ออนไลน์ที่ใช้จัดเก็บและเข้าถึงข้อมูลบนโครงสร้างพื้นฐานของ Google บริการนี้ผสานรวมประสิทธิภาพและความสามารถในการปรับขนาดของ Google Cloud เข้ากับความสามารถในการรักษาความปลอดภัยและการแชร์ขั้นสูง นอกจากนี้ยังมีรุ่นฟรี ซึ่งเหมาะอย่างยิ่งสำหรับการโฮสต์เครื่องมือระบุตำแหน่งร้านค้าแบบง่าย
เมื่อใช้ Cloud Storage ระบบจะจัดเก็บไฟล์ไว้ในที่เก็บข้อมูล ซึ่งคล้ายกับไดเรกทอรีในคอมพิวเตอร์ หากต้องการโฮสต์หน้าเว็บ คุณต้องสร้างที่เก็บข้อมูลก่อน คุณต้องเลือกชื่อที่ไม่ซ้ำกันสำหรับที่เก็บข้อมูล โดยอาจใช้ชื่อของคุณเป็นส่วนหนึ่งของชื่อที่เก็บข้อมูล
- เมื่อตัดสินใจเลือกชื่อแล้ว ให้เรียกใช้คำสั่งต่อไปนี้ใน Cloud Shell
$ gsutil mb gs://yourname-store-locator
gsutil เป็นเครื่องมือสำหรับโต้ตอบกับ Cloud Storage คำสั่ง mb เป็นตัวย่อของ "make bucket" ดูข้อมูลเพิ่มเติมเกี่ยวกับคำสั่งทั้งหมดที่มีอยู่ รวมถึงคำสั่งที่คุณใช้ได้ที่เครื่องมือ gsutil
โดยค่าเริ่มต้น ที่เก็บข้อมูลและไฟล์ที่โฮสต์ใน Cloud Storage จะเป็นแบบส่วนตัว แต่สำหรับเครื่องมือระบุตำแหน่งร้านค้า คุณต้องการให้ไฟล์ทั้งหมดเป็นแบบสาธารณะเพื่อให้ทุกคนเข้าถึงได้ผ่านอินเทอร์เน็ต คุณสามารถตั้งค่าแต่ละไฟล์เป็นสาธารณะหลังจากอัปโหลดได้ แต่จะเสียเวลามาก แต่คุณสามารถกำหนดระดับการเข้าถึงเริ่มต้นสำหรับที่เก็บข้อมูลที่สร้างขึ้นได้ และไฟล์ทั้งหมดที่คุณอัปโหลดไปยังที่เก็บข้อมูลนั้นจะรับค่าระดับการเข้าถึงดังกล่าว
- เรียกใช้คำสั่งต่อไปนี้ โดยแทนที่
yourname-store-locatorด้วยชื่อที่คุณเลือกสำหรับที่เก็บข้อมูล
$ gsutil defacl ch -u AllUsers:R gs://yourname-store-locator
- ตอนนี้คุณสามารถอัปโหลดไฟล์ทั้งหมดในไดเรกทอรีปัจจุบัน (ปัจจุบันมีเพียงไฟล์
index.htmlและapp.js) ได้ด้วยคำสั่งต่อไปนี้
$ gsutil -h "Cache-Control:no-cache" cp * gs://yourname-store-locator
ตอนนี้คุณควรมีหน้าเว็บที่มีแผนที่ออนไลน์แล้ว URL ที่ใช้ดูจะเป็น http://storage.googleapis.com/yourname-store-locator/index.html โดยแทนที่ส่วน yourname-store-locator ด้วยชื่อที่เก็บข้อมูลที่คุณเลือกไว้ก่อนหน้านี้
การล้างข้อมูล
วิธีที่ง่ายที่สุดในการล้างข้อมูลทรัพยากรทั้งหมดที่สร้างขึ้นในโปรเจ็กต์นี้คือการปิดโปรเจ็กต์ Google Cloud ที่คุณสร้างขึ้นเมื่อเริ่มบทแนะนำนี้
- เปิดหน้าการตั้งค่าใน Cloud Console
- คลิกเลือกโปรเจ็กต์
- เลือกโปรเจ็กต์ที่คุณสร้างไว้ตอนต้นของบทแนะนำนี้ แล้วคลิกเปิด
- ป้อนรหัสโปรเจ็กต์ แล้วคลิกปิด
9. ขอแสดงความยินดี
ยินดีด้วย คุณทำ Codelab นี้เสร็จแล้ว
สิ่งที่คุณได้เรียนรู้
- การเพิ่มแผนที่ที่กำหนดสไตล์เองด้วย Maps JavaScript API
- การโหลดเลเยอร์ข้อมูลลงในแผนที่ในรูปแบบ GeoJSON
- การใช้ Street View Static API เพื่อแสดงภาพ Street View ในหน้าเว็บ
- การใช้คลังสถานที่เพื่อเพิ่มแถบค้นหาการเติมข้อความอัตโนมัติของ Places ลงในหน้าเว็บ
- ใช้บริการเมตริกซ์ระยะทางเพื่อคำนวณระยะทางหลายรายการด้วยการเรียก API ครั้งเดียว
- การจัดการและการทดสอบโปรเจ็กต์การพัฒนาเว็บใน Google Cloud Platform โดยใช้อินเทอร์เฟซบรรทัดคำสั่ง Cloud Shell บนเบราว์เซอร์
- การโฮสต์เว็บไซต์ด้วย Cloud Storage
ดูข้อมูลเพิ่มเติม
- ดูอีกวิธีในการโฮสต์เว็บแมปโดยใช้ Google App Engine ใน Codelab Mapping the NYC Subway
- ดูโค้ดแล็บของ Google Maps Platform เพิ่มเติม เช่น บริการสร้างการค้นหาธุรกิจใกล้เคียง
- ช่วยเราสร้างเนื้อหาที่เป็นประโยชน์ต่อคุณมากที่สุดโดยตอบคำถามด้านล่าง
คุณอยากเห็น Codelab อื่นๆ แบบไหน
หากไม่พบ Codelab ที่ต้องการในรายการด้านบน ขอได้โดยแจ้งปัญหาใหม่ที่นี่
หากต้องการดูโค้ดเพิ่มเติม โปรดดูที่เก็บซอร์สโค้ดที่ https://github.com/googlecodelabs/google-maps-simple-store-locator