Koleksiyonlar ile düzeninizi koruyun
İçeriği tercihlerinize göre kaydedin ve kategorilere ayırın.
Tüm Google Ad Manager API çağrıları, OAuth2
kullanıcıların üçüncü taraf uygulamalarına izin vermesine olanak tanıdığından
Uygulama, kullanıcı adına web hizmetleriyle etkileşime geçebilir. OAuth2,
Kullanıcının Ad Manager hesabına erişmek için Ad Manager API istemci uygulamanız
kullanıcı adını veya şifresini işlemek zorunda kalmadan.
OAuth2 kimlik bilgileri oluşturma
OAuth2 kimlik bilgilerini oluşturmak için aşağıdaki adımları uygulayın.
1. Kimlik doğrulama türünüzü belirleme
En uygun kimlik doğrulama türünün hangisi olduğunu görmek için aşağıdaki tabloya bakın.
Ad Manager API uygulamanız için:
OAuth2 kimlik doğrulama türünüzü seçin
Hizmet hesabı
Yalnızca kendi Ad Manager verilerinize erişmeniz gerekiyorsa bunu seçin.
Kullanıcılara izin veren herhangi bir kullanıcı olarak kimlik doğrulaması yapmak istiyorsanız
Ad Manager verilerine erişmesi için uygulamanıza izin vermeniz gerekir.
Proje açılır menüsünden Create a new project'i (Yeni proje oluştur) seçin, ardından bir ad girin
ve isteğe bağlı olarak sağlanan proje kimliğini düzenleyin. Sonraki slayta geçin
Oluştur.
Kimlik bilgileri sayfasında Kimlik bilgileri oluştur'u seçin ve ardından
Hizmet hesabı anahtarı'nı seçin.
Proje açılır menüsünden Create a new project'i (Yeni proje oluştur) seçin, ardından bir ad girin
(isteğe bağlı olarak sağlanan proje kimliğini düzenleyin) ve
Oluştur.
Kimlik bilgileri sayfasında Kimlik bilgileri oluştur'u seçin ve ardından
OAuth istemci kimliği'ni seçin.
Sayfada bir ürün adı ayarlamanız istenebilir.
İzin Ekranı sayfası; Bu durumda İzin ekranını yapılandır'ı tıklayın,
istenen bilgileri girin ve şuraya dönmek için Kaydet'i tıklayın:
Kimlik bilgileri sayfası.
Uygulama Türü olarak Web Uygulaması'nı seçin. Şunu izleyin:
JavaScript kaynaklarını girme, URI'ları yönlendirme veya her ikisini birden yapmaya ilişkin talimatlar.
Oluştur'u tıklayın.
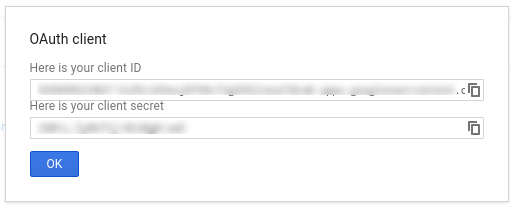
Görüntülenen sayfada istemci kimliğini ve istemci gizli anahtarını kopyalayın.
istemcinizi yapılandırırken bunlara ihtiyacınız olacak. Bu nedenle, panonuza
kitaplığını açar.
3. Ad Manager ağınızı yapılandırma
Üçüncü taraf geliştiriciyseniz müşterinizden bunu yapmasını sağlamanız gerekebilir.
.
Hizmet hesabı kullanıcısı ekle düğmesini tıklayın.
Hizmet hesabı e-posta adresini kullanarak formu doldurun. İlgili içeriği oluşturmak için kullanılan
hizmet hesabı kullanıcısına
Böylece, mevcut hizmet hesabı kullanıcısı
kullanıcı arayüzü.
Kaydet düğmesini tıklayın. Onaylayan bir mesaj gösterilir.
hizmet hesabınızın eklenmesi.
Kullanıcılar sekmesine gidip ardından mevcut hizmet hesabı kullanıcılarını görüntüleyin
Hizmet Hesabı filtresini tıklayın.
İstemci kitaplıklarımızdan birini kullanmamayı seçerseniz,
OAuth2 hizmet hesabı veya web
kendinizyapabilirsiniz.
Kamera arkası
İstemci kitaplıklarımız aşağıda belirtilen ayrıntıları otomatik olarak gerçekleştirir; böylece
yalnızca kamera arkasında olanlarla ilgileniyorsanız okumaya devam edin.
Bu bölüm, zaten aşina olan ileri düzey kullanıcılara yöneliktir.
OAuth2 spesifikasyonu ve
OAuth2'nin Google API'leriyle nasıl kullanılacağını öğrenin.
HTTP istek başlığı
Ad Manager API'sine yapılan her istekte HTTP başlığı bir erişim içermelidir
eklemeniz gerekir:
Tek bir erişim jetonu, birden fazla API'ye çeşitli düzeylerde erişim sağlayabilir. CEVAP
scope adlı değişken parametresi, kaynakların ve
işlemleri gerçekleştirmelerini sağlar. Erişim jetonu isteği sırasında
uygulaması scope parametresinde bir veya daha fazla değer gönderir.
Ad Manager'da aşağıda gösterilen tek bir kapsam bulunur. Yetkilendirme işlemi,
kullanıcı düzeyinde
analiz etmenizi sağlar.
Kapsam
İzinler
https://www.googleapis.com/auth/dfp
Ad Manager'daki kampanyalarınızı görüntüleyin ve yönetin.
[[["Anlaması kolay","easyToUnderstand","thumb-up"],["Sorunumu çözdü","solvedMyProblem","thumb-up"],["Diğer","otherUp","thumb-up"]],[["İhtiyacım olan bilgiler yok","missingTheInformationINeed","thumb-down"],["Çok karmaşık / çok fazla adım var","tooComplicatedTooManySteps","thumb-down"],["Güncel değil","outOfDate","thumb-down"],["Çeviri sorunu","translationIssue","thumb-down"],["Örnek veya kod sorunu","samplesCodeIssue","thumb-down"],["Diğer","otherDown","thumb-down"]],["Son güncelleme tarihi: 2025-08-31 UTC."],[[["\u003cp\u003eAll Google Ad Manager API calls require OAuth2 authorization for secure access to user data without storing sensitive login information.\u003c/p\u003e\n"],["\u003cp\u003eChoose between Service Account or Web Application authentication type based on your application's needs.\u003c/p\u003e\n"],["\u003cp\u003eGenerate OAuth2 credentials by following instructions for your chosen authentication type via the Google API Console.\u003c/p\u003e\n"],["\u003cp\u003eConfigure your Ad Manager network settings and client library according to provided guidelines for the specific authentication method and programming language.\u003c/p\u003e\n"],["\u003cp\u003eClient libraries handle most OAuth2 complexities but you can delve into the background details concerning HTTP headers and scopes if needed.\u003c/p\u003e\n"]]],["Google Ad Manager API access requires OAuth2 authorization. First, choose between \"Service account\" for personal data or \"Web application\" for user-authorized access. Then, create OAuth2 credentials via the Google API Console, either generating a JSON key for service accounts or a client ID and secret for web applications. Next, configure the Ad Manager network to allow API access, adding the service account email if applicable. Lastly, configure and use a client library, or implement the OAuth2 flow directly, including the access token in the HTTP header.\n"],null,["# Authentication\n\nAll Google Ad Manager API calls must be authorized through [OAuth2](http://oauth.net/2/) an open standard that\nallows users to grant permissions to third-party applications, so the\napplication can interact with web services on the user's behalf. OAuth2 enables\nyour Ad Manager API client application to access a user's Ad Manager account\nwithout having to handle or store the user's username or password.\n\nGenerate OAuth2 credentials\n---------------------------\n\nPerform the following steps to generate the OAuth2 credentials.\n\n### 1. Determine your authentication type\n\nCheck the table below to see which **authentication type** is most appropriate\nfor your Ad Manager API application:\n\n| Choose your OAuth2 authentication type ||\n|---------------------|-----------------------------------------------------------------------------------------------------------------------------------------------------------------------------------|\n| **Service account** | Choose this if you only need access to your own Ad Manager data. [Learn more.](/identity/protocols/OAuth2ServiceAccount) |\n| **Web application** | Choose this if you want to authenticate as any user who grants permission to your application to access their Ad Manager data. [Learn more.](/identity/protocols/OAuth2WebServer) |\n\n### 2. Create OAuth2 credentials\n\nOnce you've determined your authentication type, click the corresponding tab\nbelow and follow the instructions to generate the OAuth2 credentials:\nService Account\n\n1. Open the [Google API Console Credentials page](https://console.cloud.google.com/apis/credentials).\n2. From the project drop-down, choose **Create a new project** , enter a name for the project, and optionally, edit the provided Project ID. Click **Create**.\n3. On the Credentials page, select **Create credentials** , then select **Service account key**.\n4. Select [New service account](//console.developers.google.com/apis/credentials/serviceaccountkey), and select **JSON**.\n5. Click **Create** to download a file containing a private key.\nWeb application\n\n1. Open the [Google API Console Credentials page](https://console.cloud.google.com/apis/credentials).\n2. From the project drop-down, choose **Create a new project** , enter a name for the project (and optionally, edit the provided Project ID), and click **Create**.\n3. On the Credentials page, select **Create credentials** , then select **OAuth client ID**.\n4. You may be prompted to set a product name on the Consent Screen page; if so, click **Configure consent screen** , supply the requested information, and click **Save** to return to the Credentials page.\n5. Select **Web Application** for the **Application Type**. Follow the instructions to enter JavaScript origins, redirect URIs, or both.\n6. Click **Create**.\n7. On the page that appears, copy the **client ID** and **client secret** to your clipboard, as you will need them when you configure your client library.\n\n### 3. Configure your Ad Manager network\n\nIf you are a third-party developer, you may need to have your client do this\nstep for you.\nService Account\n\n1. Go to your [Ad Manager network](//admanager.google.com).\n2. Click the **Admin** tab.\n3. Ensure that **API access** is enabled.\n4. Click the **Add a service account user** button.\n5. Fill in the form using the service account email. The service account user must be granted with permissions to access the entities as if that service account user would access the entities on the UI.\n6. Click on the **Save** button. A message should appear, confirming the addition of your service account.\n7. View existing service account users by going to the Users tab and then clicking the **Service Account** filter.\nWeb application\n\n1. Go to your [Ad Manager network](//admanager.google.com).\n2. Click the **Admin** tab.\n3. Ensure that **API access** is enabled.\n\n### 4. Configure and use a client library\n\nFollow the appropriate guide below to use the credentials in your client library: \n\n### Java\n\n- [Service account flow](//github.com/googleads/googleads-java-lib/wiki/API-access-using-own-credentials-(server-to-server-flow)#step-2---setting-up-the-client-library)\n- [Web app flow](//github.com/googleads/googleads-java-lib/wiki/API-access-on-behalf-of-your-clients-(web-flow)#step-2---setting-up-the-client-library)\n\n### .NET\n\n- [Service account flow](//github.com/googleads/googleads-dotnet-lib/wiki/API-access-using-own-credentials-(server-to-server-flow)#step-2---setting-up-the-client-library)\n- [Web app flow](//github.com/googleads/googleads-dotnet-lib/wiki/API-access-on-behalf-of-your-clients-(web-flow)#step-2---setting-up-the-client-library)\n\n### Python\n\n- [Service account flow](//github.com/googleads/googleads-python-lib/wiki/API-access-using-own-credentials-(server-to-server-flow)#step-2---setting-up-the-client-library)\n- [Web app flow](//github.com/googleads/googleads-python-lib/wiki/API-access-on-behalf-of-your-clients-(web-flow)#step-2---setting-up-the-client-library)\n\n### PHP\n\n- [Service account flow](https://github.com/googleads/googleads-php-lib/wiki/API-access-using-own-credentials-(server-to-server-flow))\n- [Web app flow](https://github.com/googleads/googleads-php-lib/wiki/API-access-on-behalf-of-your-clients-(web-flow))\n\n### Ruby\n\n- [Service account flow](//github.com/googleads/google-api-ads-ruby/wiki/API-access-using-own-credentials-(server-to-server-flow)#step-2---setting-up-the-client-library)\n- [Web app flow](//github.com/googleads/google-api-ads-ruby/wiki/API-access-on-behalf-of-your-clients-(web-flow)#step-2---setting-up-the-client-library)\n\n\u003cbr /\u003e\n\nIf you choose not to use one of our client libraries, you'll need to implement\nthe OAuth2 [service account](/identity/protocols/OAuth2ServiceAccount) or [web\napp](/identity/protocols/OAuth2WebServer) flow yourself.\n\nBehind the scenes\n-----------------\n\nOur client libraries automatically take care of the details covered below so\nonly read on if you're interested in what's happening behind the scenes.\nThis section is intended for advanced users who are already familiar\nwith the [OAuth2 specification](http://tools.ietf.org/html/rfc6749) and\nknow how to [use OAuth2 with Google APIs](/accounts/docs/OAuth2).\n\n#### HTTP request header\n\nThe HTTP header in every request to the Ad Manager API must include an access\ntoken in this form: \n\n```actionscript-3\nAuthorization: Bearer ACCESS_TOKEN\n```\n\nFor example: \n\n```http\nPOST ... HTTP/1.1\nHost: ...\nAuthorization: Bearer 1/fFAGRNJru1FTz70BzhT3Zg\nContent-Type: text/xml;charset=UTF-8\nContent-Length: ...\n\n\u003c?xml version=\"1.0\"?\u003e\n\u003csoap:Envelope xmlns:soap=\"http://www.w3.org/2001/12/soap-envelope\"\u003e\n…\n\u003c/soap:Envelope\u003e\n```\n\n#### Scope\n\nA single access token can grant varying degrees of access to multiple APIs. A\nvariable parameter called `scope` controls the set of resources and\noperations that an access token permits. During the access token request, your\napplication sends one or more values in the `scope` parameter.\n\nAd Manager has only one scope, shown below. Authorization should be performed\nat the user level within the product.\n\n| Scope | Permissions |\n|---------------------------------------|-----------------------------------------------|\n| `https://www.googleapis.com/auth/dfp` | View and manage your campaigns on Ad Manager. |"]]