با مجموعهها، منظم بمانید
ذخیره و طبقهبندی محتوا براساس اولویتهای شما.
همه تماسهای Google Ad Manager API باید از طریق OAuth2 مجاز باشند، یک استاندارد باز که به کاربران اجازه میدهد به برنامههای شخص ثالث مجوز بدهند، بنابراین برنامه میتواند از طرف کاربر با سرویسهای وب تعامل داشته باشد. OAuth2 برنامه سرویس گیرنده Ad Manager API شما را قادر می سازد تا به حساب Ad Manager کاربر بدون نیاز به مدیریت یا ذخیره نام کاربری یا رمز عبور کاربر دسترسی داشته باشد.
اعتبارنامه OAuth2 را ایجاد کنید
مراحل زیر را برای ایجاد اعتبارنامه OAuth2 انجام دهید.
1. نوع احراز هویت خود را تعیین کنید
جدول زیر را بررسی کنید تا ببینید کدام نوع احراز هویت برای برنامه API Ad Manager شما مناسبتر است:
نوع احراز هویت OAuth2 خود را انتخاب کنید
حساب خدمات
اگر فقط به دادههای Ad Manager خود نیاز دارید، این مورد را انتخاب کنید.
از منوی کشویی پروژه، ایجاد یک پروژه جدید را انتخاب کنید، نامی برای پروژه وارد کنید و در صورت تمایل، شناسه پروژه ارائه شده را ویرایش کنید. روی ایجاد کلیک کنید.
در صفحه اعتبارنامه ها، Create credentials را انتخاب کنید، سپس کلید حساب کاربری را انتخاب کنید.
از منوی کشویی پروژه، ایجاد پروژه جدید را انتخاب کنید، نامی برای پروژه وارد کنید (و در صورت تمایل، شناسه پروژه ارائه شده را ویرایش کنید)، و روی ایجاد کلیک کنید.
در صفحه Credentials، Create credentials را انتخاب کنید، سپس OAuth Client ID را انتخاب کنید.
ممکن است از شما خواسته شود که نام محصول را در صفحه نمایش رضایت تنظیم کنید. اگر چنین است، روی پیکربندی صفحه رضایت کلیک کنید، اطلاعات درخواستی را ارائه کنید و برای بازگشت به صفحه اعتبارنامه، روی ذخیره کلیک کنید.
برای نوع برنامه،Web Application را انتخاب کنید. دستورالعمل ها را برای وارد کردن مبدا جاوا اسکریپت، تغییر مسیر URI یا هر دو دنبال کنید.
روی ایجاد کلیک کنید.
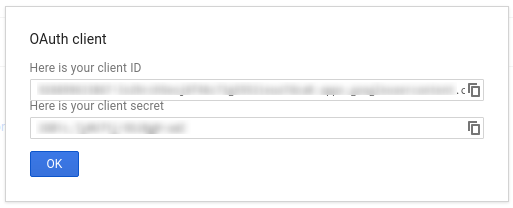
در صفحه ای که ظاهر می شود، شناسه مشتری و راز سرویس گیرنده را در کلیپ بورد خود کپی کنید، زیرا هنگام پیکربندی کتابخانه مشتری به آنها نیاز خواهید داشت.
3. شبکه Ad Manager خود را پیکربندی کنید
اگر شما یک توسعه دهنده شخص ثالث هستید، ممکن است لازم باشد مشتری خود این مرحله را برای شما انجام دهد.
با استفاده از ایمیل حساب سرویس، فرم را پر کنید. کاربر حساب سرویس باید مجوز دسترسی به موجودیت ها را داشته باشد، گویی آن کاربر حساب سرویس به موجودیت های موجود در UI دسترسی دارد.
بر روی دکمه ذخیره کلیک کنید. باید پیامی ظاهر شود که افزودن حساب سرویس شما را تأیید می کند.
با رفتن به تب Users و سپس کلیک کردن روی فیلتر حساب سرویس، کاربران حساب های سرویس موجود را مشاهده کنید.
اگر تصمیم گرفتید از یکی از کتابخانه های مشتری ما استفاده نکنید، باید حساب خدمات OAuth2 یا جریان برنامه وب را خودتان پیاده سازی کنید.
پشت صحنه
کتابخانههای مشتری ما بهطور خودکار از جزئیات زیر مراقبت میکنند، بنابراین فقط در صورتی که علاقهمند به آنچه در پشت صحنه اتفاق میافتد، آن را بخوانید. این بخش برای کاربران پیشرفته ای در نظر گرفته شده است که قبلاً با مشخصات OAuth2 آشنا هستند و می دانند چگونه از OAuth2 با API های Google استفاده کنند .
هدر درخواست HTTP
هدر HTTP در هر درخواست به Ad Manager API باید شامل یک نشانه دسترسی در این فرم باشد:
یک نشانه دسترسی واحد می تواند درجات مختلفی از دسترسی را به چندین API بدهد. پارامتر متغیری به نام scope مجموعه منابع و عملیاتی را که یک نشانه دسترسی اجازه می دهد را کنترل می کند. در طول درخواست نشانه دسترسی، برنامه شما یک یا چند مقدار را در پارامتر scope ارسال می کند.
Ad Manager تنها یک محدوده دارد که در زیر نشان داده شده است. مجوز باید در سطح کاربر در محصول انجام شود.
دامنه
مجوزها
https://www.googleapis.com/auth/dfp
کمپین های خود را در Ad Manager مشاهده و مدیریت کنید.
تاریخ آخرین بهروزرسانی 2025-08-29 بهوقت ساعت هماهنگ جهانی.
[[["درک آسان","easyToUnderstand","thumb-up"],["مشکلم را برطرف کرد","solvedMyProblem","thumb-up"],["غیره","otherUp","thumb-up"]],[["اطلاعاتی که نیاز دارم وجود ندارد","missingTheInformationINeed","thumb-down"],["بیشازحد پیچیده/ مراحل بسیار زیاد","tooComplicatedTooManySteps","thumb-down"],["قدیمی","outOfDate","thumb-down"],["مشکل ترجمه","translationIssue","thumb-down"],["مشکل کد / نمونهها","samplesCodeIssue","thumb-down"],["غیره","otherDown","thumb-down"]],["تاریخ آخرین بهروزرسانی 2025-08-29 بهوقت ساعت هماهنگ جهانی."],[[["\u003cp\u003eAll Google Ad Manager API calls require OAuth2 authorization for secure access to user data without storing sensitive login information.\u003c/p\u003e\n"],["\u003cp\u003eChoose between Service Account or Web Application authentication type based on your application's needs.\u003c/p\u003e\n"],["\u003cp\u003eGenerate OAuth2 credentials by following instructions for your chosen authentication type via the Google API Console.\u003c/p\u003e\n"],["\u003cp\u003eConfigure your Ad Manager network settings and client library according to provided guidelines for the specific authentication method and programming language.\u003c/p\u003e\n"],["\u003cp\u003eClient libraries handle most OAuth2 complexities but you can delve into the background details concerning HTTP headers and scopes if needed.\u003c/p\u003e\n"]]],["Google Ad Manager API access requires OAuth2 authorization. First, choose between \"Service account\" for personal data or \"Web application\" for user-authorized access. Then, create OAuth2 credentials via the Google API Console, either generating a JSON key for service accounts or a client ID and secret for web applications. Next, configure the Ad Manager network to allow API access, adding the service account email if applicable. Lastly, configure and use a client library, or implement the OAuth2 flow directly, including the access token in the HTTP header.\n"],null,["# Authentication\n\nAll Google Ad Manager API calls must be authorized through [OAuth2](http://oauth.net/2/) an open standard that\nallows users to grant permissions to third-party applications, so the\napplication can interact with web services on the user's behalf. OAuth2 enables\nyour Ad Manager API client application to access a user's Ad Manager account\nwithout having to handle or store the user's username or password.\n\nGenerate OAuth2 credentials\n---------------------------\n\nPerform the following steps to generate the OAuth2 credentials.\n\n### 1. Determine your authentication type\n\nCheck the table below to see which **authentication type** is most appropriate\nfor your Ad Manager API application:\n\n| Choose your OAuth2 authentication type ||\n|---------------------|-----------------------------------------------------------------------------------------------------------------------------------------------------------------------------------|\n| **Service account** | Choose this if you only need access to your own Ad Manager data. [Learn more.](/identity/protocols/OAuth2ServiceAccount) |\n| **Web application** | Choose this if you want to authenticate as any user who grants permission to your application to access their Ad Manager data. [Learn more.](/identity/protocols/OAuth2WebServer) |\n\n### 2. Create OAuth2 credentials\n\nOnce you've determined your authentication type, click the corresponding tab\nbelow and follow the instructions to generate the OAuth2 credentials:\nService Account\n\n1. Open the [Google API Console Credentials page](https://console.cloud.google.com/apis/credentials).\n2. From the project drop-down, choose **Create a new project** , enter a name for the project, and optionally, edit the provided Project ID. Click **Create**.\n3. On the Credentials page, select **Create credentials** , then select **Service account key**.\n4. Select [New service account](//console.developers.google.com/apis/credentials/serviceaccountkey), and select **JSON**.\n5. Click **Create** to download a file containing a private key.\nWeb application\n\n1. Open the [Google API Console Credentials page](https://console.cloud.google.com/apis/credentials).\n2. From the project drop-down, choose **Create a new project** , enter a name for the project (and optionally, edit the provided Project ID), and click **Create**.\n3. On the Credentials page, select **Create credentials** , then select **OAuth client ID**.\n4. You may be prompted to set a product name on the Consent Screen page; if so, click **Configure consent screen** , supply the requested information, and click **Save** to return to the Credentials page.\n5. Select **Web Application** for the **Application Type**. Follow the instructions to enter JavaScript origins, redirect URIs, or both.\n6. Click **Create**.\n7. On the page that appears, copy the **client ID** and **client secret** to your clipboard, as you will need them when you configure your client library.\n\n### 3. Configure your Ad Manager network\n\nIf you are a third-party developer, you may need to have your client do this\nstep for you.\nService Account\n\n1. Go to your [Ad Manager network](//admanager.google.com).\n2. Click the **Admin** tab.\n3. Ensure that **API access** is enabled.\n4. Click the **Add a service account user** button.\n5. Fill in the form using the service account email. The service account user must be granted with permissions to access the entities as if that service account user would access the entities on the UI.\n6. Click on the **Save** button. A message should appear, confirming the addition of your service account.\n7. View existing service account users by going to the Users tab and then clicking the **Service Account** filter.\nWeb application\n\n1. Go to your [Ad Manager network](//admanager.google.com).\n2. Click the **Admin** tab.\n3. Ensure that **API access** is enabled.\n\n### 4. Configure and use a client library\n\nFollow the appropriate guide below to use the credentials in your client library: \n\n### Java\n\n- [Service account flow](//github.com/googleads/googleads-java-lib/wiki/API-access-using-own-credentials-(server-to-server-flow)#step-2---setting-up-the-client-library)\n- [Web app flow](//github.com/googleads/googleads-java-lib/wiki/API-access-on-behalf-of-your-clients-(web-flow)#step-2---setting-up-the-client-library)\n\n### .NET\n\n- [Service account flow](//github.com/googleads/googleads-dotnet-lib/wiki/API-access-using-own-credentials-(server-to-server-flow)#step-2---setting-up-the-client-library)\n- [Web app flow](//github.com/googleads/googleads-dotnet-lib/wiki/API-access-on-behalf-of-your-clients-(web-flow)#step-2---setting-up-the-client-library)\n\n### Python\n\n- [Service account flow](//github.com/googleads/googleads-python-lib/wiki/API-access-using-own-credentials-(server-to-server-flow)#step-2---setting-up-the-client-library)\n- [Web app flow](//github.com/googleads/googleads-python-lib/wiki/API-access-on-behalf-of-your-clients-(web-flow)#step-2---setting-up-the-client-library)\n\n### PHP\n\n- [Service account flow](https://github.com/googleads/googleads-php-lib/wiki/API-access-using-own-credentials-(server-to-server-flow))\n- [Web app flow](https://github.com/googleads/googleads-php-lib/wiki/API-access-on-behalf-of-your-clients-(web-flow))\n\n### Ruby\n\n- [Service account flow](//github.com/googleads/google-api-ads-ruby/wiki/API-access-using-own-credentials-(server-to-server-flow)#step-2---setting-up-the-client-library)\n- [Web app flow](//github.com/googleads/google-api-ads-ruby/wiki/API-access-on-behalf-of-your-clients-(web-flow)#step-2---setting-up-the-client-library)\n\n\u003cbr /\u003e\n\nIf you choose not to use one of our client libraries, you'll need to implement\nthe OAuth2 [service account](/identity/protocols/OAuth2ServiceAccount) or [web\napp](/identity/protocols/OAuth2WebServer) flow yourself.\n\nBehind the scenes\n-----------------\n\nOur client libraries automatically take care of the details covered below so\nonly read on if you're interested in what's happening behind the scenes.\nThis section is intended for advanced users who are already familiar\nwith the [OAuth2 specification](http://tools.ietf.org/html/rfc6749) and\nknow how to [use OAuth2 with Google APIs](/accounts/docs/OAuth2).\n\n#### HTTP request header\n\nThe HTTP header in every request to the Ad Manager API must include an access\ntoken in this form: \n\n```actionscript-3\nAuthorization: Bearer ACCESS_TOKEN\n```\n\nFor example: \n\n```http\nPOST ... HTTP/1.1\nHost: ...\nAuthorization: Bearer 1/fFAGRNJru1FTz70BzhT3Zg\nContent-Type: text/xml;charset=UTF-8\nContent-Length: ...\n\n\u003c?xml version=\"1.0\"?\u003e\n\u003csoap:Envelope xmlns:soap=\"http://www.w3.org/2001/12/soap-envelope\"\u003e\n…\n\u003c/soap:Envelope\u003e\n```\n\n#### Scope\n\nA single access token can grant varying degrees of access to multiple APIs. A\nvariable parameter called `scope` controls the set of resources and\noperations that an access token permits. During the access token request, your\napplication sends one or more values in the `scope` parameter.\n\nAd Manager has only one scope, shown below. Authorization should be performed\nat the user level within the product.\n\n| Scope | Permissions |\n|---------------------------------------|-----------------------------------------------|\n| `https://www.googleapis.com/auth/dfp` | View and manage your campaigns on Ad Manager. |"]]