קל לארגן דפים בעזרת אוספים
אפשר לשמור ולסווג תוכן על סמך ההעדפות שלך.
כל הקריאות ל-Google Ad Manager API חייבות לקבל הרשאה באמצעות OAuth2 בתקן פתוח
מאפשרת למשתמשים להעניק הרשאות לאפליקציות של צד שלישי,
האפליקציה יכולה לקיים אינטראקציה עם שירותי אינטרנט בשם המשתמש. הפעלה של OAuth2
לאפליקציית הלקוח של Ad Manager API כדי לגשת לחשבון Ad Manager של המשתמש
ללא צורך לטפל בשם המשתמש או בסיסמה של המשתמש, או לשמור אותם.
יצירת פרטי כניסה של OAuth2
כדי ליצור פרטי כניסה של OAuth2, מבצעים את השלבים הבאים.
1. קביעת סוג האימות
בטבלה שבהמשך מוסבר איזה סוג אימות הוא המתאים ביותר.
של האפליקציה ל-Ad Manager API:
בחירת סוג אימות OAuth2
חשבון שירות
כדאי לבחור באפשרות הזו אם נדרשת לך גישה רק לנתונים שלך ב-Ad Manager.
בתפריט הנפתח של הפרויקטים, בוחרים באפשרות Create a new project (יצירת פרויקט חדש), ומזינים שם.
עבור הפרויקט, ואפשר גם לערוך את מזהה הפרויקט שסופק. לוחצים על
יצירה.
בדף Credentials, בוחרים באפשרות Create credentials (יצירת פרטי כניסה) ואז
בוחרים באפשרות מפתח לחשבון שירות.
בתפריט הנפתח של הפרויקטים, בוחרים באפשרות Create a new project (יצירת פרויקט חדש), ומזינים שם.
עבור הפרויקט (ואם רוצים, עורכים את מזהה הפרויקט שסופק) ולוחצים על
יצירה.
בדף Credentials, בוחרים באפשרות Create credentials (יצירת פרטי כניסה) ואז
בוחרים באפשרות OAuth Client ID (מזהה לקוח OAuth).
ייתכן שתתבקשו להגדיר שם מוצר
הדף 'מסך הסכמה'; אם כן, לוחצים על Configure consent screen (הגדרת מסך ההסכמה),
לספק את המידע המבוקש וללחוץ על Save (שמירה) כדי לחזור
הדף 'פרטי כניסה'.
בוחרים באפשרות Web Application (אפליקציית אינטרנט) בשדה Application Type. פועלים לפי
הוראות להזנת מקורות של JavaScript, הפניה אוטומטית של מזהי URI, או שניהם.
לוחצים על יצירה.
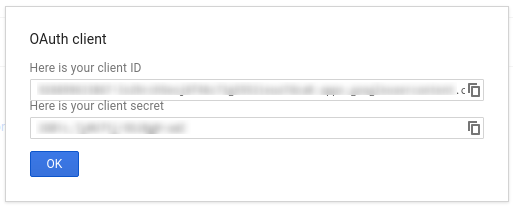
בדף שמופיע, מעתיקים את מזהה הלקוח ואת סוד הלקוח.
ללוח העריכה, כי תצטרכו אותם כשתגדירו את הלקוח
לספרייה.
3. הגדרת רשת Ad Manager
אם את/ה מפתח/ת צד שלישי, יכול להיות שהלקוח שלך יצטרך לעשות את זה
במקומכם.
ממלאים את הטופס באמצעות כתובת האימייל של חשבון השירות.
למשתמש של חשבון השירות צריכה להיות הרשאת גישה
כאילו המשתמש בחשבון השירות יוכל לגשת לישויות
ממשק המשתמש.
לוחצים על הלחצן שמירה. אמורה להופיע הודעה עם אישור
ההוספה של חשבון השירות.
כדי לראות משתמשים קיימים בחשבון השירות, עוברים לכרטיסייה Users (משתמשים) ואז
לוחצים על המסנן חשבון שירות.
אם תבחרו לא להשתמש באחת מספריות הלקוח שלנו, תצטרכו להטמיע
חשבון שירות OAuth2 או באינטרנט
אפליקציה.
מאחורי הקלעים
ספריות הלקוח שלנו מטפלות אוטומטית בפרטים המופיעים בהמשך.
כדאי להמשיך לקרוא רק אם אתם מתעניינים במה שקורה מאחורי הקלעים.
הקטע הזה מיועד למשתמשים מתקדמים שכבר מכירים
עם מפרט OAuth2
לדעת איך להשתמש ב-OAuth2 עם Google APIs.
כותרת בקשת HTTP
כותרת ה-HTTP בכל בקשה ל-Ad Manager API חייבת לכלול גישה
באסימון הזה:
אסימון גישה יחיד יכול להעניק דרגות גישה שונות למספר ממשקי API. א'
פרמטר של משתנה שנקרא scope שולט בקבוצת המשאבים
את הפעולות המותרות באמצעות אסימון גישה. במהלך בקשת אסימון הגישה,
האפליקציה שולחת ערך אחד או יותר בפרמטר scope.
ל-Ad Manager יש רק היקף אחד, כפי שמוצג בהמשך. צריך לבצע הרשאה
ברמת המשתמש במוצר עצמו.
[[["התוכן קל להבנה","easyToUnderstand","thumb-up"],["התוכן עזר לי לפתור בעיה","solvedMyProblem","thumb-up"],["סיבה אחרת","otherUp","thumb-up"]],[["חסרים לי מידע או פרטים","missingTheInformationINeed","thumb-down"],["התוכן מורכב מדי או עם יותר מדי שלבים","tooComplicatedTooManySteps","thumb-down"],["התוכן לא עדכני","outOfDate","thumb-down"],["בעיה בתרגום","translationIssue","thumb-down"],["בעיה בדוגמאות/בקוד","samplesCodeIssue","thumb-down"],["סיבה אחרת","otherDown","thumb-down"]],["עדכון אחרון: 2025-08-31 (שעון UTC)."],[[["\u003cp\u003eAll Google Ad Manager API calls require OAuth2 authorization for secure access to user data without storing sensitive login information.\u003c/p\u003e\n"],["\u003cp\u003eChoose between Service Account or Web Application authentication type based on your application's needs.\u003c/p\u003e\n"],["\u003cp\u003eGenerate OAuth2 credentials by following instructions for your chosen authentication type via the Google API Console.\u003c/p\u003e\n"],["\u003cp\u003eConfigure your Ad Manager network settings and client library according to provided guidelines for the specific authentication method and programming language.\u003c/p\u003e\n"],["\u003cp\u003eClient libraries handle most OAuth2 complexities but you can delve into the background details concerning HTTP headers and scopes if needed.\u003c/p\u003e\n"]]],["Google Ad Manager API access requires OAuth2 authorization. First, choose between \"Service account\" for personal data or \"Web application\" for user-authorized access. Then, create OAuth2 credentials via the Google API Console, either generating a JSON key for service accounts or a client ID and secret for web applications. Next, configure the Ad Manager network to allow API access, adding the service account email if applicable. Lastly, configure and use a client library, or implement the OAuth2 flow directly, including the access token in the HTTP header.\n"],null,["# Authentication\n\nAll Google Ad Manager API calls must be authorized through [OAuth2](http://oauth.net/2/) an open standard that\nallows users to grant permissions to third-party applications, so the\napplication can interact with web services on the user's behalf. OAuth2 enables\nyour Ad Manager API client application to access a user's Ad Manager account\nwithout having to handle or store the user's username or password.\n\nGenerate OAuth2 credentials\n---------------------------\n\nPerform the following steps to generate the OAuth2 credentials.\n\n### 1. Determine your authentication type\n\nCheck the table below to see which **authentication type** is most appropriate\nfor your Ad Manager API application:\n\n| Choose your OAuth2 authentication type ||\n|---------------------|-----------------------------------------------------------------------------------------------------------------------------------------------------------------------------------|\n| **Service account** | Choose this if you only need access to your own Ad Manager data. [Learn more.](/identity/protocols/OAuth2ServiceAccount) |\n| **Web application** | Choose this if you want to authenticate as any user who grants permission to your application to access their Ad Manager data. [Learn more.](/identity/protocols/OAuth2WebServer) |\n\n### 2. Create OAuth2 credentials\n\nOnce you've determined your authentication type, click the corresponding tab\nbelow and follow the instructions to generate the OAuth2 credentials:\nService Account\n\n1. Open the [Google API Console Credentials page](https://console.cloud.google.com/apis/credentials).\n2. From the project drop-down, choose **Create a new project** , enter a name for the project, and optionally, edit the provided Project ID. Click **Create**.\n3. On the Credentials page, select **Create credentials** , then select **Service account key**.\n4. Select [New service account](//console.developers.google.com/apis/credentials/serviceaccountkey), and select **JSON**.\n5. Click **Create** to download a file containing a private key.\nWeb application\n\n1. Open the [Google API Console Credentials page](https://console.cloud.google.com/apis/credentials).\n2. From the project drop-down, choose **Create a new project** , enter a name for the project (and optionally, edit the provided Project ID), and click **Create**.\n3. On the Credentials page, select **Create credentials** , then select **OAuth client ID**.\n4. You may be prompted to set a product name on the Consent Screen page; if so, click **Configure consent screen** , supply the requested information, and click **Save** to return to the Credentials page.\n5. Select **Web Application** for the **Application Type**. Follow the instructions to enter JavaScript origins, redirect URIs, or both.\n6. Click **Create**.\n7. On the page that appears, copy the **client ID** and **client secret** to your clipboard, as you will need them when you configure your client library.\n\n### 3. Configure your Ad Manager network\n\nIf you are a third-party developer, you may need to have your client do this\nstep for you.\nService Account\n\n1. Go to your [Ad Manager network](//admanager.google.com).\n2. Click the **Admin** tab.\n3. Ensure that **API access** is enabled.\n4. Click the **Add a service account user** button.\n5. Fill in the form using the service account email. The service account user must be granted with permissions to access the entities as if that service account user would access the entities on the UI.\n6. Click on the **Save** button. A message should appear, confirming the addition of your service account.\n7. View existing service account users by going to the Users tab and then clicking the **Service Account** filter.\nWeb application\n\n1. Go to your [Ad Manager network](//admanager.google.com).\n2. Click the **Admin** tab.\n3. Ensure that **API access** is enabled.\n\n### 4. Configure and use a client library\n\nFollow the appropriate guide below to use the credentials in your client library: \n\n### Java\n\n- [Service account flow](//github.com/googleads/googleads-java-lib/wiki/API-access-using-own-credentials-(server-to-server-flow)#step-2---setting-up-the-client-library)\n- [Web app flow](//github.com/googleads/googleads-java-lib/wiki/API-access-on-behalf-of-your-clients-(web-flow)#step-2---setting-up-the-client-library)\n\n### .NET\n\n- [Service account flow](//github.com/googleads/googleads-dotnet-lib/wiki/API-access-using-own-credentials-(server-to-server-flow)#step-2---setting-up-the-client-library)\n- [Web app flow](//github.com/googleads/googleads-dotnet-lib/wiki/API-access-on-behalf-of-your-clients-(web-flow)#step-2---setting-up-the-client-library)\n\n### Python\n\n- [Service account flow](//github.com/googleads/googleads-python-lib/wiki/API-access-using-own-credentials-(server-to-server-flow)#step-2---setting-up-the-client-library)\n- [Web app flow](//github.com/googleads/googleads-python-lib/wiki/API-access-on-behalf-of-your-clients-(web-flow)#step-2---setting-up-the-client-library)\n\n### PHP\n\n- [Service account flow](https://github.com/googleads/googleads-php-lib/wiki/API-access-using-own-credentials-(server-to-server-flow))\n- [Web app flow](https://github.com/googleads/googleads-php-lib/wiki/API-access-on-behalf-of-your-clients-(web-flow))\n\n### Ruby\n\n- [Service account flow](//github.com/googleads/google-api-ads-ruby/wiki/API-access-using-own-credentials-(server-to-server-flow)#step-2---setting-up-the-client-library)\n- [Web app flow](//github.com/googleads/google-api-ads-ruby/wiki/API-access-on-behalf-of-your-clients-(web-flow)#step-2---setting-up-the-client-library)\n\n\u003cbr /\u003e\n\nIf you choose not to use one of our client libraries, you'll need to implement\nthe OAuth2 [service account](/identity/protocols/OAuth2ServiceAccount) or [web\napp](/identity/protocols/OAuth2WebServer) flow yourself.\n\nBehind the scenes\n-----------------\n\nOur client libraries automatically take care of the details covered below so\nonly read on if you're interested in what's happening behind the scenes.\nThis section is intended for advanced users who are already familiar\nwith the [OAuth2 specification](http://tools.ietf.org/html/rfc6749) and\nknow how to [use OAuth2 with Google APIs](/accounts/docs/OAuth2).\n\n#### HTTP request header\n\nThe HTTP header in every request to the Ad Manager API must include an access\ntoken in this form: \n\n```actionscript-3\nAuthorization: Bearer ACCESS_TOKEN\n```\n\nFor example: \n\n```http\nPOST ... HTTP/1.1\nHost: ...\nAuthorization: Bearer 1/fFAGRNJru1FTz70BzhT3Zg\nContent-Type: text/xml;charset=UTF-8\nContent-Length: ...\n\n\u003c?xml version=\"1.0\"?\u003e\n\u003csoap:Envelope xmlns:soap=\"http://www.w3.org/2001/12/soap-envelope\"\u003e\n…\n\u003c/soap:Envelope\u003e\n```\n\n#### Scope\n\nA single access token can grant varying degrees of access to multiple APIs. A\nvariable parameter called `scope` controls the set of resources and\noperations that an access token permits. During the access token request, your\napplication sends one or more values in the `scope` parameter.\n\nAd Manager has only one scope, shown below. Authorization should be performed\nat the user level within the product.\n\n| Scope | Permissions |\n|---------------------------------------|-----------------------------------------------|\n| `https://www.googleapis.com/auth/dfp` | View and manage your campaigns on Ad Manager. |"]]