Restez organisé à l'aide des collections
Enregistrez et classez les contenus selon vos préférences.
Tous les appels de l'API Google Ad Manager doivent être autorisés via OAuth2, une norme ouverte qui
permet aux utilisateurs d'accorder des autorisations à des applications tierces.
application peut interagir avec des services web
pour le compte de l'utilisateur. Activation du protocole OAuth2
votre application cliente API Ad Manager pour accéder au compte Ad Manager d'un utilisateur
sans avoir à gérer ni à stocker
le nom d'utilisateur ou le mot de passe de l'utilisateur.
Générer des identifiants OAuth2
Procédez comme suit pour générer les identifiants OAuth2.
1. Déterminer votre type d'authentification
Consultez le tableau ci-dessous pour déterminer le type d'authentification le plus approprié.
pour votre application API Ad Manager:
Choisir le type d'authentification OAuth2
Compte de service
Choisissez cette option si vous n'avez besoin d'accéder qu'à vos propres données Ad Manager.
Choisissez cette option si vous souhaitez vous authentifier
comme n'importe quel utilisateur qui accorde
autoriser votre application à accéder à ses données Ad Manager.
Une fois que vous avez déterminé votre type d'authentification, cliquez sur l'onglet correspondant
ci-dessous et suivez les instructions pour générer les identifiants OAuth2:
<ph type="x-smartling-placeholder"></ph>
Compte de service
Dans la liste déroulante du projet, sélectionnez Créer un projet, puis saisissez un nom.
correspondant au projet et, si vous le souhaitez, modifier l'ID du projet fourni. Cliquez sur
Créer :
Sur la page "Identifiants", sélectionnez Créer des identifiants, puis
sélectionnez Clé de compte de service.
Dans la liste déroulante du projet, sélectionnez Créer un projet, puis saisissez un nom.
associée au projet (et modifiez éventuellement l'ID fourni), puis cliquez sur
Créer :
Sur la page "Identifiants", sélectionnez Créer des identifiants, puis
sélectionnez ID client OAuth.
Vous serez peut-être invité à définir un nom de produit sur le
Page sur l'écran de consentement Si c'est le cas, cliquez sur Configurer l'écran d'autorisation.
fournissez les informations demandées, puis cliquez sur Enregistrer pour revenir à
Identifiants.
Dans le champ Type d'application, sélectionnez Application Web. Suivez le
des instructions pour saisir des origines JavaScript, des URI de redirection ou les deux.
Cliquez sur Créer.
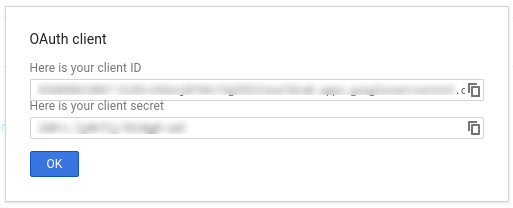
Sur la page qui s'affiche, copiez l'ID client et le code secret du client.
dans le presse-papiers, car vous en aurez besoin pour configurer votre client
bibliothèque.
3. Configurer votre réseau Ad Manager
Si vous êtes un développeur tiers, vous devrez peut-être demander à votre client de le faire
pour vous.
<ph type="x-smartling-placeholder"></ph>
Compte de service
Cliquez sur le bouton Ajouter un utilisateur au compte de service.
Remplissez le formulaire à l'aide de l'adresse e-mail du compte de service. La
l'utilisateur du compte de service doit être autorisé à accéder
aux entités comme si l'utilisateur du compte de service accédait aux entités
l'UI.
Cliquez sur le bouton Save (Enregistrer). Un message de confirmation doit s'afficher
l'ajout de votre compte de service.
Affichez les utilisateurs existants du compte de service en accédant à l'onglet "Utilisateurs",
en cliquant sur le filtre Compte de service.
<ph type="x-smartling-placeholder"></ph>
Application Web
Nos bibliothèques clientes se chargent automatiquement
des détails abordés ci-dessous afin que
ne lisez la suite que si vous êtes
intéressé par ce qui se passe en coulisse.
Cette section s'adresse aux utilisateurs expérimentés qui connaissent déjà
avec la spécification OAuth2 et
comment utiliser OAuth2 avec les API Google.
En-tête de requête HTTP
L'en-tête HTTP de chaque demande à l'API Ad Manager doit inclure un paramètre d'accès
sous la forme suivante:
Un même jeton d'accès peut accorder différents degrés d'accès à plusieurs API. A
appelé scope contrôle l'ensemble des ressources.
d'opérations autorisées par un jeton d'accès. Pendant la demande de jeton d'accès,
application envoie une ou plusieurs valeurs dans le paramètre scope.
Ad Manager ne comporte qu'un seul champ d'application, comme indiqué ci-dessous. L'autorisation doit être effectuée
au niveau de l'utilisateur dans le produit.
Champ d'application
Autorisations
https://www.googleapis.com/auth/dfp
Affichez et gérez vos campagnes dans Ad Manager.
Sauf indication contraire, le contenu de cette page est régi par une licence Creative Commons Attribution 4.0, et les échantillons de code sont régis par une licence Apache 2.0. Pour en savoir plus, consultez les Règles du site Google Developers. Java est une marque déposée d'Oracle et/ou de ses sociétés affiliées.
Dernière mise à jour le 2025/08/31 (UTC).
[[["Facile à comprendre","easyToUnderstand","thumb-up"],["J'ai pu résoudre mon problème","solvedMyProblem","thumb-up"],["Autre","otherUp","thumb-up"]],[["Il n'y a pas l'information dont j'ai besoin","missingTheInformationINeed","thumb-down"],["Trop compliqué/Trop d'étapes","tooComplicatedTooManySteps","thumb-down"],["Obsolète","outOfDate","thumb-down"],["Problème de traduction","translationIssue","thumb-down"],["Mauvais exemple/Erreur de code","samplesCodeIssue","thumb-down"],["Autre","otherDown","thumb-down"]],["Dernière mise à jour le 2025/08/31 (UTC)."],[[["\u003cp\u003eAll Google Ad Manager API calls require OAuth2 authorization for secure access to user data without storing sensitive login information.\u003c/p\u003e\n"],["\u003cp\u003eChoose between Service Account or Web Application authentication type based on your application's needs.\u003c/p\u003e\n"],["\u003cp\u003eGenerate OAuth2 credentials by following instructions for your chosen authentication type via the Google API Console.\u003c/p\u003e\n"],["\u003cp\u003eConfigure your Ad Manager network settings and client library according to provided guidelines for the specific authentication method and programming language.\u003c/p\u003e\n"],["\u003cp\u003eClient libraries handle most OAuth2 complexities but you can delve into the background details concerning HTTP headers and scopes if needed.\u003c/p\u003e\n"]]],["Google Ad Manager API access requires OAuth2 authorization. First, choose between \"Service account\" for personal data or \"Web application\" for user-authorized access. Then, create OAuth2 credentials via the Google API Console, either generating a JSON key for service accounts or a client ID and secret for web applications. Next, configure the Ad Manager network to allow API access, adding the service account email if applicable. Lastly, configure and use a client library, or implement the OAuth2 flow directly, including the access token in the HTTP header.\n"],null,["# Authentication\n\nAll Google Ad Manager API calls must be authorized through [OAuth2](http://oauth.net/2/) an open standard that\nallows users to grant permissions to third-party applications, so the\napplication can interact with web services on the user's behalf. OAuth2 enables\nyour Ad Manager API client application to access a user's Ad Manager account\nwithout having to handle or store the user's username or password.\n\nGenerate OAuth2 credentials\n---------------------------\n\nPerform the following steps to generate the OAuth2 credentials.\n\n### 1. Determine your authentication type\n\nCheck the table below to see which **authentication type** is most appropriate\nfor your Ad Manager API application:\n\n| Choose your OAuth2 authentication type ||\n|---------------------|-----------------------------------------------------------------------------------------------------------------------------------------------------------------------------------|\n| **Service account** | Choose this if you only need access to your own Ad Manager data. [Learn more.](/identity/protocols/OAuth2ServiceAccount) |\n| **Web application** | Choose this if you want to authenticate as any user who grants permission to your application to access their Ad Manager data. [Learn more.](/identity/protocols/OAuth2WebServer) |\n\n### 2. Create OAuth2 credentials\n\nOnce you've determined your authentication type, click the corresponding tab\nbelow and follow the instructions to generate the OAuth2 credentials:\nService Account\n\n1. Open the [Google API Console Credentials page](https://console.cloud.google.com/apis/credentials).\n2. From the project drop-down, choose **Create a new project** , enter a name for the project, and optionally, edit the provided Project ID. Click **Create**.\n3. On the Credentials page, select **Create credentials** , then select **Service account key**.\n4. Select [New service account](//console.developers.google.com/apis/credentials/serviceaccountkey), and select **JSON**.\n5. Click **Create** to download a file containing a private key.\nWeb application\n\n1. Open the [Google API Console Credentials page](https://console.cloud.google.com/apis/credentials).\n2. From the project drop-down, choose **Create a new project** , enter a name for the project (and optionally, edit the provided Project ID), and click **Create**.\n3. On the Credentials page, select **Create credentials** , then select **OAuth client ID**.\n4. You may be prompted to set a product name on the Consent Screen page; if so, click **Configure consent screen** , supply the requested information, and click **Save** to return to the Credentials page.\n5. Select **Web Application** for the **Application Type**. Follow the instructions to enter JavaScript origins, redirect URIs, or both.\n6. Click **Create**.\n7. On the page that appears, copy the **client ID** and **client secret** to your clipboard, as you will need them when you configure your client library.\n\n### 3. Configure your Ad Manager network\n\nIf you are a third-party developer, you may need to have your client do this\nstep for you.\nService Account\n\n1. Go to your [Ad Manager network](//admanager.google.com).\n2. Click the **Admin** tab.\n3. Ensure that **API access** is enabled.\n4. Click the **Add a service account user** button.\n5. Fill in the form using the service account email. The service account user must be granted with permissions to access the entities as if that service account user would access the entities on the UI.\n6. Click on the **Save** button. A message should appear, confirming the addition of your service account.\n7. View existing service account users by going to the Users tab and then clicking the **Service Account** filter.\nWeb application\n\n1. Go to your [Ad Manager network](//admanager.google.com).\n2. Click the **Admin** tab.\n3. Ensure that **API access** is enabled.\n\n### 4. Configure and use a client library\n\nFollow the appropriate guide below to use the credentials in your client library: \n\n### Java\n\n- [Service account flow](//github.com/googleads/googleads-java-lib/wiki/API-access-using-own-credentials-(server-to-server-flow)#step-2---setting-up-the-client-library)\n- [Web app flow](//github.com/googleads/googleads-java-lib/wiki/API-access-on-behalf-of-your-clients-(web-flow)#step-2---setting-up-the-client-library)\n\n### .NET\n\n- [Service account flow](//github.com/googleads/googleads-dotnet-lib/wiki/API-access-using-own-credentials-(server-to-server-flow)#step-2---setting-up-the-client-library)\n- [Web app flow](//github.com/googleads/googleads-dotnet-lib/wiki/API-access-on-behalf-of-your-clients-(web-flow)#step-2---setting-up-the-client-library)\n\n### Python\n\n- [Service account flow](//github.com/googleads/googleads-python-lib/wiki/API-access-using-own-credentials-(server-to-server-flow)#step-2---setting-up-the-client-library)\n- [Web app flow](//github.com/googleads/googleads-python-lib/wiki/API-access-on-behalf-of-your-clients-(web-flow)#step-2---setting-up-the-client-library)\n\n### PHP\n\n- [Service account flow](https://github.com/googleads/googleads-php-lib/wiki/API-access-using-own-credentials-(server-to-server-flow))\n- [Web app flow](https://github.com/googleads/googleads-php-lib/wiki/API-access-on-behalf-of-your-clients-(web-flow))\n\n### Ruby\n\n- [Service account flow](//github.com/googleads/google-api-ads-ruby/wiki/API-access-using-own-credentials-(server-to-server-flow)#step-2---setting-up-the-client-library)\n- [Web app flow](//github.com/googleads/google-api-ads-ruby/wiki/API-access-on-behalf-of-your-clients-(web-flow)#step-2---setting-up-the-client-library)\n\n\u003cbr /\u003e\n\nIf you choose not to use one of our client libraries, you'll need to implement\nthe OAuth2 [service account](/identity/protocols/OAuth2ServiceAccount) or [web\napp](/identity/protocols/OAuth2WebServer) flow yourself.\n\nBehind the scenes\n-----------------\n\nOur client libraries automatically take care of the details covered below so\nonly read on if you're interested in what's happening behind the scenes.\nThis section is intended for advanced users who are already familiar\nwith the [OAuth2 specification](http://tools.ietf.org/html/rfc6749) and\nknow how to [use OAuth2 with Google APIs](/accounts/docs/OAuth2).\n\n#### HTTP request header\n\nThe HTTP header in every request to the Ad Manager API must include an access\ntoken in this form: \n\n```actionscript-3\nAuthorization: Bearer ACCESS_TOKEN\n```\n\nFor example: \n\n```http\nPOST ... HTTP/1.1\nHost: ...\nAuthorization: Bearer 1/fFAGRNJru1FTz70BzhT3Zg\nContent-Type: text/xml;charset=UTF-8\nContent-Length: ...\n\n\u003c?xml version=\"1.0\"?\u003e\n\u003csoap:Envelope xmlns:soap=\"http://www.w3.org/2001/12/soap-envelope\"\u003e\n…\n\u003c/soap:Envelope\u003e\n```\n\n#### Scope\n\nA single access token can grant varying degrees of access to multiple APIs. A\nvariable parameter called `scope` controls the set of resources and\noperations that an access token permits. During the access token request, your\napplication sends one or more values in the `scope` parameter.\n\nAd Manager has only one scope, shown below. Authorization should be performed\nat the user level within the product.\n\n| Scope | Permissions |\n|---------------------------------------|-----------------------------------------------|\n| `https://www.googleapis.com/auth/dfp` | View and manage your campaigns on Ad Manager. |"]]