সেভ করা পৃষ্ঠা গুছিয়ে রাখতে 'সংগ্রহ' ব্যবহার করুন
আপনার পছন্দ অনুযায়ী কন্টেন্ট সেভ করুন ও সঠিক বিভাগে রাখুন।
একটি সাইন আপ প্রবাহ চয়ন করুন
AFP-এর সাথে একটি গুরুত্বপূর্ণ সিদ্ধান্ত হল আপনার ব্যবহারকারীদের অনবোর্ড করার জন্য একটি সাইন আপ ফ্লো বেছে নেওয়া। সাইন আপের উদ্দেশ্য হল আপনার ব্যবহারকারীদের একটি নতুন AdSense অ্যাকাউন্ট তৈরি করার অনুমতি দেওয়া (বা বিদ্যমান AdSense অ্যাকাউন্টে সাইন ইন করুন) এবং এটিকে আপনার প্ল্যাটফর্মে লিঙ্ক করা৷ আপনি যে বিকল্পটি চয়ন করেন তা নির্ভর করবে আপনি বিকাশে বিনিয়োগ করতে চান এমন প্রযুক্তিগত সংস্থান এবং আপনার ব্যবহারকারীদের জন্য আপনি যে অনবোর্ডিং অভিজ্ঞতা প্রদান করতে চান তার উপর।
বিকল্প 1: API-হীন প্রবাহ
বিকল্প 1-এর জন্য সবচেয়ে কম প্রযুক্তিগত সংস্থান প্রয়োজন কারণ এটি একটি API ব্যবহার করে না। আপনার প্ল্যাটফর্মের মধ্যে ইউজার ইন্টারফেস তৈরি করার জন্য আপনাকে শুধুমাত্র একজন ওয়েব ডেভেলপারের প্রয়োজন হবে। যাইহোক, ট্রেড-অফ হল যে এই বিকল্পটির জন্য আপনার ব্যবহারকারীদের সাইনআপ প্রবাহ সম্পূর্ণ করতে আরও পদক্ষেপ নিতে হবে।
API-হীন সাইন আপ প্রবাহের ওভারভিউ

বাস্তবায়ন
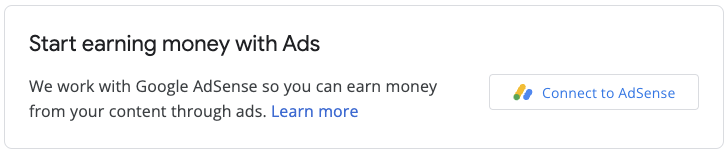
একটি API-হীন সাইনআপ প্রবাহ বাস্তবায়ন করতে, আপনাকে AdSense নগদীকরণের জন্য একটি UI উপাদান প্রদান করতে হবে। উদাহরণস্বরূপ, যে পৃষ্ঠায় আপনার ব্যবহারকারীরা তাদের "ব্যবহারকারী প্রোফাইল" বা "অ্যাকাউন্ট সেটিংস" অ্যাক্সেস করে, সেখানে একটি নগদীকরণ পৃষ্ঠা যুক্ত করুন যাতে নিম্নলিখিতগুলি অন্তর্ভুক্ত থাকে:
- AdSense এর একটি সংক্ষিপ্ত বিবরণ এবং এটি কীভাবে আপনার প্ল্যাটফর্মের সাথে ইন্টারঅ্যাক্ট করে। ব্যবহারকারীদের সম্পূর্ণরূপে সচেতন হওয়া উচিত যে তারা হয় একটি নতুন AdSense অ্যাকাউন্টের জন্য সাইন আপ করছেন বা তাদের বিদ্যমান AdSense অ্যাকাউন্ট ব্যবহার করছেন৷
- AdSense প্রোগ্রাম নীতি সম্পর্কে তথ্য। সাইন আপ করা সমস্ত ব্যবহারকারীদের AdSense প্রোগ্রাম এবং এর নীতিগুলি সম্পর্কে সচেতন হওয়া উচিত৷
- আপনার ব্যবহারকারীরা যে রাজস্ব ভাগ পাবেন। আপনি AdSense আয়ের কত শতাংশ রাখবেন এবং প্রকাশক কত শতাংশ রাখবেন তা ব্যবহারকারীদের স্পষ্টভাবে দেখানো গুরুত্বপূর্ণ৷ অ্যাডসেন্স অতিরিক্তভাবে অনবোর্ডিং ফ্লো চলাকালীন এই তথ্য দেখাবে।
- একটি "কানেক্ট অ্যাডসেন্স" বোতাম। এই বোতামটি একটি নতুন ট্যাব খুলবে এবং ব্যবহারকারীকে অ্যাডসেন্সের সঠিক পৃষ্ঠায় নিয়ে যাবে তার উপর নির্ভর করে তাদের একটি বিদ্যমান AdSense অ্যাকাউন্ট আছে কি না।
উদাহরণ কাস্টম URL:
https://adsense.google.com/adsense/signup?url={platform-site-url}
দ্রষ্টব্য: Google আপনাকে কাস্টম সাইনআপ পৃষ্ঠার URL প্রদান করবে এবং URL ভেরিয়েবলের বিষয়বস্তু সংজ্ঞায়িত করতে সাহায্য করবে৷ - ব্যবহারকারীর AdSense প্রকাশক আইডি সংগ্রহ ও সংরক্ষণ করার জন্য একটি ইনপুট বাক্স। একজন ব্যবহারকারী উপরের লিঙ্কটি দেখার পরে, তাদের এই ইনপুট বাক্সে তাদের প্রকাশক আইডি কপি এবং পেস্ট করতে হবে।
গুরুত্বপূর্ণ: এটি গুরুত্বপূর্ণ যে আপনি ব্যবহারকারীর প্রকাশক আইডি সংরক্ষণ করুন যাতে আপনি সঠিক প্রকাশকের তথ্য সহ ব্যবহারকারীর বিষয়বস্তু পৃষ্ঠাগুলিতে ট্যাগ করতে পারেন৷ আরও তথ্যের জন্য আপনার পৃষ্ঠাগুলিতে বিজ্ঞাপন ট্যাগ যুক্ত করুন দেখুন।
নিশ্চিত করুন যে আপনি ইনপুট করা স্ট্রিং যাচাই করেছেন। প্রকাশক আইডির ফর্ম্যাট হল: pub-1234567890987654
অথবা regex পদে: pub\-\d{16}
গুরুত্বপূর্ণ: কিছু AdSense ব্যবহারকারী "কানেক্ট অ্যাডসেন্স" বোতামে ক্লিক না করেই তাদের প্রকাশক আইডি পেস্ট করতে পারে। ব্যবহারকারীদের জানানো গুরুত্বপূর্ণ যে বিজ্ঞাপন পরিবেশন করার আগে তাদের AdSense অ্যাকাউন্টের সাইট পৃষ্ঠায় প্ল্যাটফর্ম ডোমেন তালিকাভুক্ত থাকতে হবে। এটি এই বোতামের প্রাথমিক উদ্দেশ্য। - ব্যবহারকারীর ট্যাগিং অবস্থা। ব্যবহারকারীরা জানতে চাইবে তাদের বিজ্ঞাপন কোড তাদের পৃষ্ঠাগুলিতে স্থাপন করা হয়েছে কি না। ব্যবহারকারীর অভিজ্ঞতার অংশ হিসাবে, আপনার ব্যবহারকারীদের জানান আপনি যখন তাদের পৃষ্ঠাগুলিকে তাদের AdSense প্রকাশক ID দিয়ে ট্যাগ করেছেন৷ আপনি অতিরিক্তভাবে চাইল্ড অ্যাকাউন্টের মেটা ট্যাগ তৈরি করতে পারেন যা সাইট যাচাইকরণের ধাপে অ্যাডসেন্সকে সহায়তা করবে। এটি ব্যবহারকারীর পক্ষ থেকে তাদের পৃষ্ঠাগুলিতে বিজ্ঞাপন ট্যাগ প্রকাশ করার প্রয়োজনীয়তাকেও সরিয়ে দেয়।
বিকল্প 2: আধা-সহায়তা API প্রবাহ
বিকল্প 2 সাইন আপ প্রবাহকে সামান্য সরল করতে AdSense ম্যানেজমেন্ট API ব্যবহার করে। এটির জন্য আরও প্রযুক্তিগত সংস্থানগুলির প্রয়োজন কিন্তু আপনার ব্যবহারকারীদের AdSense-এর জন্য সাইন আপ করার জন্য নেওয়া পদক্ষেপের সংখ্যা হ্রাস করে৷
আধা-সহায়তা API প্রবাহের ওভারভিউ

বাস্তবায়ন
একটি API এর সাথে একটি আধা-সহায়তা সাইনআপ প্রবাহ বাস্তবায়ন করতে, আপনাকে AdSense নগদীকরণের জন্য একটি UI উপাদান প্রদান করতে হবে। উদাহরণস্বরূপ, যে পৃষ্ঠায় আপনার ব্যবহারকারীরা তাদের "ব্যবহারকারী প্রোফাইল" বা "অ্যাকাউন্ট সেটিংস" অ্যাক্সেস করে, সেখানে একটি নগদীকরণ পৃষ্ঠা যুক্ত করুন যাতে নিম্নলিখিতগুলি অন্তর্ভুক্ত থাকে:
- AdSense এর একটি সংক্ষিপ্ত বিবরণ এবং এটি কীভাবে আপনার প্ল্যাটফর্মের সাথে ইন্টারঅ্যাক্ট করে। ব্যবহারকারীদের সম্পূর্ণরূপে সচেতন হওয়া উচিত যে তারা একটি Google AdSense অ্যাকাউন্টের জন্য সাইন আপ করছেন, বা তাদের বিদ্যমান AdSense অ্যাকাউন্ট ব্যবহার করছেন৷
- AdSense প্রোগ্রাম নীতি সম্পর্কে তথ্য। সাইন আপ করা সমস্ত ব্যবহারকারীদের AdSense প্রোগ্রাম এবং এর নীতিগুলি সম্পর্কে সচেতন হওয়া উচিত৷
- আপনার ব্যবহারকারীরা যে রাজস্ব ভাগ পাবেন। আপনি AdSense আয়ের কত শতাংশ রাখবেন এবং প্রকাশক কত শতাংশ রাখবেন তা ব্যবহারকারীদের স্পষ্টভাবে দেখানো গুরুত্বপূর্ণ৷ অ্যাডসেন্স অতিরিক্তভাবে অনবোর্ডিং ফ্লো চলাকালীন এই তথ্য দেখাবে।
- একটি "কানেক্ট অ্যাডসেন্স" বোতাম। এই বোতামটি আপনাকে AdSense ম্যানেজমেন্ট API ব্যবহার করে একটি AdSense গ্রাহকের অ্যাকাউন্টের তথ্য অ্যাক্সেস করার প্ল্যাটফর্ম হিসাবে অনুমোদন করবে। এটি সেট আপ করতে দয়া করে আমাদের বিকাশকারী ডকুমেন্টেশনের নির্দেশাবলী অনুসরণ করুন৷ এই API ব্যবহার করে আপনি পরবর্তী দুটি ধাপ সম্পাদন করতে পারেন।
- ব্যবহারকারীর AdSense প্রকাশক আইডি সংগ্রহ করতে AdSense ব্যবস্থাপনা API ব্যবহার করুন। নিশ্চিত করুন যে আপনি ইনপুট করা স্ট্রিং যাচাই করেছেন।
প্রকাশক আইডির ফর্ম্যাট হল: pub-1234567890987654
অথবা regex পদে: pub\-\d{16}
গুরুত্বপূর্ণ: এটি গুরুত্বপূর্ণ যে আপনি ব্যবহারকারীর প্রকাশক আইডি সংরক্ষণ করুন যাতে আপনি সঠিক প্রকাশকের তথ্য সহ ব্যবহারকারীর বিষয়বস্তু পৃষ্ঠাগুলিতে ট্যাগ করতে পারেন৷ আরও তথ্যের জন্য আপনার পৃষ্ঠাগুলিতে বিজ্ঞাপন যুক্ত করুন ট্যাগ দেখুন। - ব্যবহারকারী তাদের AdSense অ্যাকাউন্টে প্ল্যাটফর্ম সাইট যোগ করেছেন কিনা তা পরীক্ষা করতে AdSense ম্যানেজমেন্ট API ব্যবহার করুন। যদি না হয়, সেট আপ সম্পূর্ণ করতে ব্যবহারকারীকে নীচের লিঙ্কটি অনুসরণ করতে বলুন। API-এ আপনার যে সাইটের নাম চেক করা উচিত সেটি হল নিচের লিঙ্কে
{platform-site-url}
ভেরিয়েবল।
https://adsense.google.com/adsense/signup?url={platform-site-url}
দ্রষ্টব্য: Google আপনাকে কাস্টম সাইনআপ পৃষ্ঠার URL প্রদান করবে, এবং আপনাকে url ভেরিয়েবলের বিষয়বস্তু সংজ্ঞায়িত করতে সহায়তা করবে। - - ব্যবহারকারীর ট্যাগিং অবস্থা। ব্যবহারকারীরা জানতে চাইবে তাদের বিজ্ঞাপন কোড তাদের পৃষ্ঠাগুলিতে স্থাপন করা হয়েছে কি না। ব্যবহারকারীর অভিজ্ঞতার অংশ হিসাবে, আপনার ব্যবহারকারীদের জানান আপনি যখন তাদের পৃষ্ঠাগুলিকে তাদের AdSense প্রকাশক ID দিয়ে ট্যাগ করেছেন৷ আপনি অতিরিক্তভাবে চাইল্ড অ্যাকাউন্টের মেটা ট্যাগ তৈরি করতে পারেন যা সাইট যাচাইকরণের ধাপে অ্যাডসেন্সকে সহায়তা করবে। এটি ব্যবহারকারীর পক্ষ থেকে তাদের পৃষ্ঠাগুলিতে বিজ্ঞাপন ট্যাগ প্রকাশ করার প্রয়োজনীয়তাকেও সরিয়ে দেয়।
বিকল্প 3: এম্বেডেড কানেক্ট
এমবেডেড কানেক্ট বিভিন্ন রাজ্যে অ্যাডসেন্স অ্যাকাউন্টের সাথে ডিল করার সমস্ত জটিলতা দূর করে। প্রদত্ত ব্যবহারকারীর AdSense অ্যাকাউন্টের জন্য অ্যাকাউন্ট, বিজ্ঞাপন ক্লায়েন্ট এবং সাইটের অবস্থার উপর নির্ভর করে, এমবেডেড কানেক্ট ফ্লো প্রতিটি ব্যবহারকারীর জন্য একটি কাস্টমাইজড অনবোর্ডিং অভিজ্ঞতা উপস্থাপন করবে যাতে আপনাকে এটি করতে না হয়।

বাস্তবায়নের মধ্যে একটি জাভাস্ক্রিপ্ট লাইব্রেরি, একটি খালি ডিভ রয়েছে যেখানে AdSense একটি সাইন-আপ উইজেট রেন্ডার করবে এবং কিছু কলব্যাক ফাংশন যা আপনাকে ব্যবহারকারীর সাইন-আপ প্রবাহ সম্পূর্ণ করার পরে প্রকাশক আইডি সংরক্ষণ করার অনুমতি দেবে। অভিজ্ঞতা বাড়ানোর জন্য আপনি পরিপূরকভাবে অ্যাডসেন্স ম্যানেজমেন্ট এপিআই ব্যবহার করতে পারেন, উদাহরণস্বরূপ বিজ্ঞাপন ইউনিট বা অটো বিজ্ঞাপনের অবস্থা পুনরুদ্ধার করে।
এমবেডেড কানেক্ট সম্পর্কে আরও জানুন
অন্য কিছু উল্লেখ না করা থাকলে, এই পৃষ্ঠার কন্টেন্ট Creative Commons Attribution 4.0 License-এর অধীনে এবং কোডের নমুনাগুলি Apache 2.0 License-এর অধীনে লাইসেন্স প্রাপ্ত। আরও জানতে, Google Developers সাইট নীতি দেখুন। Java হল Oracle এবং/অথবা তার অ্যাফিলিয়েট সংস্থার রেজিস্টার্ড ট্রেডমার্ক।
[[["সহজে বোঝা যায়","easyToUnderstand","thumb-up"],["আমার সমস্যার সমাধান হয়েছে","solvedMyProblem","thumb-up"],["অন্যান্য","otherUp","thumb-up"]],[["এতে আমার প্রয়োজনীয় তথ্য নেই","missingTheInformationINeed","thumb-down"],["খুব জটিল / অনেক ধাপ","tooComplicatedTooManySteps","thumb-down"],["পুরনো","outOfDate","thumb-down"],["অনুবাদ সংক্রান্ত সমস্যা","translationIssue","thumb-down"],["নমুনা / কোড সংক্রান্ত সমস্যা","samplesCodeIssue","thumb-down"],["অন্যান্য","otherDown","thumb-down"]],[],[[["\u003cp\u003eAdSense for Platforms (AFP) offers three signup flow options to onboard users, each with varying technical requirements and user experiences.\u003c/p\u003e\n"],["\u003cp\u003eThe API-less flow is the simplest to implement but requires more user steps; the Semi-assisted API flow utilizes the AdSense Management API for a smoother experience; and Embedded Connect provides a fully customized and automated signup process.\u003c/p\u003e\n"],["\u003cp\u003eAll signup flows necessitate clear communication with users about AdSense policies, revenue share, and tagging status, ensuring transparency and understanding.\u003c/p\u003e\n"],["\u003cp\u003eRegardless of the chosen flow, securely storing the user's AdSense Publisher ID is crucial for proper ad serving and revenue tracking.\u003c/p\u003e\n"],["\u003cp\u003eAFP provides flexibility for platforms to tailor the signup experience to their specific needs and technical capabilities while adhering to AdSense guidelines.\u003c/p\u003e\n"]]],["The document outlines three signup flows for integrating AdSense into a platform. The API-less flow requires users to manually connect their AdSense account via a link and input their publisher ID. The semi-assisted API flow utilizes the AdSense Management API to retrieve the user's publisher ID and check their site status, reducing user steps. Embedded Connect, a third option, uses a JavaScript library for a streamlined experience and handles complex account states automatically. All options involve displaying AdSense policies and revenue sharing information.\n"],null,["Choose a sign up flow\n---------------------\n\nAn important decision with AFP is to choose a sign up flow to onboard your users. The purpose of the sign up is to allow your users to create a new AdSense account (or sign in to an existing AdSense account) and link it to your platform. The option you choose will depend on the technical resources you want to invest in development and the onboarding experience you want to provide for your users.\n\n### Option 1: API-less flow\n\nOption 1 requires the fewest technical resources as it doesn't use an API. You will only need a web developer to build the user interface within your platform. However, the trade-off is that this option requires your users to take more steps to complete the signup flow.\n\n#### Overview of the API-less signup flow\n\n#### Implementation\n\nTo implement an API-less signup flow, you need to provide a UI component for AdSense monetization. For example, on the page where your users access their \"user profile\" or \"account settings\", add a monetization page that includes the following:\n\n- A short description of AdSense and how it interacts with your platform. Users should be completely aware that they're either signing up for a new AdSense account or using their existing AdSense account.\n- Information about the [AdSense Program policies](https://support.google.com/adsense/answer/48182). All users who sign up should be aware of the AdSense Program and its policies.\n- The revenue share that your users will receive. It's important to explicitly show users what percentage of the AdSense revenue you will keep and what percentage the publisher will keep. AdSense will additionally show this information during the onboarding flow.\n- A \"Connect AdSense\" button. This button will open a new tab and take the user to the correct page in AdSense depending on whether or not they have an existing AdSense account. \n Example custom URL: \n `https://adsense.google.com/adsense/signup?url={platform-site-url}` \n **Note:** Google will provide you with the URL of the custom signup page, and help you define the contents of the URL variable.\n- An input box to collect and store the user's AdSense publisher ID. After a user visits the link above, they will need to copy and paste their publisher ID into this input box. \n **Important:** It's critical that you store the user's publisher ID so that you can tag the user's content pages with the correct publisher information. See the [Add the ad tag to your pages](/adsense/platforms/transparent/ad-tags) for more information. \n Make sure you validate the inputted string. The format of a publisher ID is: `pub-1234567890987654` \n Or in regex terms: `pub\\-\\d{16}` \n **Important:** Some AdSense users may paste their publisher ID without clicking on the \"Connect AdSense\" button. It's important to let users know that the **Sites** page in their AdSense account needs to have the platform domain listed before ads can be served. This is the primary purpose of this button.\n- The user's tagging status. Users will want to know whether their ad code has been placed on their pages or not. As part of the user experience, let your users know when you've tagged their pages with their AdSense publisher ID. You can additionally populate the [child account meta tag](/adsense/platforms/transparent/meta-tags#child_account) which will assist AdSense during the site verification steps. This also removes the need to publish ad tags on their pages on the user's behalf.\n\n### Option 2: Semi-assisted API flow\n\nOption 2 uses the [AdSense Management API](https://developers.google.com/adsense/management) to slightly simplify the signup flow. It requires more technical resources but reduces the number of steps your users need to take to sign up for AdSense.\n\n#### Overview of the semi-assisted API flow\n\n#### Implementation\n\nTo implement a semi-assisted signup flow with an API, you need to provide a UI component for AdSense monetization. For example, on the page where your users access their \"user profile\" or \"account settings\", add a monetization page that includes the following:\n\n- A short description of AdSense and how it interacts with your platform. Users should be completely aware that they are signing up for a Google AdSense account, or using their existing AdSense account.\n- Information about the [AdSense Program policies](https://support.google.com/adsense/answer/48182). All users who sign up should be aware of the AdSense Program and its policies.\n- The revenue share that your users will receive. It's important to explicitly show users what percentage of the AdSense revenue you will keep and what percentage the publisher will keep. AdSense will additionally show this information during the onboarding flow.\n- A \"Connect AdSense\" button. This button will authorize you as the platform to access an AdSense customer's account information using the [AdSense Management API](https://developers.google.com/adsense/management). Please follow the instructions on our developer documentation to set this up. Using this API you can perform the next two steps.\n- Use the AdSense Management API to collect the user's AdSense publisher ID. Make sure you validate the inputted string. \n The format of a publisher ID is: `pub-1234567890987654` \n Or in regex terms: `pub\\-\\d{16}` \n **Important:** It's critical that you store the user's publisher ID so that you can tag the user's content pages with the correct publisher information. See the See the [Add the ad tag to your pages](/adsense/platforms/transparent/ad-tags) for more information.\n- Use the AdSense Management API to check if the user has added the platform site to their AdSense account. If not, ask the user to follow the link below to complete the set up. The name of the site you should check for in the API is the `{platform-site-url}` variable in the link below. \n `https://adsense.google.com/adsense/signup?url={platform-site-url}` \n **Note:** Google will provide you with the URL of the custom signup page, and help you define the contents of the url variable.\n- - The user's tagging status. Users will want to know whether their ad code has been placed on their pages or not. As part of the user experience, let your users know when you've tagged their pages with their AdSense publisher ID. You can additionally populate the [child account meta tag](/adsense/platforms/transparent/meta-tags#child_account) which will assist AdSense during the site verification steps. This also removes the need to publish ad tags on their pages on the user's behalf.\n\n### Option 3: Embedded Connect\n\nEmbedded Connect removes all the complexity of dealing with AdSense accounts in different states. Depending on the account, ad client and site statuses for a given user's AdSense account, the Embedded Connect flow will present a customized onboarding experience for each user so that you don't have to.\n\nThe implementation involves a JavaScript library, an empty div where AdSense will render a sign-up widget, and some callback functions which will allow you to save the publisher ID once the user has completed the sign-up flow. You can supplementally use the [AdSense Management API](/adsense/management) to augment the experience, for example by retrieving ad units or the state of Auto ads.\n\n[Learn more about Embedded Connect](/adsense/platforms/transparent/embedded-connect)"]]