Google Pay has certain features and behaviors that are important for issuers to understand and incorporate into their TSP integration and pre-launch testing.
Key Google Pay UX flows
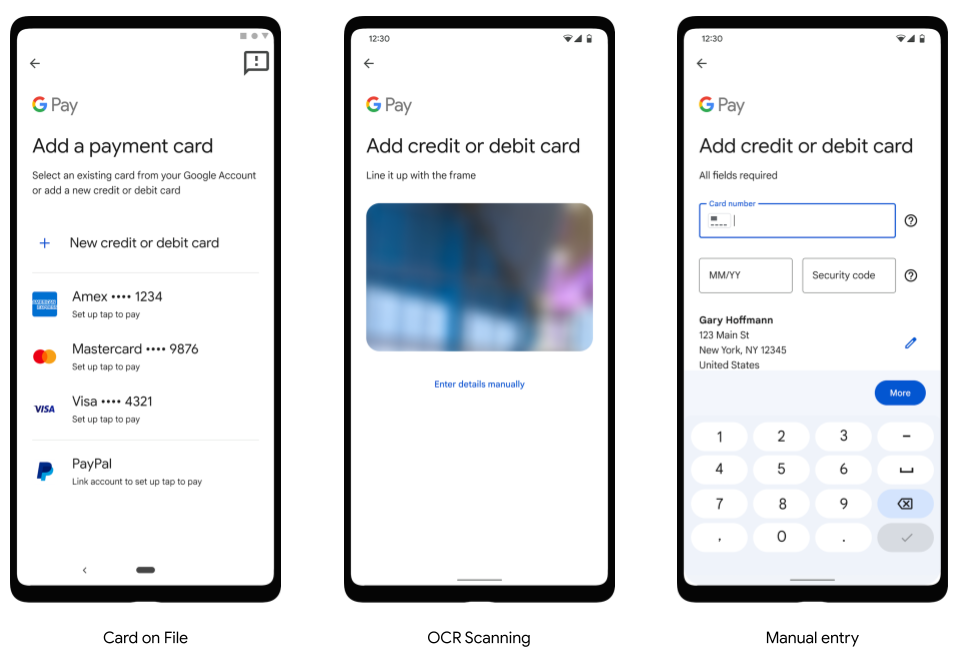
Cards can be added to Google Pay either through Google Wallet surfaces or an issuer's mobile banking app using the Push Provisioning API. Google Wallet app surfaces let users enter their card details in multiple ways, including autofilling the details using a card already stored on file, OCR scanning, and manual entry.
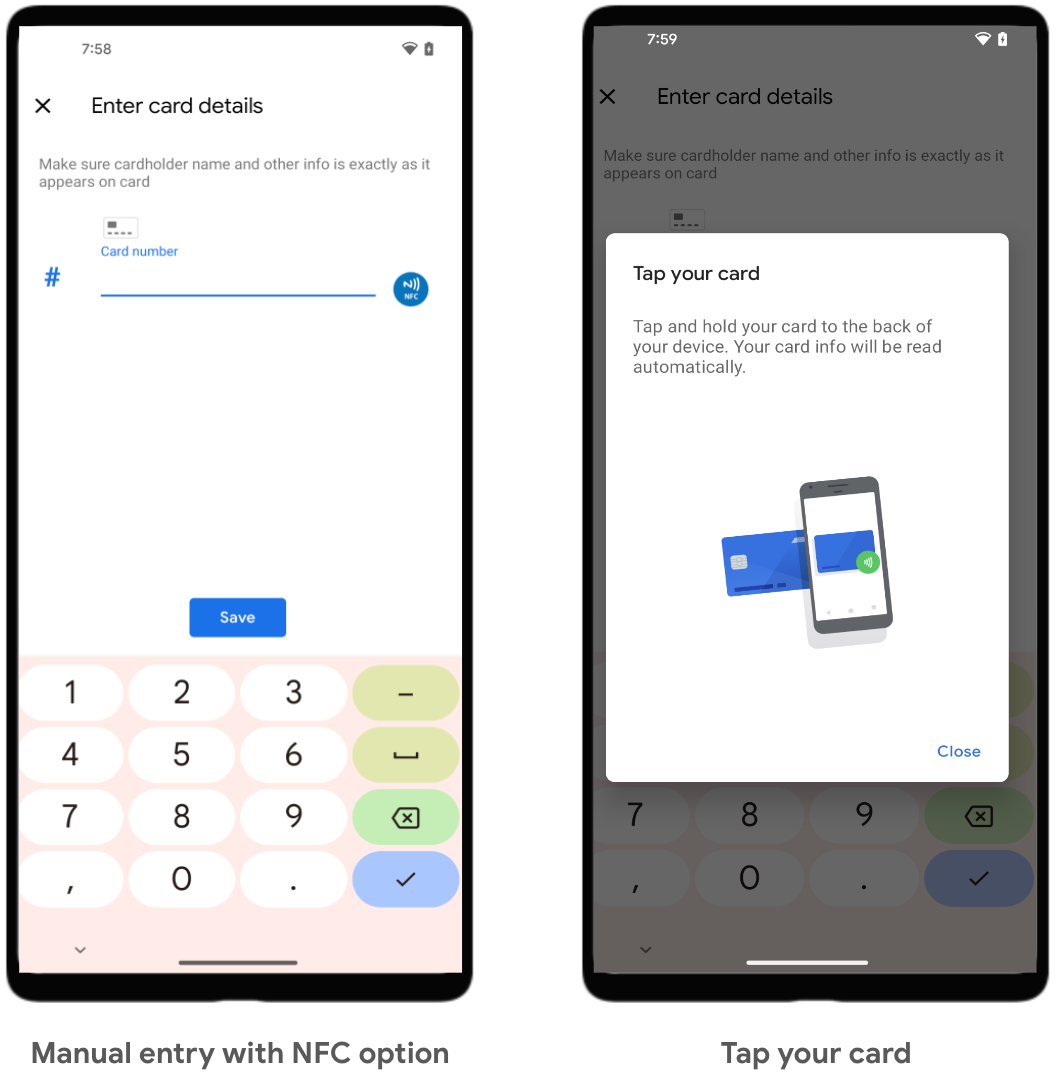
In the Netherlands, cards can also be added through Google Wallet using NFC, by tapping and holding the card to the back of the device:
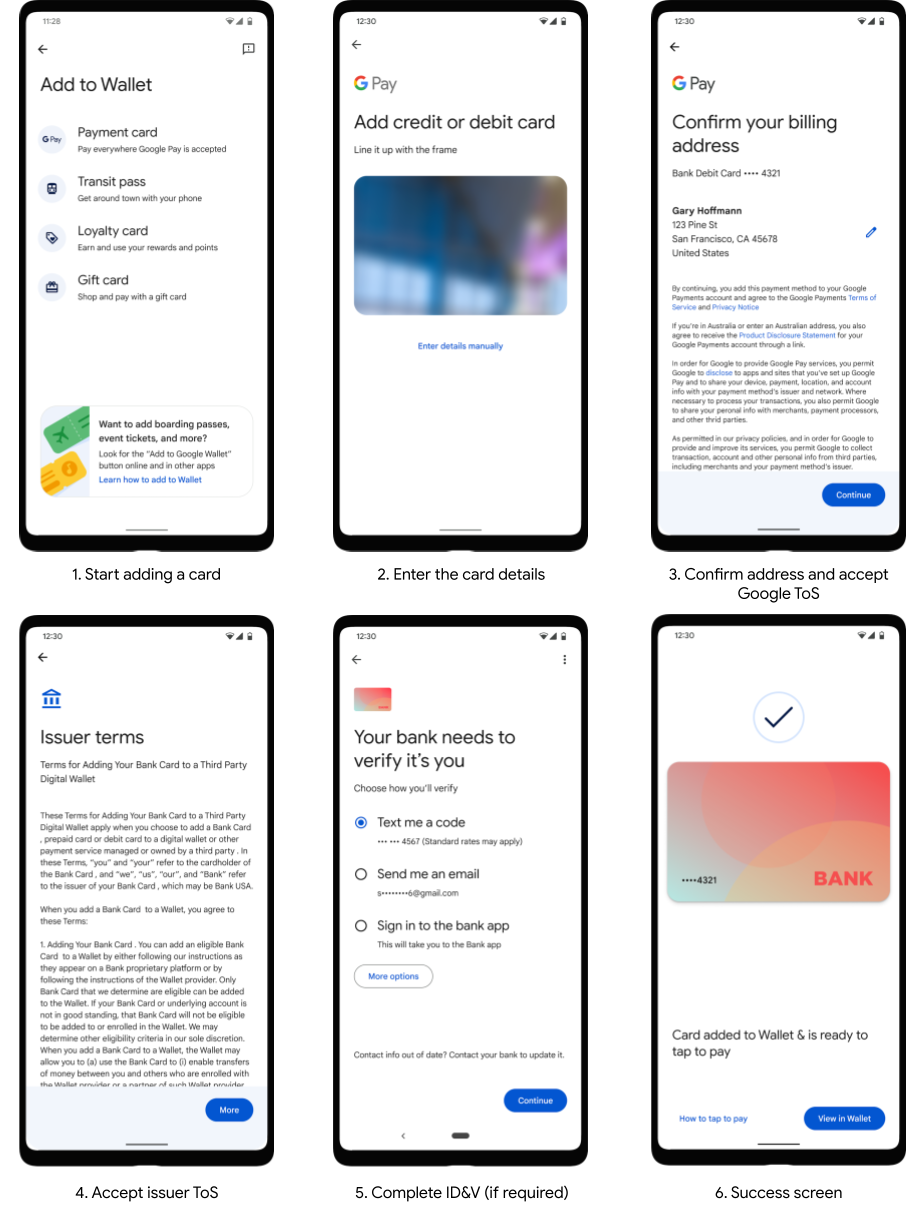
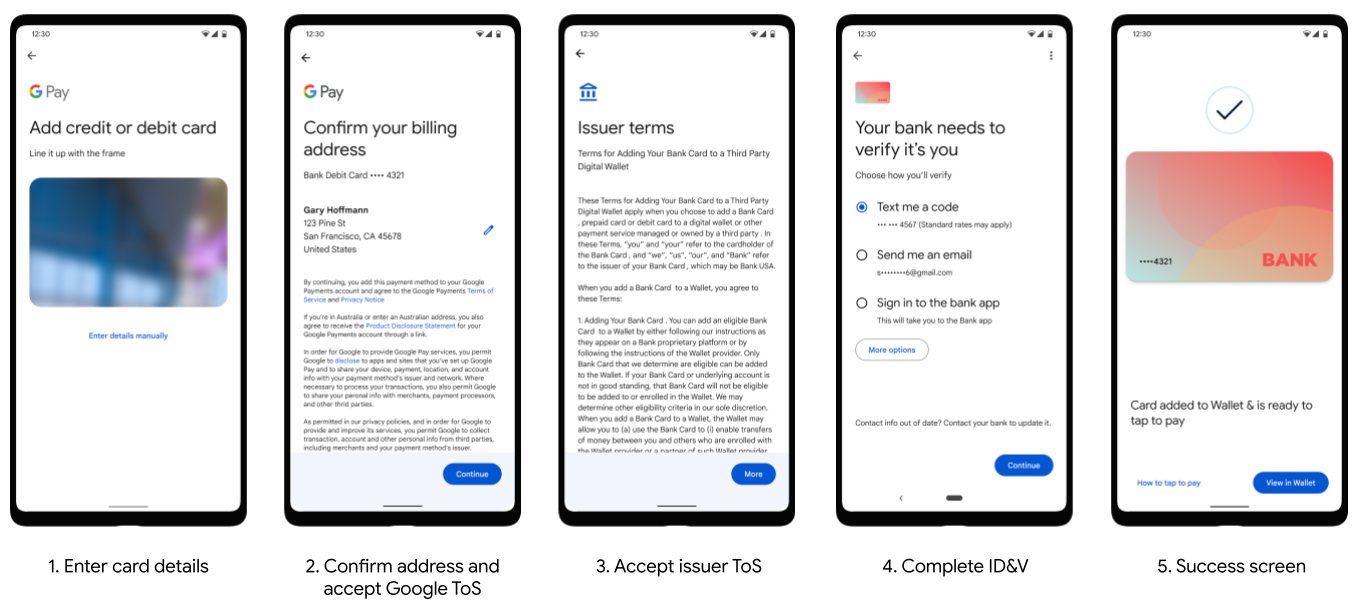
The UX flows below show common user flows for adding a card to Google Pay on a phone, tablet, and watch.
Phone and tablet tokenization experience
Wear OS by Google tokenization experience
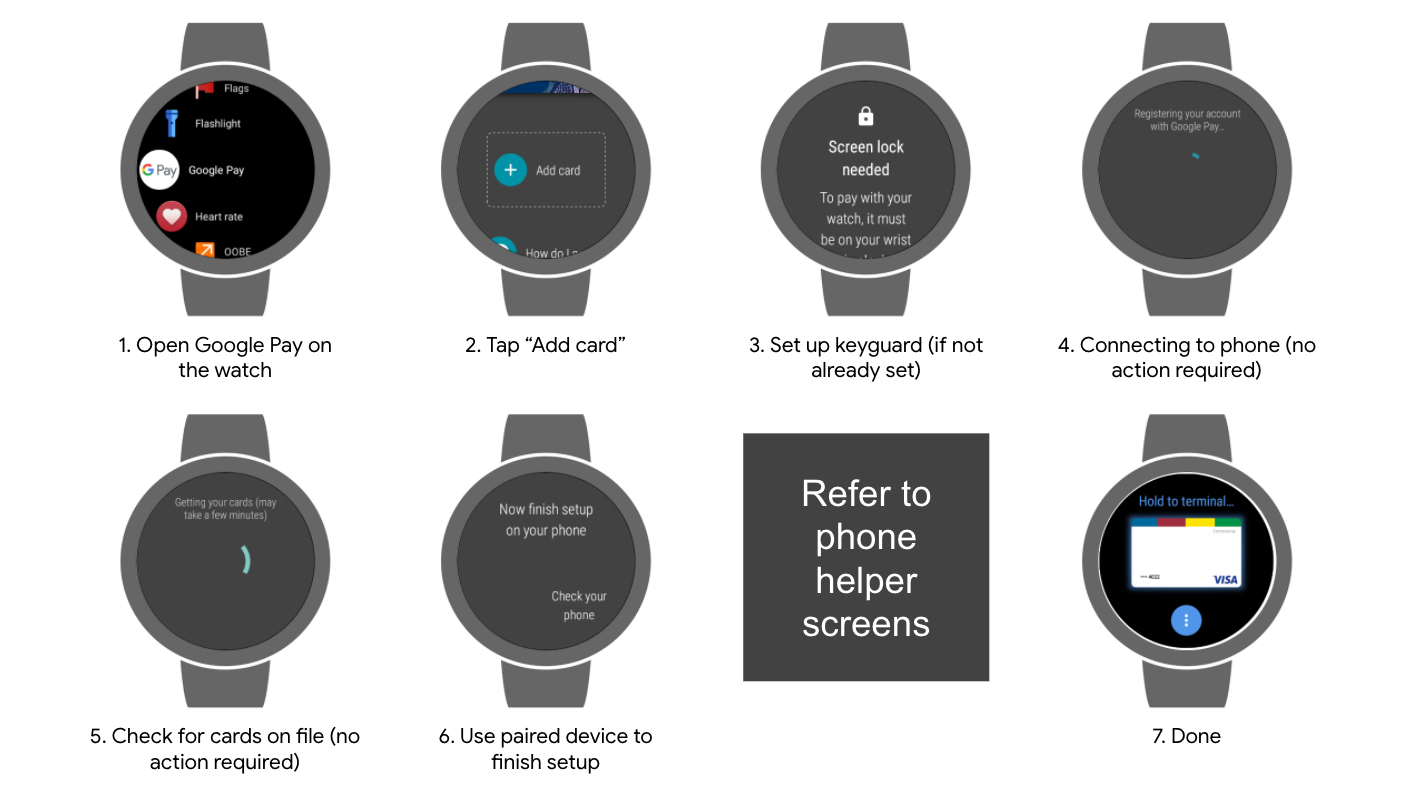
Phone helper screens:
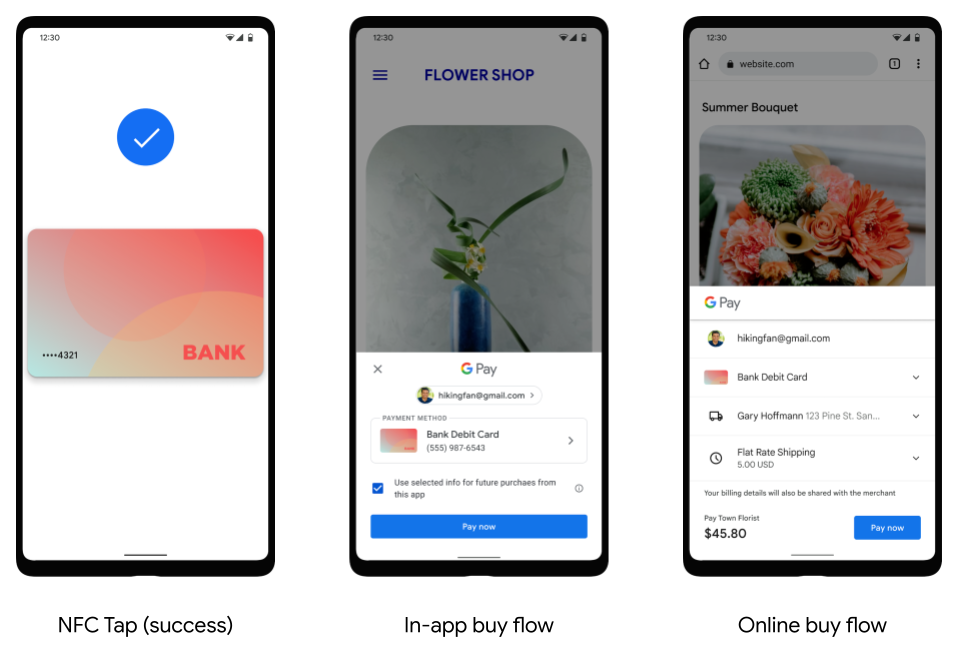
Transaction screens
Google Pay can be used to make NFC transactions in stores, make in-app payments, and make online payments.
Token deletion behavior
Tokens can be deleted for a variety of reasons other than a user deciding to manually delete a token using the Google Wallet app. Notably, after 90 days of inactivity, Google Pay initiates token deletion from our servers. To be considered active, a device needs to be turned on and connect to Google's servers once every 90 days.
The most common questions around token deletions are the scenarios where a device has been offline for 90 days, typically because they were powered off, broken, or factory reset. This scenario can be especially confusing if the issuer sends servicing messages notifying the user of the deletion. Another common reason for a deletion is when a user removes their device lock.
| User Action | Device Tokens | TSP Tokens |
|---|---|---|
| Delete one or more tokens manually using the Google Wallet app or the Push Provisioning API | Deleted | Deleted |
| Remove device lock (PIN, pattern) | Deleted | Deleted (best effort) |
| Remove Google Account (via Settings/Accounts) | Deleted | Deleted after 90 days |
| Factory reset | Deleted | Deleted after 90 days |
| Powered off device (or broken device that fails to power on) | N/A | Deleted after 90 days |
| Remotely wipe device using Android Device Manager | Deleted | Deleted |
| Remotely lock device using Android Device Manager | Disabled | Deleted if phone unreachable |
| Clear all data from Play Services (via Settings) | Deleted | Deleted when user opens Google Wallet app |
| Clear all data from Google Wallet app (via Settings) | Unchanged | Deleted after 90 days |
Supported OCR formats and countries
Google Pay supports OCR recognition of a variety of card formats to capture a card's PAN and expiry date. Google Pay's OCR tool supports the following card formats:
- 15 digits in a single line grouped 4-6-5
- 15 digits in a single line grouped 6-4-5
- 16 digits in a single line grouped 4-4-4-4
- 16 digits in a single line grouped 6-3-3-4
- 16 digits in a single line grouped 6-3-6-1
- 19 digits in a single line grouped 6-4-5-4
- 16 digits in a single line grouped 6-3-8
- 16 digits in a single line grouped 6-6-5
- 17 digits in a single line grouped 6-9-2
- 19 digits in a single line grouped 7-7-5
- 19 digits in a single line grouped 7-12
- 19 digits in a single line grouped without spaces
OCR for adding a card into Google Wallet is supported in the following countries as of now: Australia, Brazil, Canada, Czech Republic, Denmark, Finland, France, Great Britain, Hong Kong, Ireland, Japan, Norway, New Zealand, Poland, Singapore, Spain, Sweden, Switzerland, Taiwan, Ukraine, and United States.
Requesting new OCR formats
If you have been granted access to this content, make sure you are signed in with your authorized Google account. If you are a partner who needs access, use the button below for instructions on how to request access.